ON THIS PAGE:
The Cases Table is part of Case Management, and is where you can see a filtered, and sorted selection of cases.
The creating, editing, sorting, and filtering of cases is fundamental to optimizing the usefulness of the Cases Table in Case Management.
Viewing the Cases Table
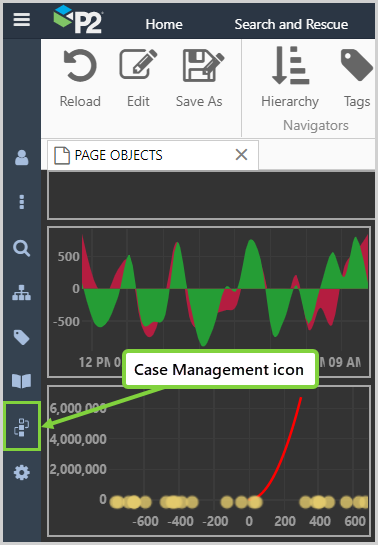
On the Home ribbon tab,
- Click the Case Management button to open Case Management.
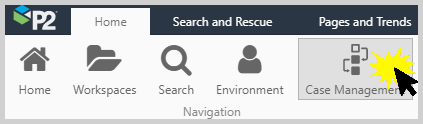
Case Management opens and displays the Overview page.

The Cases Table is a part of a Case Management page.
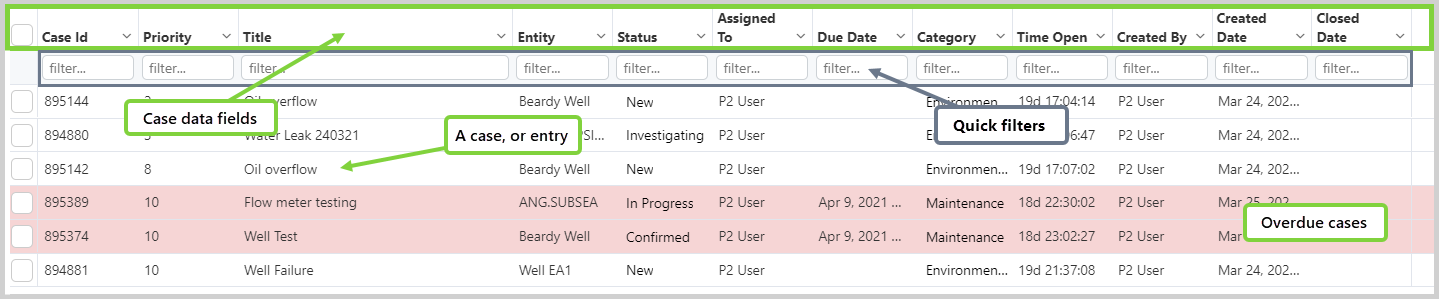
Each case entry in the Cases Table is made up of a number of compulsory and optional data fields which are displayed as columns.
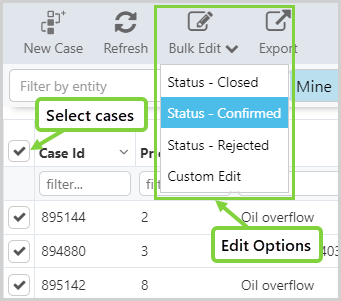
| Bulk Edit | The check box to the left of the Case Id is used to select cases for bulk editing. |
| Case Id | A unique, system-generated number identifying the case. |
| Priority | The default priority for a new case is 10. |
| Title | The case title should describe what the case is about. Sentinel-raised cases have titles configured in Sentinel, that can contain Sentinel tokens, such as the event time, the monitor name, and so on. |
| Entity | The entity is the subject of a case. Every case is linked to an Explorer entity. |
| Status | The status should be updated as the case progresses. For example: 'New' -> 'Investigating' -> 'Closed'. |
| Assigned To | You can update the Assigned To user, from a list of users that have read privileges for the case's entity, to bring this case to their attention. While any user with privileges for a case can update it, it is ideally the Assigned To person who manages their own cases. If Shift Log is installed, cases can also be assigned to a role. |
| Due Date | Ideally, the case will be resolved by this date. Overdue cases are highlighted in pale red. |
| Category | The category is used for logically grouping cases, and can also be used to filter the table contents (for example, you can choose to just view 'Environmental' cases.) |
| Time Open | The elapsed time from when the case was created until it was Closed, Rejected or Deprecated. For open cases, it is the elapsed time from when it was raised until current time. |
| Created By | The user logged-on when the case was created. |
| Created Date | The date and time the case was manually created, or raised by Sentinel. |
| Closed Date | The date and time the case was closed. |
Sorting Cases
All columns in the Cases Table can be sorted by Ascending, Descending, or Group.
Sorting options can be applied to one, or multiple columns at any one time.
To sort on a column data field:
1. Click on the drop down arrow on the right side of a column title block.
2. Select a sort option.
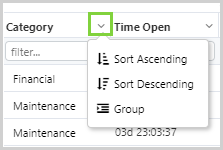
The sort options are:
| Ascending |
Varies with data type.
|
| Descending | The reverse of the Ascending option. |
| Group |
Cases are grouped with others of the same type. Applying the Group action overrides the sort precedence, with grouping always being applied first. |
When a sort is applied to multiple columns, the first column sorted has the highest precedence in the sort order, and the second column sorted has the second highest precedence. As more columns are sorted, the order of precedence continues to be allocated sequentially.
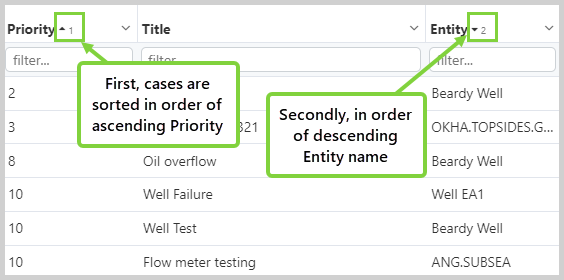
In the example above:
- The up
 arrow indicates an ascending sort has been applied to the relevant column.
 - The down
 arrow indicates a descending sort order has been applied.
 - The number indicates the sort priority.
When there is an up or down arrow beside the column name, click on the arrow to cycle between:
- Sorted Ascending
- Sorted Descending
- Unsorted
The column sort may also be removed by selecting Remove Sort from the drop down list.

Quick Filters
One or more quick filters can be applied, making it easier to find cases of interest.

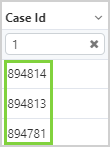
Enter a complete, or partial value, or word in the column filter field to apply a quick filter to the table.
A quick filter of '1' was applied to the Case Id field in the example below.

All Case Id field entries now contain '1'.
Adding a New Case
Cases come from Sentinel, Shift Log, or those manually entered in Explorer via Case Management.
To add a new case:
1. Click on the Case Management icon to open the Case Management page.
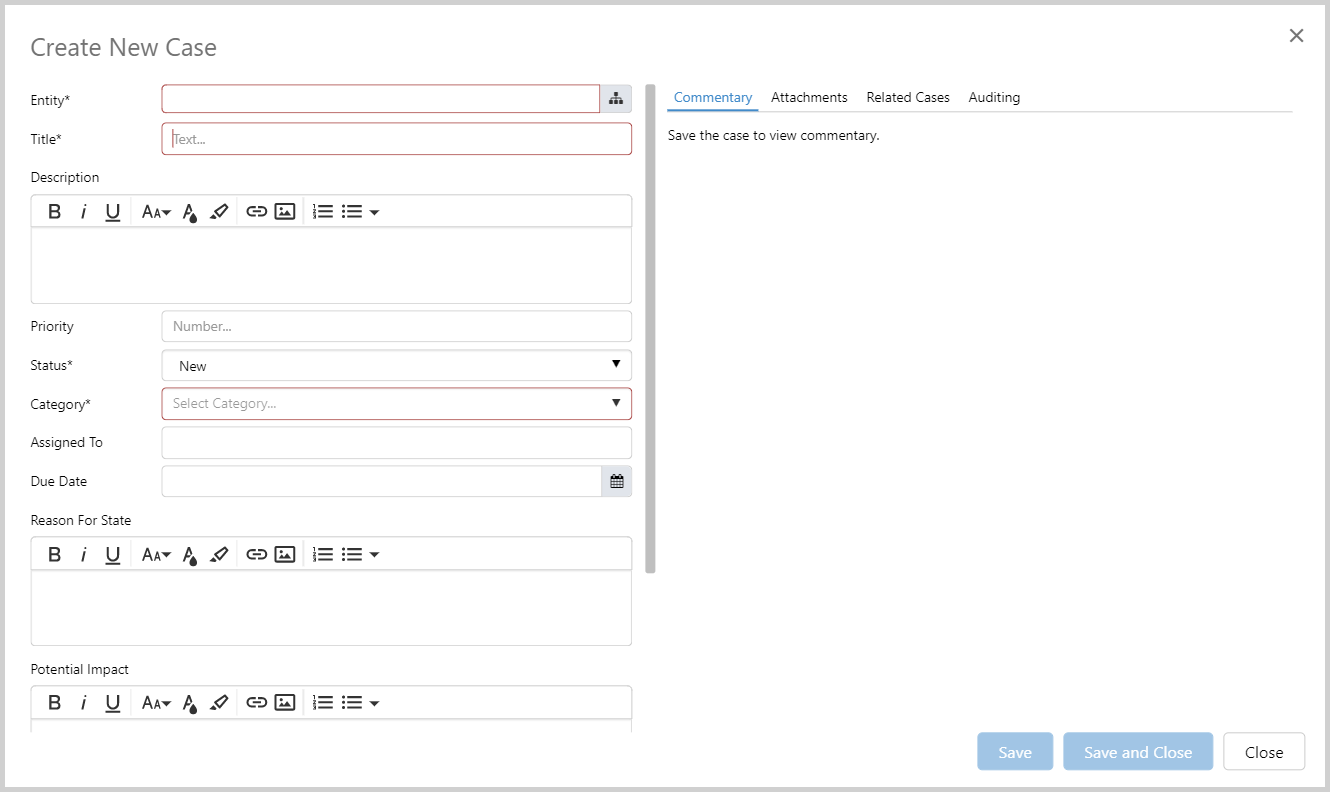
2. Click on the New Case button on the toolbar.

The Create New Case form opens.
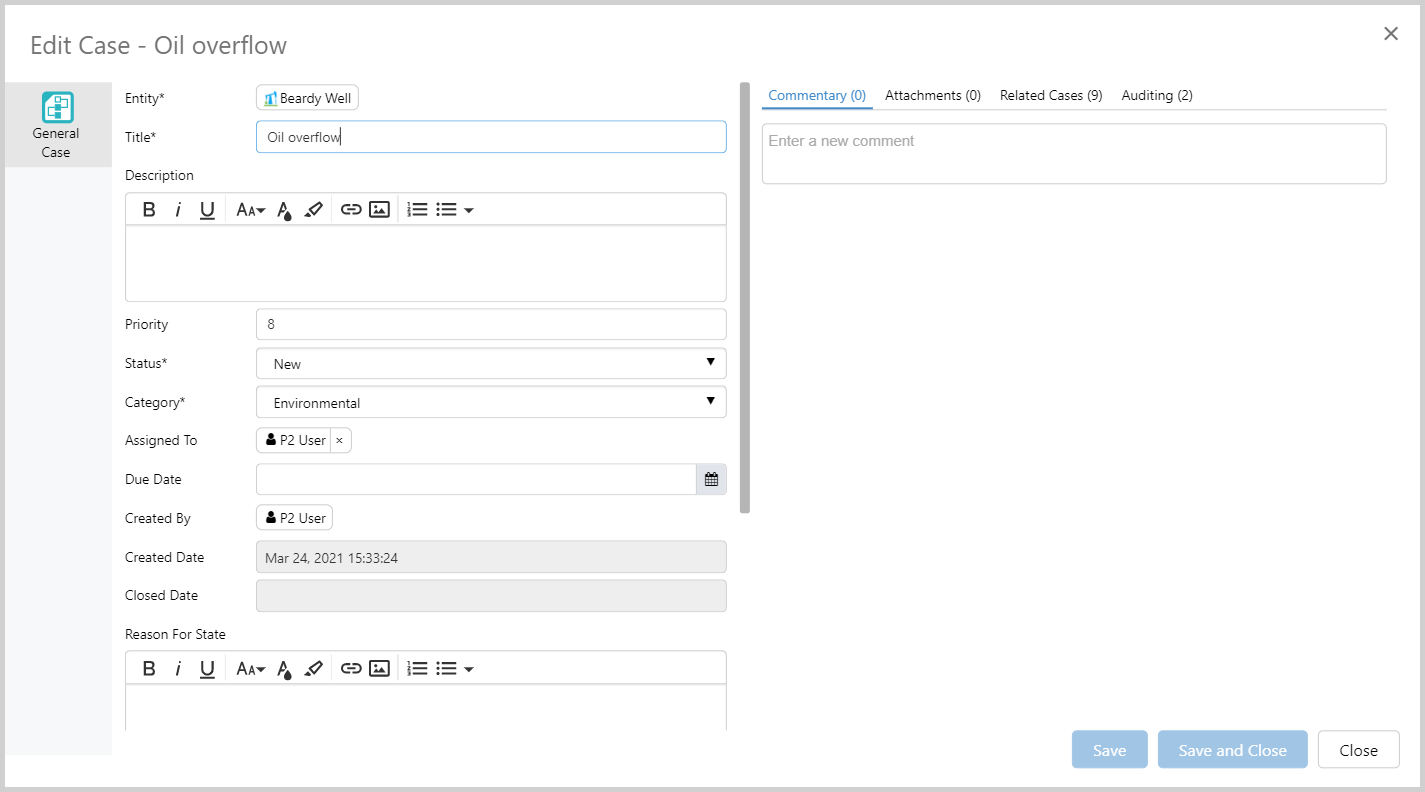
Editing Cases
Cases can be edited individually or in bulk.
Individual Case Edit
To edit an individual case:
- Click on the case you wish to edit in the cases table.
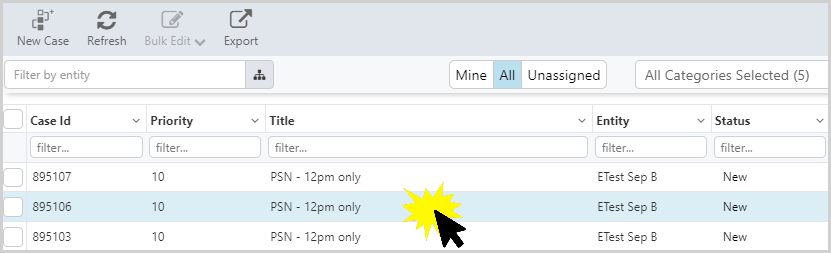
The Edit Case form will open.
Bulk Edit
You can select multiple cases and edit them all at once.
Release History
- Using the Cases Table (this release 4.9.8)
- Add Roles to Case Management Filters
- Assign Case to Role
- Using the Cases Table (4.9.3)