ON THIS PAGE:
In Field Operator, you can record both the seal you removed and the seal you placed, on the same form. You also have the options of entering seal information when completing the relevant ticket, and of associating multiple seals with the one ticket.
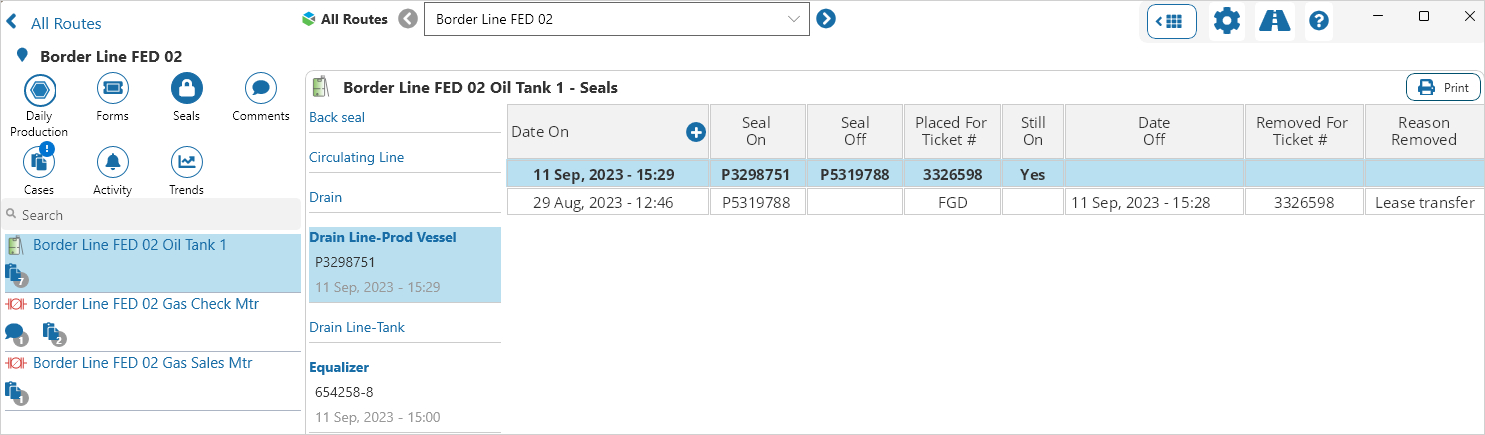
Open the Seals Screen
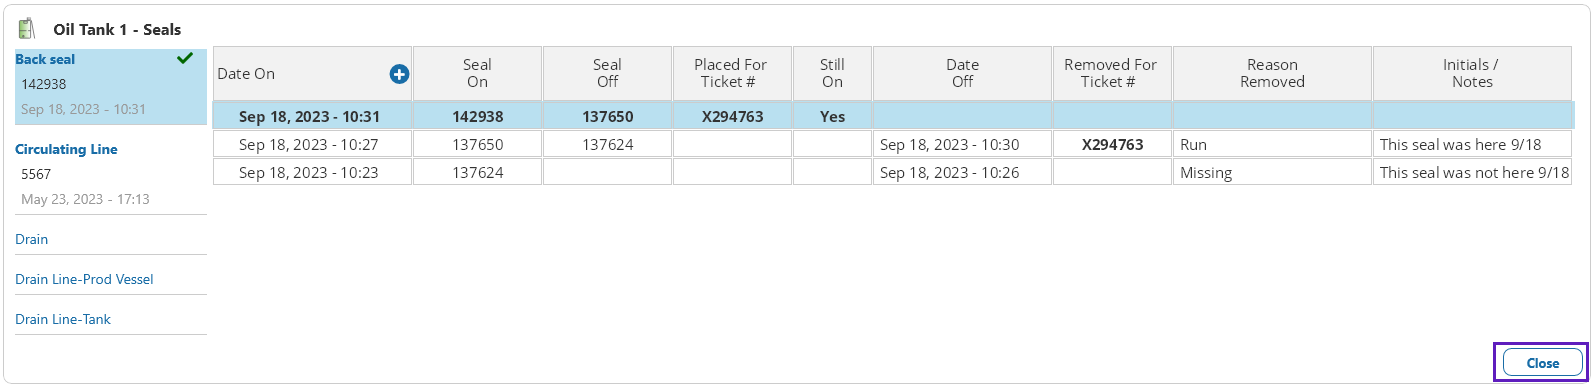
The seals screen can be used to enter details of seals that have been placed and removed, and to edit seal details that have been entered previously. In addition, multiple seals can be added to one ticket when the seals screen is opened via the Seals Detail button.
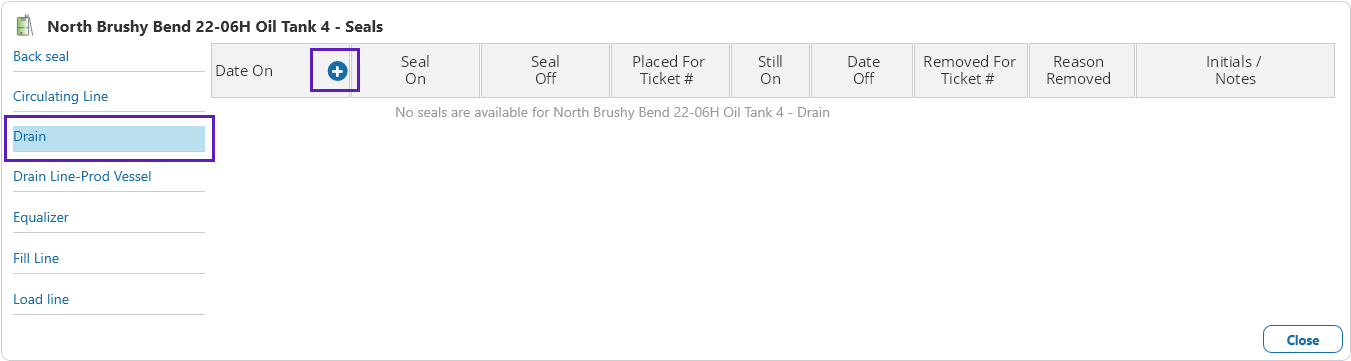
The seals screen displays the list of seals by location for the selected entity. To open:
- Select Seals in the Location Detail ribbon, or
- Tap Seals Detail button on a ticket form.
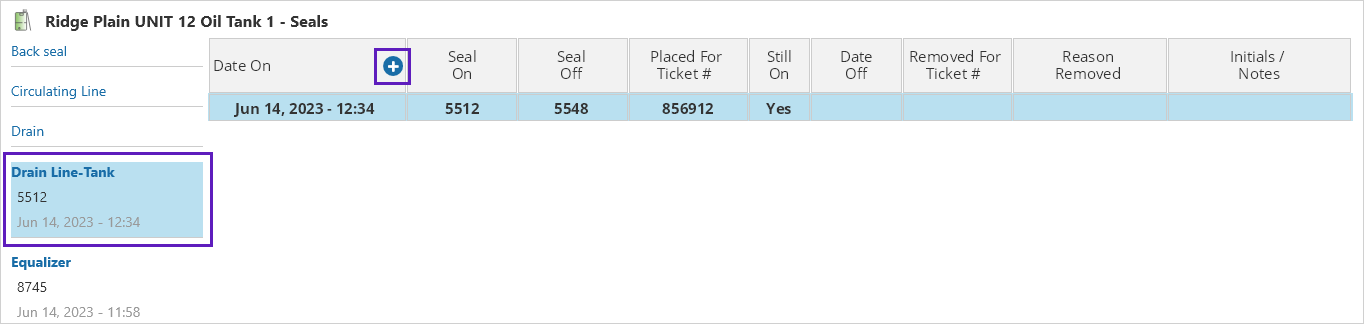
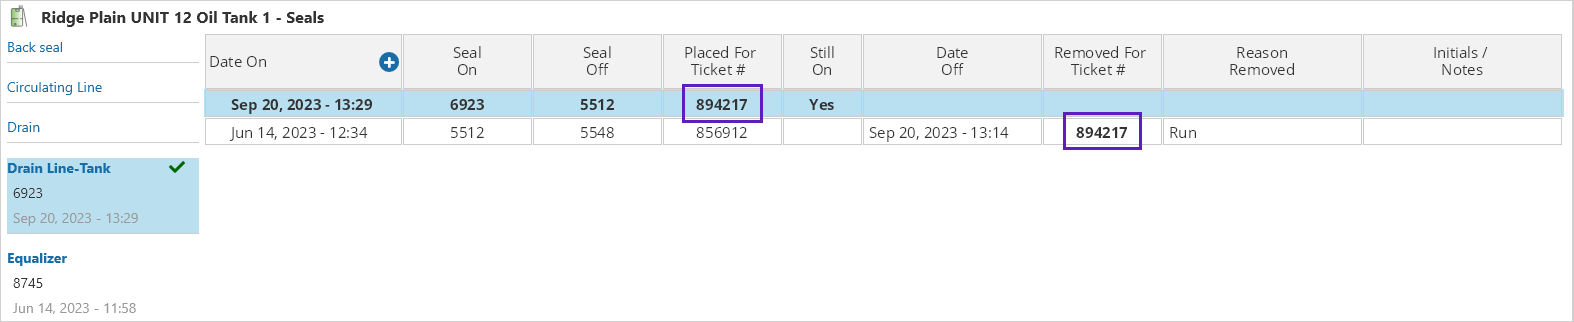
Seals screen:
| 1. | Seal Location Summary
|
|
||||||||||||
| 2. | Seal Location | Seal details are only displayed when a seal is Still On at this location. | ||||||||||||
| 3. | Add | Tap the |
||||||||||||
| 4. | Edit | Tap on an entry to edit, or view details of an existing seal. |
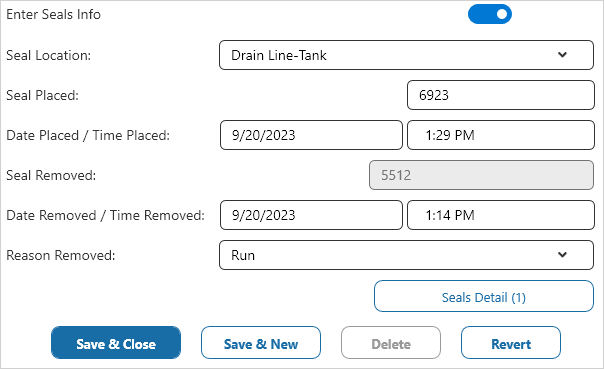
Add a New Seal
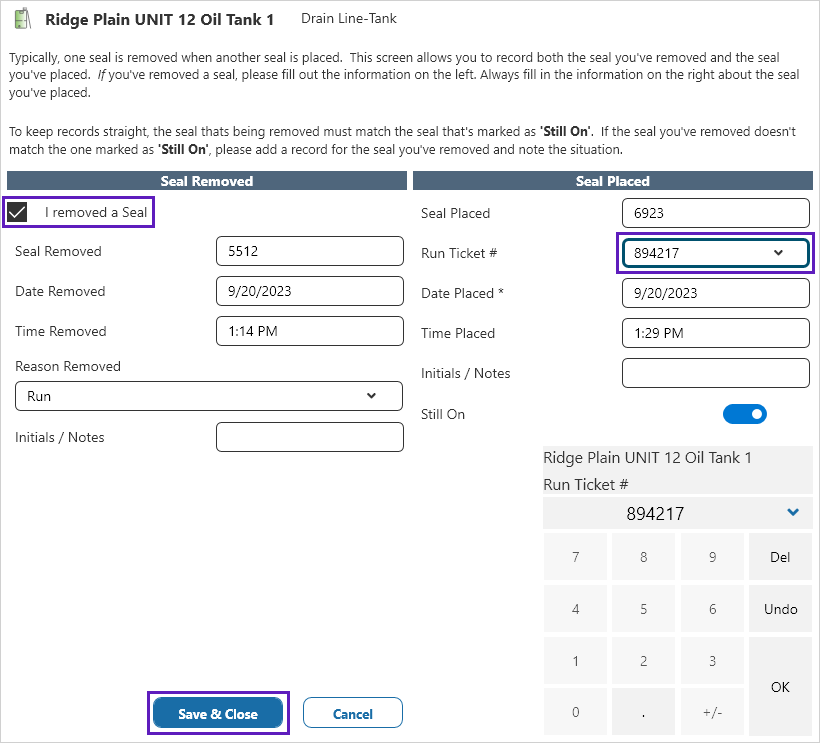
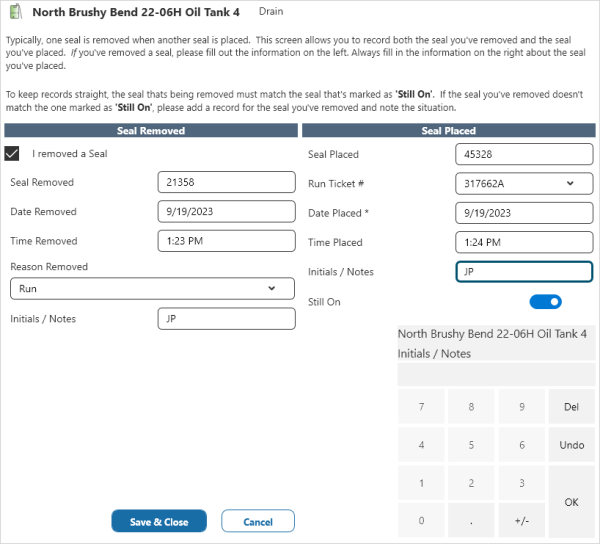
Details about the seal removed and the seal placed, can be entered into a seal form.
Open the form by tapping the ![]() on the seals screen.
on the seals screen.
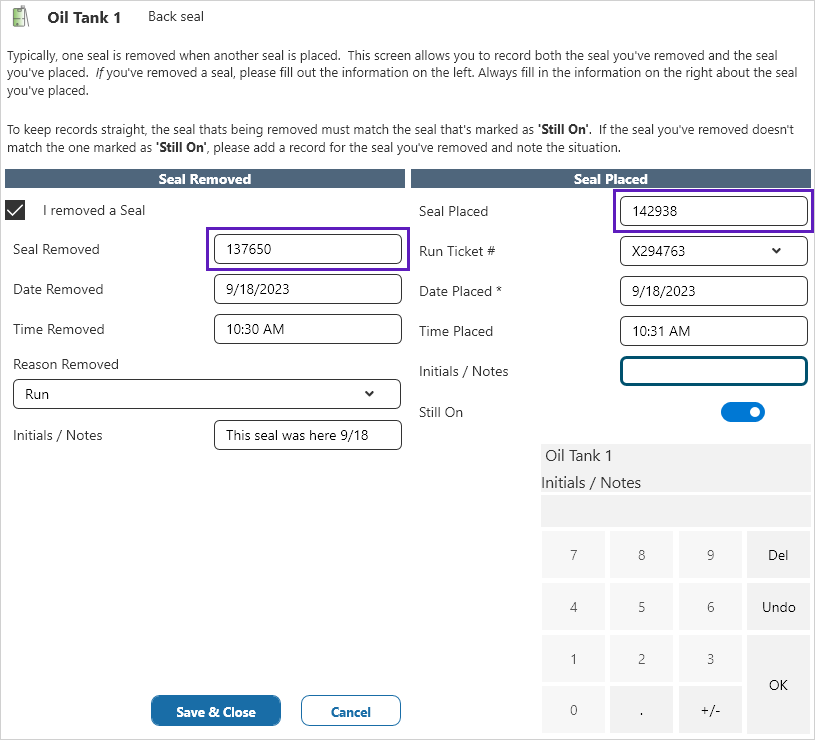
Seal form:
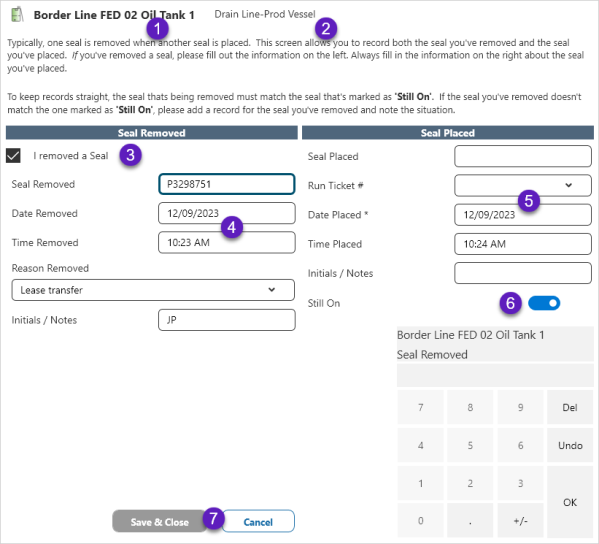
| 1. | Entity | Selected entity. |
| 2. | Seal Location | Location on the entity where the seal is attached. |
| 3. | Seal Removed | Select this checkbox when removing a seal. |
| 4. | Seal Removed Details | The seal removed fields default to the seal that is currently in place. Enter new information as required. |
| 5. | Seal Placed Details | Enter the details of the new seal placed. |
| 6. | Still On | Toggle on when there is a seal in place. Toggle off when there is no seal in place. |
| 7. | Actions | Tap on the buttons to:
|
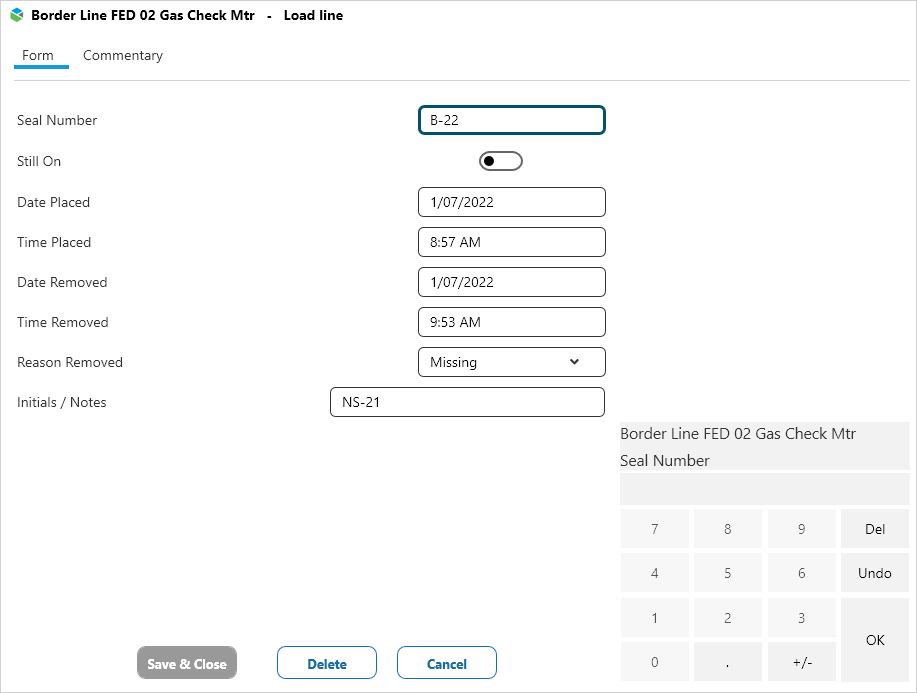
Edit a Seal
To edit a seal, tap on the relevant entry in the seals screen to open the seal details and edit as required.
Select:
- Save & Close - to save the changes and close the form
- Delete - to delete the record
- Cancel - to close the form without making any changes
- Revert - discard unsaved changes
Edit seal details:
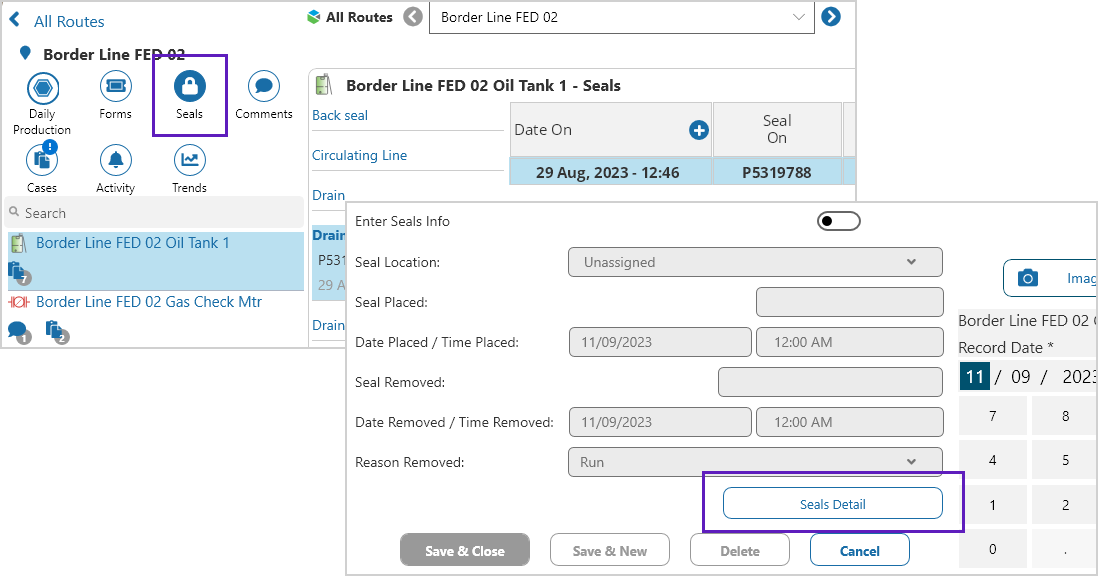
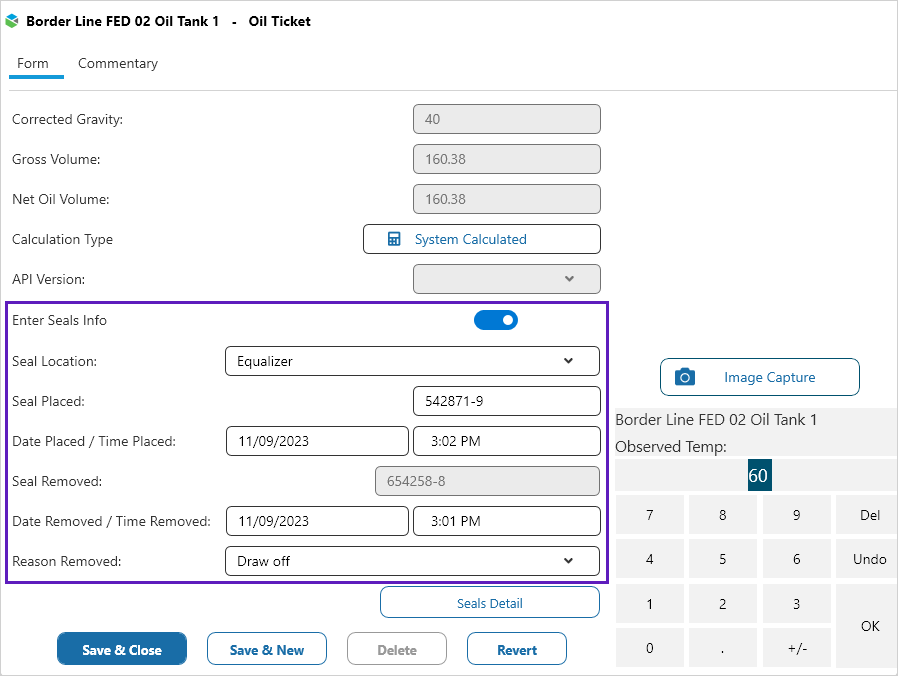
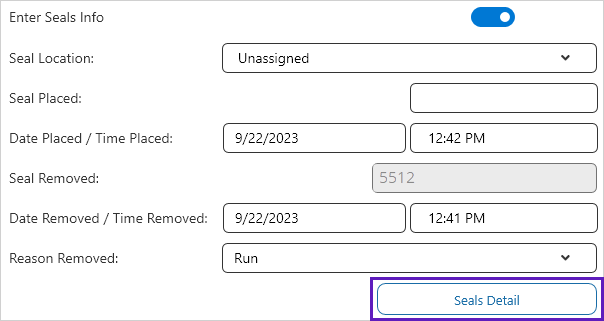
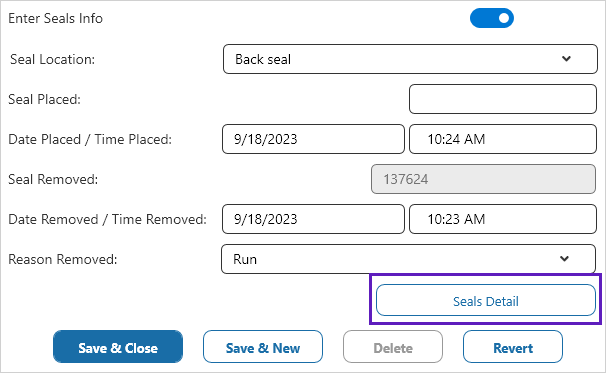
Enter a Seal on a Ticket
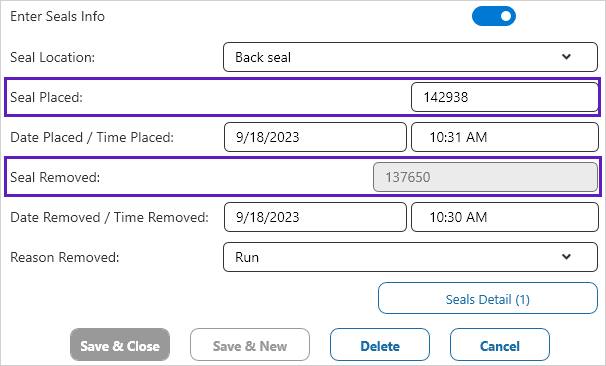
Seal details can be entered on a Ticket.
Excerpt from an oil ticket form:
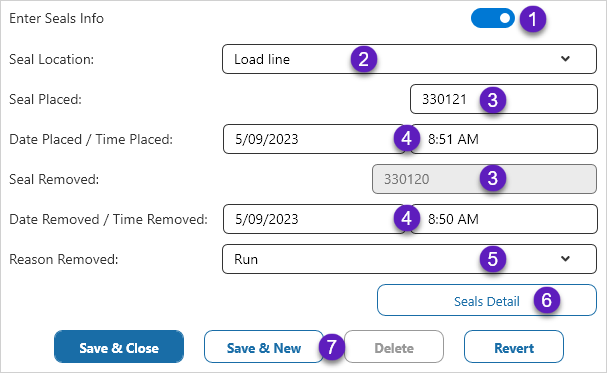
| 1. | Enter Seals Info | Toggle on to enter seal placed details. |
| 2. | Seal Location | Select an option from the dropdown list to assign the seal location. |
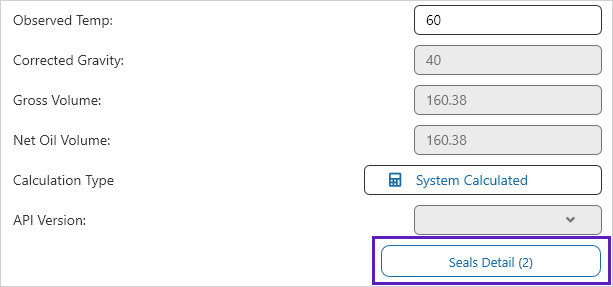
| 3. | Seals | Tap the Seal Placed field to enter the seal. The Seal Removed defaults to the latest seal for the location that is Still On, and is not editable from this screen. If the seal removed is different to the default value, you can enter the correct details on the seal form, as explained in Example 3. Active fields are outlined in dark blue and grey fields are disabled. |
| 4. | Date & Time | Select to add the date and time that seal was placed and/or removed. |
| 5. | Reason Removed | Select from the options in the dropdown list. |
| 6. | Seals Detail | Tap to open the seals screen. |
| 7. | Action Buttons |
Tap to:
|
Print a PDF Seal Report
A PDF report listing seals by route, entity and date can be printed by selecting ![]() on the Location Details Seals view.
on the Location Details Seals view.

Select the route, entities and date range to be used in the Seal Report Options.
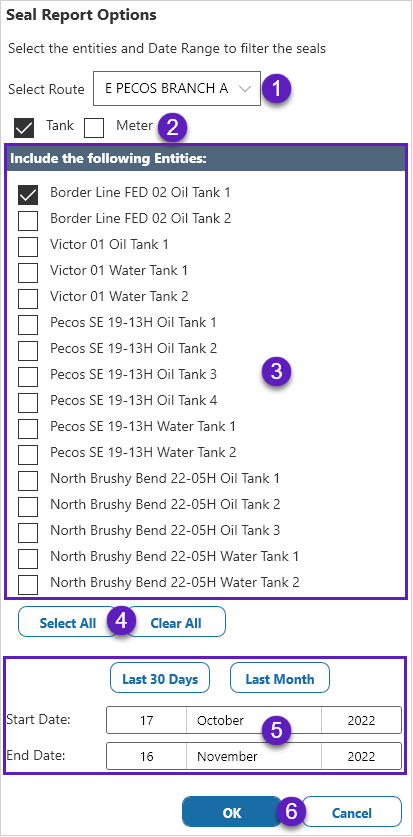
| 1 | Route | Select a route, or all downloaded routes. |
| 2 | Entity Type | Filter the entites by type. |
| 3 | Entities | Select the entites for the report. |
| 4 | Selection |
Tap on the buttons to:
|
| 5 | Date Range | Select report date range:
|
| 5 | Actions | Tap on the buttons to:
|
Seal report:

Examples: How to Enter Seal Information
The following examples explain different ways of entering and updating seals.
| Example 1 | Prior seal information is correct, and new seal information is entered in ticket screen. |
| Example 2 | Prior seal information is correct, and new seal information is entered on the seals screen. |
| Example 3 | Prior seal information is incorrect. The seals screen is used to edit the prior seal details and enter the new seal information. |
| Example 4 | Associate multiple seals with one run ticket. |
Example 1: Prior seal information is correct, and new seal information is entered in ticket screen.
The details of the Seal Placed can be filled in on the ticket screen if the Seal Removed is the latest seal that is marked as Still On.
Toggle on Enter Seals Info to enter new details.
Example 2: Prior seal information is correct, and new seal information is entered on the seals screen.
Seal information can be entered by opening the seal form from the seals screen.
1. Tap Seals Detail on the ticket screen to open the seals screen.
2. Select the seal location and tap the ![]() icon to enter the details for the new seal in the seal form.
icon to enter the details for the new seal in the seal form.
If the seal form is opened without closing the run ticket, the Run Ticket # on the seal form will default to the ticket number of the open ticket.
3. Add the seal details and select Save & Close.
The new details are shown on the seals screen.
Seal placed and seal removed information has been updated on the ticket.
Example 3: Prior seal information is incorrect. The seals screen is used to edit the prior seal details and enter the new seal information.
If the seal removed information is incorrect, the information must be corrected on the seals screen. By using the Seals Detail button on the run ticket to open the seals screen, information can be corrected without the ticket being completed or closed first.
To do this:
1. Tap Seals Detail on the ticket to open the seals screen and then tap the ![]() icon to enter the details for the new seal in the seals form.
icon to enter the details for the new seal in the seals form.
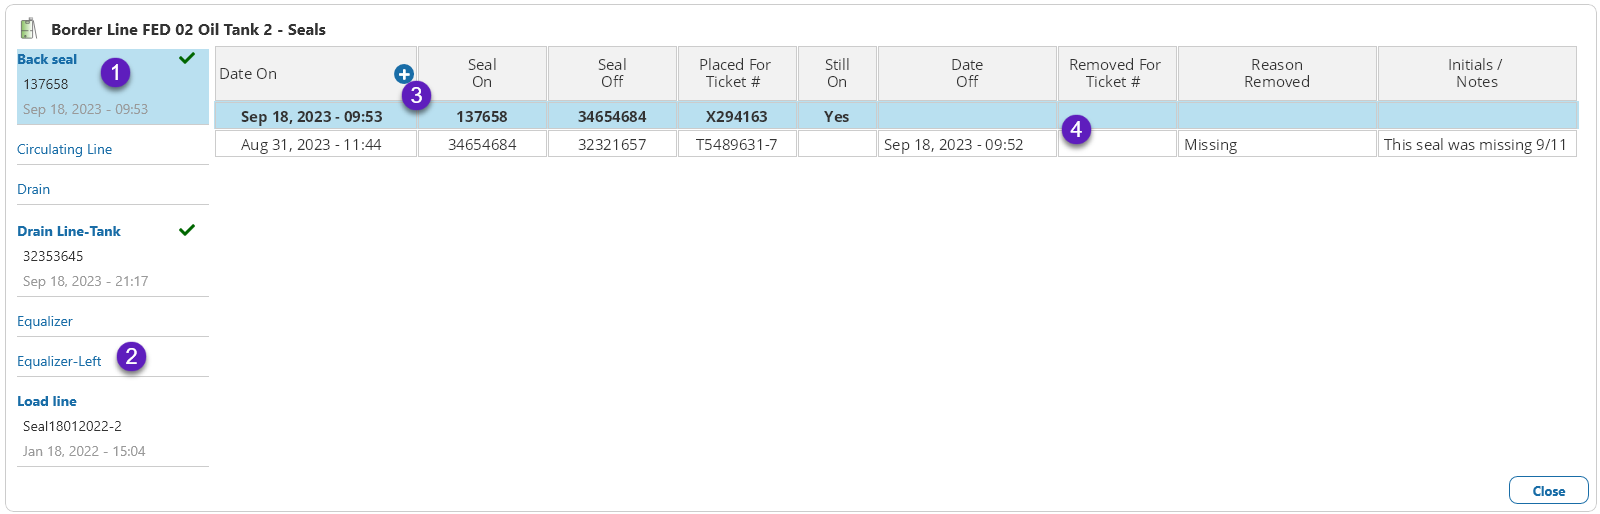
2. If there is no record of the seal removed enter the:
- Missing seal as the Seal Removed
- Seal that was there as the Seal Placed
The correct seal may or may not be associated with a run ticket depending on the reason that it is missing.
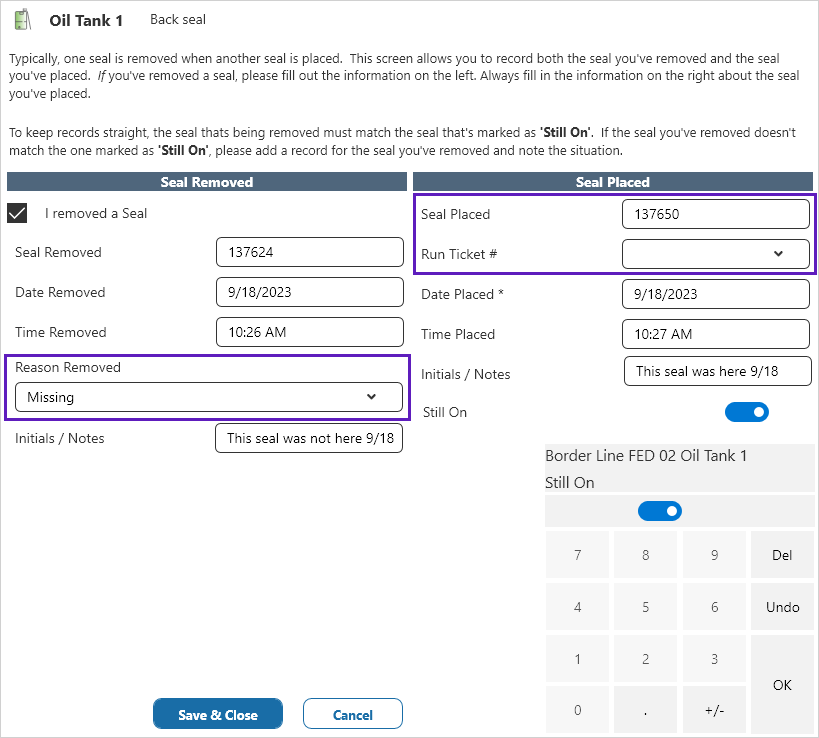
Once the missing seal has been entered, the system shows the correct seal that was installed when the user arrived on site to execute the run.
3. Remove the seal added in step 2 above and add the seal that has been placed.
As you’re adding and editing seals on the seals screen, the Run Ticket record is still in progress. Once the seal situation is corrected, tap Close to return to the ticket screen and complete the entry.
The run ticket screen now reflects the correct seal placed and seal removed.
Example 4: Associate Multiple Seals with One Run Ticket
Multiple seals can be associated with the one run ticket.
To do this:
1. Open a run ticket or add a new run ticket, enter the ticket number and open the seals screen.
2. Select the seal location and tap the ![]() icon to enter the details for the new seal in the seals form.
icon to enter the details for the new seal in the seals form.
3. Enter the seal details for the first selected seal location and tap Save & Close.
4. From the seals screen, select the second seal location and open the seals form. Enter the seal details and save the entry.
On the seals screen, a green tick shows the seal locations that are associated with the ticket.
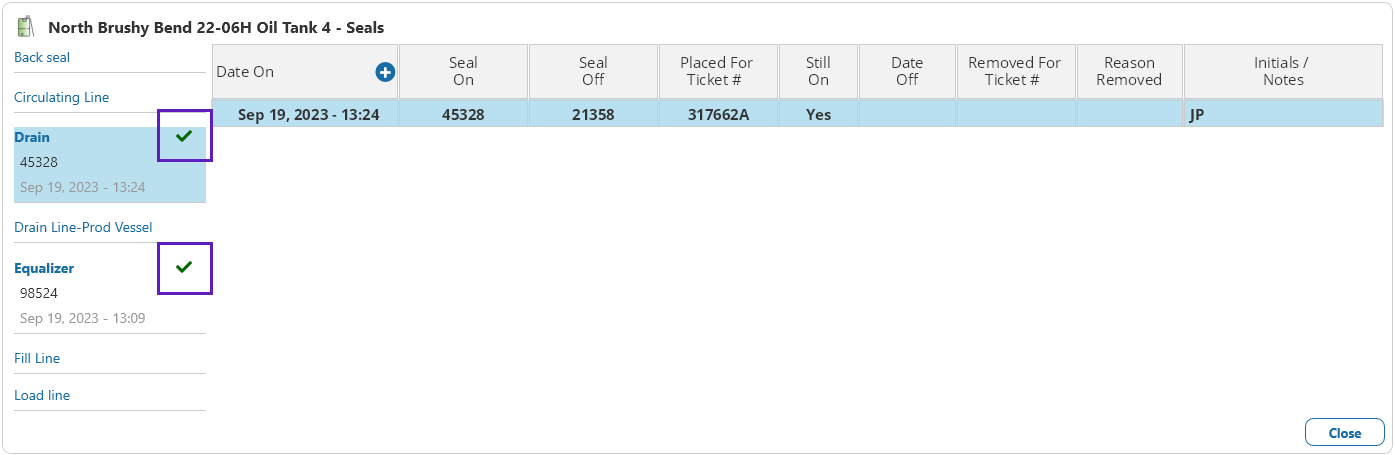
On the run ticket, if there is more than one seal associated with the ticket, the seal fields are no longer shown and the Seals Detail button indicates the count of associated seals.
On run ticket:
Release History
- Seals (this release, 4.11)
- Access the seal screen from the ticket screen
- Seals (4.8)
- Seals (4.4)