ON THIS PAGE:
In P2 Explorer, all pages and trends are either private or public. A public page or trend is visible to all users, while a private page or trend is visible only to the person who created it and to Explorer Administrators.
The exception here is for pages or trends shared from your private workspace. These are accessible from the shared link, but do not give access to the private workspace itself. (This behaviour was introduced in P2 Explorer version 4.5.0).
Private pages and trends (saved to the owner's private workspace: "My Workspace") can become public by way of the publishing process. The owner submits the page or trend for review and publishing, or saves the page to a public workspace, to which they have access.
Note: After a page or trend has been published, you can not unpublish it.
Submitting a Page
If you have Explorer Administrator permissions, you can publish a page directly to a public workspace. Otherwise, you will need to submit a page for publishing in one of two ways:
- My Environment (Home tab)
- Explorer Ribbon (Page tab)
Submitting via My Environment
- In the Home tab of P2 Explorer, click the Environment
 button.
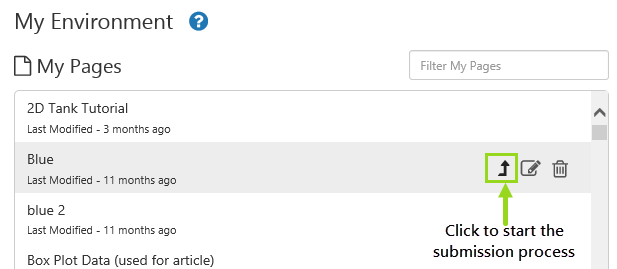
 - In My Environment, go to the My Pages section and find the page you want to publish.
- Click the Submit
 button next to that page.
Submitting via the Ribbon
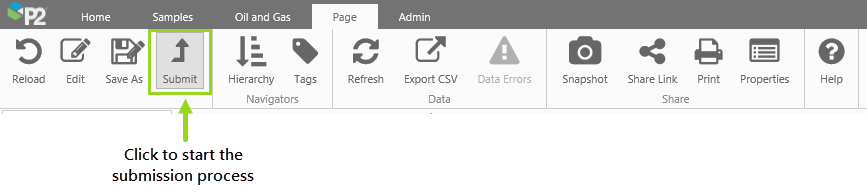
If your page is open in display mode, you can submit it for publishing without having to go into My Environment.
- Click the Page tab in P2 Explorer Studio.
- Click the Submit button.
Submitting a Trend
If you have Explorer Administrator permissions, you can save a trend directly to a public workspace. Otherwise, you will need to submit the trend for publishing via My Environment.
- In the Home tab of P2 Explorer, click the Environment button.
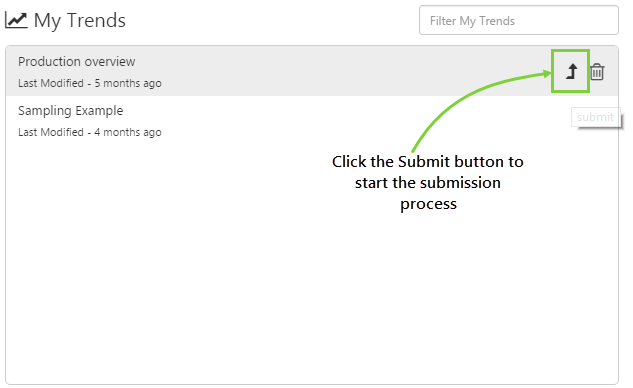
- In My Environment, go to the My Trends section and find the trend you want to publish.
- Click the Submit button next to that Trend.
The Submission Process
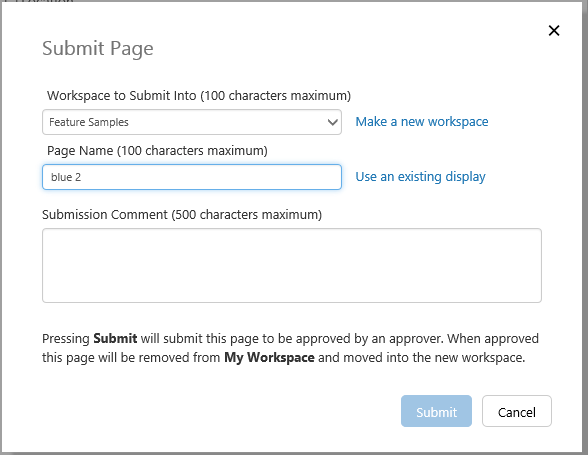
The submission process is the same for both pages and trends. After clicking Submit, a window appears with a submission form.
Fill in the form, and then click the Submit button to send the page or trend for approval.
 |
| Submission form for a page |
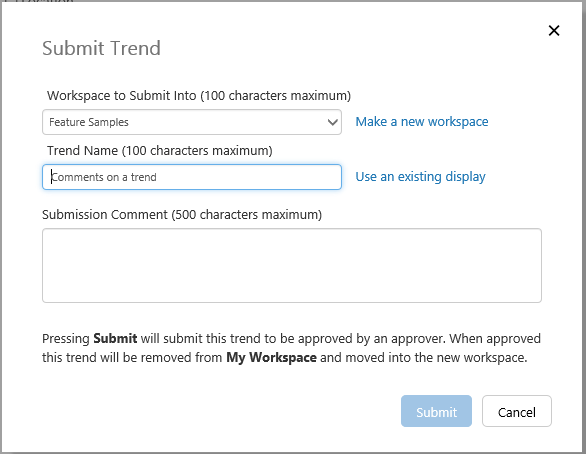 |
| Submission form for a trend |
| Workspace to Submit Into | Select an existing workspace from the drop-down list, or click the Make a new workspace, then type in the name of the new workspace in teh text box which replaces the drop-down list. |
| Page Name/ Trend Name | By default, the display name will be the current saved display name. However you can change this here, or you can even overwrite an existing page/trend. When you want to use an existing display, the text box changes to a drop-down list, from which you can select the display you want to overwrite. |
| Submission Comment | If you want to leave a message for the person approving the submission, you can write this here. This will appear in My Environment. |
Approving or Rejecting a Page or Trend
Once a page or trend has been submitted for review, they are listed in the Pages and Trends Pending Approval box in My Environment.
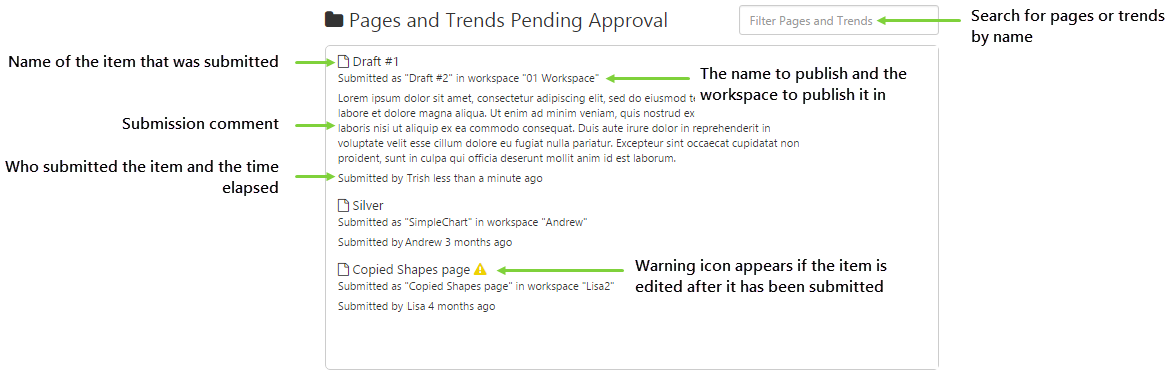
To approve an item for publishing, hover over the item and click the appropriate action button:
| Preview | Preview the page or trend before deciding whether or not to publish it. You can then approve or reject a page directly from Explorer Studio. | |
| Approve | Approve the page or trend immediately. This moves the page or trend to the designated public workspace, viewable by anyone who has view permissions to the workspace. | |
| Reject | Reject the page or trend immediately. This moves the page or trend back to the private workspace of the person who created it. When rejecting an item, you have the option of adding a comment. This is stored in the database for auditing purposes. |