ON THIS PAGE:
Overview
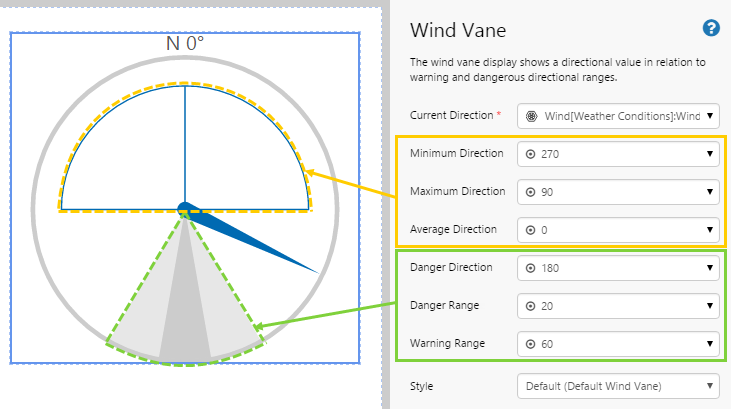
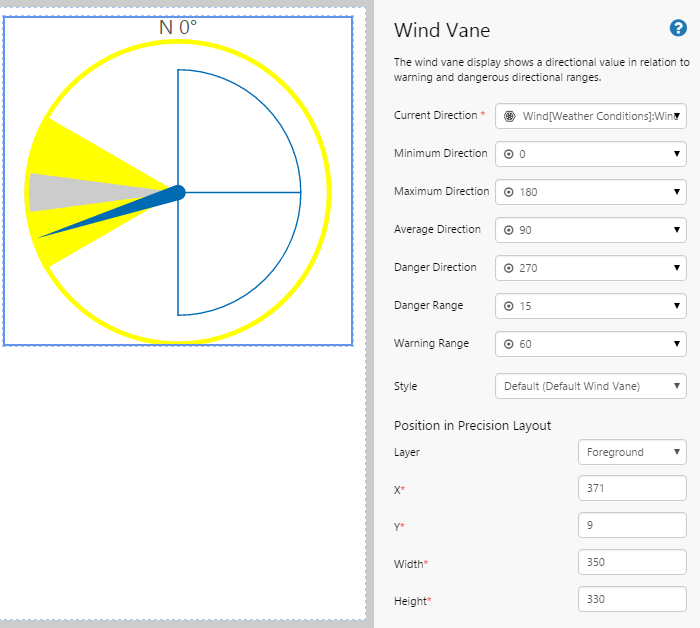
The Wind Vane shows the current wind direction in relation to a nominated critical direction and associated zones.
The following diagram shows a Wind Vane being configured:
Note: Wind direction is expressed as an angle in degrees. For simplicity, you should enter the angles as values between 0-360. However, angles will wrap around 360 degrees to cater for sources that retrieve the value outside this range (e.g. 400 deg = 40 deg, and 361 deg = 1 deg) .
| Current Direction: | The source from which the Wind Vane gets its wind direction data. |
| Minimum Direction: | The direction, in degrees, that is considered to be the lowest value for the wind direction. |
| Maximum Direction: | The direction, in degrees, that is considered to be the highest value for the wind direction. |
| Average Direction: | The direction, in degrees, that is considered to be the mean value for the wind direction. E.g. This could be used to indicate the prevailing wind. |
| Danger Direction: | The wind direction, in degrees, that indicates a potential problem. E.g. This could be used to indicate the direction of the nearest settlement to the facility. |
| Danger Range: | The angle (in degrees), relative to the Danger Direction, designating the total range that indicates a potential problem. When the current wind direction is within this range, the colour changes to red. Values greater than 360 are truncated to 360. E.g. If 45 is specified, the Danger Range will be 22.5 degrees left of the Danger Direction and 22.5 degrees right of the Danger Direction, resulting in a total range of 45 degrees. |
| Warning Range: | The angle (in degrees), relative to the Danger Direction, designating the range that indicates a potential problem of lesser severity than the Danger Range. When the current wind direction is between this range and the Danger Range, the colour changes to yellow. This value should be greater than the Danger Range value. If this value is less than or equal to the Danger Range, the wind vane will never show a warning. Values greater than 360 are truncated to 360. E.g. If 90 is specified, the Warning Range will be 45 degrees left of the Danger Direction and 45 degrees right of the Danger Direction, resulting in a total range of 90 degrees. |
| Style: | The style you want to apply to the Wind Vane component. If you are a Style Administrator, you can add a new Wind Vane style. |
Tutorial: Creating a Wind Vane
If you're unfamiliar with the process of building pages, read the article Building an Explorer Page.
In this tutorial, we'll show you how to set up a Wind Vane that updates its direction automatically every 3 seconds.

Let’s go through this process, step-by-step.
Step 1. Prepare a Studio Page
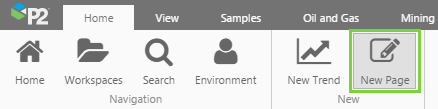
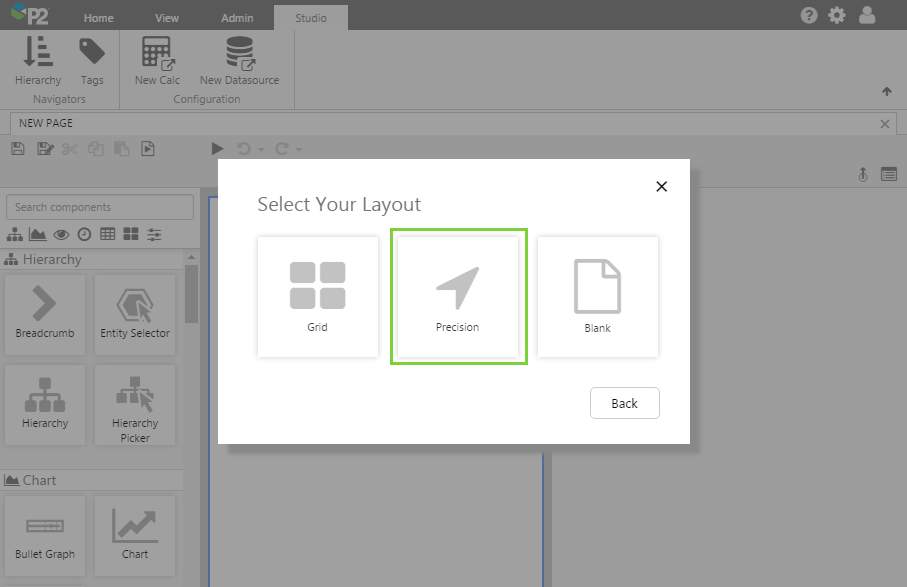
Before you start, click the New Page button on the Home tab of the ribbon. Choose the Precision layout.
Step 2. Add the Wind Vane
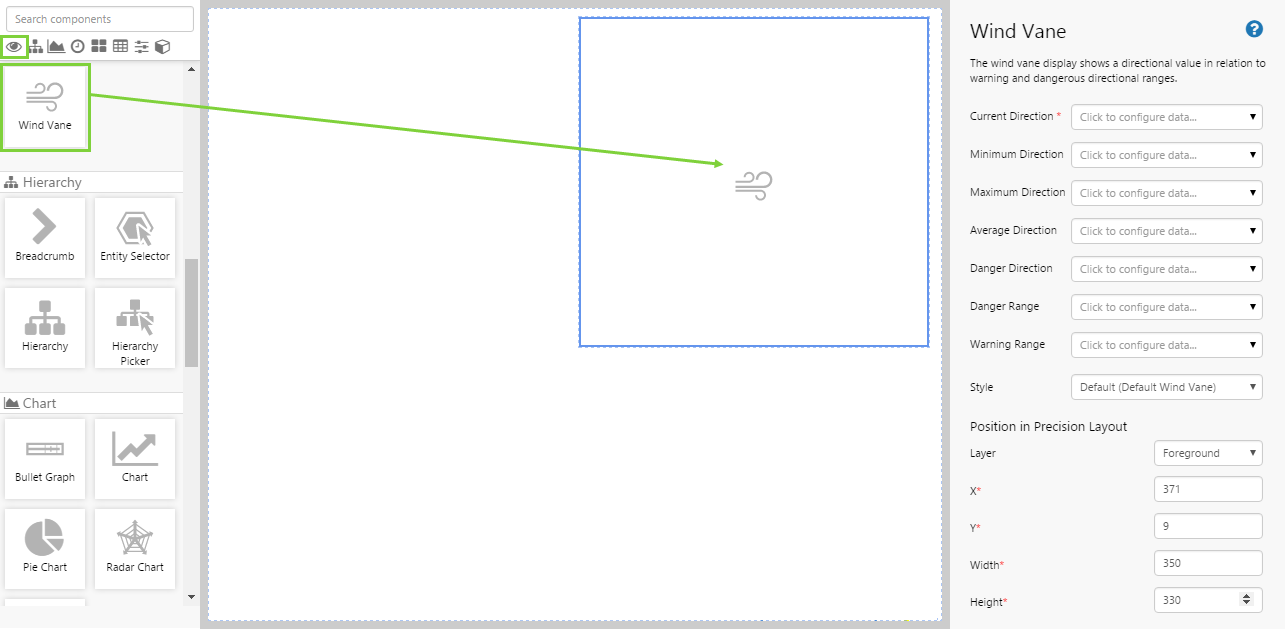
Drag and drop the Wind Vane component onto a grid cell. The Wind Vane is in the Display ![]() group. Position it as follows:
group. Position it as follows:
- X: 371
- Y: 9
- Width: 350
- Height: 330
Step 3. Configure the Wind Vane
Configure the Wind Vane as follows.
Configuring the Current Direction:
- Open the Current Direction Data Selector by clicking on the field. Click the Attribute
 tab, and fill in the fields as follows:
- Entity: Wind
- Template: Weather Conditions
- Attribute: Wind
- Attribute Value: Wind Direction
- Sample Method: (Variable) pageSampleMethod
- Sample Interval: (Variable) pageSampleInterval
- Time: (Variable) endTime
- Item: Value
- Entity: Wind

Click the Preview button to check that you are getting data. If the preview window is blank, you may have filled in a parameter incorrectly.
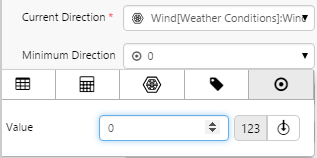
Configuring the Minimum Direction:
You can get this value from a tag if it's likely to change, otherwise it's easier to simply enter a fixed value.
- Click away from the Data Selector.
- Open the Minimum Direction Data Selector by clicking on the field. Stay on the Value
 tab, and fill in the field as follows:
- Value: 0
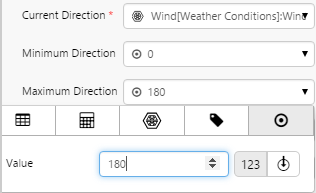
Configuring the Maximum Direction:
You can get this value from a tag if it's likely to change, otherwise it's easier to simply enter a fixed value.
- Click away from the Data Selector.
- Open the Maximum Direction Data Selector by clicking on the field. Stay on the Value tab, and fill in the field as follows:
- Value: 180
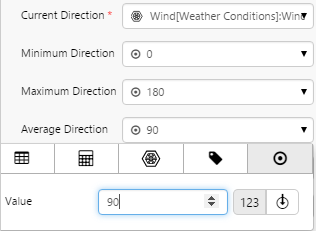
Configuring the Average Direction:
You can get this value from a tag if it's likely to change, otherwise it's easier to simply enter a fixed value.
- Click away from the Data Selector.
- Open the Average Direction Data Selector by clicking on the field. Stay on the Value tab, and fill in the field as follows:
- Value: 90
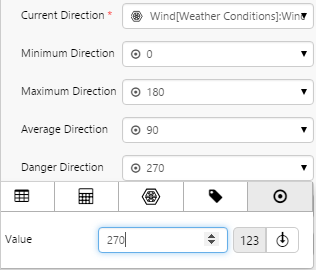
Configuring the Danger Direction:
You can get this value from a tag if it's likely to change, otherwise it's easier to simply enter a fixed value.
- Click away from the Data Selector.
- Open the Danger Direction Data Selector by clicking on the field. Stay on the Value tab, and fill in the field as follows:
- Value: 270
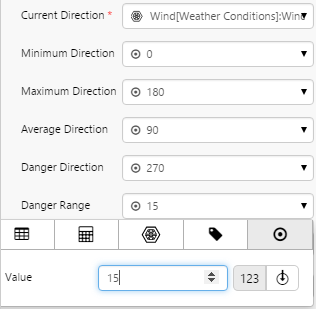
Configuring the Danger Range:
You can get this value from a tag if it's likely to change, otherwise it's easier to simply enter a fixed value.
- Click away from the Data Selector.
- Open the Danger Range Data Selector by clicking on the field. Stay on the Value tab, and fill in the field as follows:
- Value: 15
Configuring the Warning Range:
You can get this value from a tag if it's likely to change, otherwise it's easier to simply enter a fixed value.
- Click away from the Data Selector.
- Open the Warning Range Data Selector by clicking on the field. Stay on the Value tab, and fill in the field as follows:
- Value: 60

Step 4. Add and Configure a Current Date/Time Toggle
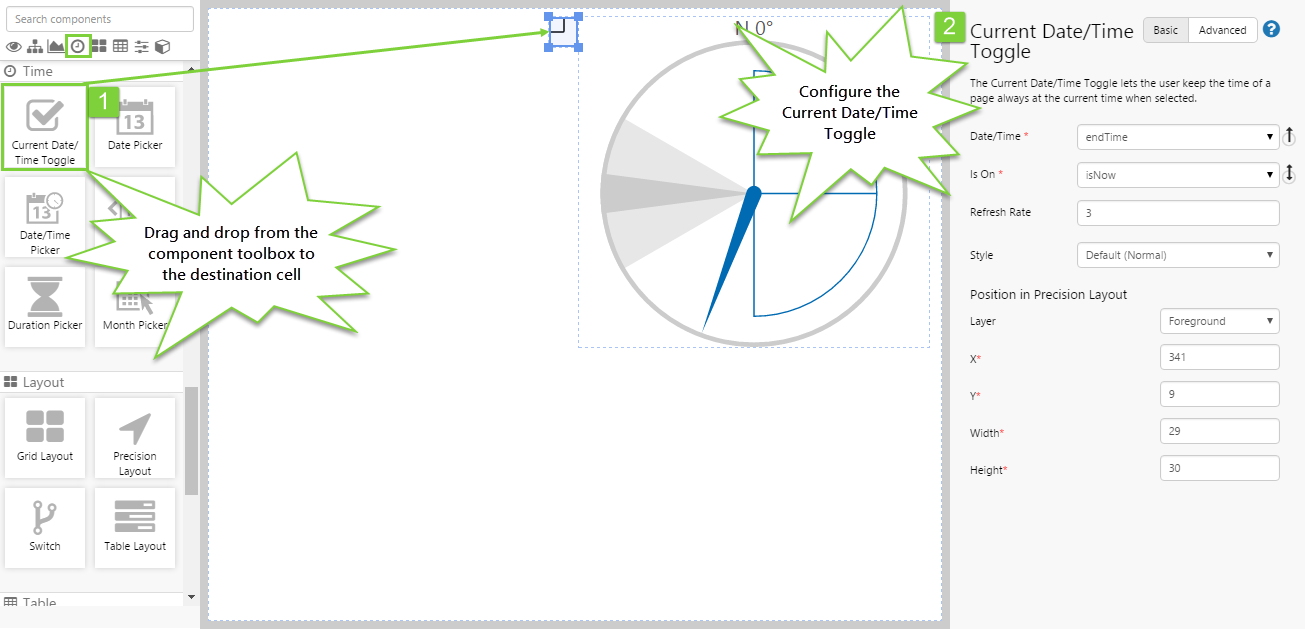
In this step, we add the Current Date/Time Toggle component to refresh the page automatically every 3 seconds. We can use the Basic configuration for this.
Configure the fields as follows:
- Date/Time: endTime (this is the default)
- IsOn: isNow (this is the default)
- Refresh Rate: 3
Step 5. Set the Default Values
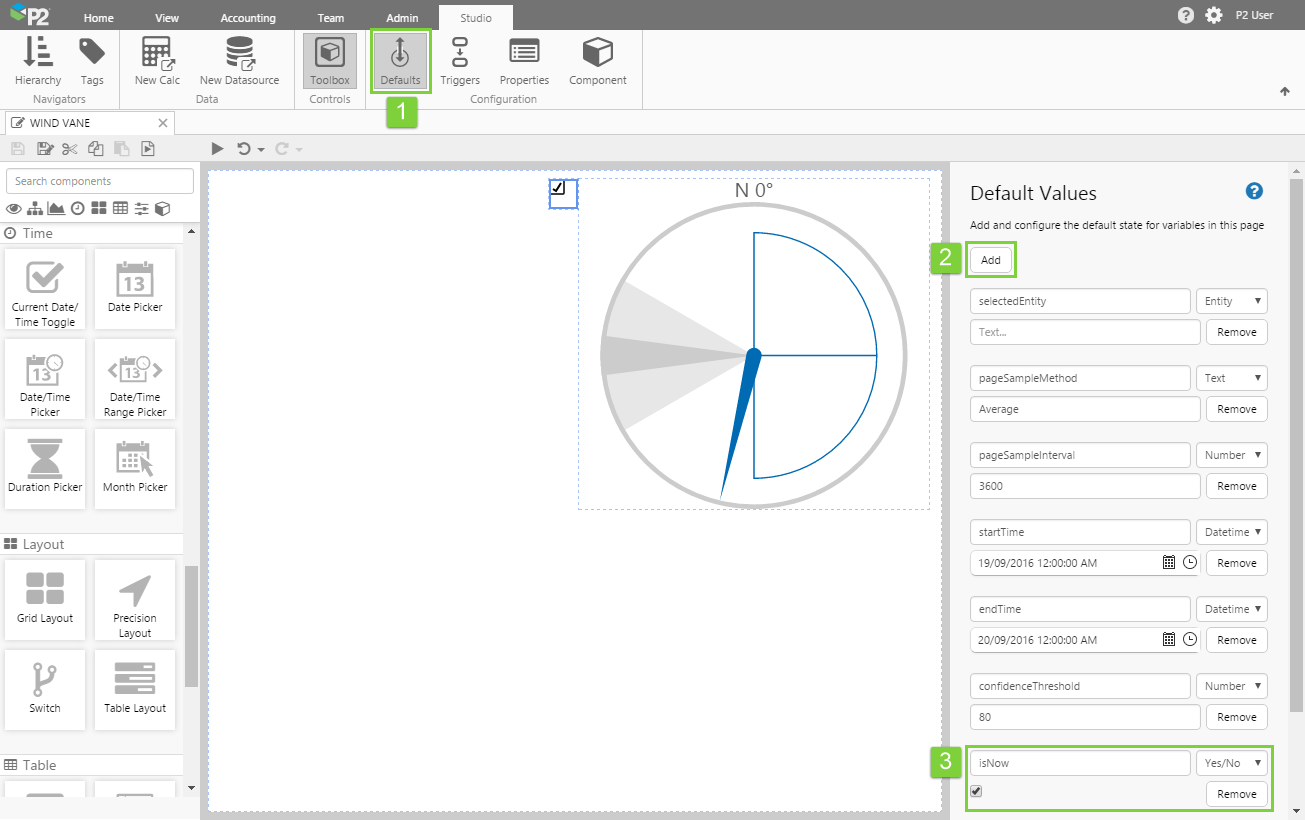
At the moment, the page depends on the user to click the Current Date/Time Toggle to automatically refresh the page. However, you may not want to rely on the user doing this, so let's set up the default state for the toggle to be selected.
You should specify default values that are appropriate for your intended purpose.
To do this, we need to add a new default variable that matches the IsOn variable in the Current Date/Time Toggle's configuration, from the previous step.
- Click the Defaults button in the Studio tab of the ribbon.
- Click the Add button.
- Add a new default value named, 'IsNow', with a type of Yes/No, and select the check box.
You should now see the Current Date/Time Toggle update to reflect the 'yes' state.
Step 6. All done!
Congratulations! You now have a page with a Wind Vane that displays the wind direction from a tag, with the Wind Vane refreshing every 3 seconds.
- Click the preview
 button on the Studio toolbar to see what your page will look like at run time.
 - Click the toggle button and observe the changes in the Wind Vane.
![]() Don't forget to save your page!
Don't forget to save your page!