ON THIS PAGE:
Triggers are actions that you can add to a page, in order to control how certain variables behave on the page.
A trigger is a special type of component in Explorer, whose job it is to watch a variable on the page, and then do some type of action when this variable changes.
Triggers are useful for adding advanced interactions to a page, by regulating variables to conform to certain rules.
An example of a trigger is the Hierarchy Query. This trigger watches for the user to select an entity. Any time the selected entity changes, the trigger will run and return a list of child entities.
Triggers are accessed via the ribbon in Explorer Studio, and are only visible to the page designer.
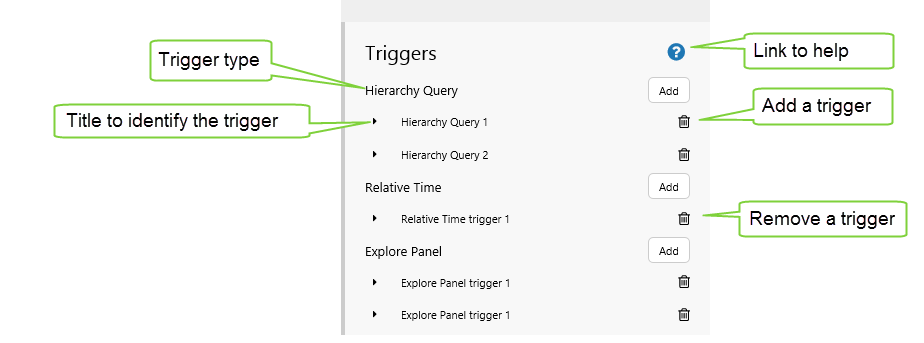
Types of Triggers
P2 Explorer currently offers three types of triggers. Click the links below to see detailed information and tutorials on how to use each trigger.
| Hierarchy Query | Generates a list of child entities from a hierarchy, for a selected entity. This is useful when using an asset model to display entities, but you want to restrict the type of entities displayed depending on the template and level in a hierarchy. |
| Relative Time | Sets a time difference between two datetime variables on a page. It does this by applying a specified time offset to an input variable, and designating this new time to an output variable. The time difference is a period of time either before or after the input time. The output variable can be used elsewhere on the page, effectively allowing you to have a relative time that keeps pace with the date and time that you are selecting. |
| Explore Panel | Opens the Explore panel, every time the configured variable changes. Currently this opens the Explore panel for Cases, and the required variable is a case id. |
Adding a Trigger
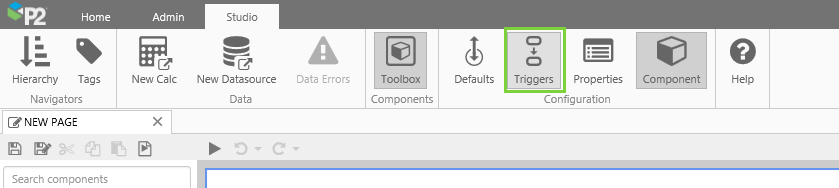
Triggers are only available from Explorer Studio, while designing a page.
To open the Triggers panel, click the Triggers ![]() button in the Configuration group on the Studio ribbon tab.
button in the Configuration group on the Studio ribbon tab.
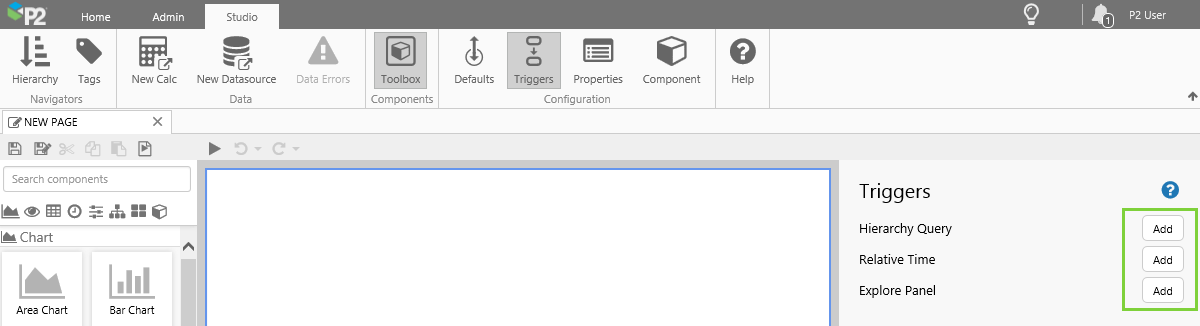
The Triggers panel on the right shows the available triggers.
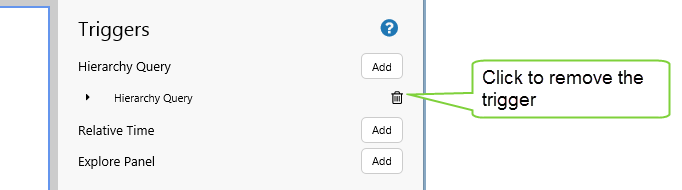
To add a trigger, click the Add button next to the type of trigger you want to add.
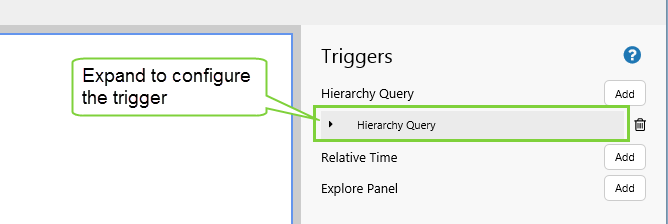
Then, click the arrow next to the trigger to expand its configuration options.
To remove a trigger, click the bin ![]() icon next to it.
icon next to it.
Release History
- Triggers 4.6.1 (this release)
- New Explore Panel trigger type
- Triggers 4.5.4
- Triggers first introduced