P2 Server Management allows you to create tags or datasets that are specifically designed to contain the results of a calculation. These are then available to users in consuming applications, such as P2 Explorer. This article describes how to create a calculation in both P2 Server Management and the Import/Export spreadsheet.
Server Management
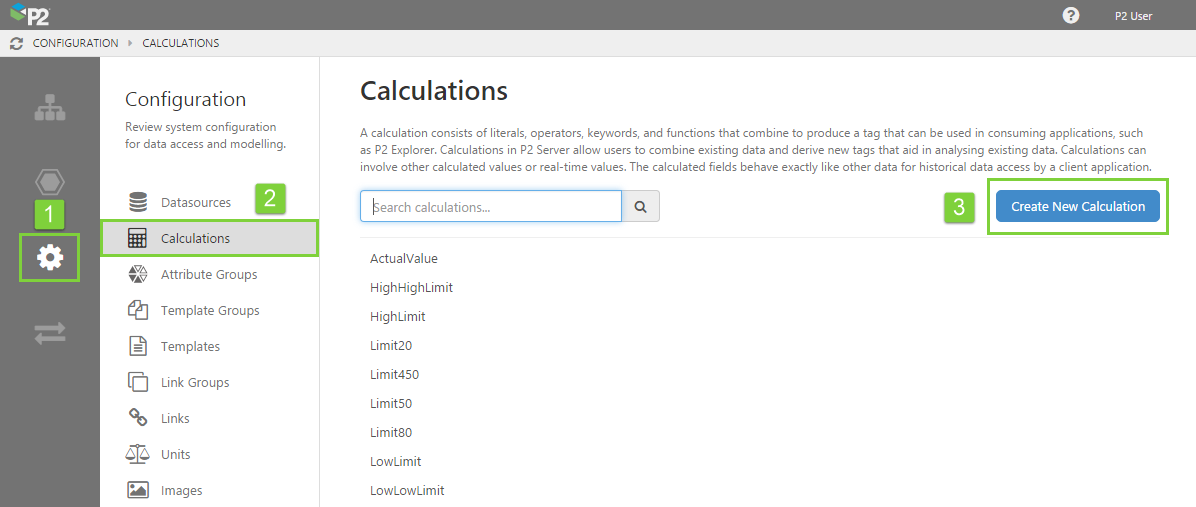
In P2 Server Management, creating a calculation is performed through the Configuration ![]() menu option.
menu option.
1. Open P2 Server Management, and click the Configuration icon.
2. Click Calculations.
3. Click the Create New Calculation button, or click the calculation you want to edit.
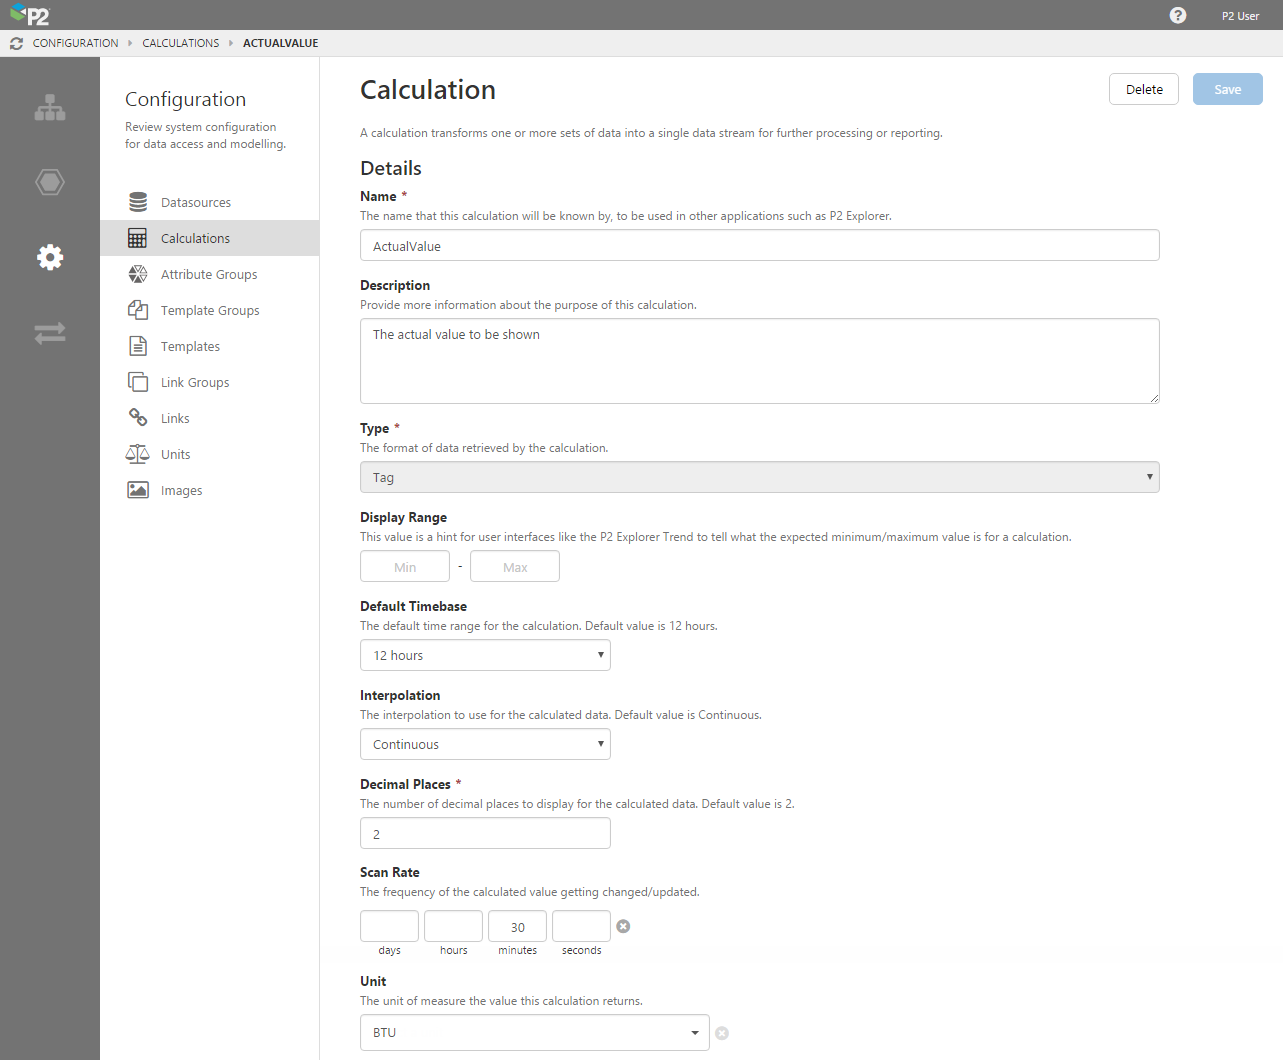
4. Fill in the fields as required:
- Name: Note that the name cannot contain reserved characters.
- Description: For the description, it's often useful to provide a broader explanation of what the calculation tag represents.
- Type: The type of calculation you are creating: tag or dataset.
If your calculation type is a tag, you should also complete the following details:
| Display Range | Allows consuming applications (e.g. P2 Explorer Trend) to tell what the expected minimum/maximum value is for a tag. If supported, this information may be imported by the adaptor. |
| Default Timebase | The time range that will be used by default when the tag is displayed in consuming applications, such as being added to a P2 Explorer trend. The default is 12 hours. |
| Interpolation | The type of interpolation to assume for the data returned by this calculation tag. This affects how the data is displayed on a trend in P2 Explorer, and the default trace style. The default is Continuous.
|
| Decimal Places | The number of decimal places to display for the tag. An example of this being used is when the tag is displayed in the Status Tile of P2 Explorer. The default is 2. |
| Scan Rate | The frequency with which the tag is updated with live values in the data source. Consuming applications can use this to limit the range of a raw fetch on data which has a high scan rate. |
| Unit |
The unit of measure for this tag. Select this from the drop-down list, which contains all units defined in the master list. See also: Creating a Master List of Units |
| Digital State Set | If this tag represents a digital state set, select it from the drop-down list. |
5. Create the calculation using the Calculation Editor.
The Calculation Editor is an easy to use assistant for creating, validating, and testing expressions.

6. Click the Save button in the top right corner.
Import/Export Spreadsheet
The Import/Export spreadsheet is generally only used to make bulk changes.
If you want to create or edit calculations as part of a bulk configuration, you can use the Calculation Tag tab in the Import/Export spreadsheet.
Note that this only applies to calculations of the 'Tag' type. The fields you need to fill in here are the same as the ones in P2 Server Management for calculation tags.
Look for the red comment ![]() icon in the row headers, to get help with each column.
icon in the row headers, to get help with each column.
DO NOT change anything in the Global Id field - this is the unique identifier for the attribute group that allows it to be tracked across systems, and when it is renamed. It is automatically generated by the system.

Note: The choices for Default Timebase and Interpolation are available from drop-down lists on those cells.
Dependencies
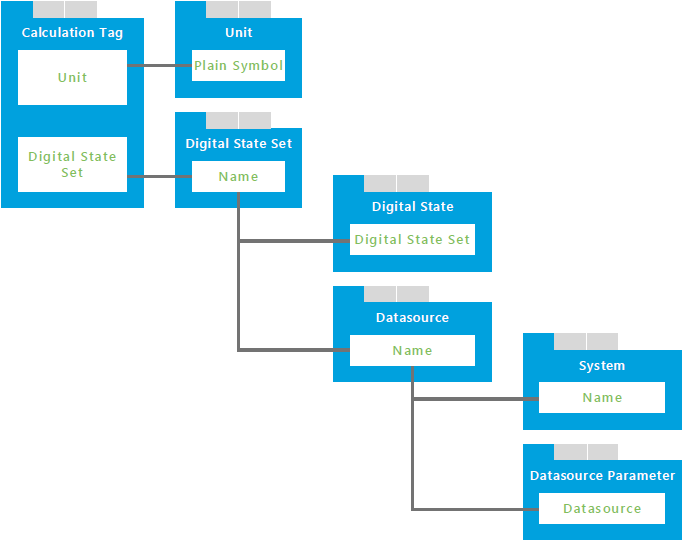
The Calculation Tag has dependencies on information from other tabs. Understanding these dependencies assists in resolving import errors.
Direct Dependencies
The Calculation Tag tab is directly dependent on 2 other tabs, Unit and Digital State Set, because columns on the Calculation Tag tab directly reference columns on those tabs.
| This column | On this tab | Why you need to pay attention |
| Plain Symbol | Unit | Required by the 'Unit' column on the Calculation Tag tab. |
| Name | Digital State Set | Required by the 'Digital State Set' column on the Calculation Tag tab. |
Cascading Dependencies
A cascading dependency exists when a dependent tab (above) has additional dependencies. These are the columns that you need to pay attention to:
| This column | On this tab | Why you need to pay attention |
| Digital State Set | Digital State | References the 'Name' column on the Digital State Set tab. |
| Name | Datasource | References the 'Datasource' column on the Digital State Set tab. |
| Datasource | Datasource Parameter | References the 'Name' column on the Datasource tab. |
| Name | System | References the 'System' column on the Datasource tab. |
Here is a diagram of the dependent tabs and columns. Use this to help you visualise how the dependencies work, and ensure all required columns are completed. Use the comments inside the spreadsheet to help you.