ON THIS PAGE:
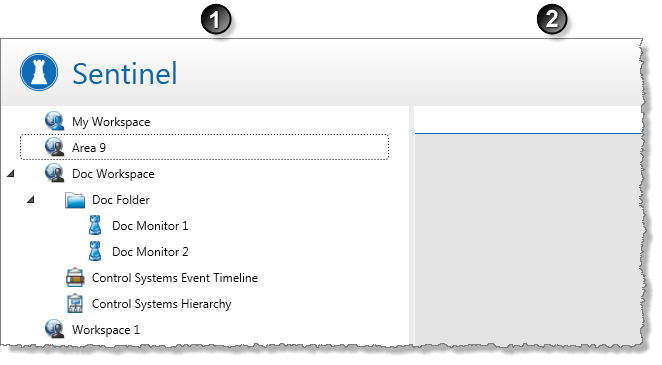
Workspaces are provided as a way for you to logically group monitors into a hierarchy that makes sense for your site. Workspaces are described only by a name and description, and you can create as many as you need for your site.
Next to each workspace in the Workspace panel is an event notification label, showing the total number of current non-default events for all monitors in that workspace. The number is colour-coded to display the highest severity of event occurring within the workspace.
Note: There could be more than one event notification label, if you have de-selected the option Combine severities into a single count in the Event Display Options.
If a workspace contains a monitor with a status message, this is displayed next to the workspace.
You can perform the following actions on a workspace:
- Add a new workspace.
- Edit the workspace name and description.
- Remove the workspace from Sentinel. You can only delete a workspace that has no folders or monitors.
Workspace Security Roles
To see a workspace in the Workspace panel, you either need a security role that has the Workspaces View privilege (allowing you to view all public workspaces), or you need privileges to view a specific workspace.
Workspace viewers are personnel belonging to any of the selected roles, for example, Sentinel Editors, that have been assigned to the Security Roles list for that workspace.
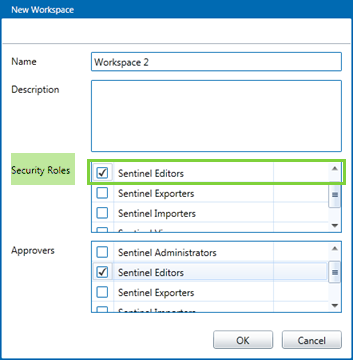
In the example above, Workspace 2 has the Sentinel Editors role selected as Security Roles. Users that have this role can view all folders and monitors in this workspace.
Note: All roles in Security are listed under both the Security Roles and Approvers panels in the workspace.
These are the levels of workspace access:
- Users who have a role selected in Security Roles for a workspace, have access to that particular workspace.
- Users who have a role with the Sentinel Workspaces View privilege have access to all workspaces, excluding private workspaces.
- Users who have a role with the Sentinel Workspaces Edit privilege have access to all workspaces, excluding private workspaces. They can also:
- Add and edit workspaces
- Add and edit folders
- Submit monitors for approval (and unsubmit)
- Add and edit event views
- Users who have a role with the Sentinel Admin privilege have access to all workspaces, including private workspaces. They can also:
- Set Security Roles in workspaces
- Set Approvers in workspaces (where Change Management is enabled)
- Delete workspaces, folders, monitors
Note: the Sentinel Admin privilege cascades into all of the Sentinel module privileges.
Clear Status Messages
To clear all status messages from the monitor status log, for every monitor within a particular workspace:
- In the Workspace panel, right-click on the workspace
 .
. - Select Clear Messages
 from the menu.
The status messages are deleted, for the workspace.
Add a Workspace
To add a new workspace:
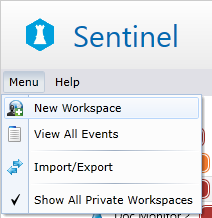
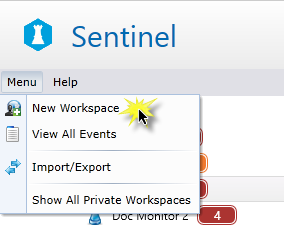
- Click the Menu button below the Sentinel header.
- Click
 New Workspace.
A New Workspace dialog box opens in the Main panel:
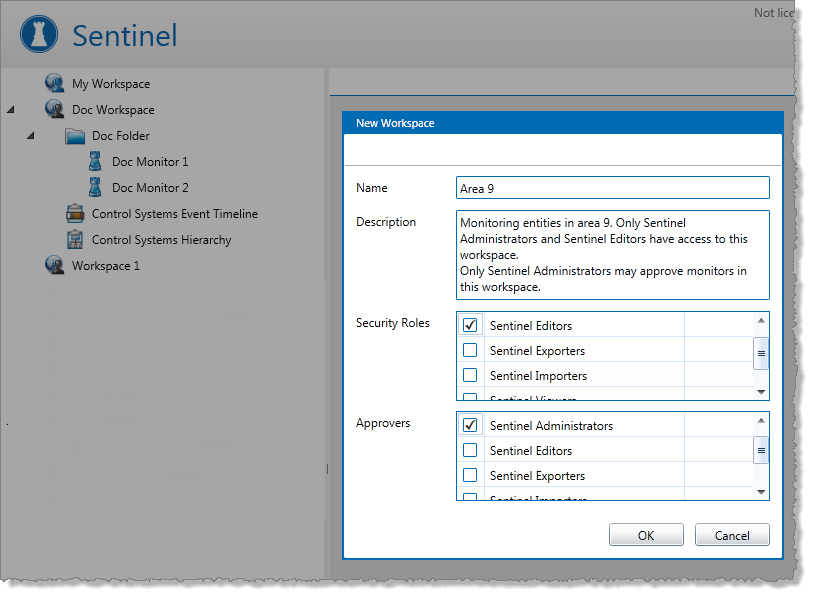
- In the New Workspace dialog box:
- In the Name text box, type a name for the new workspace.
- In the Description text box, type a description for the new workspace.
- Assign workspace security roles in the Security Roles group.
- Assign approvers, in the Approvers group.
- Click OK to save the new workspace.
Note: The Approvers section is only applicable where Sentinel has been configured to use Change Management.
The new workspace appears in the Workspace panel.
Workspaces are alphabetically ordered in the workspace panel, with the exception of My Workspace, which appears at the top of the list.
My Workspace is automatically created by the system.
Edit a Workspace
Editing a workspace is similar to adding a new one.
- In the Workspace panel, right-click on the workspace
 that you want to edit.
 - Select Edit
 from the list.
 - In the workspace page of the Main panel, update the Edit Workspace page as required:
- Change the name in the Name box.
- Change the description in the Description box.
- Change security roles by selecting the relevant Security Roles check boxes.
- If Change Management is in use, you can change approvers by selecting the relevant Approvers check boxes.
- Click OK to save.
Your changes to the workspace are saved.
Delete a Workspace
You will only be able to delete a workspace that contains no folders, monitors, or event views.
- In the Workspace panel, right-click on the workspace
 that you want to delete.
 - Select Delete
 from the list.
 - Click Yes at the prompt.
The workspace is removed.
Adjust the Event Display Options
The event display options determine which current events are counted and then displayed in the event notification labels.
Based on the time selection (in the Show events for drop-down list), events are counted or not counted depending on when they occurred. For example, if a current event started two hours ago, and the last 48 hours option is selected, this event is not included in the count.
Suppression events are only included in the count if the Show suppression events option is selected.
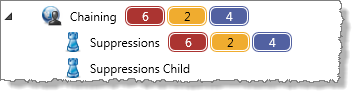
Depending on the selection of Combine severities into a single count, the event count is either a single total for that workspace / folder / monitor, displayed in a single event notification label, or it is grouped into separate counts for the different severities. When severities are not combined, each severity has its own event notification label (if the count is greater than zero).
- To close the Event Display Options panel, in the Workspace panel, click the collapse
 arrow.
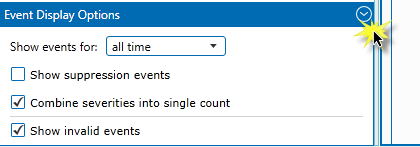
- To open the Event Display Options panel, in the Workspace panel, click the expand
 arrow on the Sentinel footer.

Choose Events Period
Select a period from the Show events for drop-down list. The options are:
- all time: Shows the count for all current events regardless of when they started.
- today: Shows the count for current events that started today.
- this week: Shows the count for current events that started within the last week.
- this shift: Shows the count for current events that started during the current shift.
- last 12 hours: Shows the count for current events that started during the last 12 hours.
- last 24 hours: Shows the count for current events that started during the last 24 hours.
- last 48 hours: Shows the count for current events that started during the last 48 hours.
Note: today, this shift and this week are all based on the Server configuration setting that define the “start of day offset” (StartOfDayOffsetMin), as well as “first day of week” (FirstDayOfWeek)and “shift length” (ShiftHrs).
Show Suppression Events
To include suppression events in the event count, select the Show suppression events check box. Note that suppression events are displayed in the Events Grid regardless of this selection.
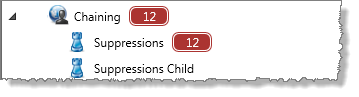
Combine Severities
To combine severities into a single count, displayed in a single event notification label, select the Combine severities into single count check box.
| Example of severities combined in a single count | Example of severities shown in separate counts |
 |
 |
Show Invalid Events
An invalid event is one that raised a case which was subsequently investigated and rejected. The event status is Invalid. Other event statuses are Unknown and Valid.
- To include invalid events in the event count and in the Events Grid, select the Include Invalid Events check box.
Note: Event Status is only applicable where Case Management is enabled. The Show Invalid Events option is greyed out if Case Management is disabled.
See All Private Workspaces
Whereas most users are only able to see their own private workspace, only users with appropriate privileges to see all private workspaces within the Sentinel system, to view, edit and move the monitors, folders and event views in these private workspaces, and also to view the events raised within these private workspaces.
A possible reason for moving a monitor to another workspace is when the owner of the originating private workspace is unable to work on the monitor for a while. The monitor can be worked on by another user within their own private workspace, if it has been moved there by a Sentinel Administrator. A Sentinel Administrator may also choose to disable or edit a monitor within a private workspace if it causing performance issues.
To gain access to all private workspaces:
- Click the Menu button below the Sentinel header.
- Click Show All Private Workspaces
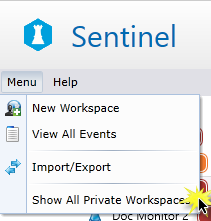
Note: This menu option is only visible to Sentinel Administrators.
The menu closes, and all private workspaces appear in the Workspace panel. The private workspaces are ordered alphabetically under “My Workspace”, and before public workspaces. Private workspaces are named as: “[UserName]’s Private Workspace”. For example “Jo Smith’s Private Workspace”.
- To remove your access to all private workspaces, repeat the steps above.
Note: When you have access to all private workspaces, the item Show All Private Workspaces in the menu is preceded by a tick symbol.