ON THIS PAGE:
You can create a new monitor in a workspace or in a folder, or you can copy an existing monitor as the base for your new monitor.
To create a new monitor:
- In the Workspace Panel, right-click on the workspace
 or folder
  where you want to add the new monitor.
 - Select New Monitor
 from the list. The New Monitor page opens on the Main Panel.
 - Define the following:
- Monitor Details
- Triggers
- Tests
- Actions
- Post Process
- Save the monitor.
The monitor page contains a lot of information, but you can expand or collapse panels as needed.
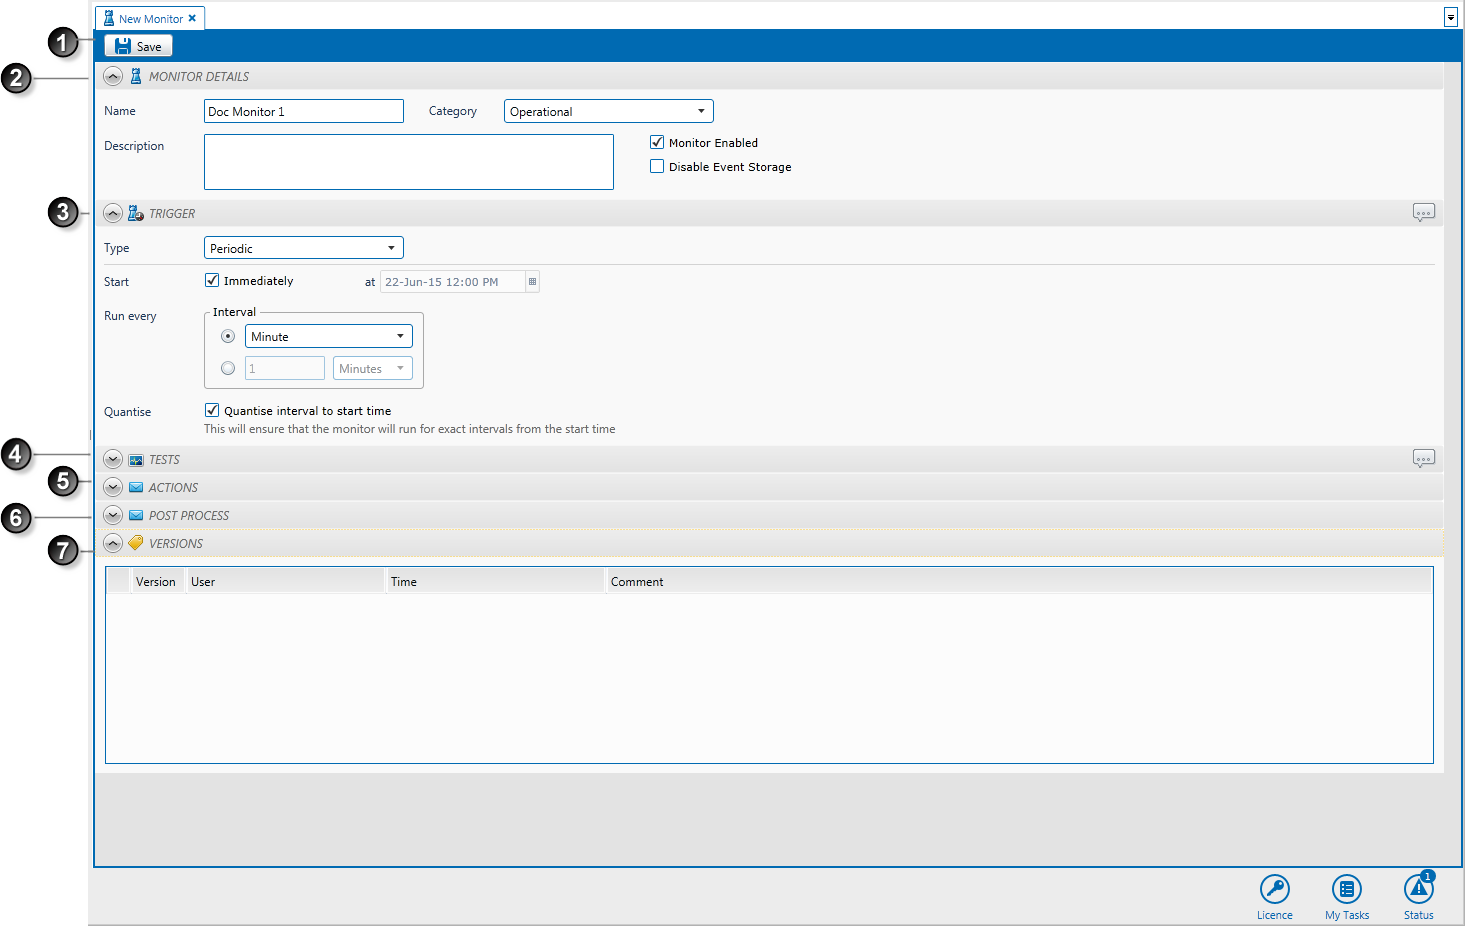
| Monitor Header | |||
| Monitor Details | The name, category, and description of the monitor. You can also enable or disable the monitor from here. | ||
| Triggers | This is set up to start the tests in the monitor. The trigger can be time based or condition based, or driven by an external application. | ||
| Tests | Define what you want to monitor, how you want to monitor it, which sample intervals to use, and which actions to take under certain conditions. | ||
| Actions | Define monitor actions. Assign actions to various tests. | ||
| Post Process | Add a web service, which Sentinel calls when the monitor finishes running. | ||
| Versions |
Monitor Details
In the New Monitor page, expand the Monitor Details ![]() panel.
panel.
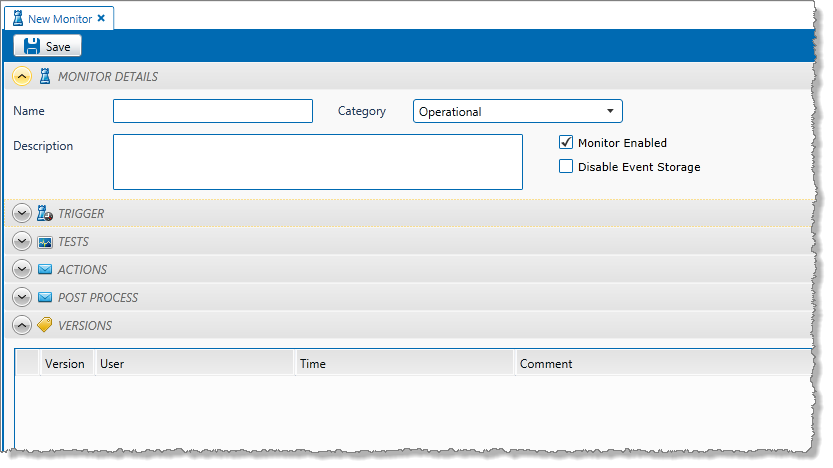
Fill in the following:
| Name | This is a unique, descriptive name for the monitor. This field is required. |
| Category | The monitor category is used as a filter in reporting and in case form selection. The Operational category is the default. |
| Description | This is a meaningful description of what the monitor is intended for. The monitor description appears as a tooltip when you hover the mouse over the monitor in the Workspace panel. The description is optional. |
| Monitor Enabled | To ensure that the monitor will process, ensure this check box is selected. Note: The monitor is enabled by default, unless it is a copied monitor, in which case it is disabled. |
| Disable Event Storage | Select this if you don’t want to store events relating to the monitor. |
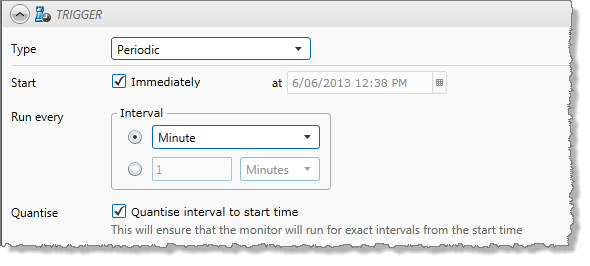
Trigger
Define a trigger to ensure that the monitor processing occurs at a specified time, or under specified conditions.
- In the New Monitor
 page, expand the Trigger
  panel.
 - Choose the Type of trigger:
- Periodic
- Date
- Monitor Chaining
- Application - To add an optional comment, click the comment
 button on the top right of the Trigger panel, describing the reasons you have chosen to use this trigger.
Tests
You need to add at least one test to the monitor.
Actions
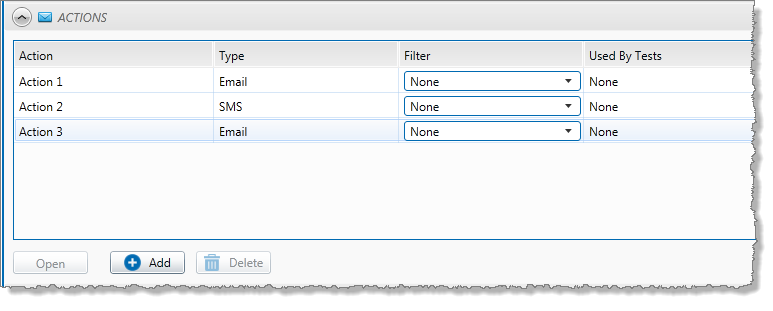
All the actions for a monitor are displayed in the Actions ![]() panel of the monitor. You can add multiple actions to a monitor.
panel of the monitor. You can add multiple actions to a monitor.
- To display the actions grid, expand the Actions panel.
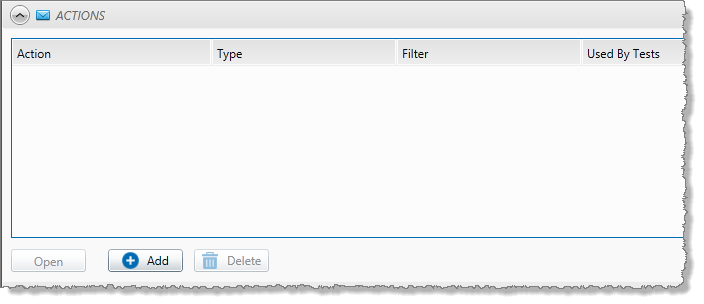
The actions grid is made up of four columns:
| Action | The action name. |
| Type | The standard Sentinel action is an SMS, an Email, an SMS via Web Service, or a Web Service action. |
| Filter | The default value is None. The other type of filter is Group Suppression. |
| Used By Tests | When an action is assigned to a test, the test name is added to the list displayed in this column. Every test that uses this action is an item on the list. |
To add an Action, click Add.
The New Action page appears. There may already be default tokens in the subject box and the message box, as defined in the Sentinel configuration file.
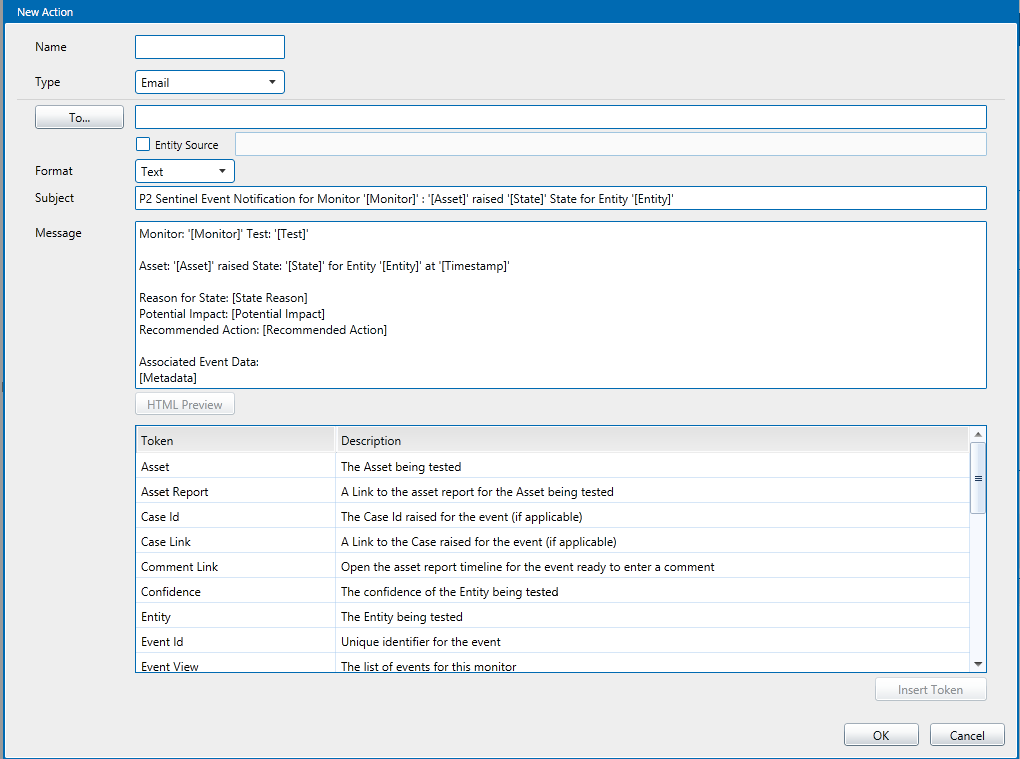
Name: Type a name for the action.
Type: Select one of the following:
- SMS
- SMS via Web Service
- Web Service
Note: For Web Service actions, the screen appearance changes to display the relevant text boxes.
Complete the details for the action type, and then click OK to save it.
The action is saved, and listed in the actions grid in the Actions panel of the monitor.

Note: You can assign the action to any of the tests within the monitor.
Email, SMS, or SMS via Web Service
|
To |
Click To, and type either:
|
|
Entity Source |
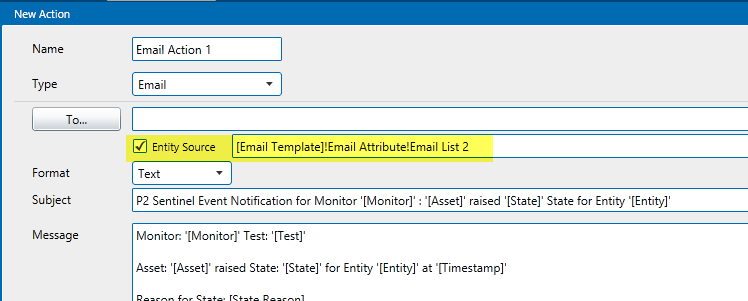
For email actions only, you can define a list of email addresses as an attribute value on a template. Type the full definition for the attribute value that stores the list of recipients’ email address, in the format: [template]:attribute!attribute value. E.g. [Email Template]:Email Attribute!Email List 2 The source entities for tests that use this action must have the defined template assigned to them, and there should be at least one email address in the attribute value specified in the definition.
|
|
Format |
For an email action, select the type of email format you wish to send: Text or HTML. |
|
Subject |
For an email action, type a subject line in the Subject box. You can include tokens in the subject line. |
|
Message |
Type the message that you want to send. You can include tokens in the message. For HTML emails, you may use standard HTML mark-up tags in the message body. When you have finished the message, click the HTML Preview button to check that the formatting is correct. Note: You can use the CSS ‘severity’ class within a span element to style the email content according to the event’s severity colours. For example, the following snippet: <span class=”severity”>[Severity]</span> Would apply colouring like this for the severity text: Asset:'Asset 1' raised State: 'High Exceeded' with Severity: 'Medium' for Entity 'Calc.SIN.Large' at '15/10/2013 4:31:00 PM' |
Contact List (AD)
A contact is the name, email address, and mobile telephone number of a person you want to notify when an event occurs.
Details for potential contacts are stored in the Mail Server database and are accessed through the Choose Contacts window.
Note: Choose Contacts is only available if Active Directory is set in the Sentinel configuration file.
You can choose to look up a contact, or you can type in a contact name.

- Click To in the Action page. The Choose Contacts page opens, with a contact list.
- For an email action, all of the Mail Server database contacts that have an email address are displayed in the list.
- For an SMS action, all of the Mail Server database contacts that have a mobile telephone number are displayed in the list. - In the Filter box, type part of a contact name, or part of an email address to filter the contact list. To sort the list in alphabetical order (ascending or descending), click the User/Group heading or the Email Address heading.
- To add a contact from the list, select a user or group and click To, or double-click. The User or Group is added to the To box, below the contact list.
- Keep adding contacts following the instructions above.
- Click Add.
The list of contacts is added to the To box in the action.
Entity Source Recipients
Entity Source recipients for email actions need to be configured in Server Management. If you are a Server Administrator, you can configure entity source recipients as follows:
Note: The instructions below need to be carried out in Server Management, and requires Server Admin privileges.
Step 1. Create a New Template in Server Management
- Create a new template that will be used especially for this purpose. Give it a name, such as ‘Email Template’, and assign it to a suitable template group; you can create a new template group especially for this purpose, and call it ‘Email Template Group’, or similar.
- Add an attribute to the template, with a data type of TimeSeries, and give it a name, for example: ‘Email Attribute’.
- Add an attribute value to the attribute and give it a name, for example, ‘Email List 1’.
The template is ready to be used for storing email recipients.
Step 2. Assign the Template to Entities and Configure the Attribute Values
For entities that will be using the Entity Source feature in a Sentinel email action, assign the new email template.
Note: Because the email template is only for assigning email attributes, we recommend that it is not assigned as a primary template.
For each entity that you are assigning the new email template to:
- In Server Management, locate the entity.
- Assign the new template.
- Edit the attribute value, by adding a list of email recipients for the entity. The attribute value must be of type String, and email recipients are separate by a semi-colon (;). Type in either the full email address (for example, jo.smythe900@gmail.com) or type in the email display address, as it appears in Active Directory, enclosed in double quotations (for example, “Smythe, Jo”).
Example of the attribute value showing several recipients
“James, Logan”; “Cook, Simon”; “Jones, Bob”
Note: If the asset that raised the state for the action is an entity that does not have the email template defined, or the attribute value has not been configured to hold an email address, the monitor will stop because the email recipients could not be found for the entity.
The following error message, or similar, is displayed:
‘Email was not sent because an error occurred getting the email recipients from ‘WIW 2[Sentinel Email Recipients]:Email List!List One’: The following data object was not found: ‘WIW 2[Sentinel Email Recipients]:Email List!List One’,
where WIW 2 is the entity, [Sentinel Email Recipients] is the template, Email List is the attribute and List One is the attribute value.
Web Service actions
For a GET method, you only need to complete the URL details. For a POST method, you need to complete the URL details and the body details.
Note: You should have a basic understanding of HTTP principles in order to complete the Web Service action details.
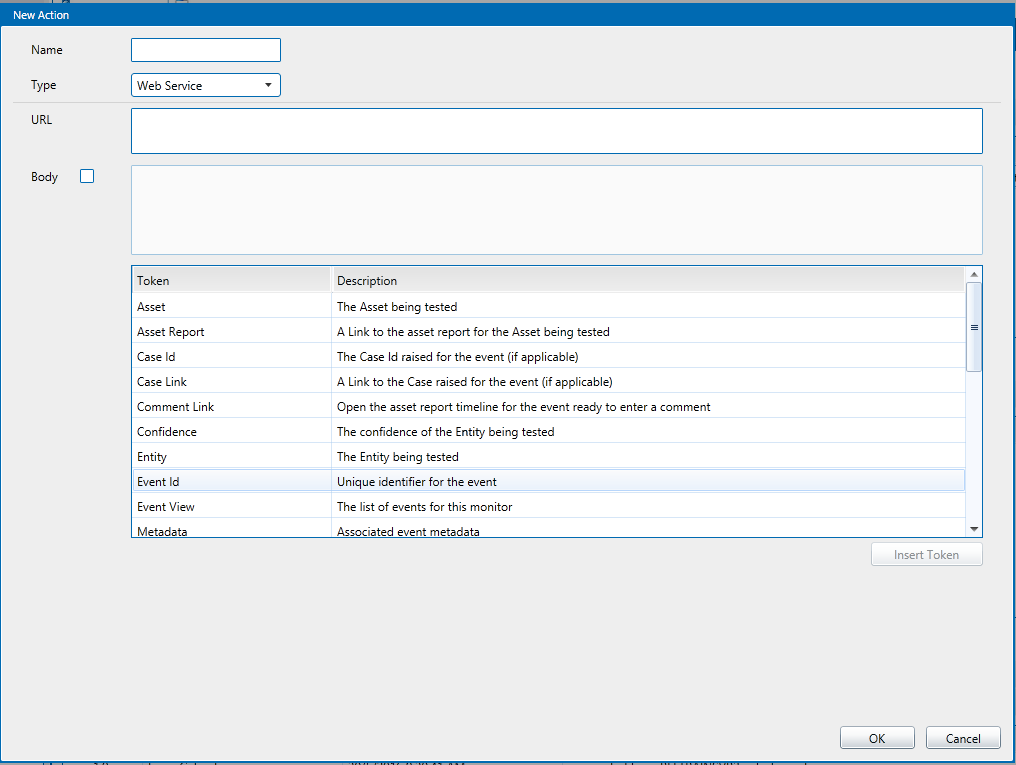
URL: This is the URL that you want the action to call, and may contain tokens.
Body: If you want to use the POST method, select the Body check box and type in the relevant details. These should correspond to the requirements of the web service that the action will call.
Note: Sentinel will log an error if there are problems calling the Web Service action, due to invalid details supplied, invalid credentials, or due to a problem with the web service itself.
Edit an Action
To edit an action:
- In the actions grid, select the action that you want to change.
- Click Open.
- Follow the instructions in Add an Action.
Delete an Action
Note: You cannot delete an action if it is assigned to a test.
To delete an action from the list:
- In the actions grid, select the action that you want to remove.
- Click Delete.
- At the prompt, click Yes to confirm that you want to delete the action.
The action is deleted.
Group Suppression for an Action
You can set a group suppression filter to group actions within a monitor.
- Locate the action that you want to group.
- In the Filter drop-down list, click Group Suppression.
Post Process
The Post Process is an optional feature of a monitor. When the monitor finishes running, Sentinel calls a web service, if this has been selected in the Post Process section of the monitor.
- In the Monitor
 page, expand the Post Process
  panel.
 - Click Add.
- Select Web Service from the Type drop-down list.
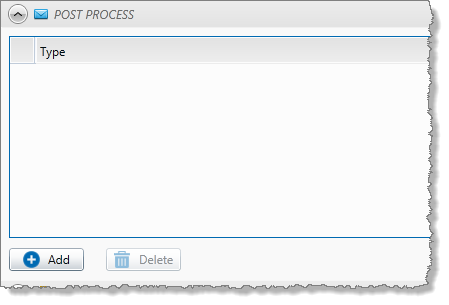
Note: The web service needs to be specified in the Sentinel Configuration file.
- To delete a post process, select it in the grid and click Delete.