Editing a monitor is similar to adding a new one.
You need to edit a monitor to perform the following tasks:
- Change the monitor details.
- Enable or disable the monitor.
- Update the trigger.
- Add, edit, or delete monitor tests.
- Add, edit, or delete monitor actions.
Note: You cannot change a monitor while it is in a submitted state. The submitted state only applies where Sentinel is configured to use change management.
In the Workspace panel, locate the monitor ![]() that you want to edit.
that you want to edit.
- Right-click on the monitor.
- Select Edit
 from the monitor menu. The monitor opens in a new tab in the Main Panel.
 - Apply any changes to the monitor:
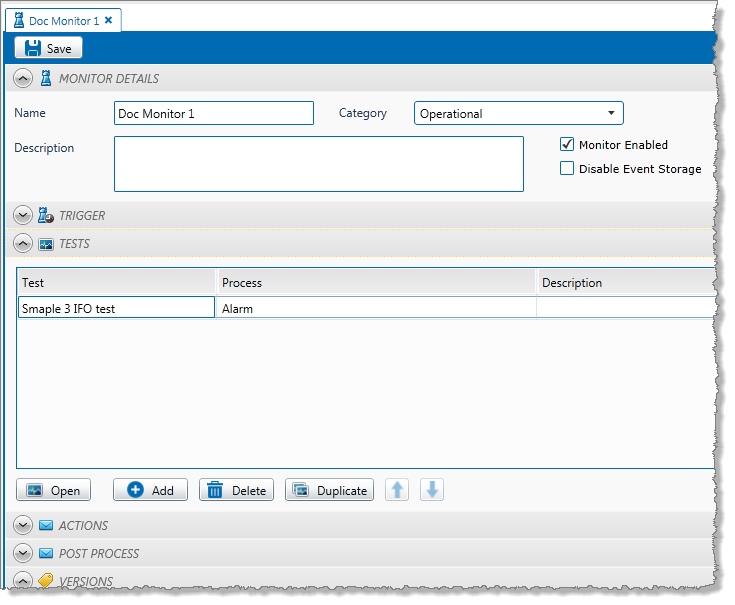
Monitor Details
Trigger
Tests: Add, edit, delete, or organise tests.
Actions: Add, edit, or delete actions. - Save the monitor:
- Click Save.
- Add a comment (if comments are enabled in the Sentinel configuration file).
Note: If Sentinel has been configured to use change management, it is important that you add a meaningful comment to assist with the approval process.- Type a comment in the Comment box, in the Save Monitor dialog box.
- Click OK.
The monitor is saved with the latest version information. If Sentinel has been configured to use change management, this includes a minor version number.
Note: If Sentinel has not been configured to use change management, any changes to the monitor take effect as soon as you save the monitor.
If Sentinel has been configured with change management, the changes only take effect when the monitor is approved.
Edit a Test
You need to edit a test in order to perform the following tasks:
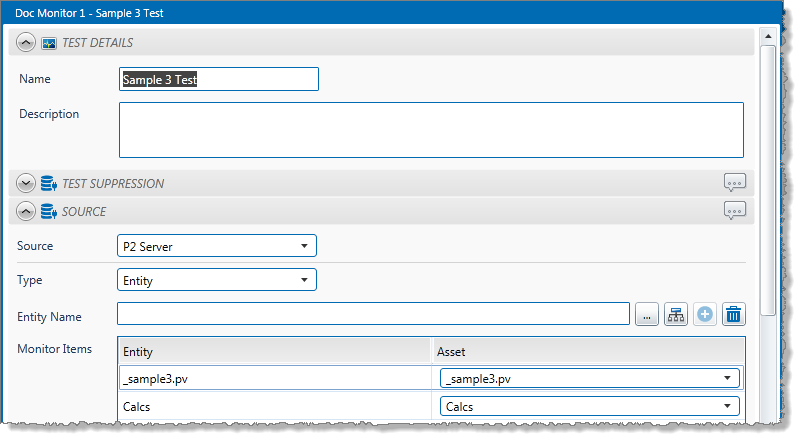
- Change the test details.
- Change the test source.
- Add, change, or remove preconditions.
- Change the test process.
- Change the state configuration.
- Change the test actions.
Perform the following steps to edit a test:
- In the Test
 panel of the monitor, click a row on the test grid to select it.
 - To open the test, double-click on the row or select the row and click the Open
 button.
The test opens in a new tab in the Main Panel. - Apply changes to the test. Follow the instructions in Step 3. Add Tests.
- Click OK to save the test.
The test is saved. All changes will take effect when the test is invoked at the next trigger time, and only after the monitor is saved (and the new version is approved if Sentinel uses Change Management).
Delete a Test
To delete a test:
- In the Test
 panel of the monitor, click a row on the test grid to select it.
 - Click the Delete
 button.
 - At the prompt, click Yes.
The test is deleted, as well as all of its associated events and cases.
Note: The monitor must be saved (and approved if Sentinel uses Change Management) for this change to take effect.
Organise Tests
Tests can be moved up or down in the Tests ![]() grid. This has no functional effect, other than providing a way for you to organise tests within the monitor.
grid. This has no functional effect, other than providing a way for you to organise tests within the monitor.
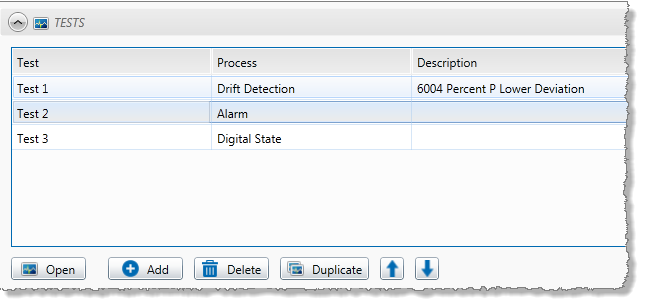
In the Test panel:
- Click a row on the test grid to select it.
- Move the row up or down a level.
Click Up to move the test up one level in the grid.
Click Down to move the test down one level in the grid.
 - Repeat step 2 until the test is in the preferred position on the grid.
Note: The monitor must be saved (and approved if Sentinel uses Change Management) for this change to take effect.
Duplicate a Test
A Sentinel test can be duplicated within the same monitor. Every test within a monitor must have a unique name; other than this, all features of the test are identical to the original. You can change any part of the new test to suit its purpose.
To copy a test:
- In the Test
 panel of the monitor, click a row on the test grid to select it.
 - Click the Duplicate
 button. The copied test page appears.
 - Type a new test name in the Name box.
- Change any of the test features, such as suppression details, preconditions, process details, and so on.
- Click OK to save the test.