ON THIS PAGE:
The types of triggers available to initiate Sentinel monitor processing are: Periodic, Date, Application, Monitor Chaining.
Periodic Trigger
Use a periodic trigger to initiate monitor processing at periodic intervals.
1. From the Type drop-down list, select Periodic.
The Trigger panel appearance changes, as shown in the screen image below:
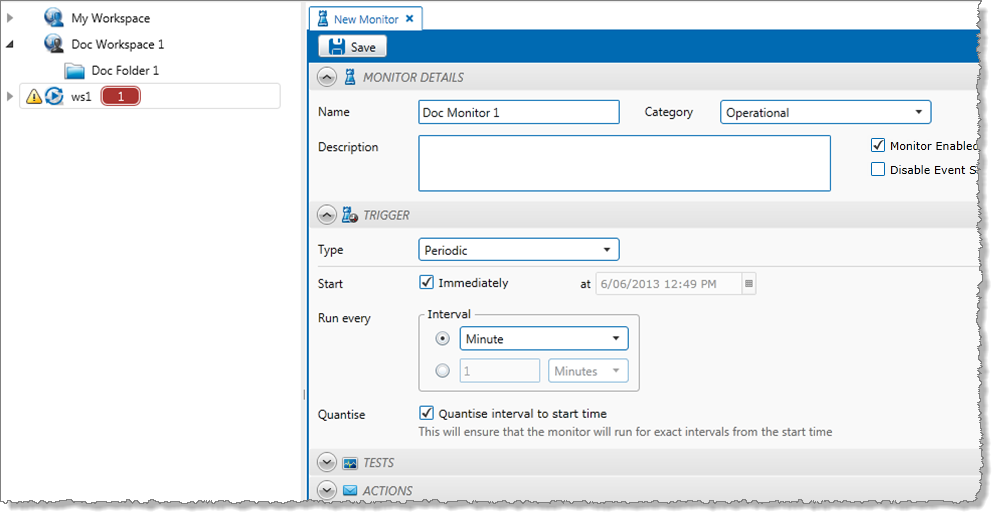
2. Select a start time.
You can set a periodic trigger to start immediately, or at a specified time in the future.
- Select the Immediately check box to start the trigger immediately.
Or
- Click the calendar icon to select a Start date and time for the monitor.
3. Select a time interval in the Interval box.

- Select the first option button in the Interval box, and then select an interval from the corresponding Interval drop-down list. This could be a minute, 5 minutes, an hour, a week, and so on, and indicates that the trigger should run every single minute, 5 minute interval, hourly interval, and so on.
Or
- Select the second option button in the Interval box. Then type in a number, for example 2, and select Minutes or Hours from the accompanying drop-down list.
4. To ensure that the monitor is triggered at exact intervals from the start time, select the Quantise check box.
The periodic trigger causes the monitor to start at each set interval. The interval period can be a minute, 5 minutes, an hour, a week, or every two hours, every three minutes and so on, depending on the interval settings selected.
Note: The first trigger time for the monitor is the start time plus the trigger interval. Subsequent trigger start times are the last trigger time plus the trigger interval.
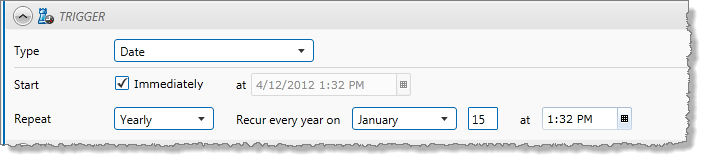
Date Trigger
Use a date trigger to initiate monitor processing at selected date intervals, at a set time.
1. From the Type drop-down list, select Date.
The Trigger panel appearance changes, as shown in the screen image below:
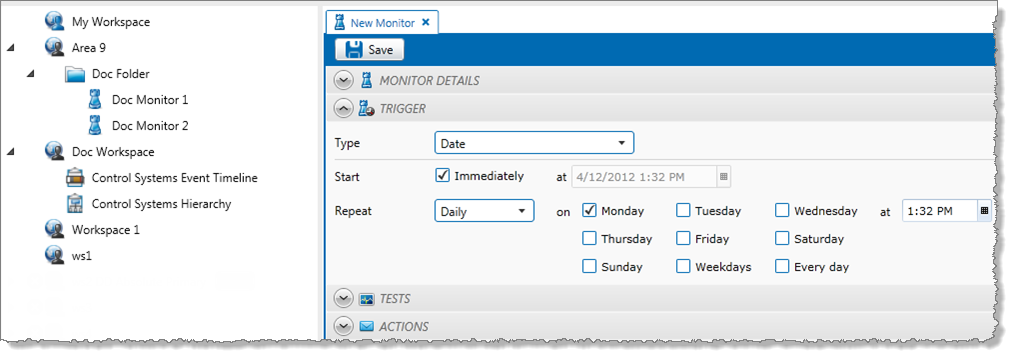
2. Select a start time. You can set a date trigger to start immediately, or at a specified time in the future.
- Select the Immediately check box, to start the trigger immediately.
or - Click the calendar icon to select a start date and time for the monitor.
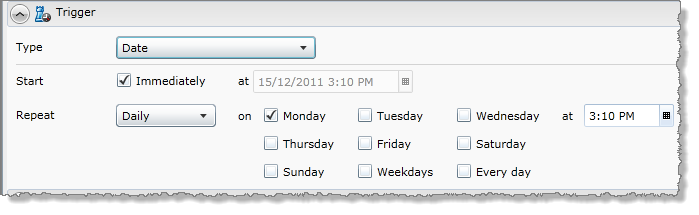
3. Select an interval (Daily, Monthly, or Yearly) from the Repeat drop-down list.
4. Select the trigger days of the week, days of the month, or days of the year, as appropriate:
- For a Daily repeat interval, every day of the week has a check box, as shown:
-
- Select the Weekdays check box to select all days from Monday to Friday.
- Select the Every day check box to select every day of the week, from Monday to Sunday.
- Select individual days, for example select the Monday check box and the Wednesday check box.
The trigger runs the monitor tests on all of the selected days, at the specified run time.
- For a Monthly repeat interval, type a valid day (1 to 31) of the month in the Days box, to select which days of every month to trigger the monitor tests.
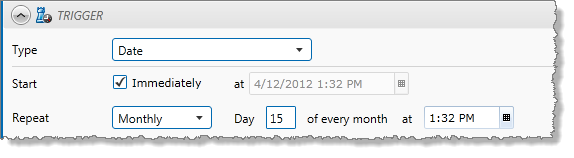
The trigger runs the tests on the specified day of every month, at the specified run time.
- For a Yearly repeat interval:
-
- Select a month from the Months drop-down list.
- Type a valid day (1 to 31) of the month in the Days box.
The trigger runs the monitor tests every year, on the specified day of the specified month, at the specified run time.
5. Click the calendar icon to select a run time.
Note: The first trigger time for the monitor is the next date and time selected, after the start date. Subsequent trigger times will be at the next repeat period, after the last trigger time.
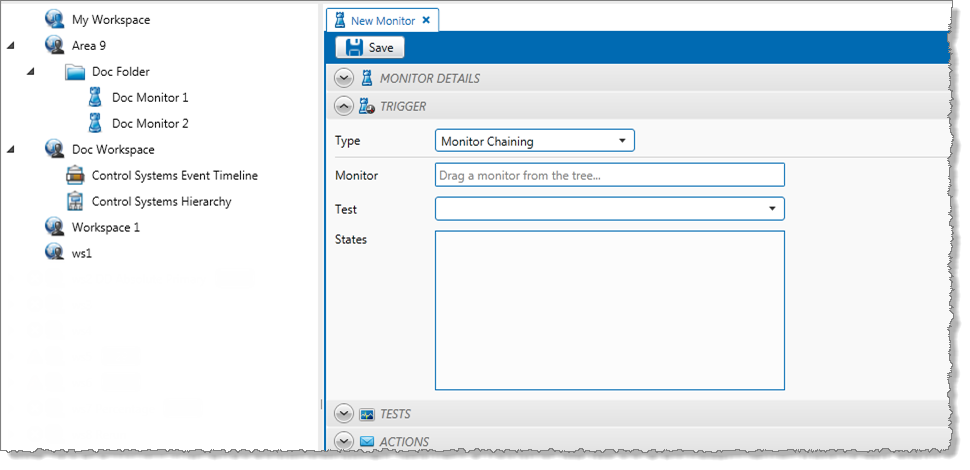
Monitor Chaining Trigger
You may want to trigger a monitor when various states are reached by a test within another monitor. To achieve this outcome, the triggered monitor needs a monitor chaining trigger.
To set up a monitor chaining trigger:
1. Select Monitor Chaining from the Type drop-down list.
The Trigger panel appearance changes, as shown in the screen image below:
2. Add a Triggering Monitor. This is the monitor which causes the trigger to activate.
- In the Workspace panel, find the monitor that you want to use.
- Click and drag the monitor to the Monitor box in the trigger panel.
When the monitor is positioned directly over the Monitor box, an arrow ![]() icon appears.
icon appears.
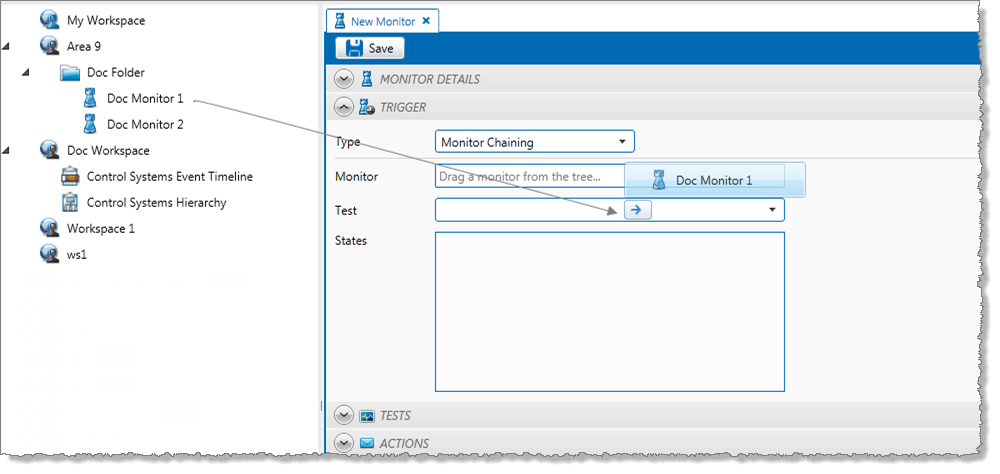 When the arrow icon appears, release the mouse button.
The triggering monitor name appears in the Monitor box.
3. Select a test from the Test drop-down list. This is the particular test within the triggering monitor which will cause the new chained monitor trigger to activate.
The selected test is the triggering test, and appears in the Test box of the trigger panel.
4. From the States check list, select Triggering States. You may select one or more of the listed states.
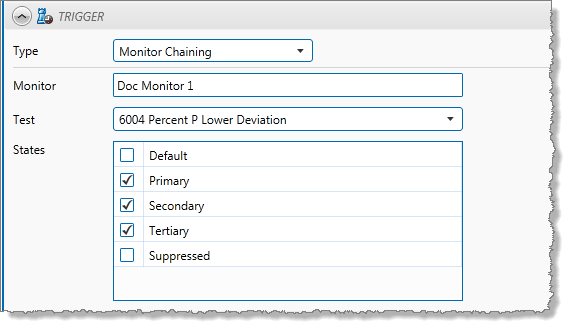
These are the selected states within the test that cause the trigger to activate (for tests that use Monitor Chaining Source as their source).
The monitor chaining trigger is ready. Every time the Triggering Test of the Triggering Monitor reaches any of the Triggering States, the monitor is triggered.
Setting the Source for a Chained Monitor
The source for any test using a chained monitor defaults to Monitor Chaining Source.
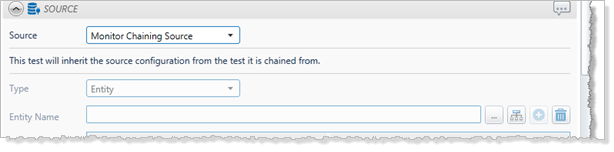
The test inherits the source configuration from the chaining test. If you change the source configuration for the chaining monitor, the change carries through to the chained monitor.
If any test of a chained monitor uses a source other than “Monitor Chaining Source” (for example, “P2 Server”), the chained monitor uses the parent trigger setting, and is not triggered by events of the parent monitor.
Application Trigger
This trigger is activated whenever a call is made from an external application.
- Select Application from the Type drop-down list.
The Trigger panel appearance changes, as shown in the screen image below:
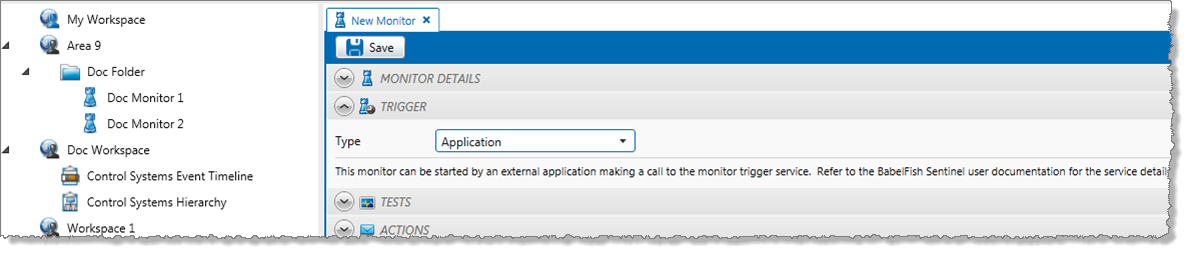
The application trigger is set for the monitor.