ON THIS PAGE:
Over the life cycle of an asset, it's purpose or type may change, and different information may be required for the asset. Changing the primary template of an entity allows you to manage these changing requirements.
To change the primary template:
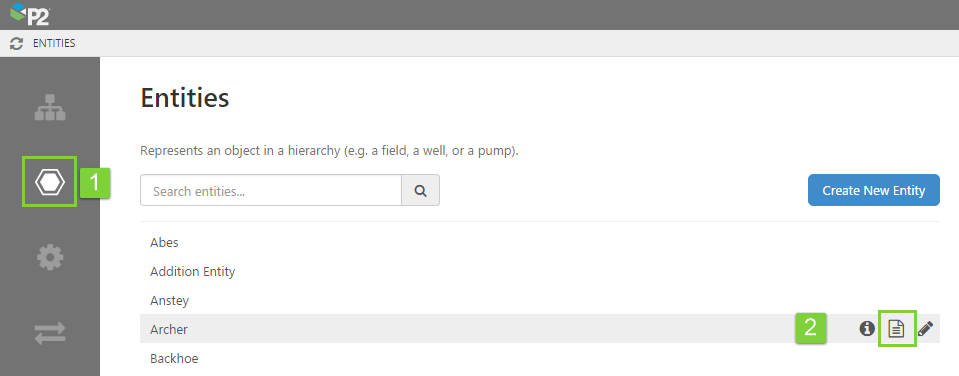
1. Open IFS OI Server Management, and click the Entities ![]() icon.
icon.
2. Find the entity you want in the list (you may need to search for it by name). Hover over the entity, and click the Template ![]() icon on the right.
icon on the right.
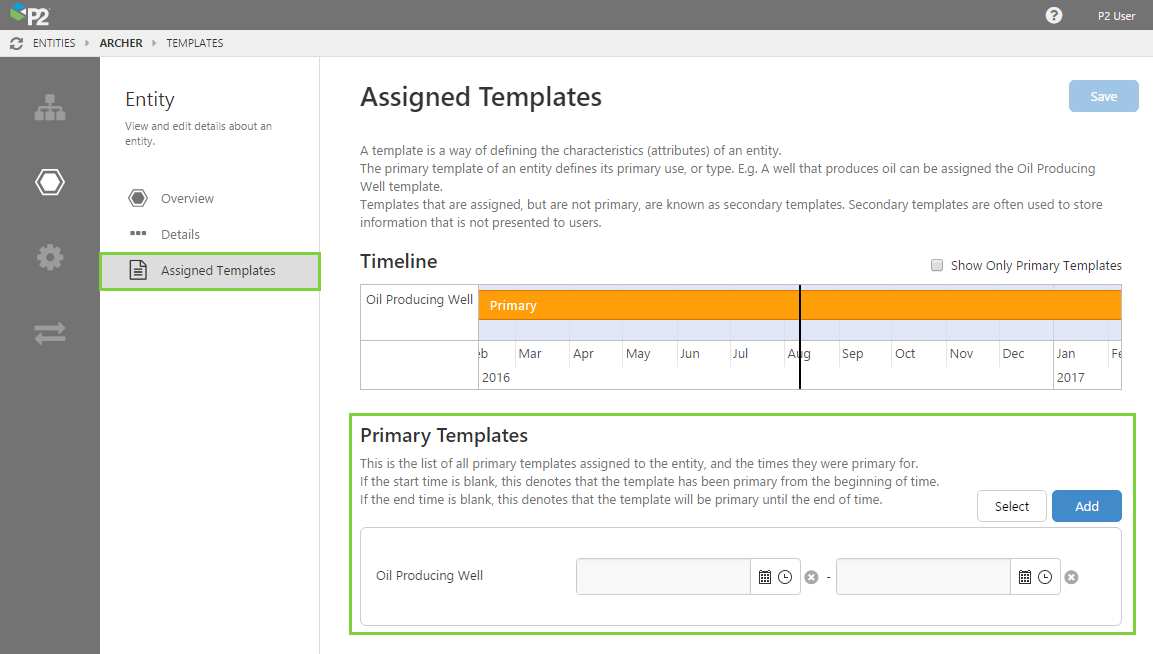
Alternatively, you can click the name of the entity, and then click Assigned Templates.
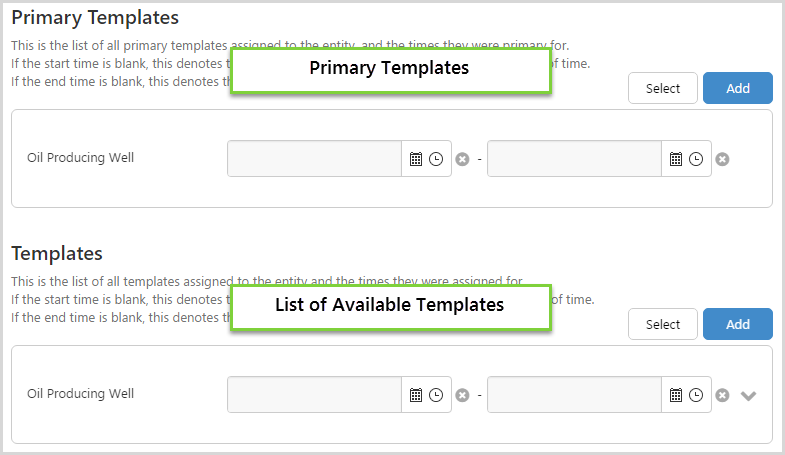
How to Change the Primary Template
There are 2 ways to change the primary template:
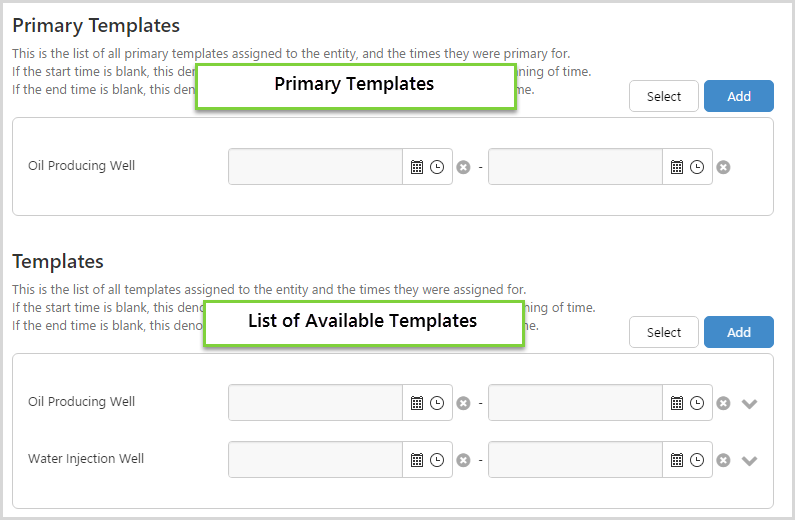
- If the template you want to use is already in the list of templates for the entity, you can simply swap the primary template with one from this template list.
- If the template you want to use is NOT in the list of templates for the entity, you will first need to add the template.
Scenario 1: Swapping the Primary Template with Another in the List
If the template you want to change over to is already in the Templates list, all you need to do is:
- Assign an end date to the existing primary template.
- Add the new primary template.
- Assign the dates for the new template.
Here are the steps in detail:
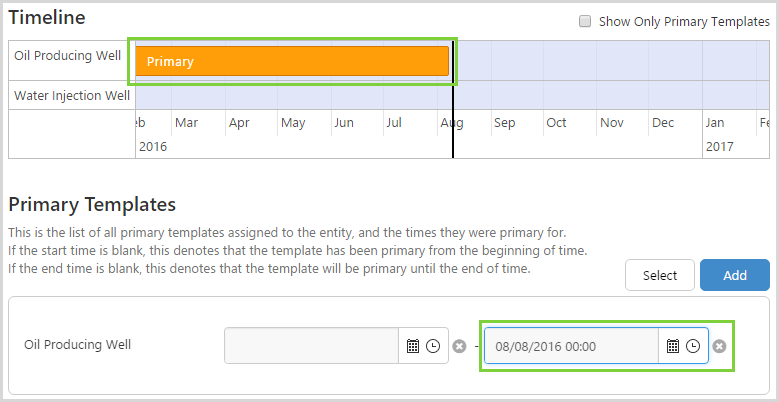
1. First, you need to assign an end date to the current primary template. In the Primary Templates section, click the calendar ![]() icon to select the end date.
icon to select the end date.

You will see the timeline change to reflect the new end date:
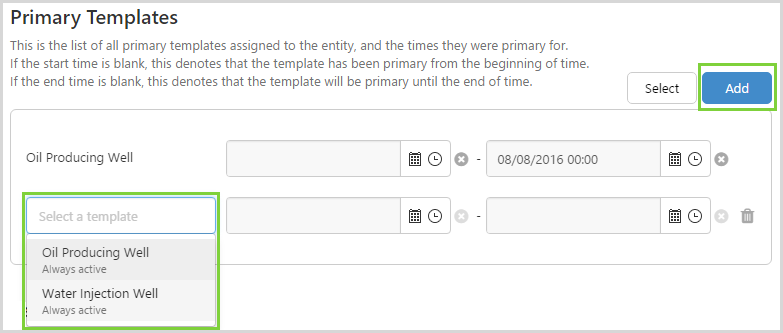
2. Now you can add the new primary template. Click the Add button.
3. A new line will be added, and you can select the new primary template from the drop-down box.
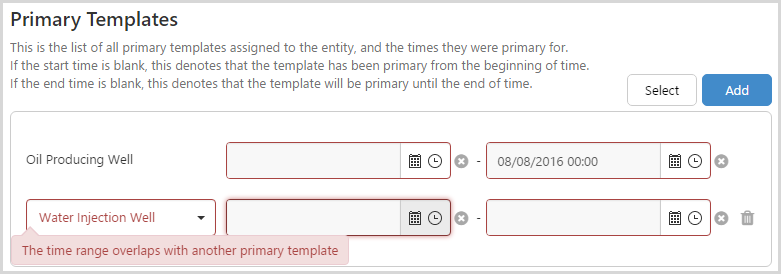
When you select a new template, you may be warned of a time range overlap. This will often happen if you have a null start date.
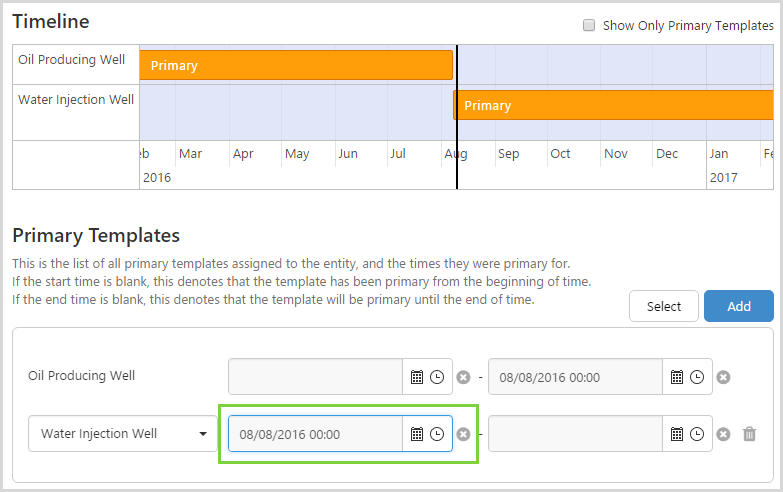
4. Click the calendar ![]() icon to select a new start date. This will usually be the same date as your end date for the previously used primary template.
icon to select a new start date. This will usually be the same date as your end date for the previously used primary template.
You will see the timeline update to reflect the new primary template and assigned dates.
5. When you are done, click the Save button in the top right corner.
![]() You have now successfully changed your primary template!
You have now successfully changed your primary template!
Scenario 2: Adding a New Template Instance
If the template you want to change to is not in the list of available templates, you will first need to add it to the Templates list. You can then follow the steps above to assign it as the primary template.
1. Click the Add button next to Templates.
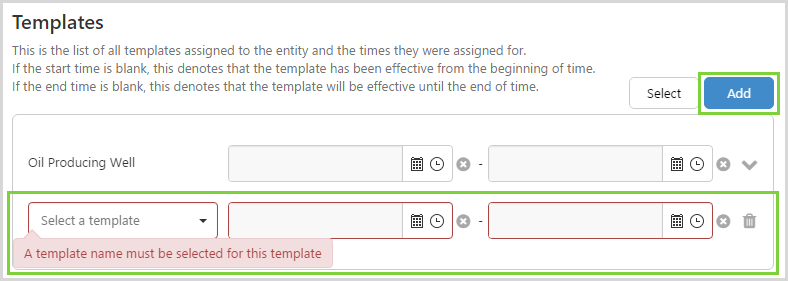
2. A new line will be added, and you can select the new template from the drop-down box.
3. Click the calendar ![]() icons to select start and end dates.
icons to select start and end dates.
4. Click the Save button at the top right of the page.
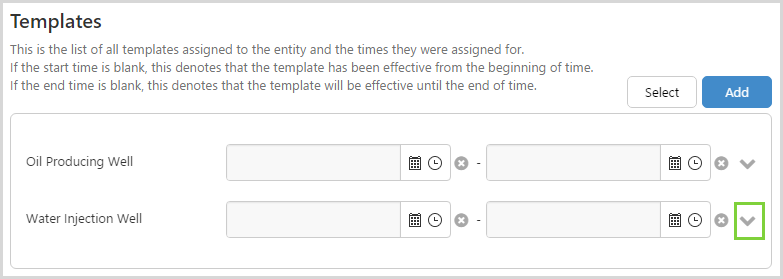
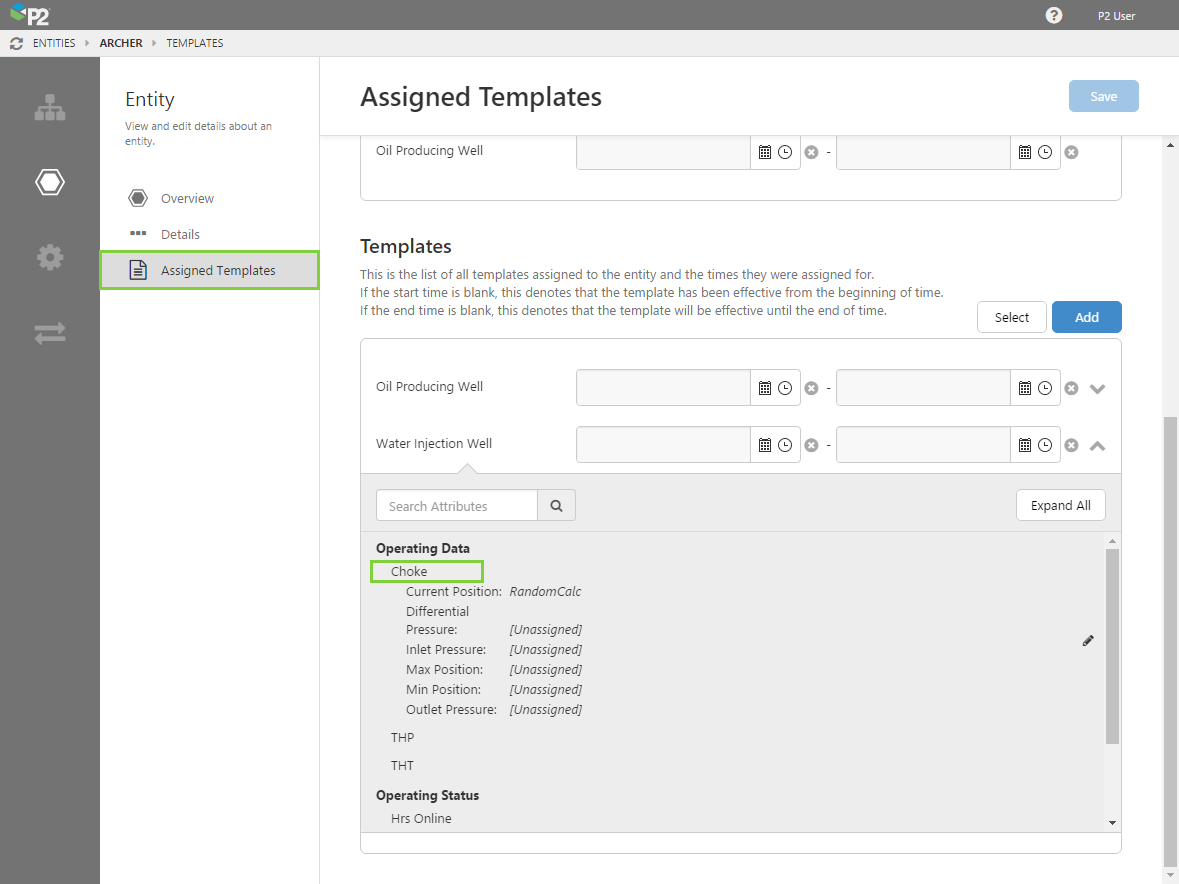
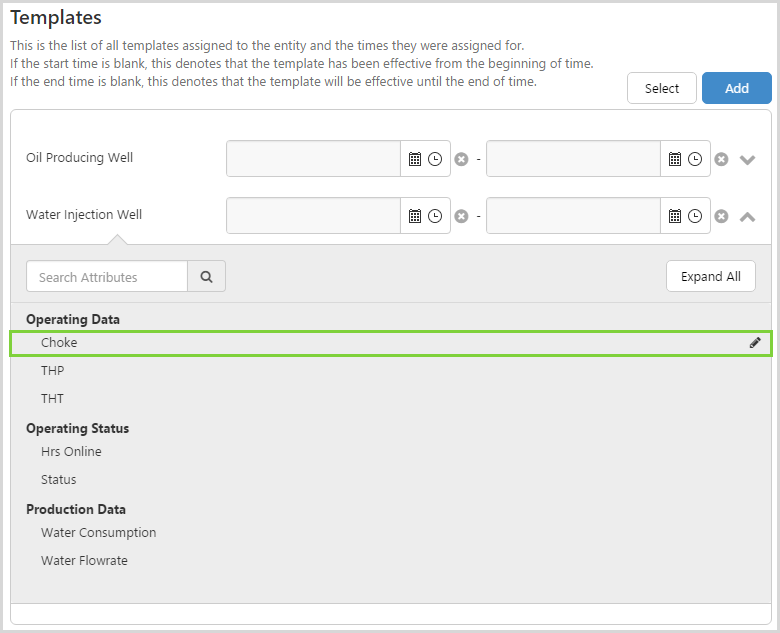
5. You will notice that the template instance now has a drop-down arrow next to it. Click the down arrow next to the added template to expand its attributes list.
This is where you configure where the attributes will retrieve their values from for this entity. So while a Water Injection Well may already have an attribute for Choke, the entity still needs to pull that attribute value from somewhere. This is where you configure that.
6. For the attribute you want to configure, hover over the attribute and click the edit ![]() icon on the right.
icon on the right.
The Attribute Values page opens. As attributes are also time-aware, this page contains a timeline view similar to the one on the templates page.
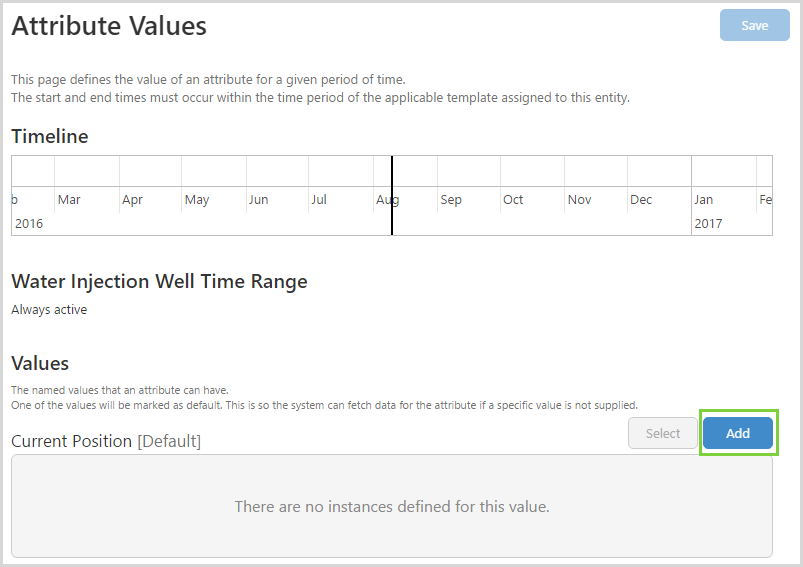
8. Click the Add button for the attribute value you want to configure. You can add as many attribute values as necessary.
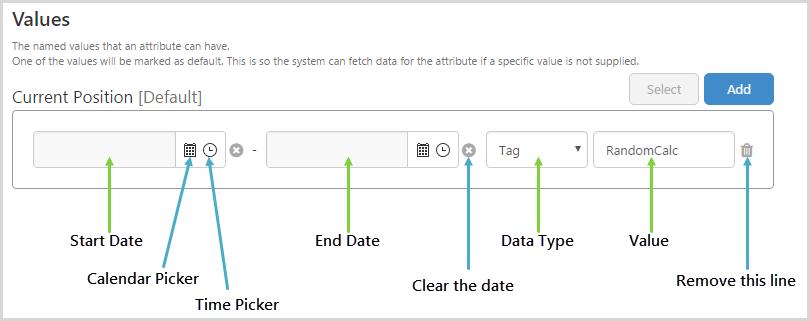
An attribute can have a number of values, and they can be of different types. For example, for one date range you may want the attribute to have a fixed value and for another date range you may want the attribute to get its value from a tag.
Note also that the time ranges available for an attribute are tied to the time range of the template instance, and cannot extend beyond the template instance's start or end times. Date ranges for individual attribute values cannot overlap.
9. When you have finished configuring your attribute values, click Save in the top right corner.
10. Click Assigned Templates to return there. Click the name of the attribute you have just configured, and observe the attribute values.
11. You can now assign this template as a Primary Template, as per Scenario 1 above.