ON THIS PAGE:
In Field Operator, you can record both the seal you removed, and the seal you placed, on the same form. You also have the option of entering seal information when completing the relevant oil ticket.
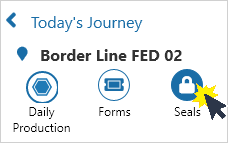
Finding a Seal
Seals can be entered, viewed and edited from Location Detail.
Select Seals on the Navigation Ribbon, to view a list of seals for the selected location.
Seals grid:
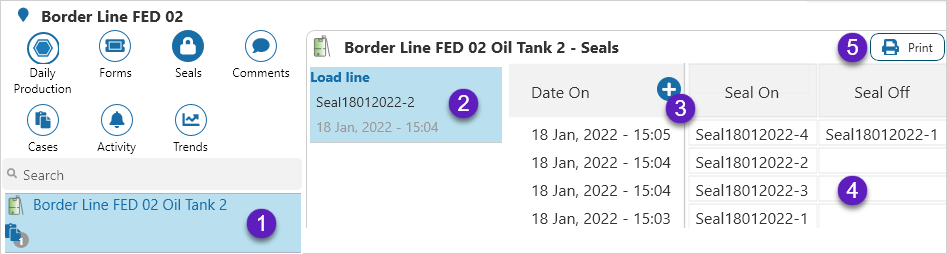
| 1 | Entity | Selected entity. |
| 2 | Seal Location | Location on the tank where a seal can be attached. |
| 3 | Add | Click the |
| 4 | Edit | Click on an entry to edit, or view an existing seals data. |
| 5 | Select |
Adding a New Seal
Details about the seal removed, and the seal placed, can be entered into a new seals form.
New Seal Form:
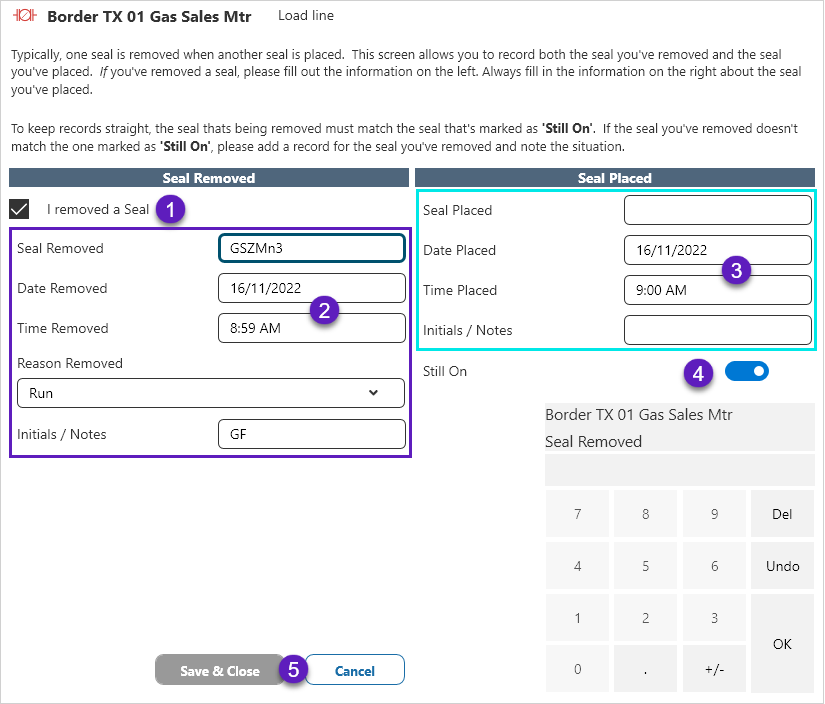
| 1 | Seal Removed | Select this checkbox when removing a seal. |
| 2 | Seal Removed Details | The seal removed fields default to the seal that is currently in place. Enter new data as required. |
| 3 | Seal Placed Details | Enter the details of the new seal placed. |
| 4 | Still On | Toggle on when there is a seal in place. Toggle off when there is no seal in place. |
| 5 | Actions |
Click on the buttons to:
|
Seal report:

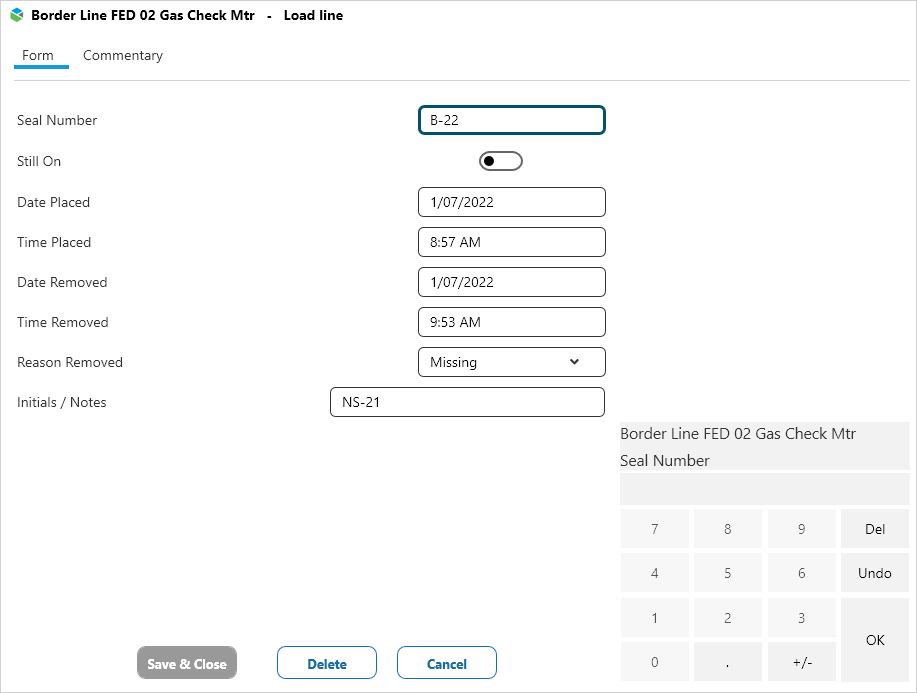
Editing a Seal
After opening a seal form, edit the details as required and select:
- Save & Close - to save the changes and close the form
- Delete - to delete the record
- Cancel - to close the form without making any changes
- Revert - discard unsaved changes
Edit Seal Form:
Entering a Seal on an Oil Ticket
Seal data can be entered into an Oil Ticket.
Excerpt from Oil Ticket form:
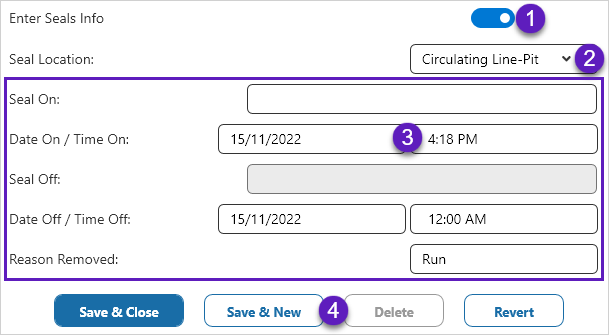
| 1 | Enter Seals | Toggle on to enter the Seal data. |
| 2 | Location | Select from the options in the dropdown list. |
| 3 | Fields |
Click field to enter readings. The Seal Off fields default to the seal that is currently in place. If the seal removed is different to the default value, you can enter the correct details by Adding a New Seal. The active field is outlined in dark blue. Grey fields are disabled. |
| 4 | Action Buttons |
Click to:
|
Printing a PDF Report
Select the route, entities and date range to be used in the seal report.
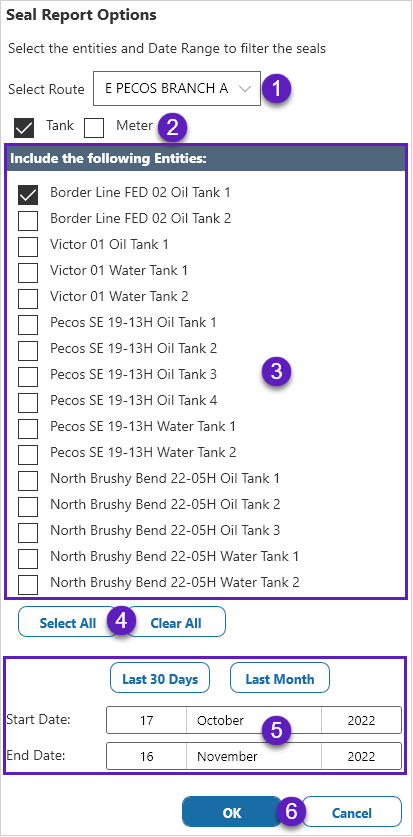
| 1 | Route | Select a route, or all downloaded routes. |
| 2 | Entity Type | Filter the entites by type. |
| 3 | Entities | Select the entites for the report. |
| 4 | Selection |
Click on the buttons to:
|
| 5 | Date Range |
Select report date range:
|
| 5 | Actions |
Click on the buttons to:
|
Seal report:

Release History
- Seals (this release 4.8)
- Initials/notes column on grid
- Seals (4.7)
- Report
- Edit notes on removed seal
- Seals (4.6)
- On meters
- Seals (4.4)