ON THIS PAGE:
The Report - Form component is designed to display a log entry in a format that is optimized for viewing and printing the entry.
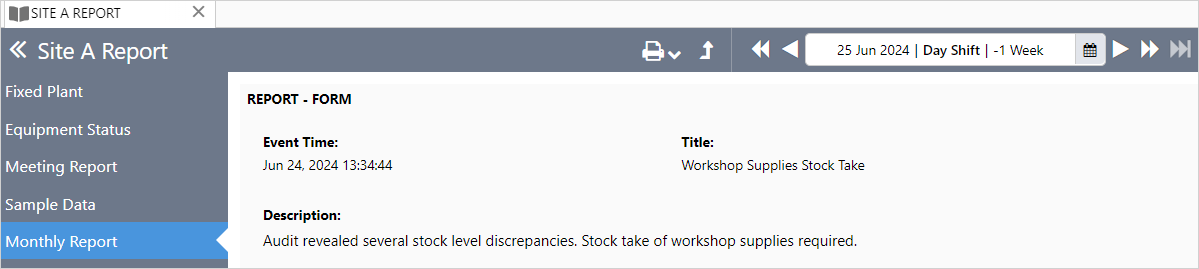
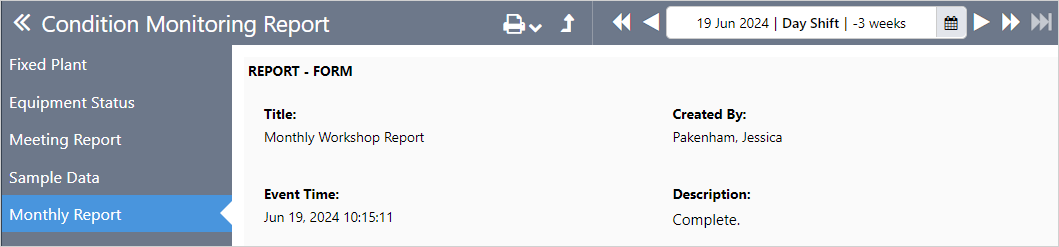
The component displays a single entry from a form, and serves to provide a summary or overview of a shift.
Configuration
The configuration can be customized to suit your application.
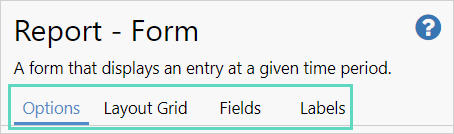
The tabs, Options, Layout Grid, Fields, and Labels, each contain different configuration options.
Options
Configure where the log entry displayed in the Report - Form comes from.
| 1. | Title* Add your own title or use the default title, Report - Form. This field is mandatory. |
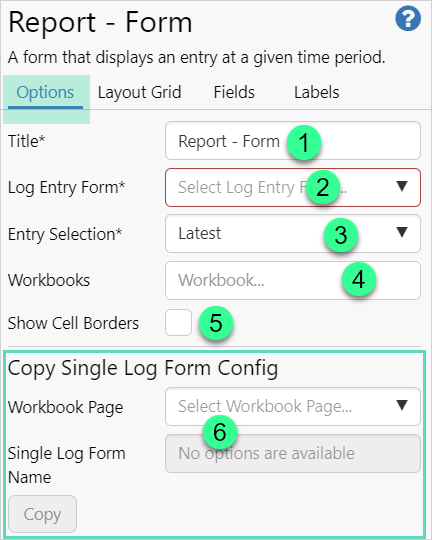 |
| 2. | Log Entry Form* Select the Log Entry Form that contains the entry you wish to display. This field is mandatory. |
|
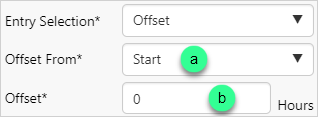
| 3. | Entry Selection* The log entry selected can be either the latest entry in the log, or an offset entry. The latest entry is the most recent entry that has been saved to the log. It can come from any of the selected workbooks, including the current workbook. An offset entry is the first entry that is saved to the log after the offset period has passed.
Select: |
|
| 4. |
Workbooks |
|
| 5. | Show Cell Borders Display borders around the fields. |
|
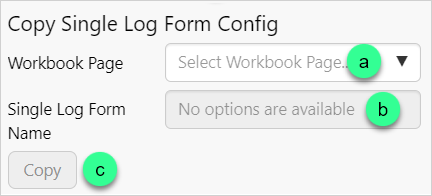
| 6. | Copy Single Log Form Config If you have a Single Log Form configured in the same workbook, you can copy its configuration.
Enter the Copy Single Log Form Config details. |
Layout Grid
Configure the grid which forms the basis for the report layout.
| 1. | Add Use the Add button to add a new column or row to your report. |
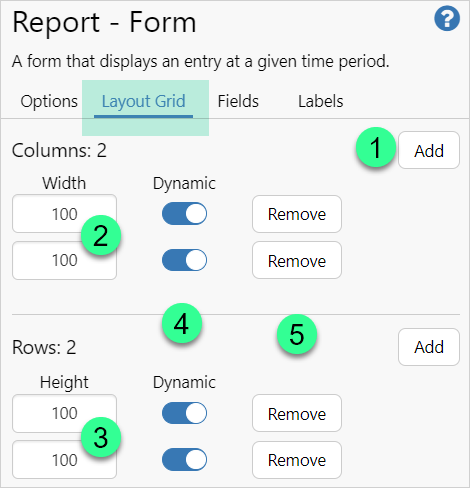 |
| 2. | Width Enter the width of the column as a number of pixels. Type * to allow the browser to automatically adjust the width of the column. |
|
| 3. | Height Enter the height of the row as a number of pixels. Type * to allow the browser to automatically adjust the height of the row. |
|
| 4. | Dynamic Dynamically resize the column or row. This has the effect of increasing the page size with one scrollbar, instead of scrollbars being activated for each column or row. |
|
| 5. | Remove Removing a column or row will also delete the contents of that column or row. |
Fields
Configure which fields to display and where to position them in the grid.
| 1. | Fields The fields in the selected log entry form. Expand the field to access configuration options. |
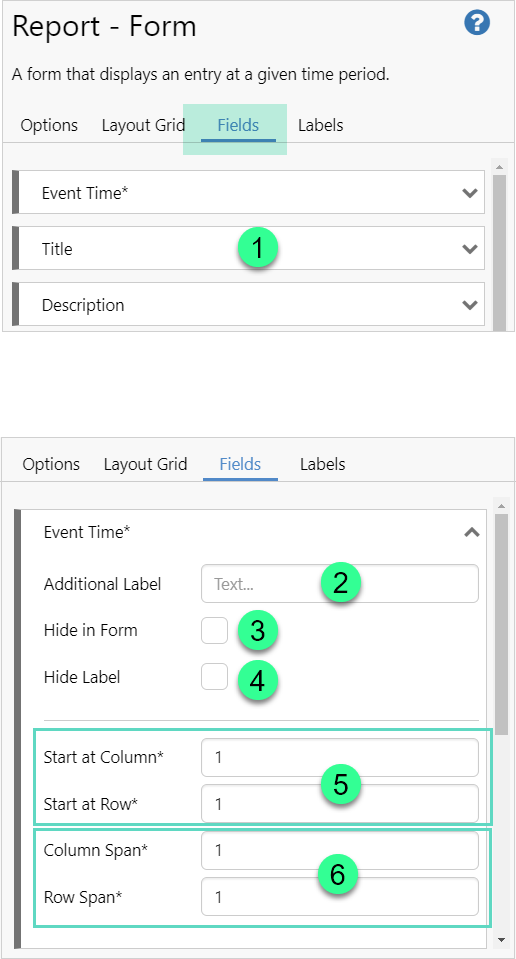 |
| 2. | Additional Label The additional label will be added in italics under the field display name. 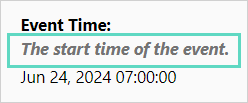 |
|
| 3. | Hide in Form The field will not be displayed in the report when this option is selected. |
|
| 4. | Hide Label Both the display name and the additional label will be hidden when this option is selected. |
|
| 5. | Position Specify the column and row that will form the top left hand corner of the space occupied by the field. The number and outline will be red if there is conflict with another field's position, or the column or row number is invalid. |
|
| 6. | Size A field can span multiple rows and columns, up to the maximum configured in the Layout Grid. Enter the number of columns and rows to be used to display the field. The number and outline will be red if there is conflict with another field's position, or the span range extends beyond the Layout Grid. |
Labels
Configure cells in the grid as labels.
| 1. | Delete Click the |
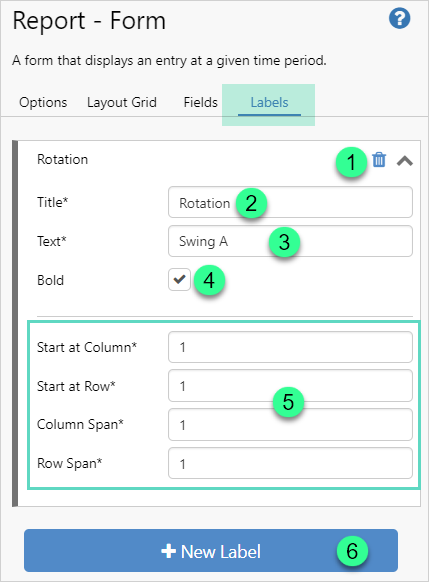 |
| 2. | Title* Name of the label. This field is mandatory. |
|
| 3. | Text* The label text; this is what will be displayed on the report. This field is mandatory. |
|
| 4. | Bold Select to apply bold formatting to the label text. |
|
| 5. | Position and Size Select where in the report to position the label, and how much room to allocate for it. |
|
| 6. | Add a New Label Add and configure new labels as required. |
Tutorial
This tutorial builds on the entry components tutorial.
In this tutorial, we'll add a Report - Form component to a page in Workbook Studio.
Step 1. Prepare a Studio Page
To start, click the New Workbook button on the Home tab of the ribbon and add a new page.

Step 2. Add a Report - Form
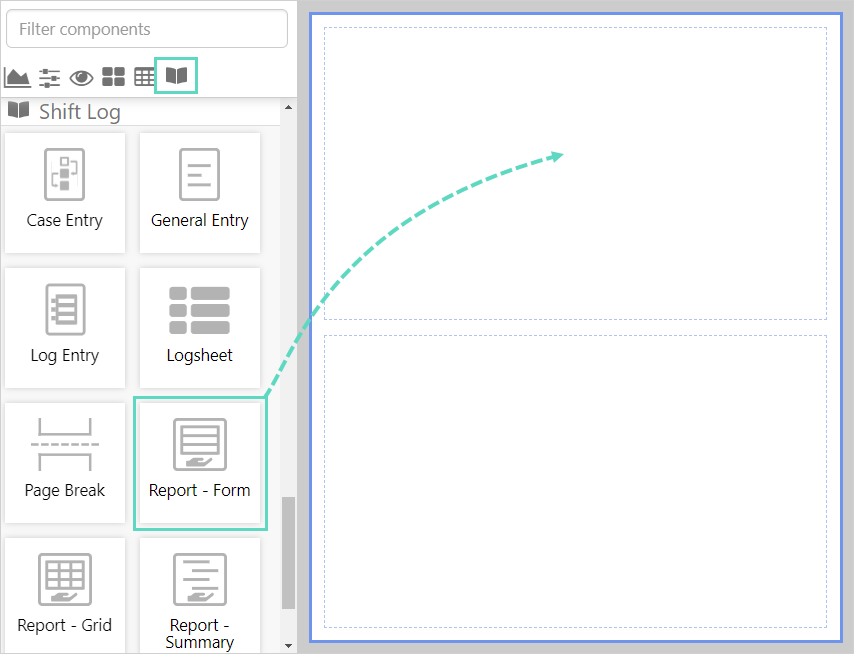
Drag and drop the Report - Form component onto a cell. The Report - Form is a part of the Shift Log ![]() group.
group.
Step 3. Configure the Report - Form
The configuration options available are explained in Configuration.
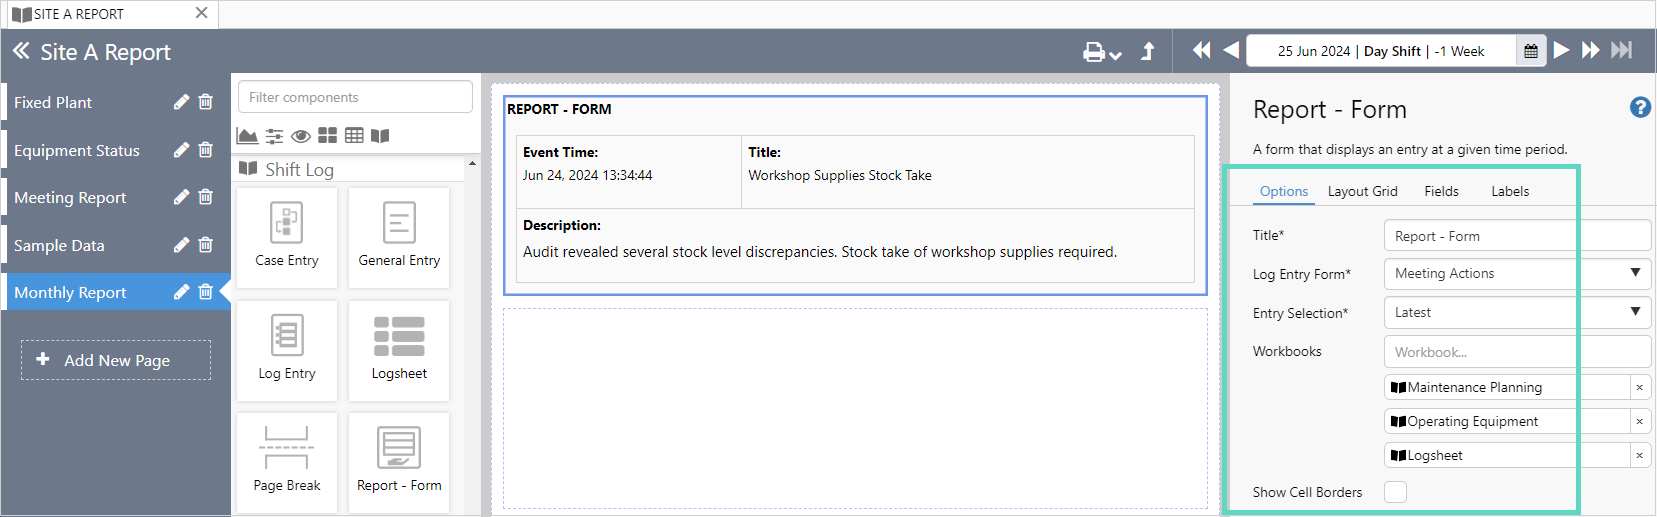
The Options tab configuration:
Step 4. All done!
Remember to save your work.
The Report - Form on a workbook page.