Overview
The Selection List shows a list of values where the selection is made by another component. The Selection List must be used in conjunction with another component that publishes a list as an event.
The following diagram shows a Selection List being configured alongside an Entity Selector:
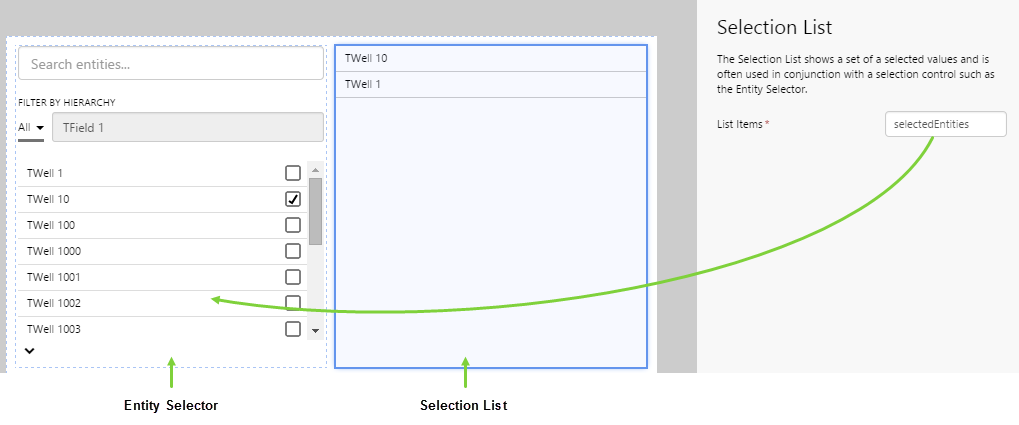
| List Items: | The name of the event from which the list items are obtained. |
Tutorial
A Selection List is used when you want to view the items that have been selected from a list. The component listens to an event generated by another component, and uses this to retrieve the list of values that it displays.
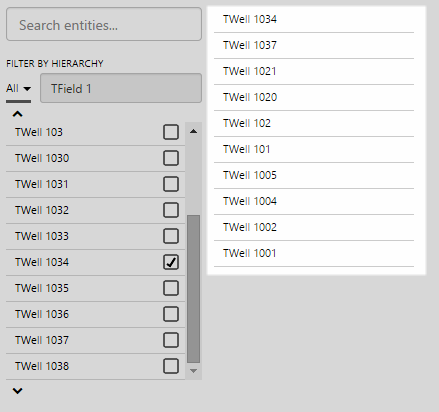
For example, you could have an Entity Selector component that offers a number of wells for selection. Perhaps you want the users to choose a maximum of 10 wells, and have the names of those wells displayed by the Selection List.
In this tutorial, we'll look at doing just that. We'll create an Entity Selector that allows users to choose a maximum of 10 wells from a long list, and the chosen wells will be displayed by the Selection List.
Let's go through this process, step-by-step.
Step by Step: Creating a Selection List Driven by an Entity Selector
Before you start, open a new tab in Explorer and click the “Create a New Page in Studio Mode” thumbnail. Choose the grid layout - you can adjust the rows and columns if you like but it's not important for this exercise.
If you have access to the training environment, you can follow the steps exactly as outlined here. Otherwise, you will need to adjust the configuration to suit your data.
Step 1. Add the Selection List to the page
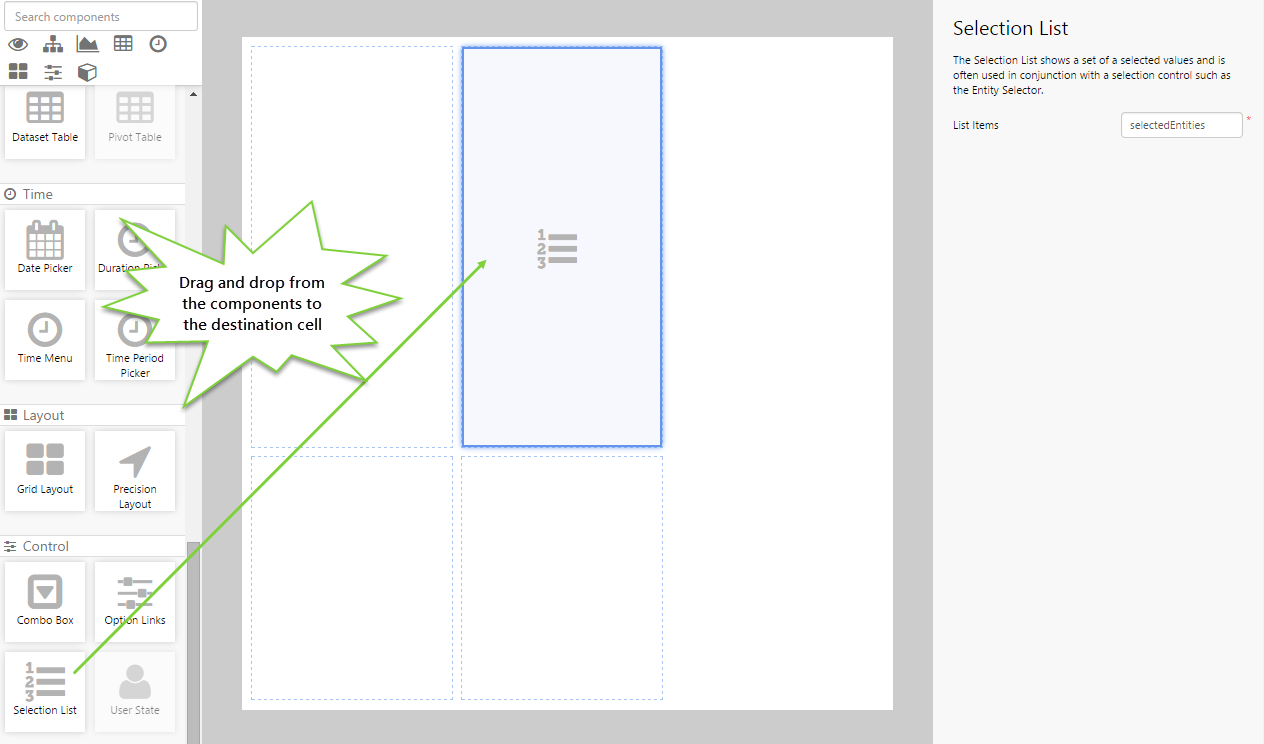
Drag and drop the Selection List component onto a grid cell.
Step 2. Configure the Selection List
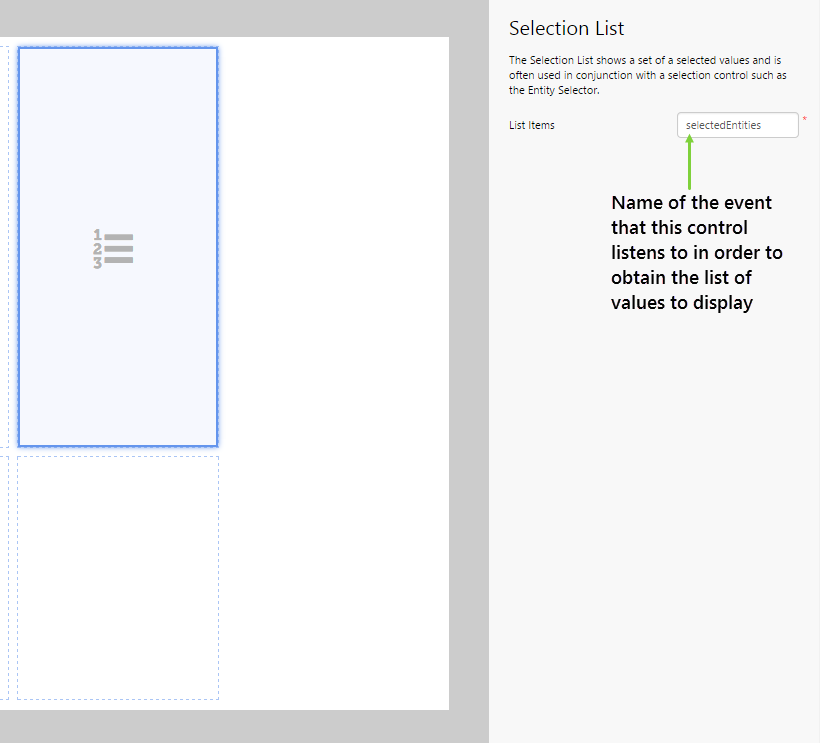
In this tutorial, we want to populate the Selection List from an event that is generated by an Entity Selector. Let's call this "selectedEntities".
Step 3. Add and Configure an Entity Selector
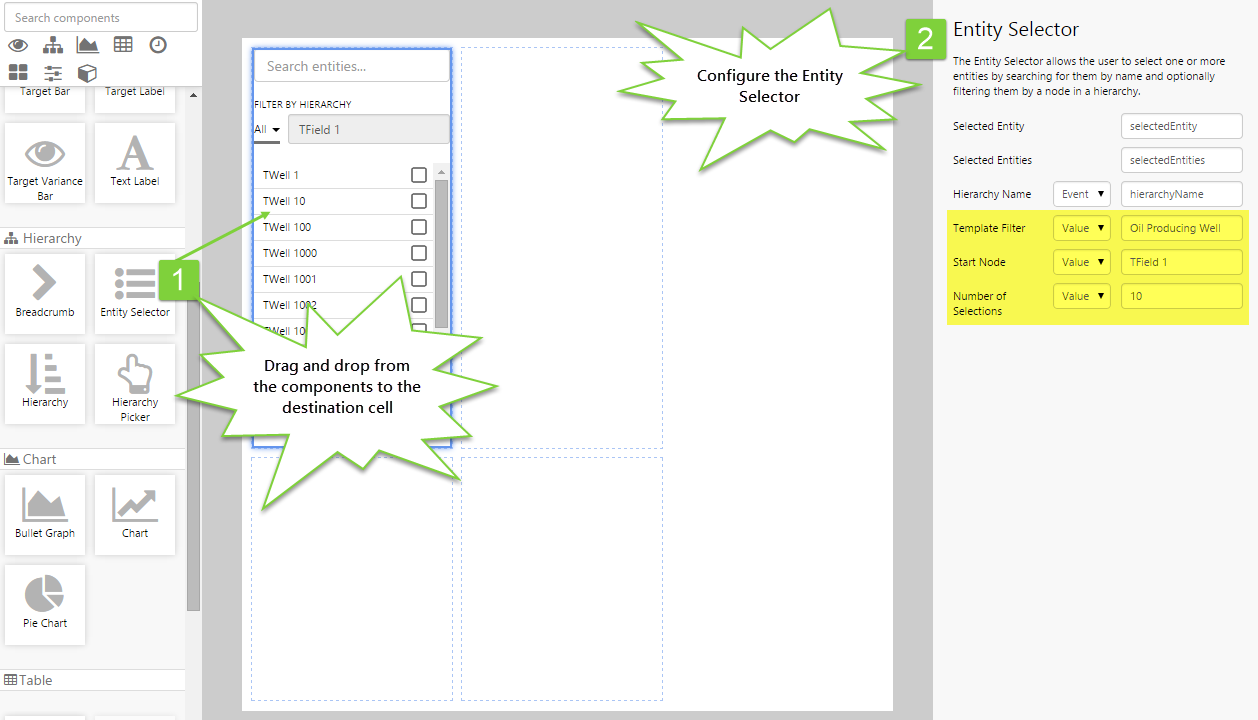
Drag and drop the Entity Selector component from the list on the left onto an empty cell. You will notice that several of the configuration values are prepopulated. In fact, the Selected Entities value is already prepopulated with the event name that we used in the previous step. This is the event that will provide the list of values to the Selection List. We still need to make some tweaks though, so let's change the following:
- Template Filter: Oil Producing Well
- Start Node: TField1
- Number of Selections: 10
Step 4. Rejoice!
Congratulations! You now have a fully functioning Selection List that displays a list of wells that the user selects from an Entity Selector.
- Click the preview
 button on the Studio toolbar to see what your page will look like in run-time.
![]() Don't forget to save your page!
Don't forget to save your page!