ON THIS PAGE:
This article describes how to create links (previously called renderers) in P2 Server Management and group them for display in the P2 Explorer ribbon. For information on how to assign links to a template, see: Creating Templates and Attributes.
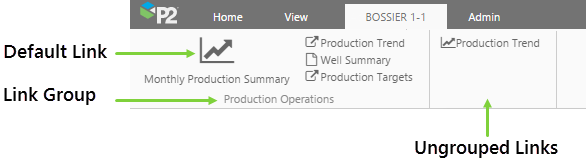
In P2 Server, links can be assigned to templates. When a template with assigned links is designated as the primary template for an entity, those assigned links will appear in the entity's Table of Contents in P2 Explorer. Here is an example of a Table of Contents for entity Bossier 1-1:
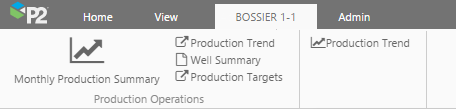
Links can be organised into groups for display in the Table of Contents, or may remain ungrouped. The default link on a template will appear as the first link in the Table of Contents, and will be larger than the other links.
What can you link to?
You can create links to an Explorer page or trend by specifying the GUID for the page or trend. You can also link to a URI, which can be an external website.
An important capability is that you can also use expressions inside links to drive custom URLs. This provides the ability to open custom reports in an external system with data from P2 Server. These systems include document management systems, maintenance systems, reporting systems, or even custom third party systems, as long as they accept the parameters.
Examples
Simple well report
The following example opens an external website in a new browser window, and passes through the name of the entity selected in P2 Explorer (or another application that can consume these links):
https://myExternalSite/openWellReport?Well=EXPR(ENTITY)
Well report with dates
This example opens an external website in a new browser window, and passes through the name of the selected entity, as well as the start and end of the current production day (calculated at the time the link is clicked):
https://myExternalSite/openWellReport?Well=EXPR(ENTITY)&StartTime=EXPR(ProductionDayStart(Time()-86400))
&EndTime=EXPR(ProductionDayStart(Time()))
Well report with live tag data
This example opens an external website in a new browser window, and passes through the name of the selected entity, as well as the value of a historian tag (Silver), at the time the link is clicked:
https://myExternalSite/openWellReport?well=EXPR(ENTITY)&CurrentValue=EXPR({Silver,sampleMethod='Raw'})
Server Management
There are 2 main parts to creating a Table of Contents:
- Creating the link groups.
- Creating the links.
The only prerequisite is that the thing you are linking to must already exist.
Once the links are created, they can be assigned to a template - this step will also define the default link for entities that have the template designated as primary.
Creating a Link Group
To create a link group in P2 Server Management:
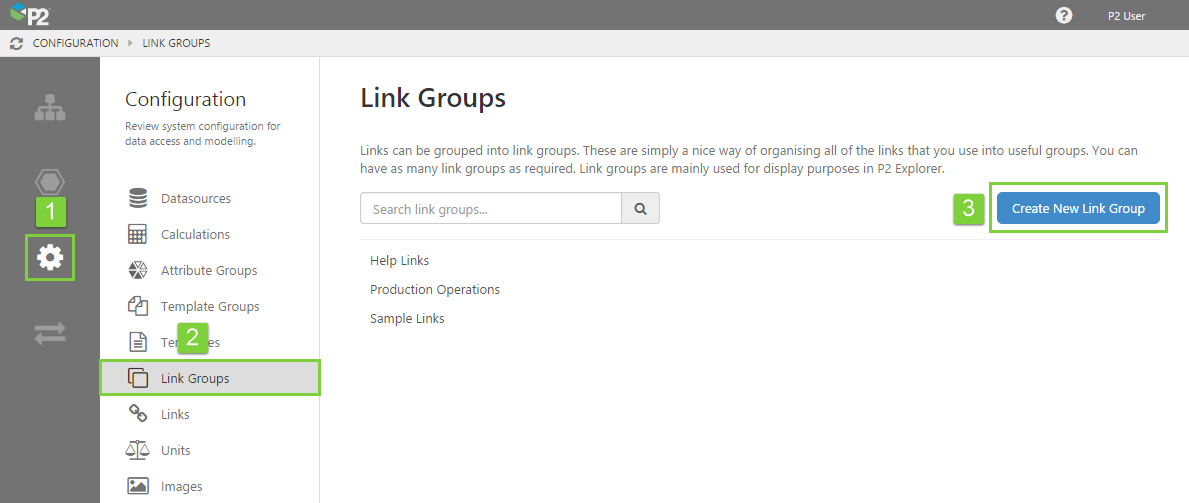
1. Open P2 Server Management, and click the Configuration ![]() icon.
icon.
2. Click Link Groups.
3. Click Create New Link Group.
Note: If you want to edit an existing group, select it from the list below the Create button.
4. Give the link group a name and a description. Note that the name must be unique and cannot contain any reserved characters. For the description, it's often useful to provide a broader explanation of the purpose of the link group and how it will be used.
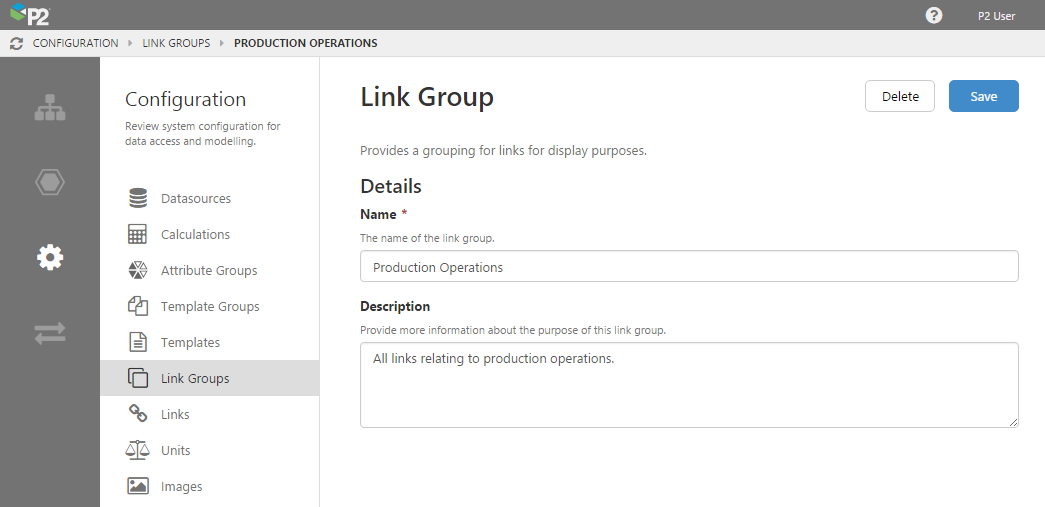
5. When you have finished, click the Save button in the top right corner.
Creating a Link
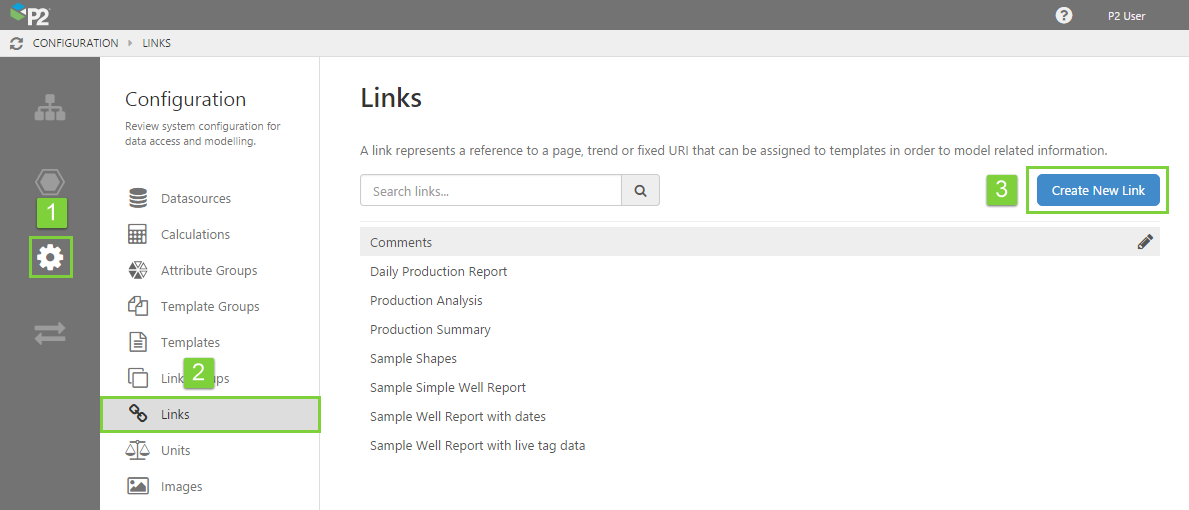
To create a link in P2 Server Management:
1. In P2 Server Management, and click the Configuration ![]() icon.
icon.
2. Click Links.
3. Click Create New Link.
Note: If you want to edit an existing link, select it from the list below the Create button.
4. Fill out the following information:
- Give the link a name and a description. As link names do not have to be unique, it's often useful to provide a description of where the link comes from.
- Select the Link Group. This must already exist in the system.
- Specify the Type of link this is: Page, Trend, or URI. Note that Page refers only to Explorer pages, not other web pages.
- Target:
- Specify Application for Pages and Trends.
- Specify Browser if you are linking to a URI.
- Value:
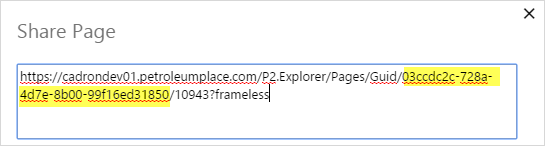
- For Pages and Trends, specify the GUID. To get the GUID, go to P2 Explorer and click Share Link on the page or trend. The GUID refers to the long number after the guid/ portion of the address:
- For a URI, type the address of the website. Here are some examples that should work:
- p2energysolutions.com
- www.p2energysolutions.com
- https://p2energysolutions.com
- https://e4helpcenter.petroleumplace.com/help
- For Pages and Trends, specify the GUID. To get the GUID, go to P2 Explorer and click Share Link on the page or trend. The GUID refers to the long number after the guid/ portion of the address:
5. When you have finished, click the Save button in the top right corner.
Done! Now that you have created links and link groups, you can assign them to a template and also define the default link for entities that have the template designated as primary.
Import/Export Spreadsheet
The Import/Export spreadsheet is generally only used to make bulk changes. If you want to create links and link groups as part of a bulk configuration, you need to use the following tabs in the Import/Export spreadsheet:
- Link Group
- Link
Look for the red comment ![]() icon in the row headers, to get help with each column.
icon in the row headers, to get help with each column.
DO NOT fill in or change anything in the Global Id field - this is the unique identifier for the attribute group that allows it to be tracked across systems, and when it is renamed. It is automatically generated by the system.
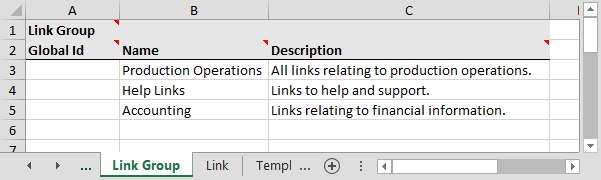
Link Group Tab
The screenshot below shows an example of configured link groups. The fields are the same as the ones in the Creating a Link Group step in Server Management, using the above instructions on this page.
Link Tab
The screenshot below shows an example of configured links. The fields are the same as the ones in the Creating a Link step in Server Management, using the above instructions on this page.
