Explorer's metadata-driven menu makes it easier for users to navigate to pages, trends, and workbooks. This is a user-driven classification system, designed to reduce the administrative burden of continually adding new displays to a corporate menu.
The structure of the menu is created in Server Management, and that structure is then used by users to build there own customised menus.
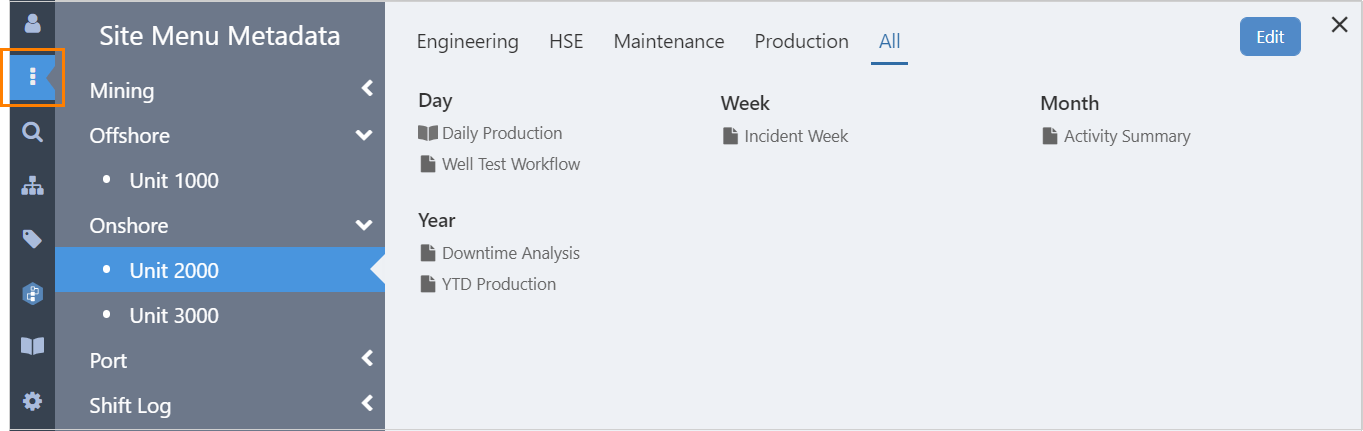
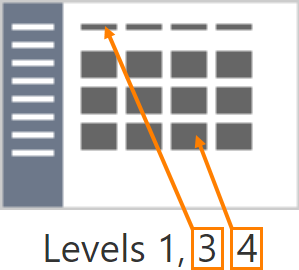
Customised Site Menu in Explorer:
Creating the Menu Structure
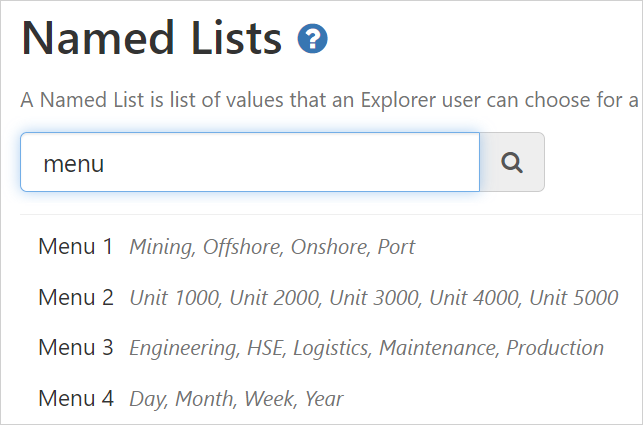
To create the menu structure, a named list is assigned to each level of the menu, with the named list values forming the headings for the levels.
First, create a Named List for each menu level.
The menu configuration in Server Management:
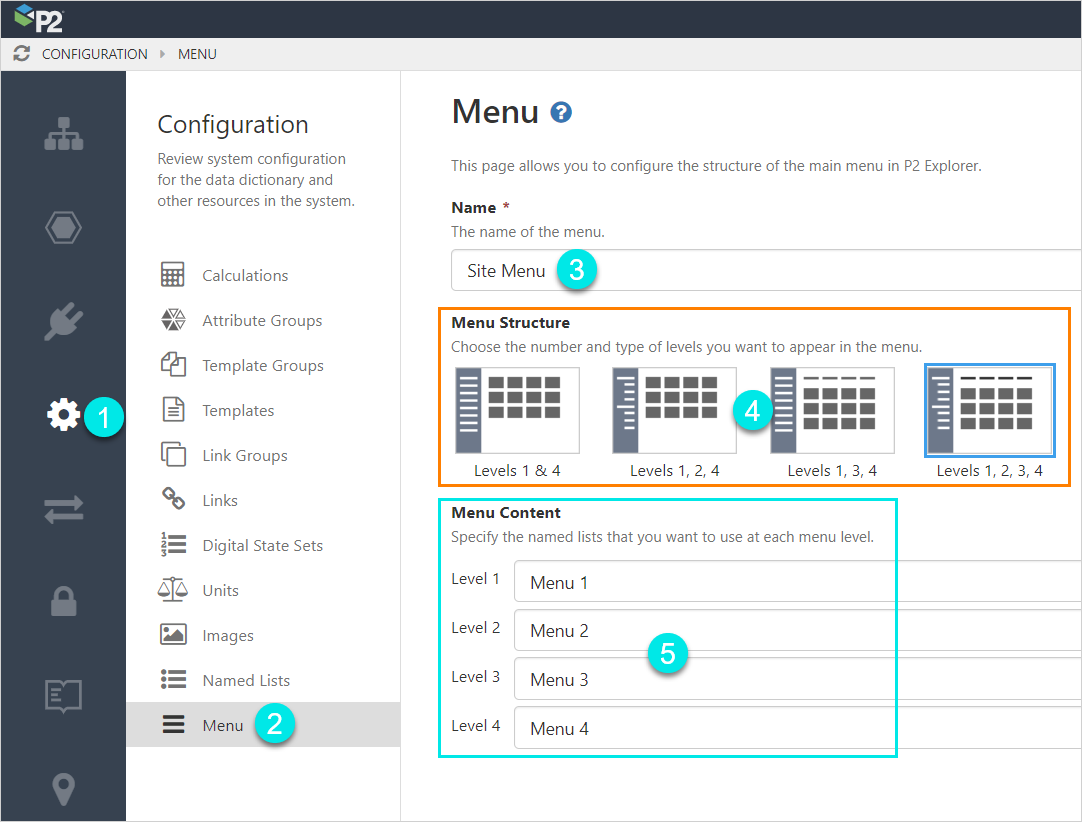
| 1 Configuration | Select configuration | ||||
| 2 Menu | Select menu | ||||
| 3 Name |
Enter the title for the menu; this will be displayed in Explorer
|
||||
| 4 Structure |
Select the number and type of levels to be used in the menu
|
||||
| 5 Content |
Specify the named lists to be used for each menu level |

Building a Customised Menu
Pages, trends, and Workbooks can be added to the menu by selecting a heading for each menu level, in the Classification section of the Display Information panel.
To build a customised menu:
1. Select the Info ![]() button in the toolbar of the page, trend or Workbook, to open the Display Information panel for that item.
button in the toolbar of the page, trend or Workbook, to open the Display Information panel for that item.
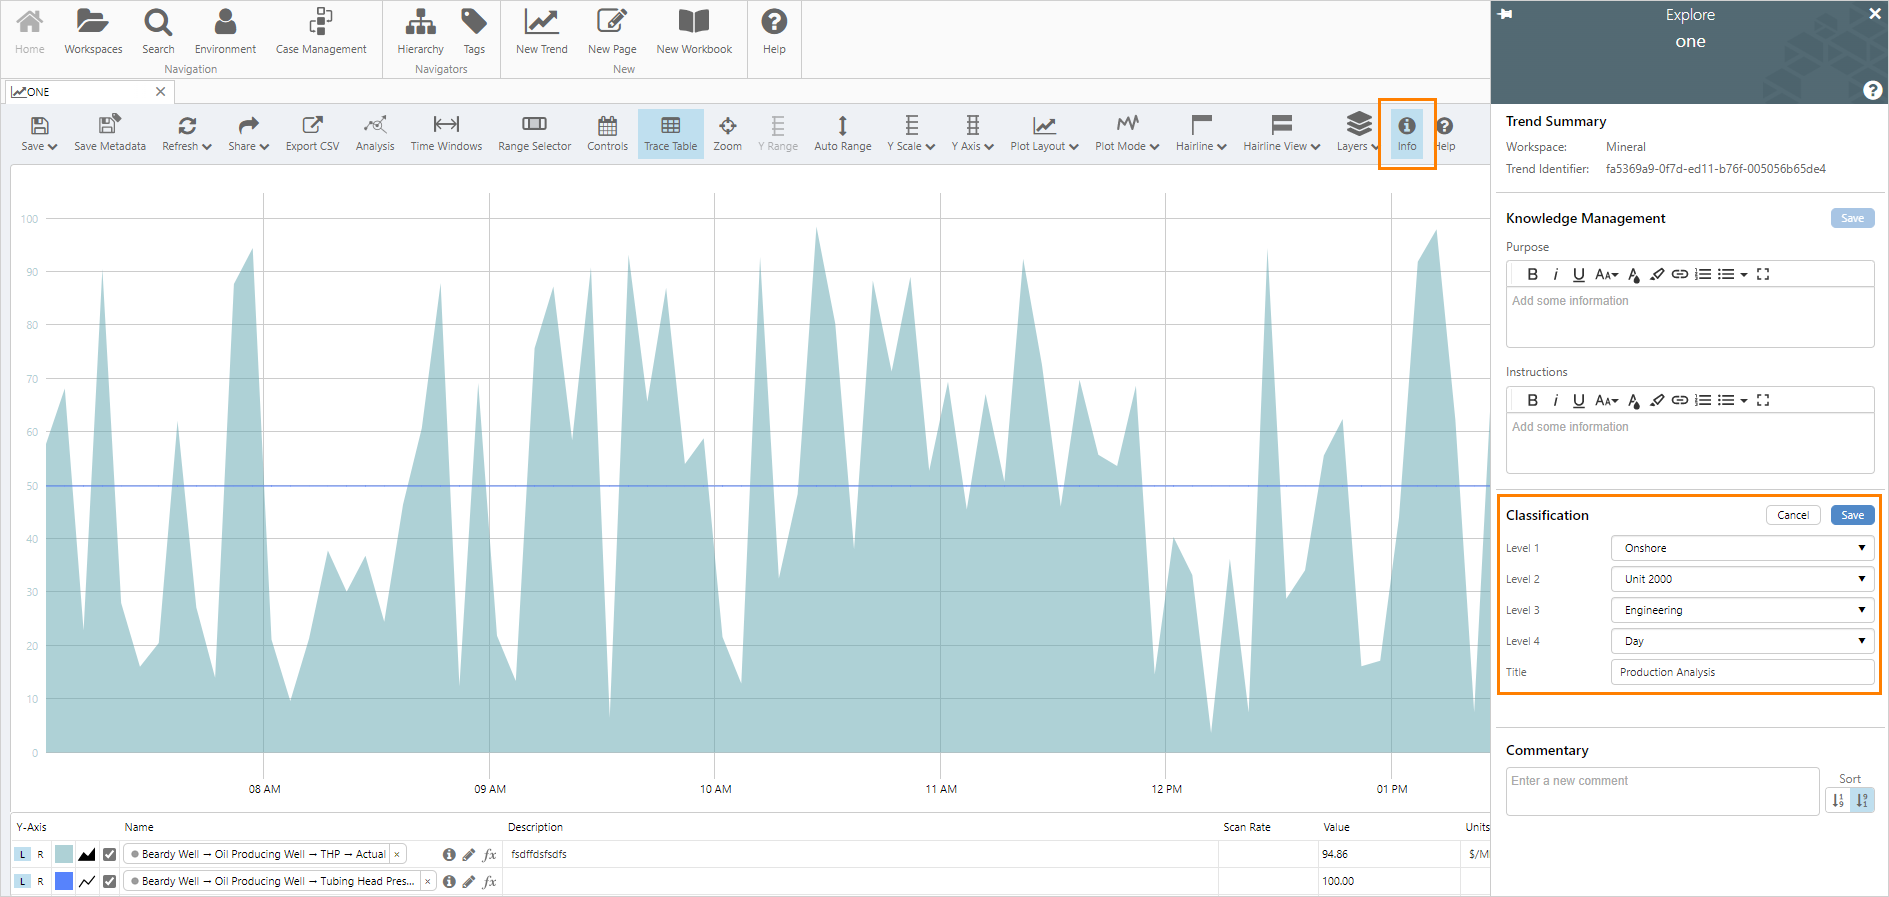
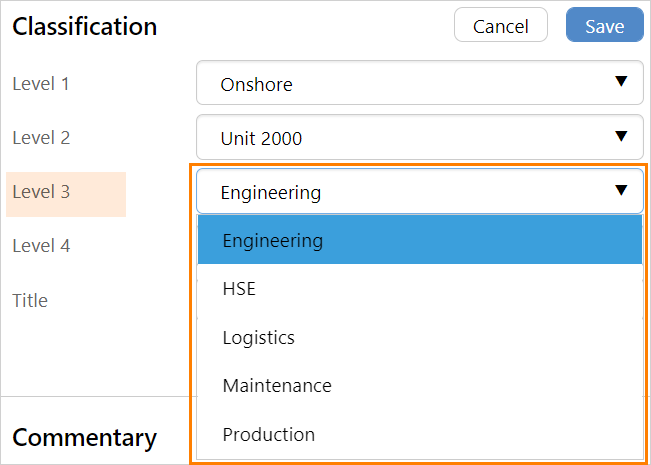
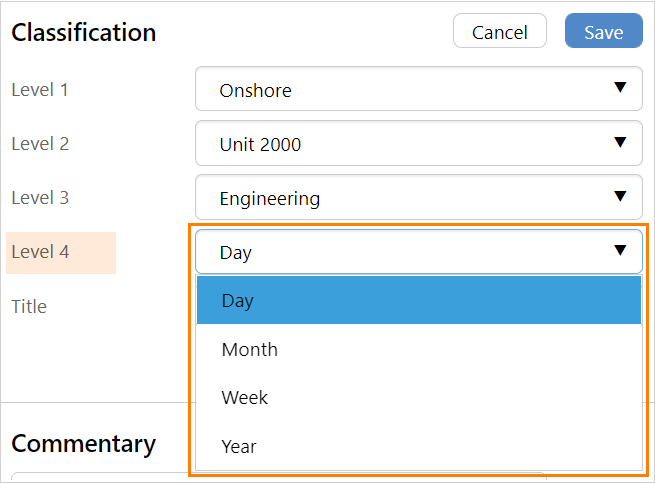
2. In the Classification, select a heading from each menu level:
 |
 |
 |
 |
3. Add a title for the menu item.

The trend in the menu:

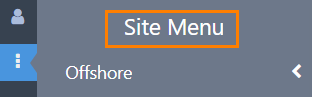
| 1 Site Menu | Site menu button on the Explorer shortcut menu |
| 2 Title | Menu title as defined in Server Management |
| 3 Level 1 | Heading selected for level 1 |
| 4 Level 2 | Heading selected for level 2 |
| 5 Level 3 | Heading selected for level 3 |
| 6 Level 4 | Heading selected for level 4 |
| 7 Item | Click to open the selected page, trend or Worbook |
Menu Security
Workspace security applies to all items in the Site Menu.