ON THIS PAGE:
This article describes how to create hierarchies using IFS OI Server Management or the Import/Export spreadsheet. For general information on hierarchies, see: Hierarchies in IFS OI Server.
A hierarchy is an organised structure of entities, intended to form a model of assets within an organisation. Configuring a well-structured hierarchy is crucial to getting the most out of your asset model. You can configure a hierarchy using Server Management or the Import/Export spreadsheet.
Your hierarchies should never contain more than 1,000 children under a single node - not only does this make the hierarchy difficult to navigate, it also impacts the performance of IFS OI Server.
Server Management
In Server Management, configuring a hierarchy requires 2 steps, all done through the Hierarchies menu option:
- Creating the hierarchy.
- Assigning entities to the hierarchy.
The only prerequisite is that you must have already created the entities you intend to use.
Creating a Hierarchy
To create a hierarchy in IFS OI Server Management:
1. Open IFS OI Server Management, and click the Hierarchy ![]() icon.
icon.
2. Click Create New Hierarchy.
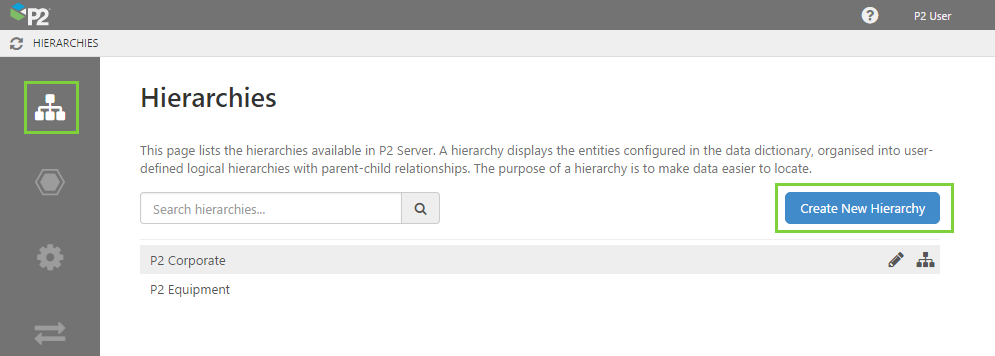
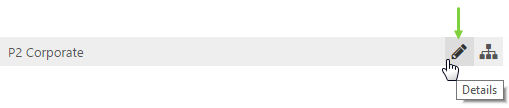
Note: If you want to edit the details of an existing hierarchy, hover over it from the list below the Create button, and click the edit ![]() button.
button.
3. Give the hierarchy a name and a description. Note that the name must be unique and cannot contain any reserved characters. For the description, it's often useful to provide a broader explanation of the purpose of the hierarchy and the type of entities it contains.
4. Specify an Ordinal. This determines the order of the hierarchy in relation to other hierarchies, on the Hierarchies page. The ordinal must be a number greater than 0, or left blank.
Items will be ordered by their ordinal first, from lowest to highest. Items without an ordinal will then be ordered alphabetically.
An ordinal of 0 indicates the hierarchy should be at the top of the list.

5. When you have finished, click the Save button in the top right corner.
Assigning Entities to the Hierarchy
To assign entities to a hierarchy in IFS OI Server Management:
1. Open IFS OI Server Management, and click the Hierarchy ![]() icon.
icon.
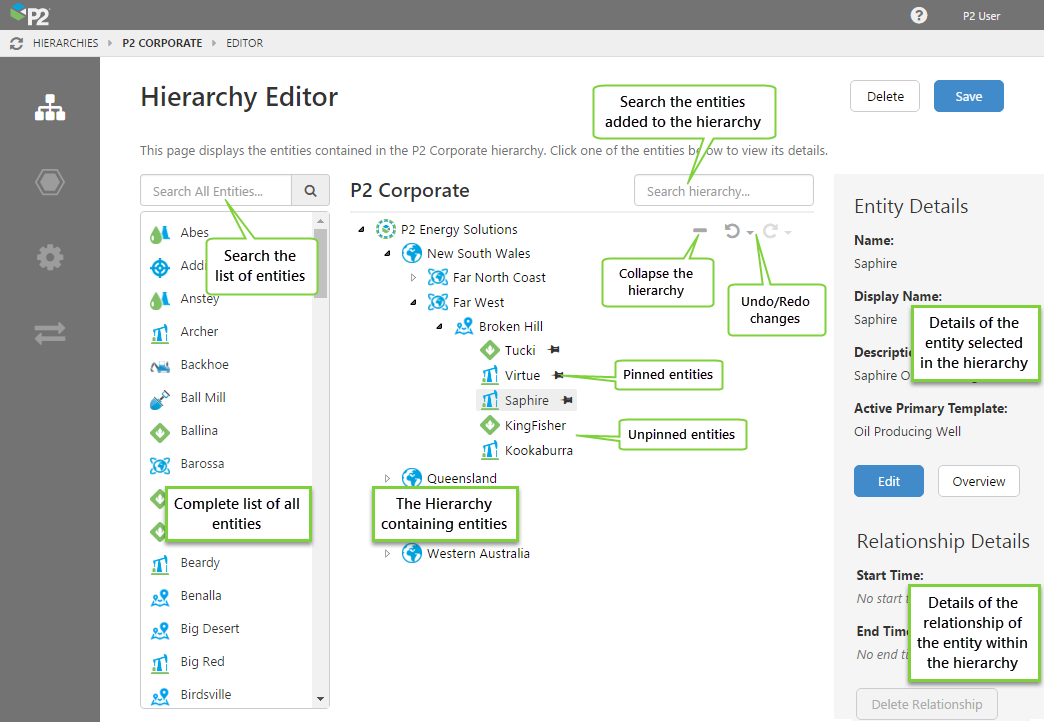
2. Click the name of the hierarchy.
3. Find an entity in the list (either by scrolling or searching for it) and then drag it onto the empty hierarchy box.
Note: Currently, start and end times can only be specified using the import/export spreadsheet.
4. Continue to drag entities onto the hierarchy.
You can also 'pin' desired entities to the top of its parent.
When an entity is pinned, it is reordered so that it becomes the first child of its parent, and an ordinal is set. When subsequent entities within the parent are pinned, they are moved to the bottom of the pinned entities and are also set an ordinal.
You can then re-order the pinned entities in the order you want. The remaining unpinned entities will still be sorted alphabetically by Display Name.
New entities that are dragged to the list of pinned entities, will also be pinned by default.
5. When you have finished, click the Save button in the top right corner.
Done! Now that you have created and populated a hierarchy, your asset model is ready to use in IFS OI Explorer.
Removing Entities from the Hierarchy
When you want to remove an entity from a hierarchy, you are only severing the entity's relationship with the hierarchy. To do this:
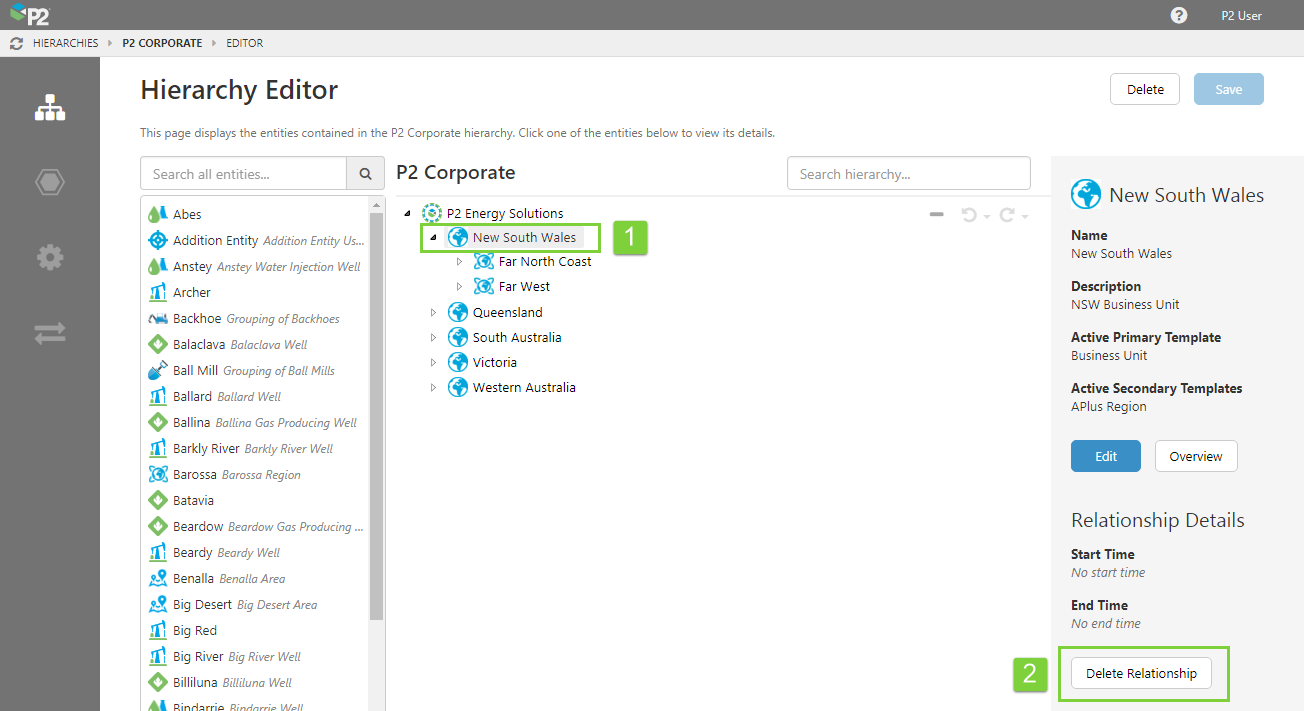
1. Click the entity you want to remove.
2. In the Relationship Details panel on the right, click Delete Relationship.
3. In the Are you sure? window:
A. Check the details of the Hierarchy Relationship.
Note: Deleting a hierarchy relationship also deletes all of the relationships below it in the hierarchy (i.e. the entity's children). The entities themselves remain in the system, but are removed from the hierarchy.
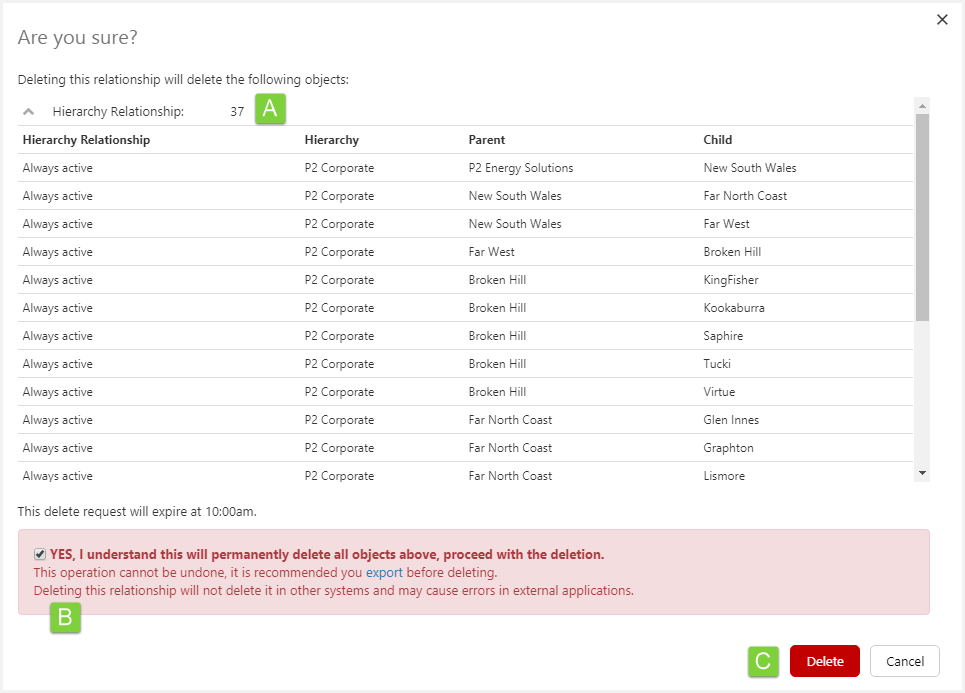
B. If you want to proceed, select the YES, I understand check box.
C. Click the Delete button. The entity is removed from the hierarchy, along with all its children.
Video
Import/Export Spreadsheet
The Import/Export spreadsheet is generally only used to make bulk changes.
If you want to create hierarchies as part of a bulk configuration, you need to use the following tabs in the Import/Export spreadsheet:
- Hierarchy
- Hierarchy Relationship
Look for the red comment ![]() icon in the row headers, to get help with each column.
icon in the row headers, to get help with each column.
DO NOT fill in or change anything in the Global Id field - this is the unique identifier for the hierarchy that allows it to be tracked across systems, and when it is renamed. It is automatically generated by the system.
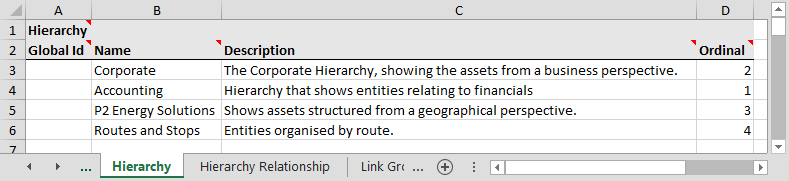
Hierarchy Tab
The screenshot below shows an example of configured hierarchies. The fields are the same as the ones in the Creating a Hierarchy step in Server Management, using the above instructions on this page.
Dependencies
The Hierarchy tab has no dependencies on information from other tabs.
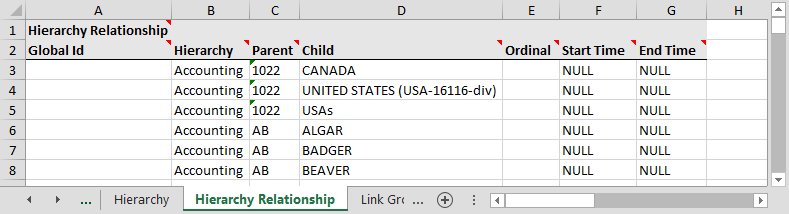
Hierarchy Relationship Tab
The screenshot below shows an example of configured hierarchy relationships. Hierarchy relationships are time-aware, meaning that you can assign a start time and end time for a node to exist in a hierarchy. For example, you may commission a new well, so the new well will have a start time that is relevant to only that well.
Dependencies
The Hierarchy Relationship has dependencies on information from other tabs. Understanding these dependencies assists in resolving import errors.
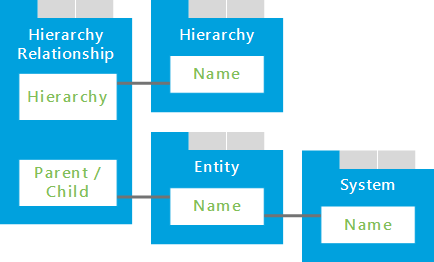
Direct Dependencies
The Hierarchy Relationship tab is directly dependent on 2 other tabs, Hierarchy and Entity, because columns on the Hierarchy Relationship tab directly reference columns on those tabs.
| This column | On this tab | Why you need to pay attention |
| Name | Hierarchy | Required by the 'Hierarchy' column on the 'Hierarchy Relationship' tab. |
| Name | Entity | Required by the 'Parent' and 'Child' columns on the 'Hierarchy Relationship' tab. |
Cascading Dependencies
A cascading dependency exists when a dependent tab (above) has additional dependencies. These are the columns that you need to pay attention to.
| This column | On this tab | Why you need to pay attention |
| Name | System | Required by the 'System' column on the 'Entity' tab. |
Here is a diagram of the dependent tabs and columns. Use this to help you visualise how the dependencies work, and ensure all required columns are completed.