ON THIS PAGE:
There will be occasions where you will want to update the P2 Server database in bulk, rather than manually adding individual items in P2 Server Management. You can do this by exporting the existing data to a specially formatted Excel® spreadsheet. The spreadsheet is formatted so that the Data Dictionary has the required information to update your information model directly in the database.
Updating the data in the P2 database is a simple 3-step process.
- Export the existing P2 Server data.
- Update the spreadsheet.
- Create the zip file.
- Import the file.
Let’s look at this process, step by step.
Step 1. Export existing data
Because both the format and content of the import file is crucial to a successful update, we’ve made it easy for you to download the data you need to update. All you need to do is download or export the configuration data from P2 Server Management.

- In P2 Server Management, click the Import/Export icon in the navigation bar.
- Select the Export option from the middle panel.
- Choose the 'Select All' option.
Alternatively, you can select the specific objects you want to export (read about dependencies here). - Click the Export Server Data button.
The export file will download and you will be prompted to save it to your computer.
Step 2. Update the spreadsheet
The key to a successful import is to make sure that everything in the spreadsheet is filled in correctly.
The important part in an update is to make sure you have the Global Id columns filled in. These correspond to the GUIDs in the database that determine the records that will be updated.
Note: The GUID is exported from the database into the Global Id column. Do not change this, or the database will not recognise the row.
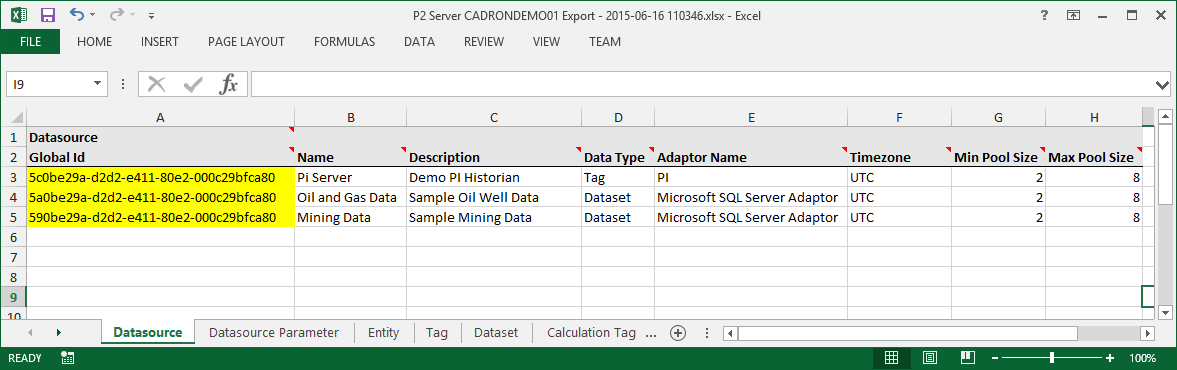
On the header rows in the spreadsheet, there are help comments for every column. This should provide you with enough information on what should be entered in the column. Click the little red comment indicator on the header row to see the help.
Step 3. Create the zip file
This step only applies if you want to import images. To create the zip file for importing images:
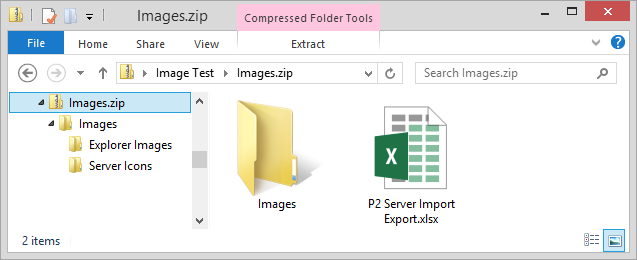
1. If you're importing images for the first time, create a folder named 'images'. If the folder was present in your export data, use that folder.
2. Inside the images folder, ensure there is a folder for each image group. The name of the image group folder must match the name of the image group.
3. Place the images inside the relevant image group folder.
4. Zip together the images folder and the modified .xslx file. At the top level, your zip file should look like this:
Step 4. Import the spreadsheet
When importing, P2 Server first checks the file for errors and then asks for your permission to proceed. This is a fail-safe mechanism to ensure no errors propagate into the system.
Note: During import, P2 Server Management is locked and other users will not be able to make any changes until the import has finished and the session is released.
The first part of the import process is similar to the export process:
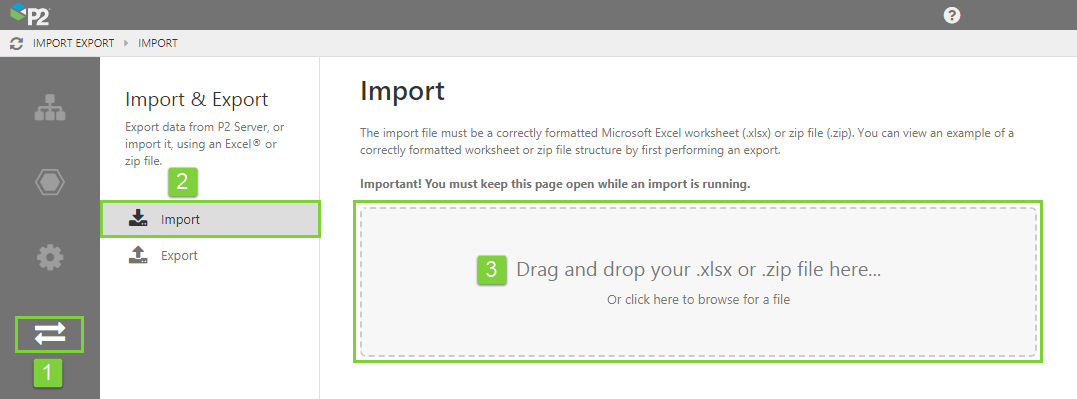
1. In P2 Server Management, click the Import/Export icon in the navigation bar.
2. Select the “Import” option from the middle panel.
3. Drag and drop your file into the box, or click the box to browse for your file and upload it.
The process continues as soon as P2 Server detects your file. First, the file is checked for errors and an overview of the upload is displayed. The overview tells you how many rows have been counted for each worksheet, and highlights any errors that may be encountered. The overview for an error-free spreadsheet looks something like this:
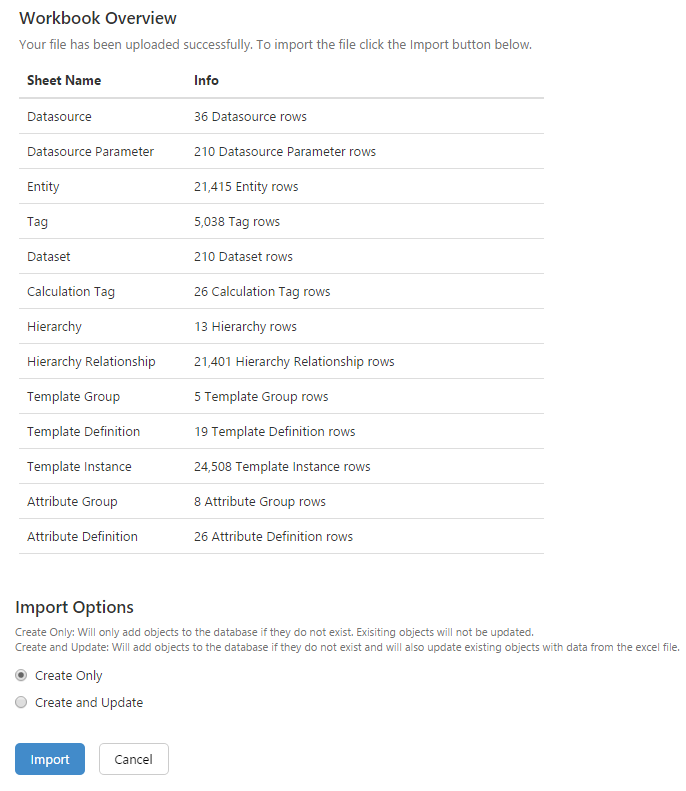
You must explicitly allow the import to proceed. You may continue to import a file with errors, but the system will disregard the errors and only import the correctly filled in sheets.
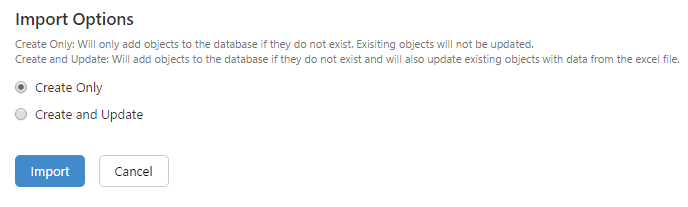
There are 2 import options you can choose from:
- Create Only. Objects will only be ADDED to the database if they do not already exist. No existing objects will be updated.
- Create and Update. Existing objects will be UPDATED with data from the import file, and new objects will be ADDED if they do not exist.
4. For the scenario where you are updating existing records, select the “Create and Update” option, and then click Import. Or if you are only adding new records, select "Create Only".
5. When the import has finished, a success message appears in the top right corner.

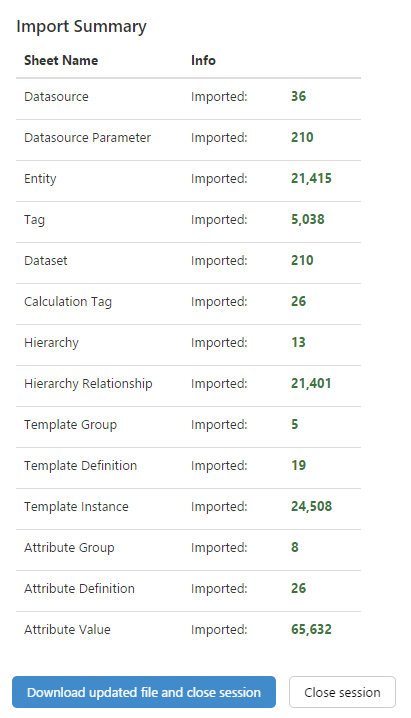
6. Scroll to the bottom of the screen to see the Import Summary.
This will show you the number of rows imported or updated per worksheet.
7. At this point, you can download the updated file. The downloaded file will be exactly the same as the file you imported, except that the Global Id for the new rows in the spreadsheet will be updated. It’s a good idea to download the file if you intend to re-use your spreadsheet to update the database. This file will retain any formulas you used to calculate fields.
You should download the file if you intend to re-use your spreadsheet to update the database. The downloaded file will be exactly the same as the file you imported, except that the GUIDs (Global ID) will be updated in the spreadsheet. The spreadsheet will retain any formulas you used to calculate fields.
Otherwise, you can just simply close the session (click “Close session”).
What if I get errors?
Errors and warnings are commonly encountered during processing and import, usually associated with the spreadsheet being filled in incorrectly.
Release History
- Updating the Configuration 4.5.1 (this release)
- Added the ability to export images
- Updating the Configuration 4.4.5
- Added export options
- Updating the Configuration 4.3.1