ON THIS PAGE:
The forms and hierarchy used are specific to A-Plus and need to be configured correctly for the application to work.
The configuration comprises the following steps:
- Assign an A-Plus secondary template to entities
- Assign the primary template that will be selected as the Equipment Type in the form configuration, to Area Equipment and Measurement Point Equipment entities
- Add the entities to a hierarchy to create an A-Plus hierarchy
- Select the A-Plus hierarchy in Global Settings
- Create a Site
- Add Areas under the Site
- Add new forms or use the default forms
Hierarchy, Entities and Templates
The hierarchy, is made up of entities which have A-Plus templates assigned to them, and has the following structure.
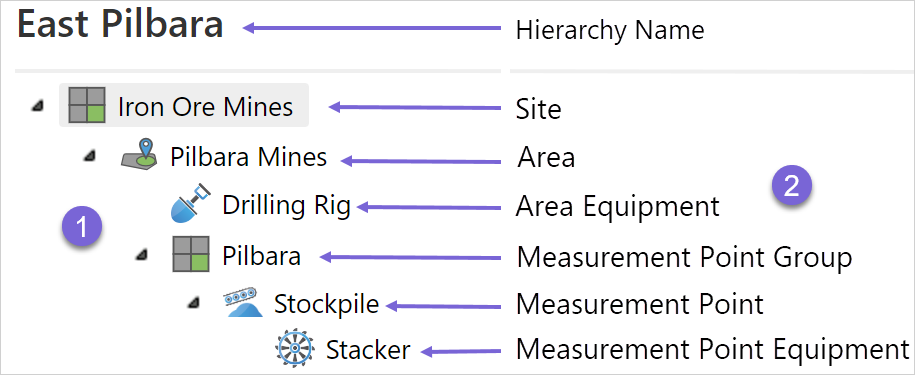
| 1. Entities | Entities in the hierarchy |
| 2. Type | The entity type is determined by the assigned secondary template |
The templates that can be assigned to an entity as a secondary template are:
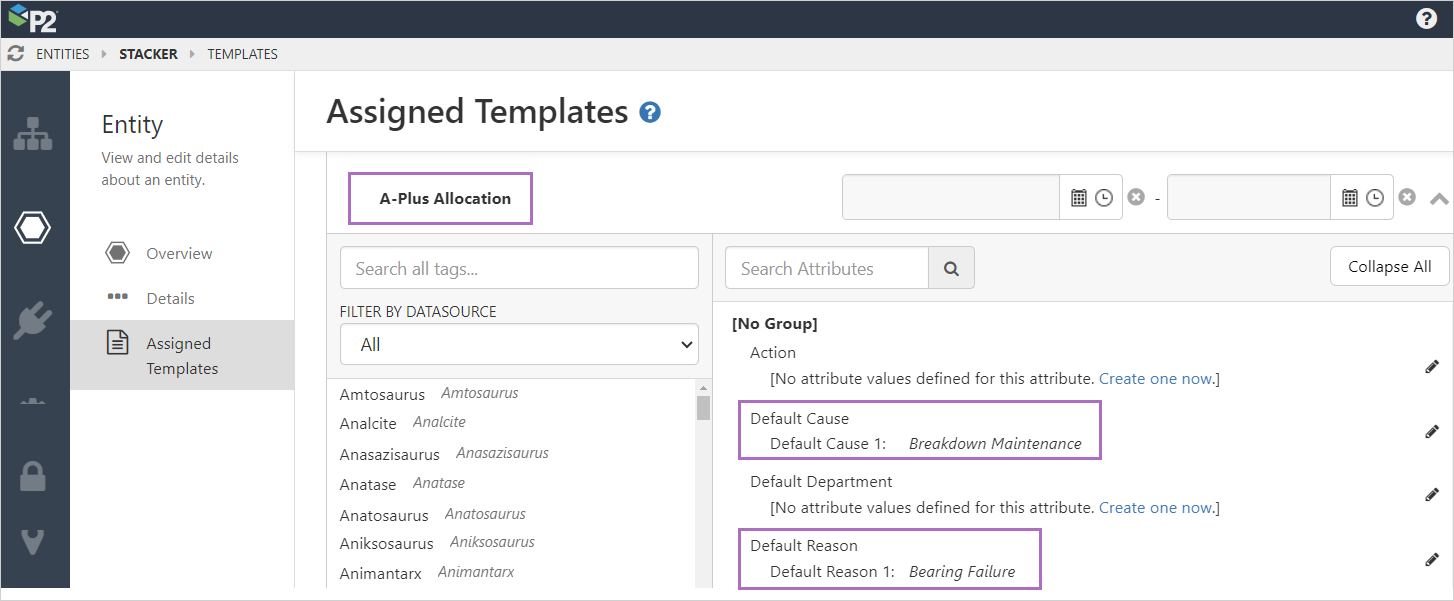
| A-Plus Allocation | Contains attributes for action, Cause, default action, default Cause, default Department, and default loss rate, to apply to an entity when events are raised. This should be applied to any Equipment entity (Measurement Point Equipment or Area Equipment) that is to be monitored using IFS OI Sentinel, and provides Causes and Reasons allocated from Server entities or tags. |
| A-Plus Area |
Assign this as a secondary template to entities that represent an area. |
| A-Plus Area Equipment |
Assign this as a secondary template to entities that are child nodes of an Area entity. It represents equipment that belongs to an area. Note: Area Equipment and Measurement Point Equipment are mutually exclusive. Note: If an entity is “Area Equipment” then it is expected to have a Primary Template that defines its Equipment Type. |
| A-Plus Measurement Point | Assign this as a secondary template to entities that represent a measurement point. |
| A-Plus Measurement Point Equipment |
Assign this as a secondary template to entities that are child nodes of a Measurement Point entity. It represents equipment that belongs to a measurement point. Note: that Area Equipment and Measurement Point Equipment are mutually exclusive. Note: If an entity is “Measurement Point Equipment” then it is expected to have a Primary Template that defines its Equipment Type. |
| A-Plus Measurement Point Group | Assign this as a secondary template to entities that represent a measurement point group. |
| A-Plus Performance | Assign this as a secondary template to entities that represent KPIs. Typically there would be a Target and an Actual measure applied so that the reports that show KPIs can fetch the values. This template is not strictly required for KPIs, however, as they can be configured to come from any template/attribute. E.g. A Crushing Plant may already have a tonnes per hour tag. |
| A-Plus Site | Assign this as a secondary template to entities that represent a site. Note that this is only intended for grouping purposes within the A-Plus hierarchy, and is not a main Site as configured under Server Management Sites. |
| A-Plus Summary Group | Assign this as a secondary template to entities that represent a summary group. This is an optional a grouping node that can contain similar equipment. This only affects the equipment selection screens in A-Plus. |
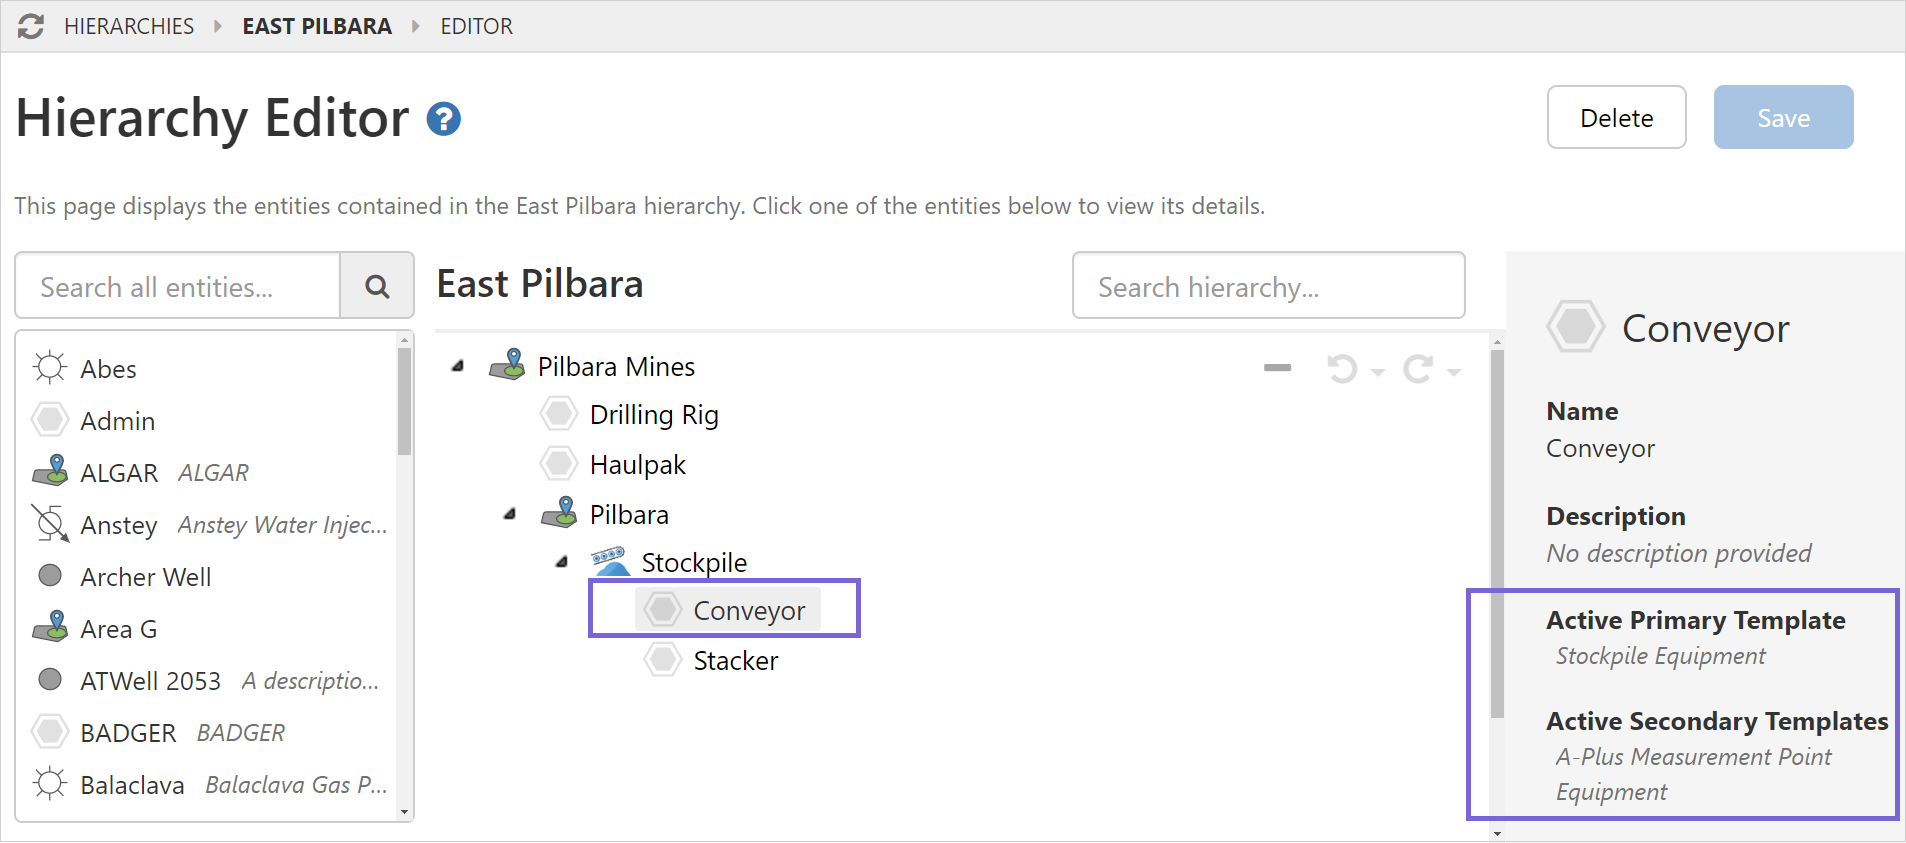
Note: Only one A-Plus template should be assigned to each entity in the A-Plus hierarchy.
In this example the entity Conveyor has the primary template Stockpile Equipment and the secondary template Measurement Point Equipment.
Assign Default Values with Allocation Template
Some attributes in the Allocation template can be used to fetch tag values and others to store default values as a string.
The attributes below are used for tag fetches and take precedence over the Default attributes.
| Attribute | |
| Sample Interval | Data type string, if no value is set will default to 60 second. |
| Sample Method | Data type string, if no value is set will default to "LastKnownValue". |
| Cause | Data type tag, point to tag to be queried for default value. |
| Reason | Data type tag, point to tag to be queried for default value. |
| Department | Data type tag, point to tag to be queried for default value. |
| Time Usage | Data type tag, point to tag to be queried for default value. |
Attribute Values for these attributes are used to store the default values, and must follow the allocation model configuration.
| Attribute | |
| Default Cause | Data type string. This value is used when no Attribute Values are defined for Cause. |
| Default Reason | Data type string. This value is used when no Attribute Values are defined for Reason. |
| Default Department | Data type string. This value is used when no Attribute Values are defined for Department. |
| Default Time Usage | Data type string. This value is used when no Attribute Values are defined for Time Usage. |
Attributes are assigned a default value in Server Management.
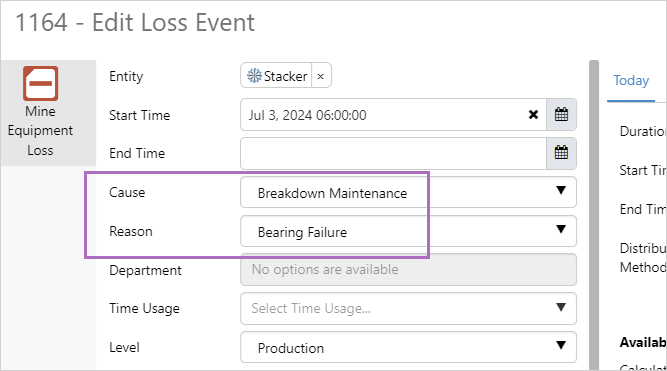
The default values are applied when a new or updated event is saved, if the allocation template is assigned to the entity.
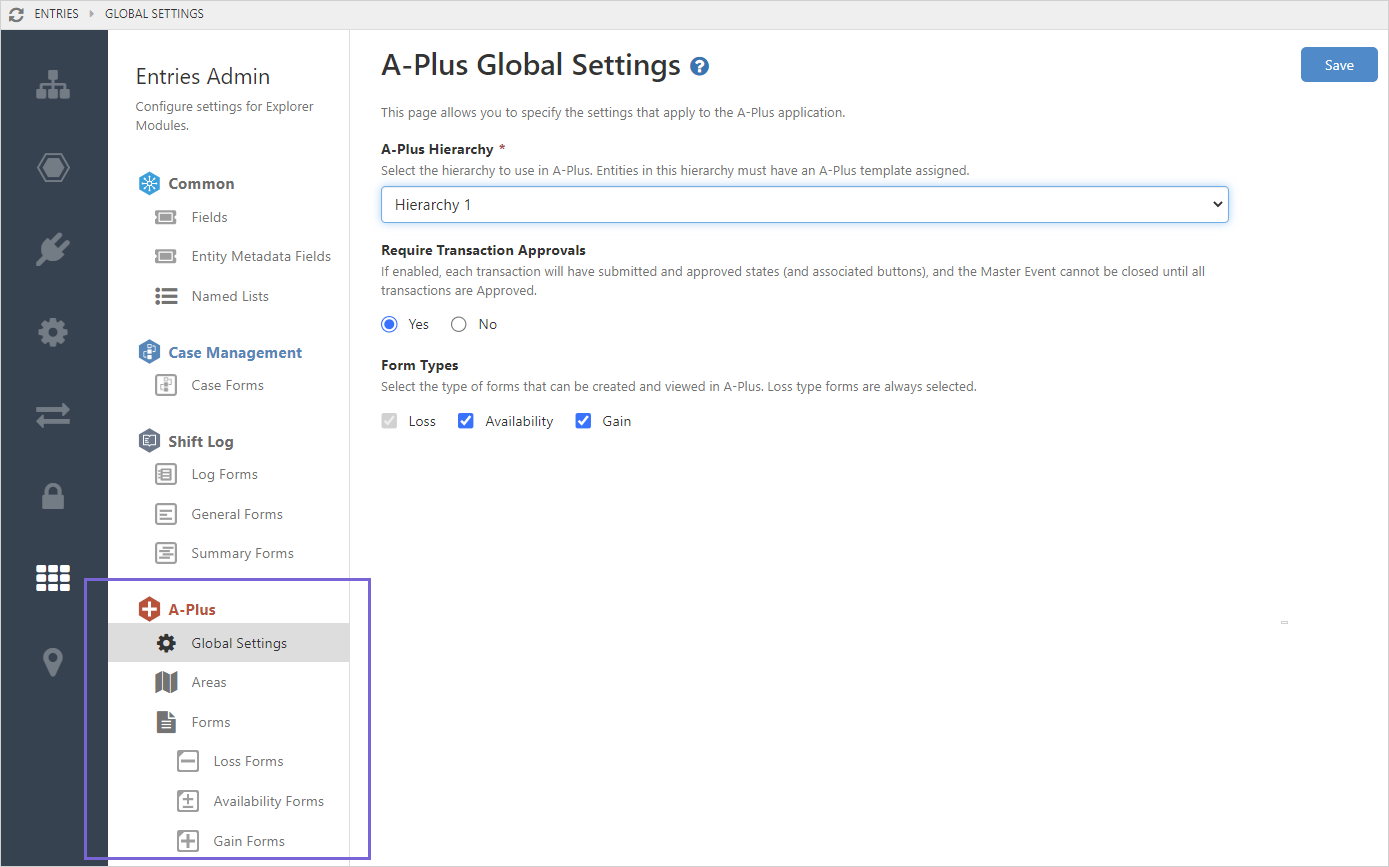
Entries Admin
Configuration settings that are specific to A-Plus are found on the Entries Admin ![]() page in Server Management.
page in Server Management.
|
Select the:
|
|
|
Areas are added to a site and assigned:
|
|
|
The Loss, Availability and Gain forms can be customised, alternatively, the forms can be used in their default configuration. There can only be one form of each type for each piece of equipment. |
Global Settings
These settings apply to the A-Plus application.
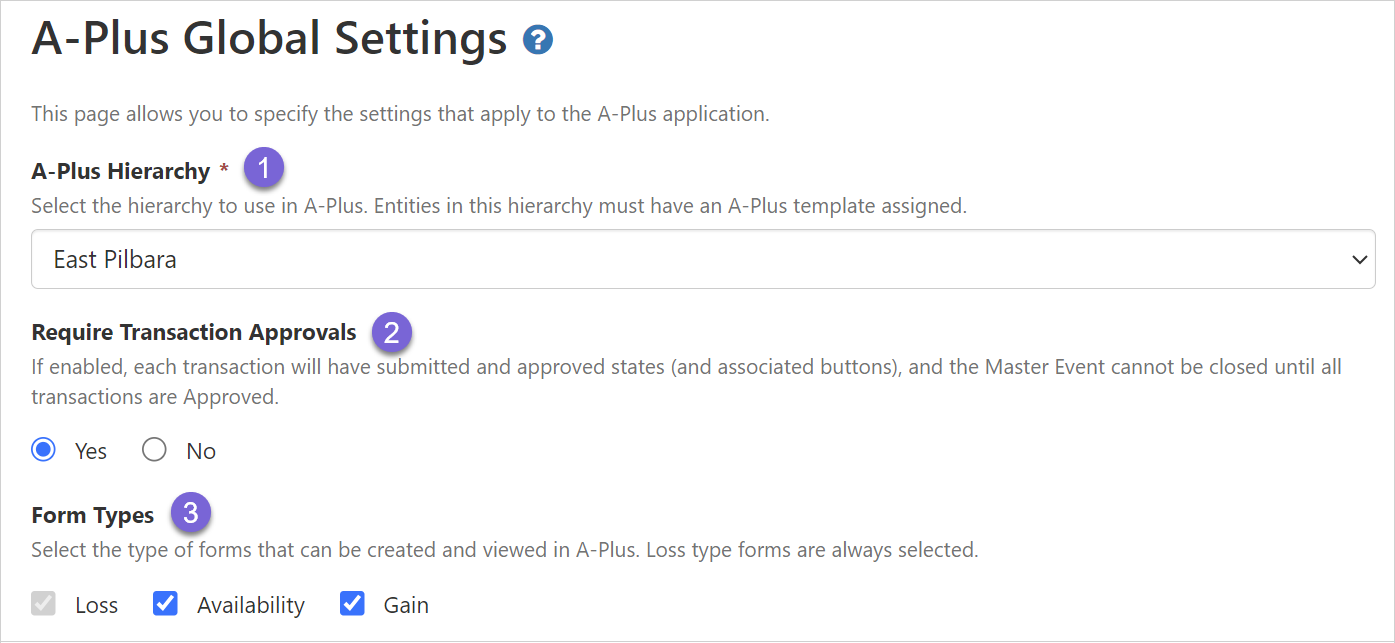
| 1. Hierarchy |
The name of the A-Plus hierarchy.
An A-Plus template must be assigned as the secondary template to entities within this hierarchy. |
||||||
| 2. Transaction Approvals |
When enabled, all transactions:
When disabled, all transactions:
|
||||||
| 3. Form Types | Select the types of forms that can be added, viewed and edited. The form types selected here are available when entering and editing events.
|

Areas
Areas are added to sites and determine the:
- Form that is used for new events
- Shift period that is used to create master event transaction records
- Hierarchy node used as the starting point for equipment selection in events
- Roles that can access the area's events
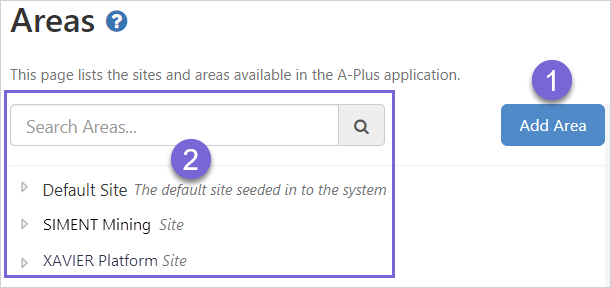
| 1. New Area | Click on Add Area to open the Area Details. |
| 2. Existing Area | Use the search, or expand the list of sites below the search, to find the required area. |
Area Details:
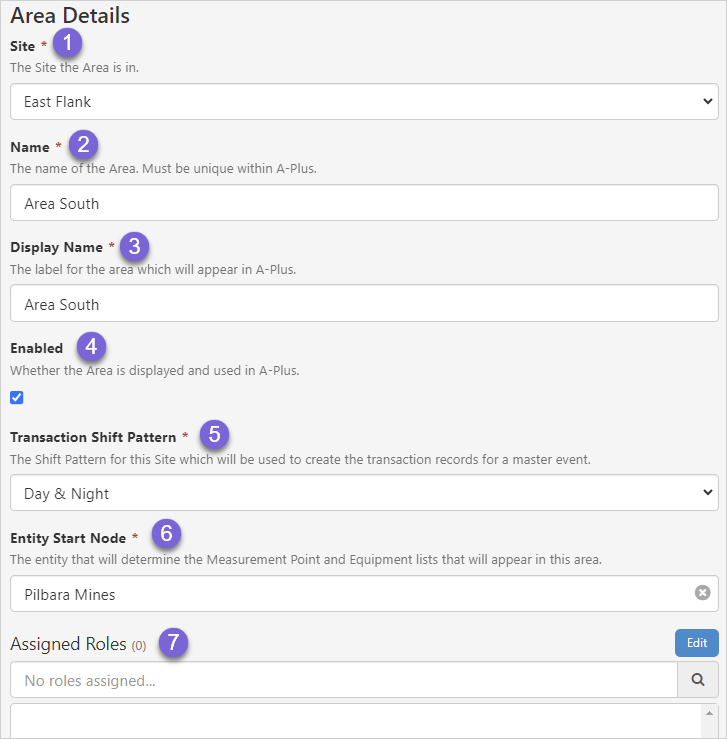
| 1. Site | The site the area is located at. |
| 2. Name | The unique name for the area. |
| 3. Display Name | The label for the area. This label will be used to represent the area in A-Plus. |
| 4. Enabled | Whether the area is used and is visible in A-Plus. |
| 5. Transaction Shift Pattern |
A shift pattern from the selected site must be assigned to the area. The period of the selected shift determines the period of each transaction record in a master event.
|
| 6. Entity Start Node |
Entity start nodes:
Note: An area entity that is part of the nominated hierarchy, is selected as the Entity Start Node when a site area is configured. Both the area entity and the site area are different items and can have the same or different names. |
| 7. Assigned Roles | Only users with the assigned roles will be able to see the area in A-Plus. |
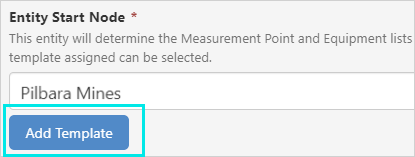
Entity Start Node
An area entity from the hierarchy is assigned to the Entity Start Node in the site area configuration. This part of the hierarchy then forms the equipment hierarchy in A-Plus for that particular site area, and is known by the name of the site area.

| 1. Hierarchy | A-Plus hierarchy. Pilbara Mines is an A-Plus area entity. |
| 2. Site Area configuration | The area entity Pilbara Mines is assigned to site area, Area South. |
| 3. Equipment hierarchy | The Equipment hierarchy from the A-Plus event dialog. Area South is a site area. |
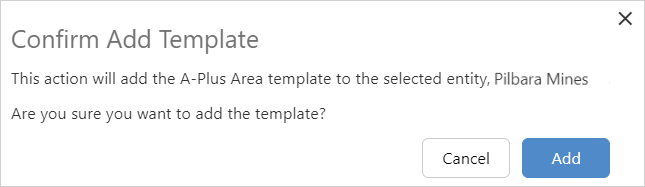
Any entity which belongs to an A-Plus hierarchy and isn't assigned to a different area can be selected as the Entity Start Node. If the entity selected does not have the A-Plus Area template assigned, the Add Template button can be used to add it automatically.
After clicking Add Template you will be asked for confirmation.
Forms
There are three types of forms that can be used to create events, Loss, Availability and Gain forms.

For each, the form can be used in its default configuration or it can be customised as required.
Each form type is designed for a different type of entry and has different system fields.
The form used by the event dialog is automatically selected according to the:
- Area and Equipment Type that have been selected in the form configuration
- Equipment selected in the dialog
Note: There can only be one form of each type, Loss, Availability and Gain, for each piece of equipment (entity).
Release History
- How to Configure A-Plus (this release, 4.17):
- Entity Start Node for Area