A Form defines both the type of entries that will be created, and the fields that the entries will contain.
Forms are configured by administrators in Server Management and are used in A-Plus, Case Management and Shift Log.
Types of Forms
The different types of forms are designed for different purposes and have different default and mandatory fields. All form types can have any number of fields in addition to the default fields.
There is only one copy of each form, and of all the entries that have been added using the form. This means that a particular Case Form viewed in Case Management contains the same entries as when that same form is viewed in a Shift Log page.
Here's a quick guide to help you understand the difference between the different form types:
| A-Plus: | Loss Form | Availability Form | Gain Form | |||
| Purpose | Used to represent periods when the actual capacity, of a piece of equipment or a process, is less than forecast capacity. | Used to represent periods when the equipment, or process, is unavailable. | Used to track and account for production that exceeds capacity. | |||
| Default Fields |
All A-Plus forms are populated with the same default fields.
Read more: A-Plus Form used in Entry Dialog. |
|||||
| Case Management: | Case Form | |||||
| Purpose | Designed to be used for ongoing issues. These forms are used in Case Management and in Shift Log. | |||||
| Default Fields |
|
|||||
| Shift Log: | Log Form | General Form | Summary Form | |||
| Purpose | Designed to be contained within a shift. The Event Time determines what shift these entries will appear in. | These entries will appear in a Workbook until they are closed. They are not tied to a shift. | These are the destination forms for shared entries in a summary workbook. The summary tables they are displayed in can be configured to provide view access only to users. | |||
| Default Fields |
|
|
|
|||
In addition to the above default fields, all entries also contain the following system fields:
- Created By
- Created Date
- ID
- Last Modified By
- Last Modified Date
Creating a Form
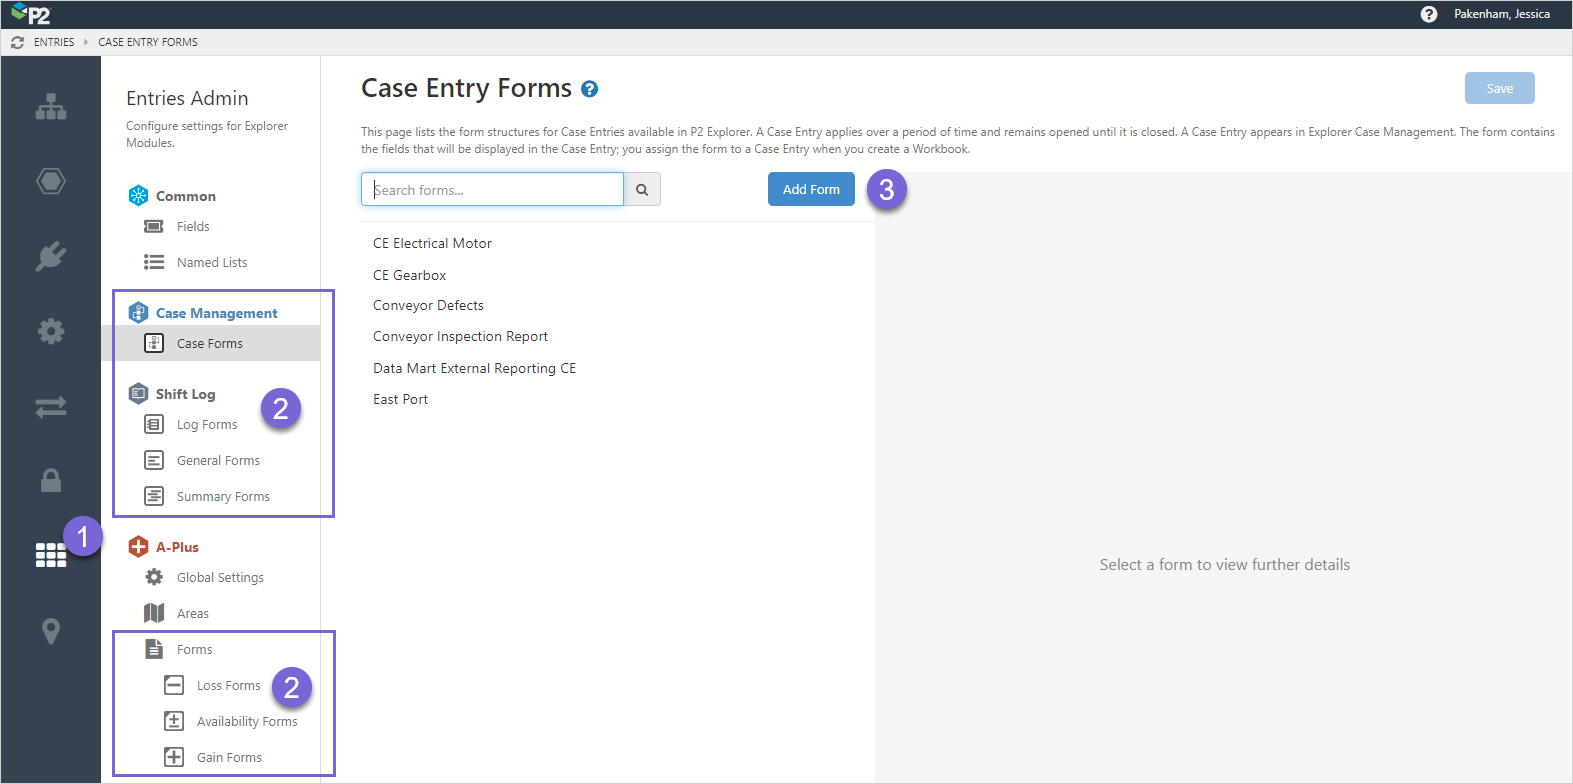
To create a new Form in P2 Server Management:
1. Open P2 Server Management and click the Entries Admin ![]() icon.
icon.
2. Click the form type of the form you wish to create.
In the following example a Case Form type has been selected.
3. Click Add Form, or click on an existing form in the list to edit its details.
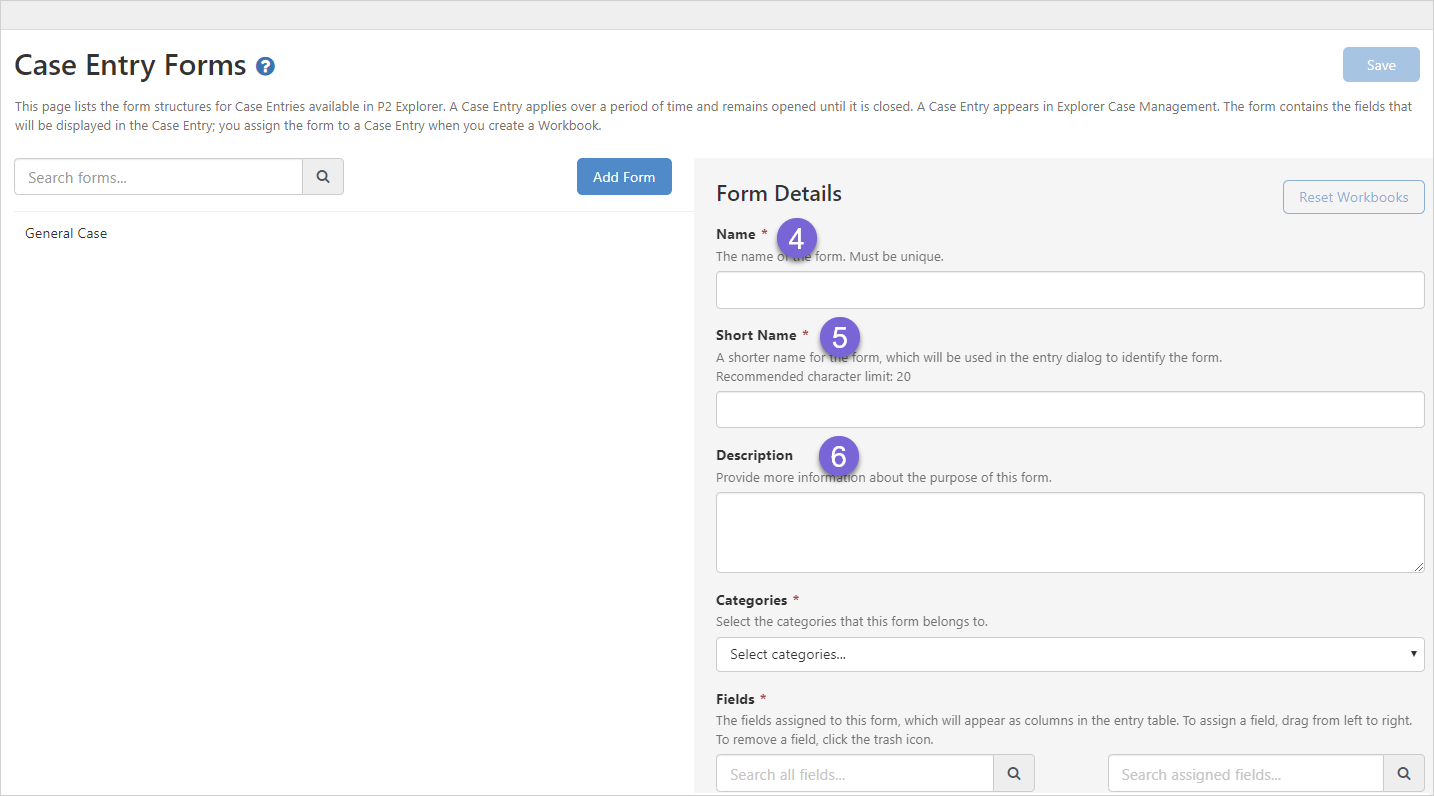
4. In the Form Details section that opens on the right, enter a unique Name that does not contain any reserved characters..
5. Enter a Short Name that will be used to identify the form in the entry dialog.
6. You can also provide a Description to explain what the form is about and how it should be used.
7. When configuring a Case Form, you need to select the Categories the form belongs to. This means that the list of available forms in Case Management will be filtered by the category selected in the dialog.

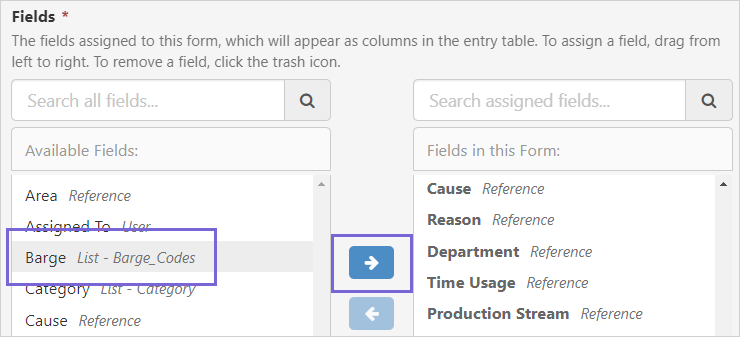
8. Next, choose the Fields that you want to appear in the entries that use this form.
The available fields are listed on the left, and the fields contained in the form are listed on the right. Fields that are bold cannot be removed from the form, however fields can be hidden from display if required.
To add a field to the form, first select the field on the left and then click the right arrow to add it to the form.
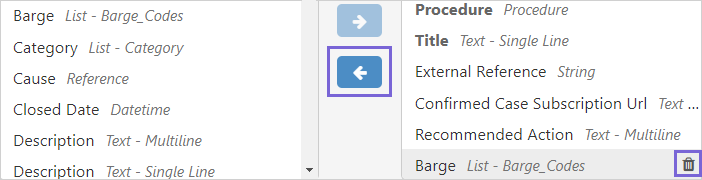
Fields can be deleted from the form by selecting the field and clicking on the left arrow, or by clicking on the trash can beside the field.
At this point, you can save the form and start using it in the relevant application.
9. The form's configuration can be refined further by:
- Specifying default behaviours for the form
- Refining how the fields appear in the table view
- Refining how the fields appear in the entry form dialog
- Adding instructions - this applies to Shift Log only
- Creating a Field Set
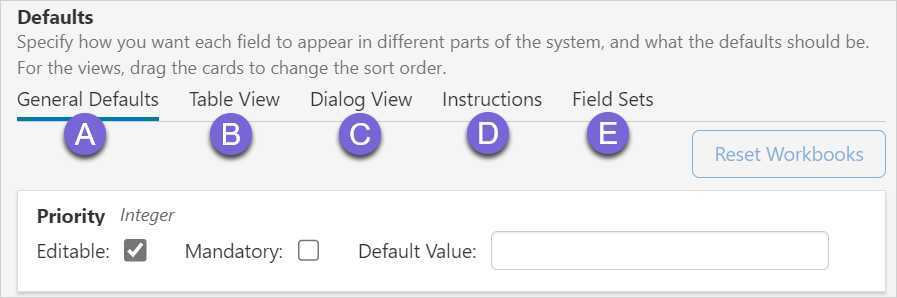
A. On the General Defaults tab, for each field you can specify:
- Editable - users will be able to edit this field in the entry form dialog
- Mandatory - this will be a required field in the entry form dialog
- Default Value - what, if any, the default value should be for the field.
Caution: Mandatory fields must also be either Editable, have a Default Value or both.
B. Click the Table View tab to specify:
- Hidden - the field will not be shown in the entries table
- Width (px) - you can optionally specify a default width for the column of this field in the entries table. If the column is blank, a default width will be calculated
- Sort order - click and hold each "card" to use drag and drop to change the sort order
Note: The order of the fields in the Table View and Dialog View is not related to the order of the fields in the assign fields box.
C. Click the Dialog View tab to specify:
- Hidden - the field will not be shown in the entry form dialog, which means that users will not be able to change the field's value. Note if you hide a field, you need to specify a default value if the field is deemed mandatory
- Depending on the type of field, other options may be available, such as the maximum number of characters for a single line text field, the height for a multiline text field, or Hide Formatting Toolbar
- Only show when - set the conditions for hiding or displaying the field in the dialog. The field is displayed when the value of the list field equals or does not equal, the predetermined value.
- Sort order - click and hold each "card" to use drag and drop to change the sort order
D. Select the Instructions tab to add information about a field. Fields that have added instructions are indicated by the clickable info ![]() icon to the right of the field in the dialog view.
icon to the right of the field in the dialog view.
Note: Instructions are only viewable in the Shift Log dialog.
E. From the Field Sets tab you can add or edit Field Sets.
Field Sets can be used to create named list value hierarchies to implement decision tree processes.
10. The order of the fields can be changed in both the Table and Dialog Views.
Watch the following video to see how to sort the fields.
11. When you have finished, click the Save button in the top right corner.
You can now use the form.
Note: that Explorer must be reloaded for this form to become available.
Conditional Fields
Whether a field appears in the dialog view of a form is determined by the conditional statements added to the field in Server Management.
Multiple condition statements can be used and are also found in the Entries Search and when Filtering Logs.
To configure the condition, select the Dialog View tab and the Only show when checkbox.

| 1. Field | Any list or Boolean field in the form can be used in the condition statement. | ||||||||||||
| 2. Operator |
Operators available for single select lists and Boolean fields are:
Operators available for single select list fields only are:
Operators available for multi-select list fields are:
|
||||||||||||
| 3. Value |
Select the field value that will determine if the condition is met.
|
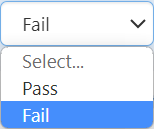
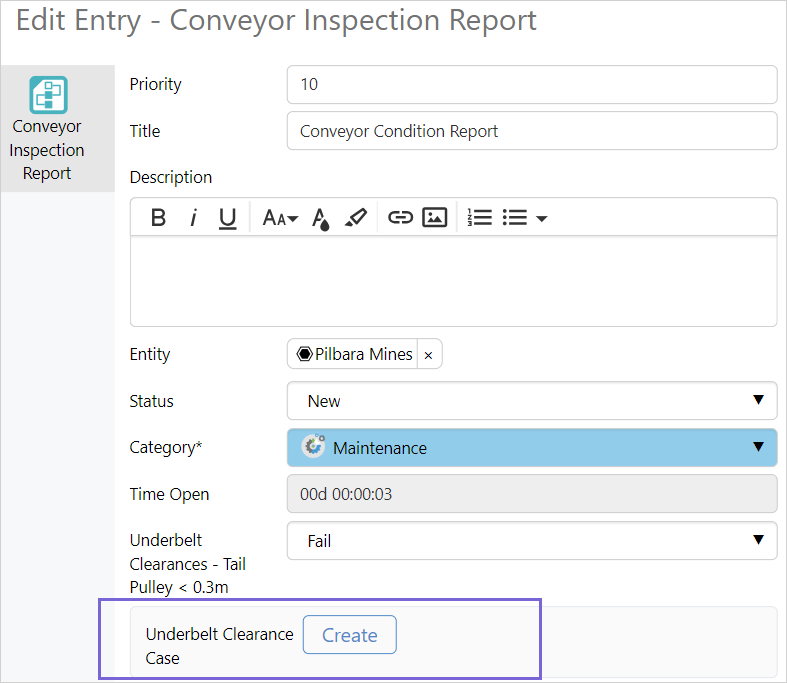
The Underbelt Clearance Case field is only displayed when the condition 'Underbelt Clearances - Tail Pulley < 0.3m Equals Fail' is met:
Release History
- Forms (this release, 4.14):
- Entries Admin
- A-Plus 4