ON THIS PAGE:
Sites, with defined shift and swing patterns, and reporting periods, are used in A-Plus and Shift Log.
Each site can be configured differently and can have, for example, multiple shift patterns.
Adding a Site
1. Open Server Management and click the Sites ![]() icon.
icon.
If you are creating a site for the first time, you will see a Default Site seeded into the system. You can choose to edit the default site, or add a new one.
2. Click Create New Site, or click the Default Site to modify it.
Note: To edit an existing site, use the Search function to filter the list of sites and select from the displayed list.

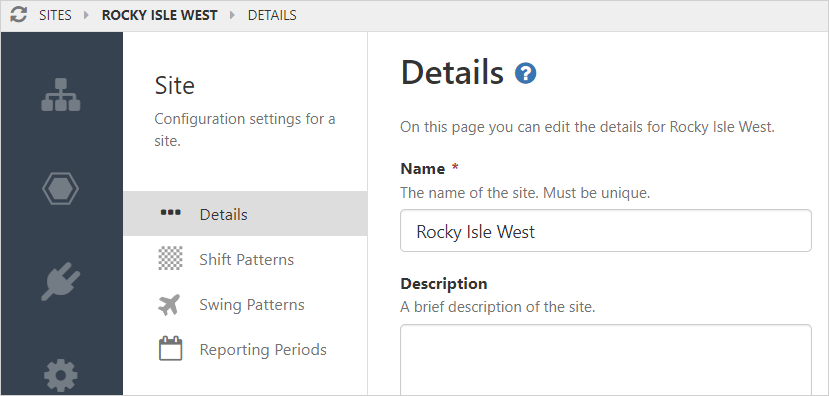
3. Fill in the Name and Description fields. Note, the name cannot contain reserved characters.
4. The browser time zone is selected as the site time zone by default and can be changed as required.

5. Save the site by clicking the Save button in the top right corner.
Saving the Site activates the Shift Patterns, Swing Patterns and Reporting Periods menu items.
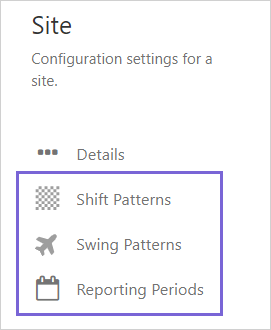
| Shift Patterns | Displays the list of available shift patterns, and the option to add a new shift pattern. |
| Swing Patterns | Displays the list of available swing patterns, and the option to add a new swing pattern. Note, swing patterns are only used in Shift Log. |
| Reporting Periods |
The reporting periods can be customized and are only available in the A-Plus shift picker.
|
Assigning a Default Site
A default site can be selected, and will be assigned automatically to all new Workbooks.
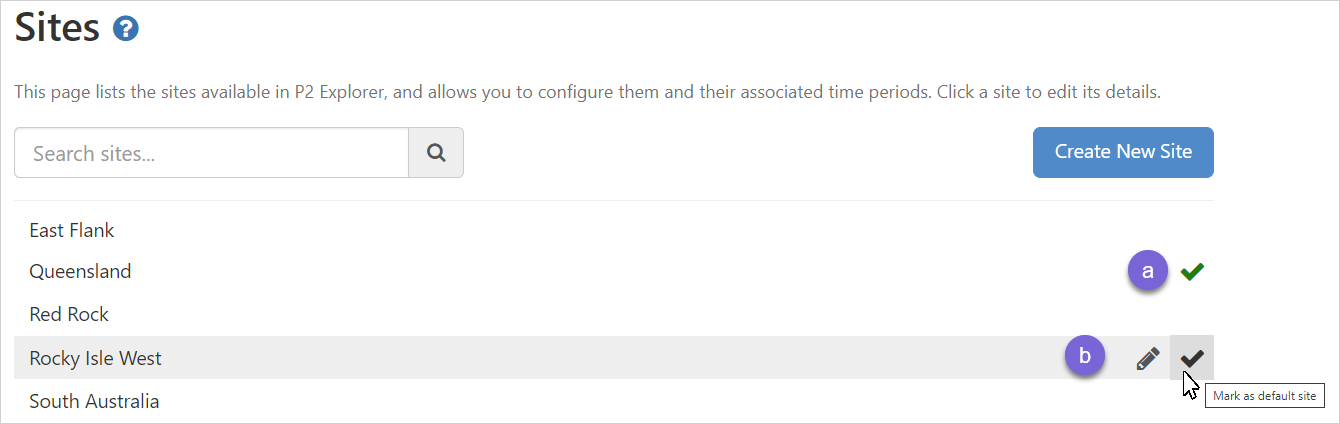
| a. | A green check mark |
| b. | When you hover over a site, you have the option to select the:
|
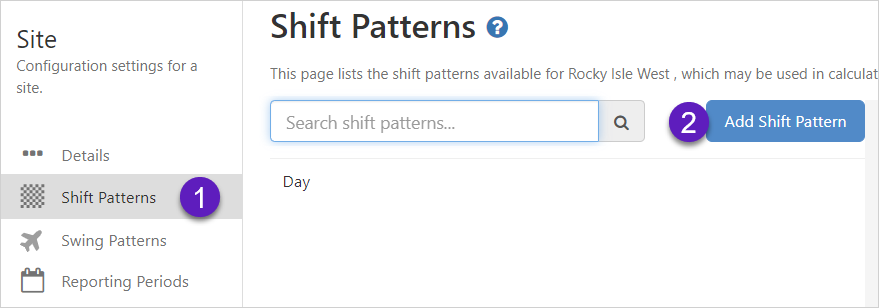
Adding a Shift Pattern
A shift pattern is a 24-hour period divided into equal portions of time, with the start time being the time the first shift starts. You can also specify the length of the shifts in the pattern. Shifts can be 6, 8, 12, or 24 hours long.
To add a shift pattern:
1. Click Shift Patterns.
2. Click Add Shift Pattern.
3. Fill in the Shift Pattern Details.

| Name | The name of the shift pattern. The shift pattern name will be listed in the Workbook settings when the site is selected. |
| Description | Provide an optional description for the shift pattern. |
| Time Zone | Site time zone information. |
| Start Time | The starting time of the first shift E.g. 07:00 |
| Shift Length | The shift duration, in hours. The shift length determines how many shifts there are in a 24-hour period. |
| Shifts | The number of rows shown depends on the shift length.
Each shift is named by default. Enter a new shift name if required. Disable a shift by clearing the Enabled checkbox. |
| Default Shift Pattern | A shift pattern can be specified as the default pattern for that site, and it will appear as the default shift in Workbooks. This is used by shift-based calculations. |
4. Click the Save button.
![]()
The Shift Pattern is added to the list below the search box, select from the list to edit a particular shift pattern.
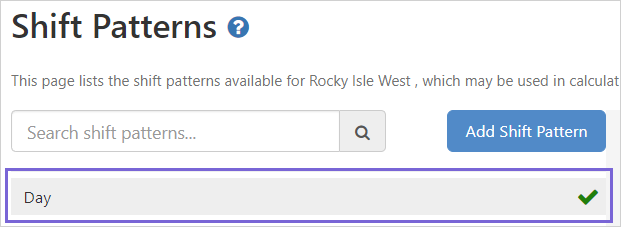
A green check mark on the right side of a shift pattern, indicates that the shift pattern is the default pattern for the site.
Hover over the right side of a selected shift pattern, and click the check mark to select, or deselect the shift pattern as the default pattern.

Adding a Swing Pattern
A swing pattern details the number of work days, the number of days off, and the starting date of the swing. Each work group will follow a particular swing pattern, and each swing pattern can be assigned to multiple work groups.
Note: Swing patterns are a feature of Shift Log only.
To add a swing pattern:
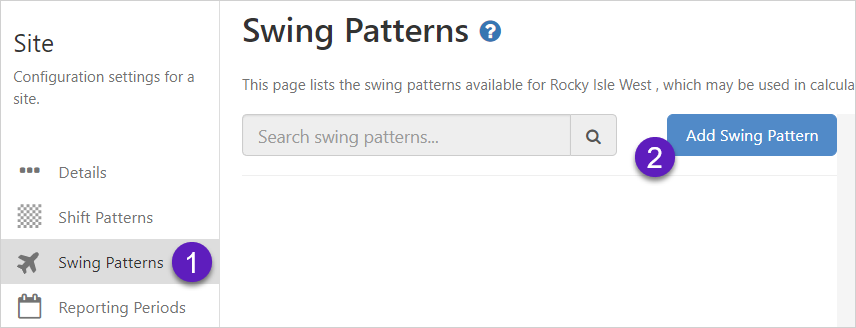
1. Click Swing Patterns.
2. Click Add Swing Pattern.
3. Fill in the Swing Pattern Details.
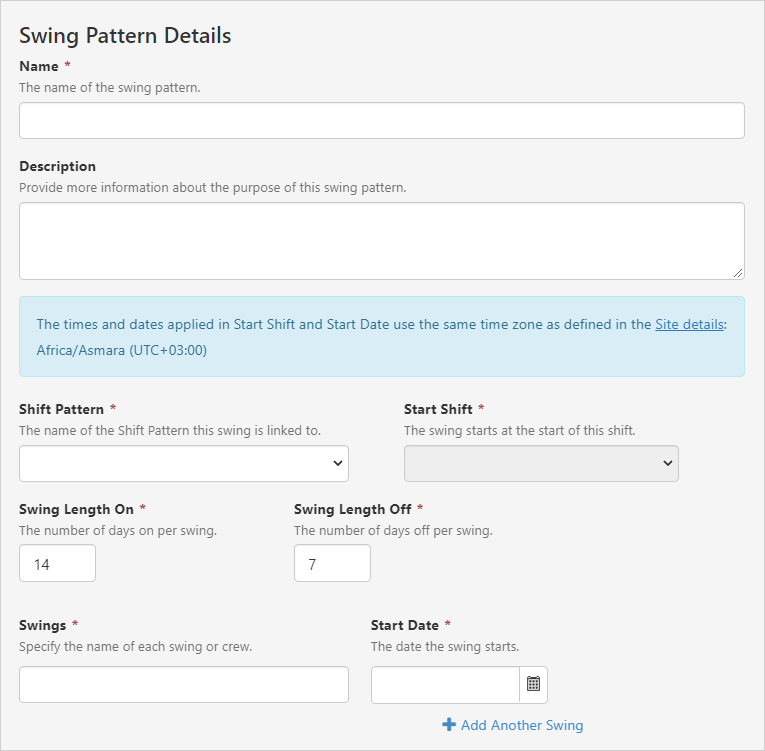
| Name | The name of the swing pattern. The swing pattern name will be listed in the workbook settings when the site is selected. |
| Description | Provide an optional description for the swing pattern. |
| Time Zone | Site time zone information. |
| Shift Pattern | The name of the shift pattern the swing is linked to. |
| Start Shift | The name of the first shift of the swing. |
| Swing Length On | The number of consecutive work days per swing |
| Swing Length Off | The number of consecutive days off per swing. |
| Swings | Name of the swing, or the work group on the swing. |
| Start Date | The date of the first work day of the swing. |
| Add Another Swing | Add another swing or work group to the swing pattern. |
4. Click the Save button.
![]()
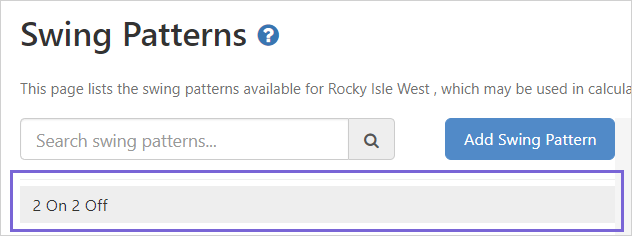
The Swing Pattern is added to the list below the search box. Select from the list to edit a particular swing pattern.
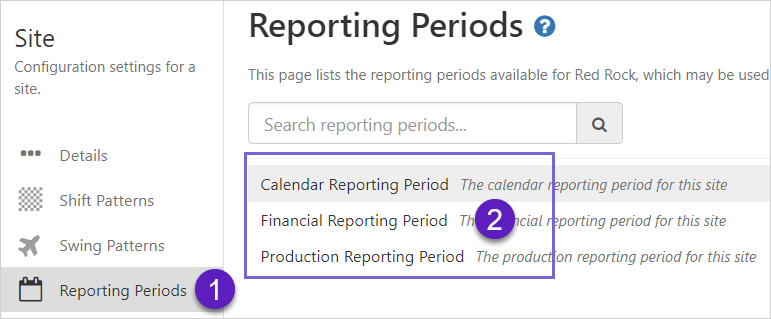
Editing Reporting Periods
The reporting periods are a selection of time periods that can be set to reflect the starting time, weekday and month for a:
- Calendar reporting period
- Financial reporting period
- Production reporting period
Note: Reporting periods are a feature of A-Plus only.
To edit a reporting period:
1. Click Reporting Periods.
2. Select the reporting period you wish to edit.
3. Update the Reporting Period Details.
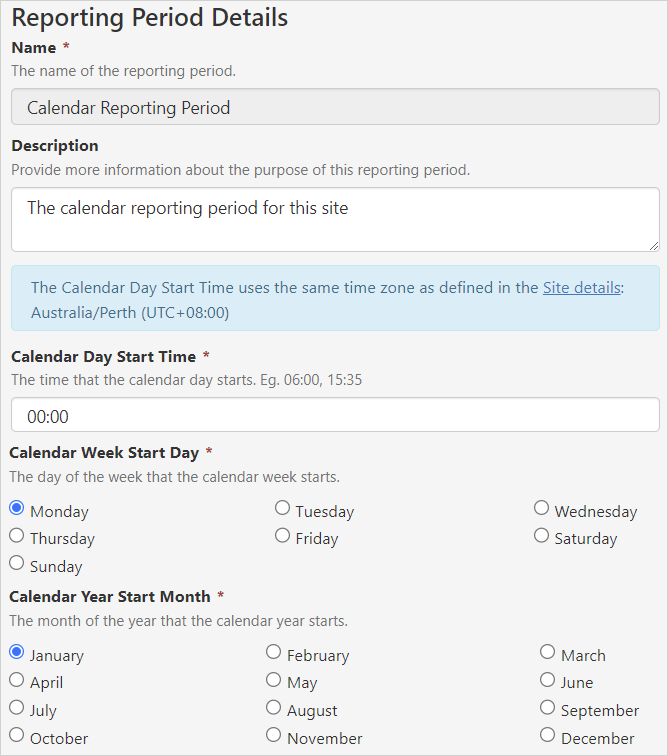
| Name | The name of the reporting period. | |||||||||
| Description | An optional description for the reporting period. | |||||||||
| Reporting Period Type | Reporting Period Parameters | |||||||||
|
||||||||||
4. Click the Save button.
![]()
Release History
- Sites, Shifts and Swings 4.14 (this release)
- Entries Admin
- Reporting Periods
- Sites and Shift Patterns 4.9.10
- Sites and Shift Patterns 4.7