Case Management is all about activities and changing statuses surrounding events for cases that have been manually raised in Explorer or Shift Log, and those raised in source applications such as IFS OI Sentinel.
A Case Management page.
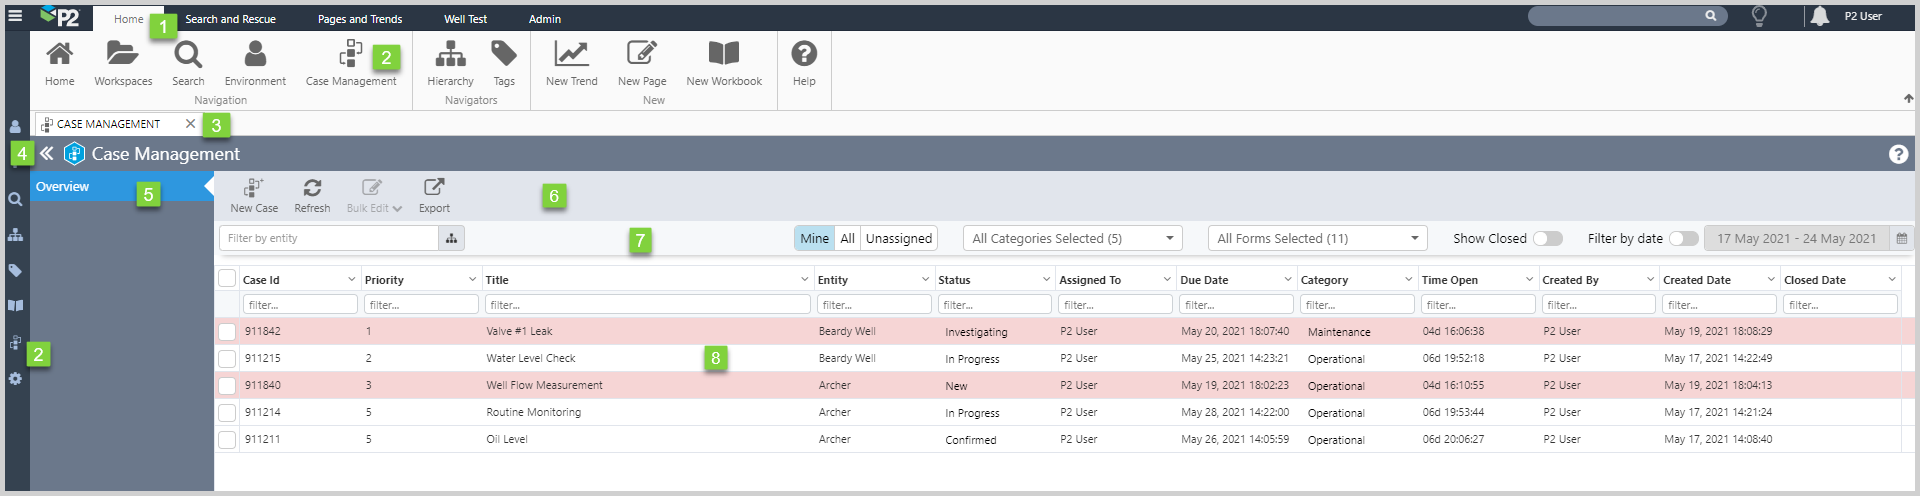
| 1. | Explorer Ribbon | The Home Tab on the Explorer Ribbon. |
| 2. | Case Management | Click on the Case Management |
| 3. | Display Tab |
When you open Case Management a new display tab is opened. Click the × to close the display. |
| 4. | Hide Pages List | Click on the double chevron to hide, or display the list of Case Management pages. |
| 5. | Pages | List of Case Management pages. Pointer indicates the active page, which is highlighted in blue. |
| 6. | Functional Toolbar |
The functional toolbar contains the functions available for the selected page. The Overview page contains buttons to add a new case, refresh the table, perform bulk editing of cases, and access the export function. |
| 7. | Filter Bar |
The filter bar contains options for filtering the cases displayed in the Cases Table. |
| 8. | Cases Table |
The Cases Table shows all the cases for the selected Case Management page. Within the table you can sort, group, and filter the cases by the column data fields. |