ON THIS PAGE:
Overview
The Entity Selector allows a user to select one or more entities from a list. The user can either use a search bar to search for entities by name, or use a filter to find the entities in a hierarchy.
The Entity Selector can be used as an alternative to the Hierarchy control when:
- You want to limit the number of selections a user can make. For example, you may want the user to only be able to select 3 entities.
- You want to filter the hierarchy to only show entities of a specific type.
- You want the hierarchy to start from a specific child node.
You should not use the Hierarchy control and Entity Selector on the same page. Doing so may result in unexpected behaviours.
Configuring an Entity Selector
The Entity Selector component now uses infinite scrolling instead of paging, which means less clicking for the end user. Remember to limit large result sets, using the ‘Search entities’ keyword filter option, as well as ‘Find under’ to search for entities under a node.
Basic Mode
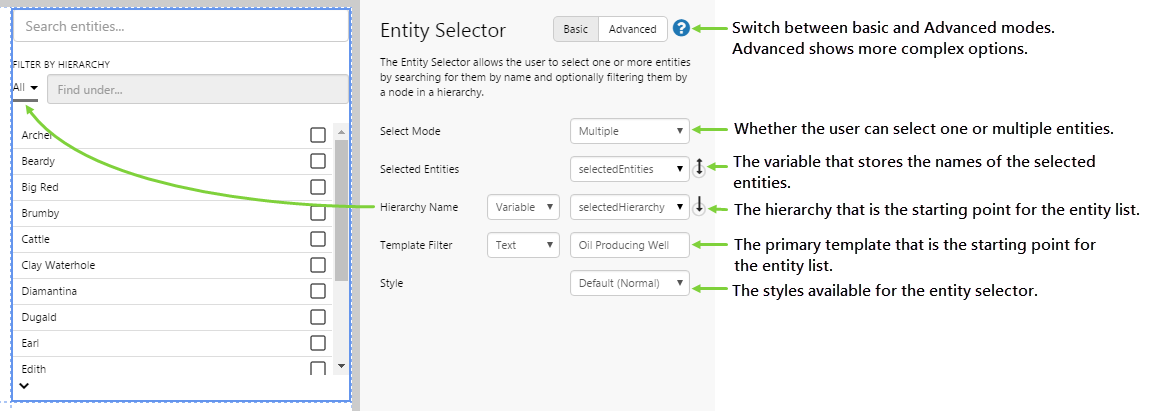
| Select Mode: | Single or Multiple. Defines whether the user will be allowed to select a single entity, or multiple entities. |
| Selected Entities: | The variable that is generated when a user selects an entity or entities from the list. If the Select Mode is Single, this variable becomes selectedEntity. |
| Hierarchy Name: | This can be a variable or text field. It contains the name of the hierarchy that is the starting point for the list of entities that is initially displayed in the component. The entities are displayed in a flat list. |
| Template Filter: | This can be a variable or text field. It contains the name of the primary template by which entities are filtered in the component. This requires some knowledge of the asset model in P2 Server. Only entities of this type will be displayed, even during searches. |
| Style: | The style you want to apply to the Entity Selector component. If you are a Style Administrator, you can add a new Entity Selector style. |
Advanced Mode
Advanced mode has 2 additional fields.
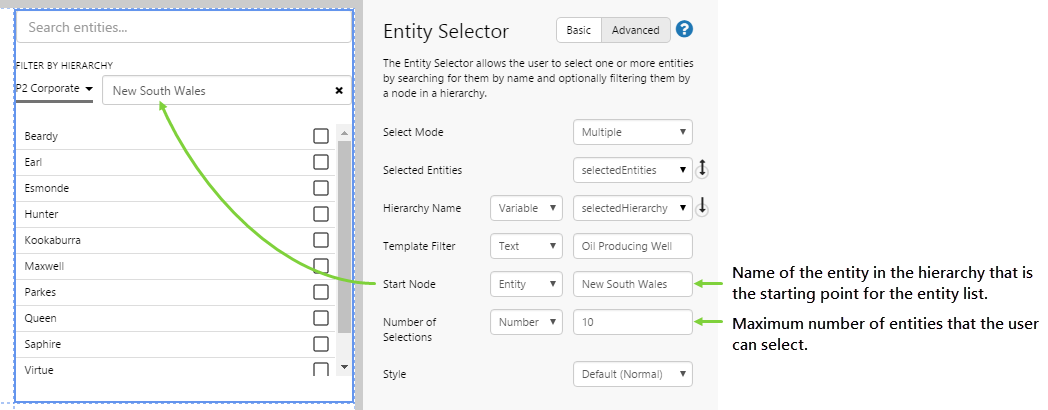
| Start Node: | The name of the node in the hierarchy that is the starting point for the list of entities that is initially displayed in the component. Only the children of this node will be displayed. |
| Number of Selections: | The maximum number of entities that a user is able to select from the available list of entities. If you want the user to only select a single entity, you should not specify more than 1, otherwise you may get unexpected behaviours. |
Tutorial: Adding an Entity Selector that Drives a Pie Chart
If you're unfamiliar with the process of building pages, read the article Building an Explorer Page.
In this tutorial, we'll look at adding an Entity Selector to a page, which will allow the user to only select a single entity. We'll also add a Pie Chart to show how using the Entity Selector can affect another component on the page.
Now, let's look at how we're actually going to do this, step-by-step.
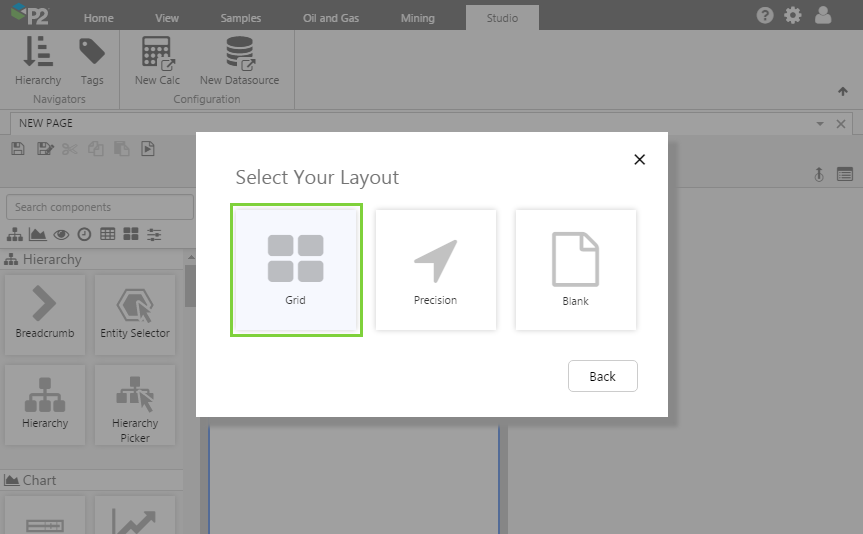
Step 1. Prepare a Studio Page
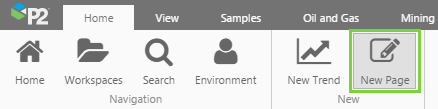
Before you start, click the New Page button on the Home tab of the ribbon. Choose the Grid layout.
Step 2. Add the Entity Selector to the Page
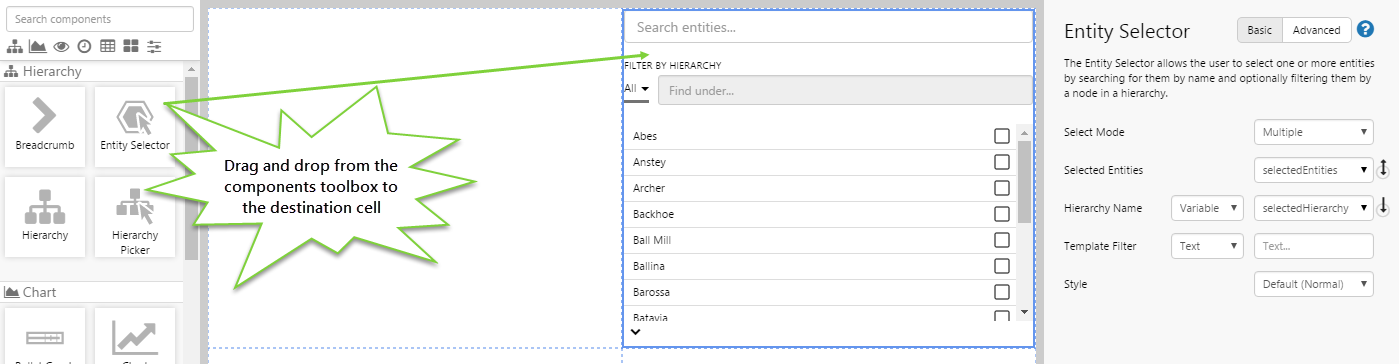
Drag and drop the Entity Selector component onto a grid cell. The Entity Selector is in the Hierarchy ![]() group.
group.
Step 3. Configure the Entity Selector
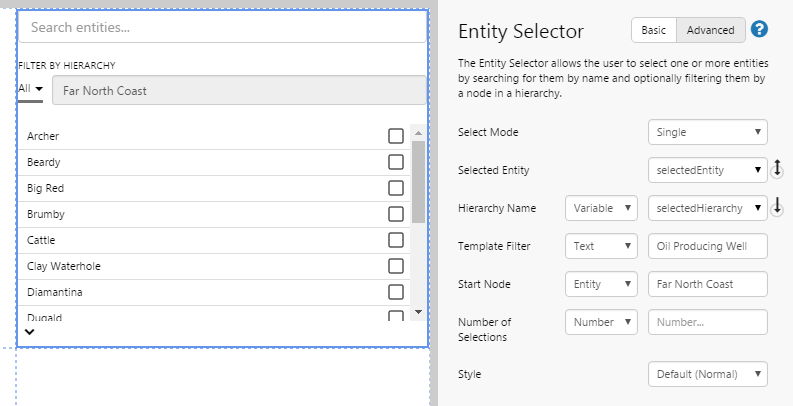
In this step, we want to create an Entity Selector that will allow the user to select a well from a specific point in the hierarchy. We need to use the Advanced configuration for this.
Click the Advanced button, and configure the fields as follows:
- Select Mode: Single
- Selected Entity: selectedEntity (this will automatically be populated)
This is the variable that the Entity Selector uses to store the name of the entity that the user selects. - Hierarchy Name: (Variable) selected Hierarchy
This is the variable that the Entity Selector uses to determine the hierarchy that will be displayed. - Template Filter: (Text) Oil Producing Well
Only entities that have this template will be displayed in the component, even when using the Entity Selector's search capability. - Start Node: (Entity) Far North Coast
Only entities that are children of this node, as well as having the Oil Producing Template, will be initially displayed. - Number of Selections: (leave this blank)
Step 4. Set the Default Values
If you don't set any default values, the Entity Selector will show all the entities in all the hierarchies in one flat list. But let's say we want to present a particular hierarchy when the page is first loaded. We can do this here. We can also specify the entity that will always be selected by default when the page is loaded.
You should specify the default values for the selected hierarchy and entity to guide the user in selecting the relevant assets.
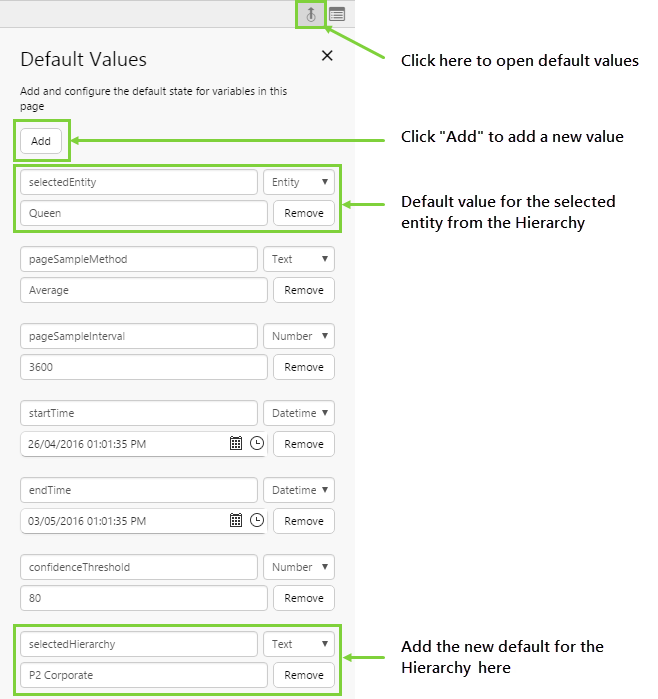
Let’s change the default data that is displayed. We are interested in 2 variables: selectedEntity and selectedHierarchy.
- Click the Default Values button on the Studio toolbar.
- selectedEntity is listed first, update it to specify "Queen".
- Click the Add button.
- Add a variable called selectedHierarchy with a type of Text. Type in the hierarchy name: P2 Corporate.
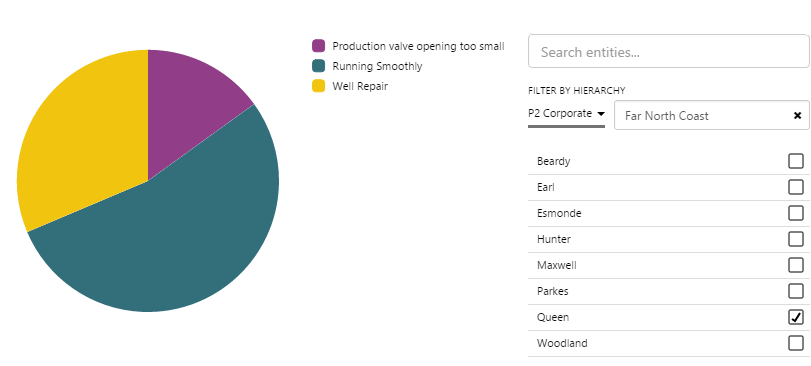
You should now see the Entity Selector filter change to the default hierarchy, and the check boxes selected for the default entity.
Step 5. Add and Configure a Pie Chart
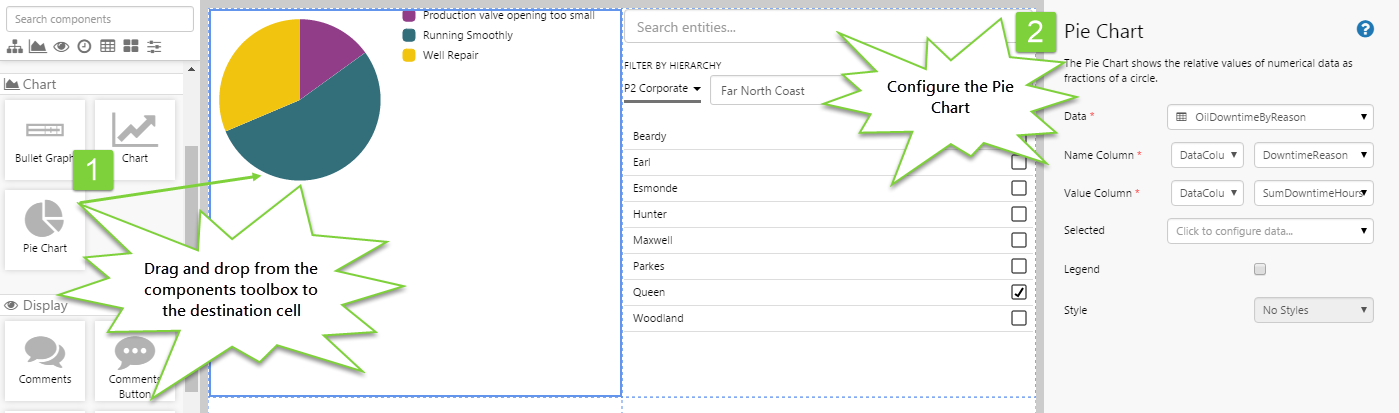
Let's add a pie chart that will make use of the data. This Pie Chart will show the downtime for the selected well.
Drag and drop the Pie Chart component onto the upper left grid cell, and configure it as follows.
- Data: Click the field to use the Data Selector. Staying on the Dataset Query
 tab, type OilDowntimeByReason.
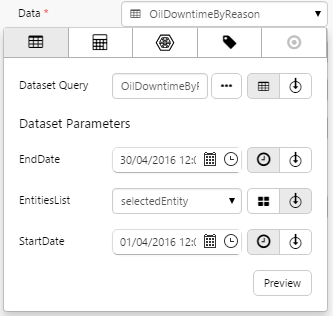
For the Dataset Parameters, enter a StartDate and EndDate that are a month apart (e.g. 1-30th April).
For EntitiesList, click the variable button and choose selectedEntity.
- Name Column: DowntimeReason
- Value Column: SumDowntimeHours
Step 6. All done!
Congratulations! You now have a fully functioning Entity Selector that updates a pie chart when you select different entities.
- Click the preview
 button on the Studio toolbar to see what your page will look like in run-time.
 - Choose different entities and see the pie chart change.
![]() Don't forget to save your page!
Don't forget to save your page!
Release History
- Entity Selector 4.3.2