ON THIS PAGE:
Overview
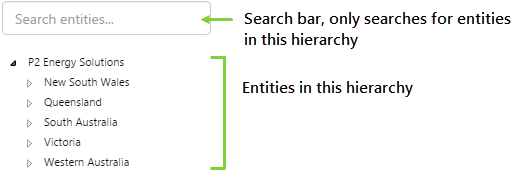
The hierarchy control allows a user to select an entity from a specific hierarchy. This control is often used in conjunction with the hierarchy picker.
First, the user selects the hierarchy from the hierarchy picker. The hierarchy control then makes the entities in that hierarchy available to the user, who will pick the entities they are interested in. Users can also search for entities in the hierarchy.
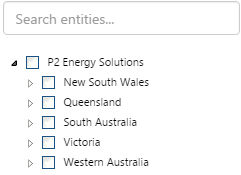
The following image shows 2 configured hierarchy controls. On the left, the user can select multiple entities, on the right the user can select only one entity:
 |
 |
| Multiple entity selection | Single entity selection |
Configuring Hierarchies
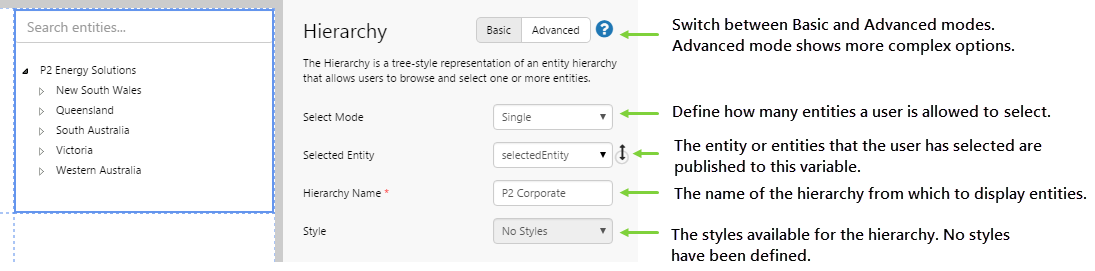
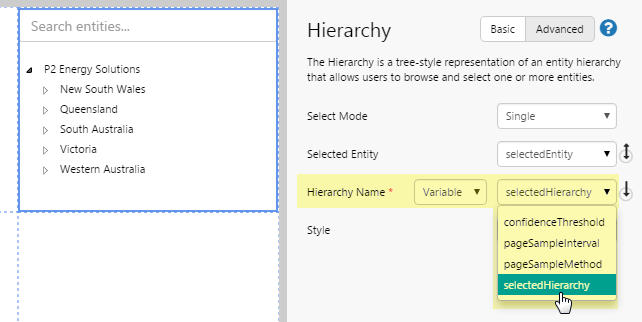
There are 2 configuration modes. Basic mode shows the options most commonly used. Advanced mode allows you to change the type of properties used.
Basic Mode
Advanced Mode
In Advanced mode, you have the option of choosing a variable to drive the Hierarchy Name. To do this, you first need to add the variable to the default values, then you will be able to select it from the drop-down list.
| Select Mode: | Single or Multiple. Defines whether you will allow the user to only select a single entity, or to select multiple entities. |
| Selected Entity: | The name of the variable that the hierarchy publishes to when the user selects an entity or entities. If the Multiple select mode is chosen, this will change to "Selected Entities". This variable will contain the entities that are selected, and other components (such as a chart) can read from this variable. |
| Hierarchy Name: | The name of the hierarchy from which to display entities. The hierarchy must already exist in P2 Server. |
| Style: | The style you want to apply to the Hierarchy component. If you are a Style Administrator, you can add a new Hierarchy style. |
Tutorial: Creating a Hierarchy That Drives a Pie Chart
If you're unfamiliar with the process of building pages, read the article Building an Explorer Page.
In this tutorial, we’ll look at adding a Hierarchy to a page, along with a Pie Chart. When the user selects entities from the Hierarchy, the Pie Chart updates to reflect data for the selected entities.
Let’s go through this process, step-by-step.
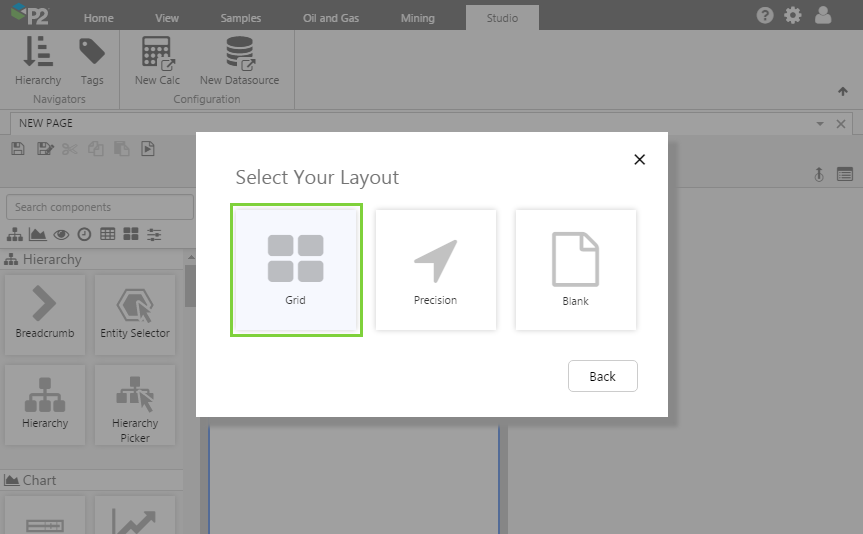
Step 1. Prepare a Studio Page
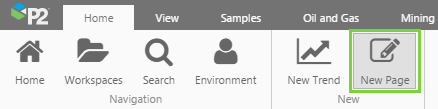
Before you start, click the New Page button on the Home tab of the ribbon. Choose the Grid layout.
Step 2. Add the Hierarchy to the Page
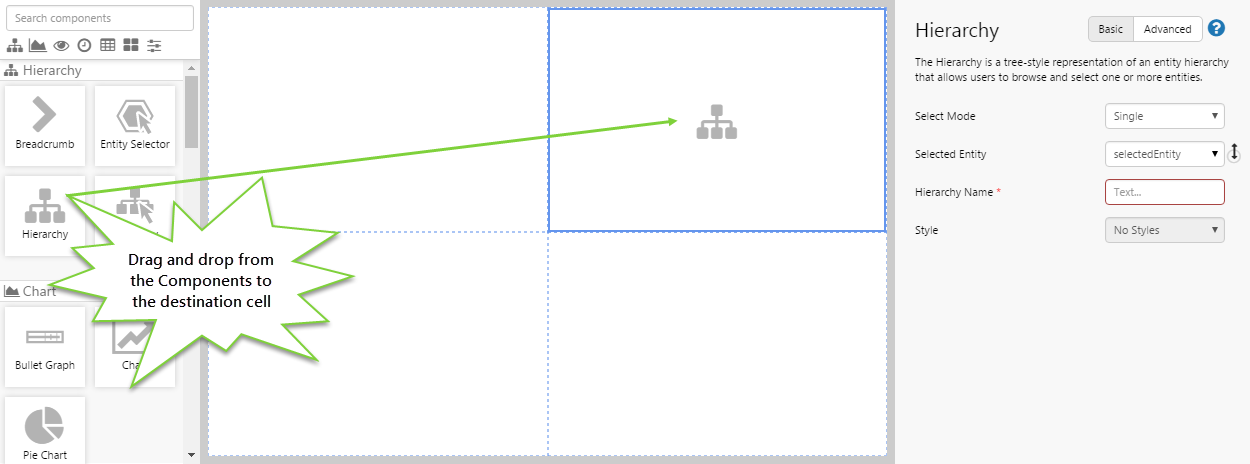
Drag and drop the Hierarchy component onto the upper right grid cell. The Hierarchy is in the Hierarchy ![]() group.
group.
Step 3. Configure the Hierarchy
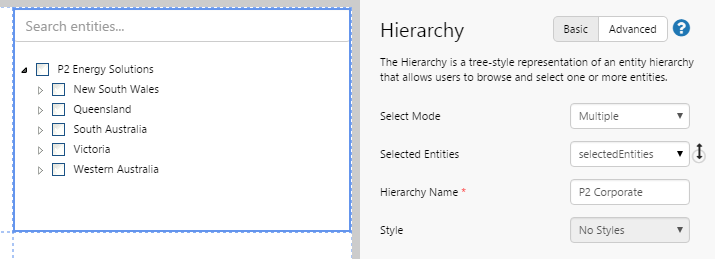
In this step, we want to allow users to select multiple entities from a hierarchy that we have specified. We can use the basic configuration for this.
Configure the settings as follows:
- Select Mode: Multiple
- Selected Entities: selectedEntities (this will automatically be populated)
- Hierarchy Name: P2 Corporate
Selected Entities is always a variable, so that other components on the page will dynamically update when the Hierarchy publishes the list of entities that the user has selected. This is often used to link components such as charts and tables.
Step 4. Add and Configure a Pie Chart
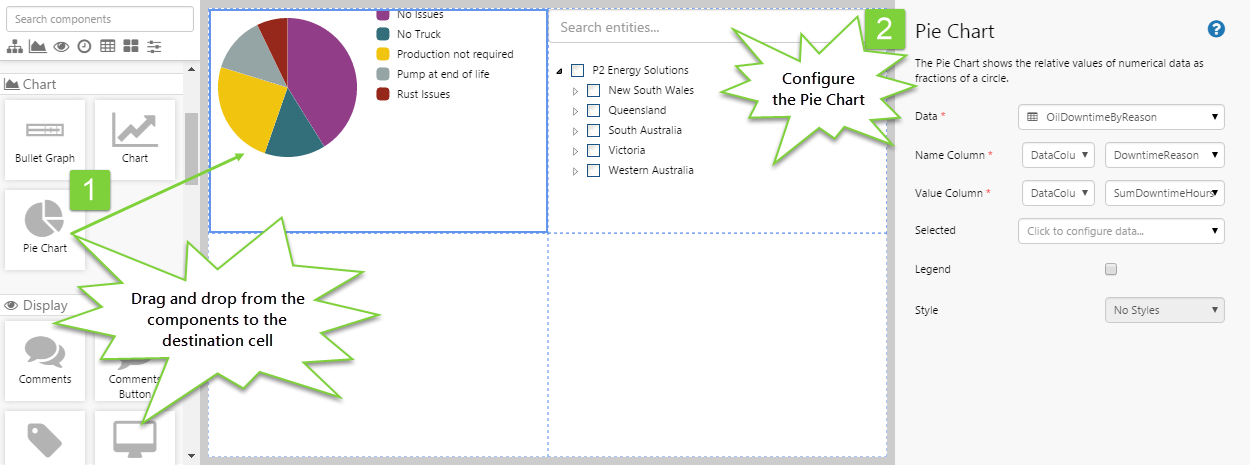
Drag and drop the Pie Chart component onto the upper left grid cell, and configure it as follows.
- Data: Click the field to use the Data Selector. Staying on the Dataset Query
 tab, type OilDowntimeByReason.

For the Dataset Parameters, enter a StartDate and EndDate that are a month apart (e.g. 1-30th April).
For EntitiesList, click the variable button and choose selectedEntities.
- Name Column: DowntimeReason
- Value Column: SumDowntimeHours
Step 5. Set the Defaults
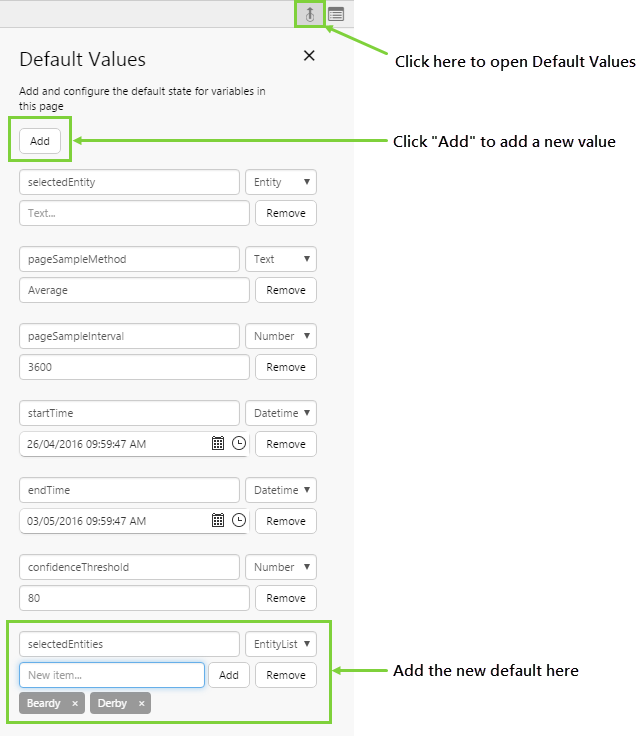
At the moment, the page shows the default values that have been set for the OilDowntimeByReason dataset in P2 Server. This may sometimes be misleading to the user, as they cannot see what the default values are.
You should specify default values for the selected entities so the user can understand what data is being displayed when the page first opens.
Let’s change the default data that is displayed. We do this by creating defaults for the variables specified in the components in the previous steps. The variable we are interested in is the selectedEntities variable.
- Click the Default Values button on the Studio toolbar.
- Click the Add button.
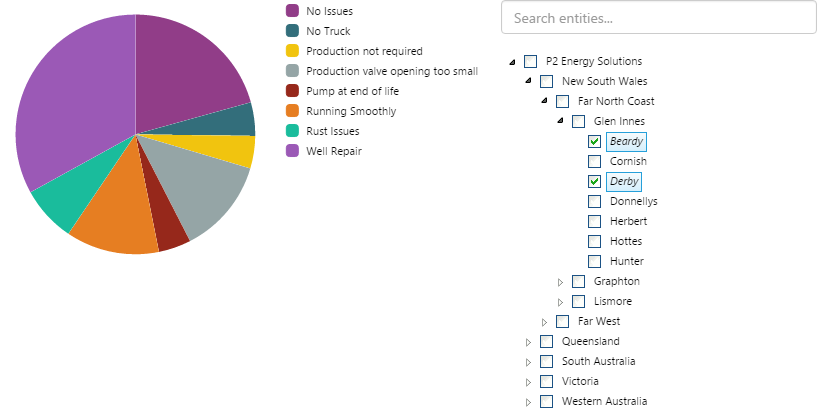
- Add a variable called selectedEntities with a type of EntityList. Type in the following entity names: Beardy, Derby.
You should now see the Hierarchy and Pie Chart update to reflect the new defaults.
Step 6. All Done!
Congratulations! You now have a fully functioning Hierarchy that allows the user to select a number of entities. When you select entities from the Hierarchy, downtime data for the selected entities is displayed in a Pie Chart.
![]() Don’t forget to save your page!
Don’t forget to save your page!