ON THIS PAGE:
Overview
Without Default Value
You can assign a default value to any variable on an Explorer page.
These defaults set the context of a page, and give it a finished look at run-time.

With a Default Value
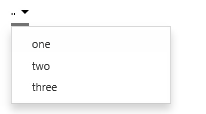
For example, a Combo Box should have a default value assigned to its Selected Option variable, otherwise there is no selection when the page opens, and the user has to make the selection. (Unless the page is opened via hyperlink, and the variable is set by variable mapping.)
Some Default Values
Default values can also be used for dataset variables, to ensure that queries run with useful variables as soon as a page is opened.
Trend Default Values
Trends also have default values, but these have been predefined and cannot be changed. For more information on trend default values, refer to the Variable Parameters section of Link to Trend via a URL.
Overriding Default Values
If you open a page or trend from another Explorer page using hyperlinks, you can pass values from the calling page, using Variable Mapping. If a value is mapped to a variable in this way, the default value is overridden.
For example, if you have page with a default period of November 2013, you can open the same page via a hyperlink, assigning that page's selected period, May 2015.
Page Default Values
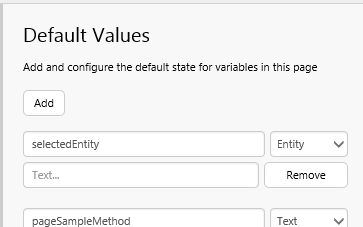
When you add a new page, several page default pairs (Variable Name and Default Value) are added as Page Defaults.
|
|
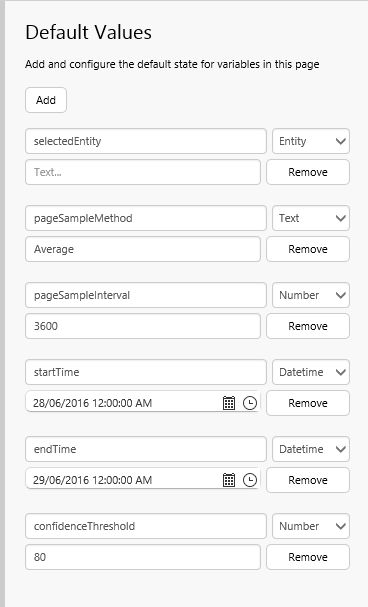
These default values are commonly used by various components, and related to tags and attributes. When you add new components to the page, these defaults are assigned to the relevant properties, allowing for consistency within the page and across various pages. (Note that if you change a default value for any of the page variables, you lose this consistency across pages).
For example, when you drop an attribute onto the page, its Sample Method, Sample Interval and Time properties use the page default variables of pageSampleMethod, pageSampleInterval and endTime, respectively.
Similarly, when you configure a chart to use tag data, the page defaults (pageSampleMethod, pageSampleInterval, startTime and endTime) are applied before you even define which tags to use.
| Example 1: Sample Method, Sample Interval and End Time for a data label's attribute. | Example 2: Sample Method, Sample Interval, Start Time and End Time for a data label's tag. | |
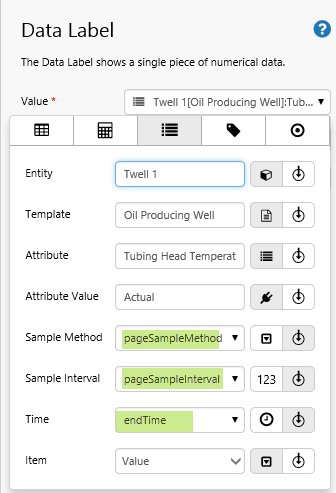 An attribute dropped onto a page (this uses the data label component) |
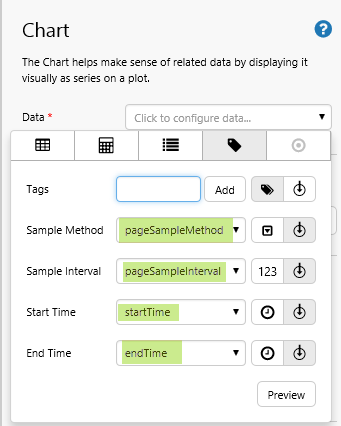 A Chart being configured to use Tag data |
Updating Default Values
You can open the Default Values panel and update the Variable Name or the Default Value for any default. See how this is done, in step 2 of the Tutorial.
Note: Check where the defaults are already being used, before editing.
Quick Start
This section explains how to set up a default value in two steps.
Open Default Values
The default value panel lists all of the defaults for a page. You can add, remove or change these here.
Click the Defaults button on the Configuration tab group of the Studio ribbon, to open the Default Values panel. To close the Defaults Panel click any button on the Configuration tab group.

What to Add
Find out what variables you have on the page, and then assign each of these a default value. You need to match the variable name and type (for example, Text), and the associated value should come from a set of options for that variable (for example, choose 'Jan' for variable selectedMonth).
Type in the variable name, select a type, and then type in the default value.
Tutorial: Adding a Default Value
In this tutorial, we're going to add Option Links, and then set a Default Value for its Selected Option.
Step 1. Add and Configure Option Links
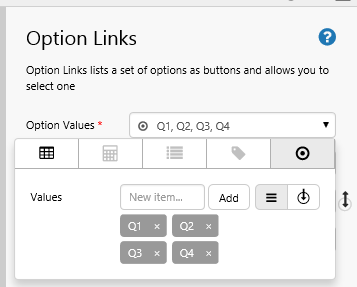
1. Drag an Option Links component onto the a grid cell.
2. Add the following Option Values: Q1, Q2, Q3, Q4, using Value ![]() data.
data.
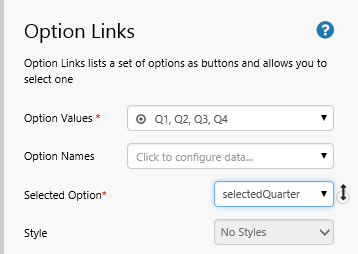
3. Type selectedQuarter in the Selected Option edit box.
This is how your Option Links should look in Studio.
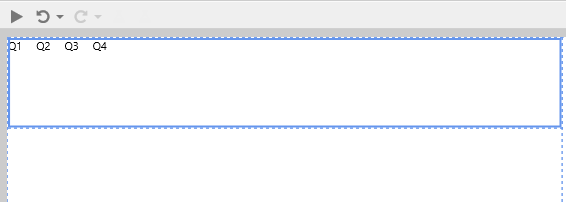
Note how none of the options is selected yet (there is no underlined option). We're going to change that in the next step, by adding a default value.
Step 2. Add a Default Value
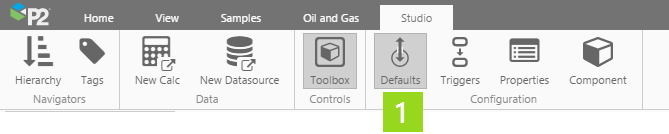
1. Click the Defaults button on the Configuration tab group of the Studio ribbon, to open the Default Values panel.
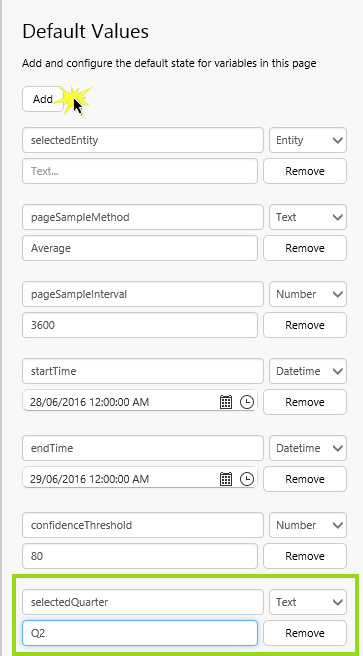
2. In the Default Values panel, click Add, scroll to the bottom of the default values list, then type a variable name, selectedQuarter, into the edit box, keep the Type as Text, and type a default value, Q2, in the second edit box.
Note: You can edit any of the defaults, by typing a new value in the applicable edit box of any default (the variable name and/or the default value).
3. Now look at the option links in preview mode.
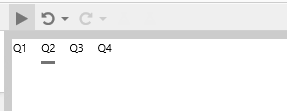
Note how Q2 is selected (underlined) in the Option Links. This will be the default value, each time a user opens this page during run-time.
Comprehensive Reference
This section describes the properties of the Default Value panel.
1. Click the Defaults button on the Configuration tab group of the Studio ribbon, to open the Default Values panel. To close the Defaults Panel click any button on the Configuration tab group.
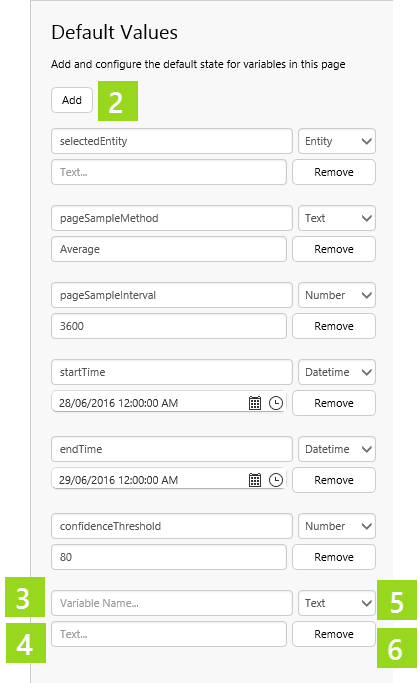
2. Click Add for every default value you want to add; variables used in the Explorer page, or as dataset parameters, can be referenced here by Variable Name.
3. Type in a variable name, matching a variable used on the page.
4. The default value should come from a set of valid values; for example, if you use a default value for a Combo Box, then the default value should be one the Option Values for that Combo Box.
5. Select a type from the drop-down list. This should suit the variable's use in other components. For example, choose Number for a variable that you will use for a threshold on the page.
6. Click Remove next to a default value that you want to remove.
Variable Types
The table below contains the different variable types you can use for default variables.
| Data Type | Examples of Usage |
| Text | The Selected Option for a Combo Box component; part of the Content for a Text Label component. |
| List | The Option Values or Option Names for a Combo Box or Option Links component. |
| Entity | The Selected Entity of a Hierarchy component; the Entity for a Data Label component's Value (if it is using attribute data). |
| EntityList | The Selected Entities of a Hierarchy component (using Multiple Select Mode); the Entities of a Data Table component's Data (if it is using attribute data). |
| Template | The Template for a Data Label component's Value (if it is using attribute data). |
| Attribute | The Attribute for a Data Label component's Value (if it is using attribute data). |
| AttributeValue | The Attribute Value for a Data Label component's Value (if it is using attribute data). |
| Tag | The Tag for a Data Label component's Value (if it is using tag data); the Tag for a Level Meter component's Upper Limit (if it is using tag data). |
| TagList | The Tags for a Data Table's Data component (if it is using Tag data). |
| Calculation | The Calculation for a Data Label component's Value (if it is using ad hoc calculation data). |
| CalculationList | The Calculations for a Data Table component's Data (if it is using ad hoc calculation data). |
| Number | The default selection (Selected Option) for a Combo Box component; the Value for a Data Label component's Value (if it is using value data). |
| Yes/No | The Hide Config Panel of a Pivot Table component. |
| Datetime | The Date/Time of a Current Date/Time Toggle component. |