ON THIS PAGE:
When new people start in your organisation, if you are using Windows Authentication, all users will automatically be added to P2 Security the first time they log in to P2 Explorer.
If you are not using Windows Authentication, you will need to manually add people as users in P2 Security.
Once a user has been added in P2 Security (either automatically or manually), they will automatically be included in the Everyone global role, which has read and modify permissions for all workspaces, pages, and trends in P2 Explorer.
Tutorial 1: Granting Users Permissions
Users are granted permissions by being assigned to global roles.
Step 1. Create the global roles
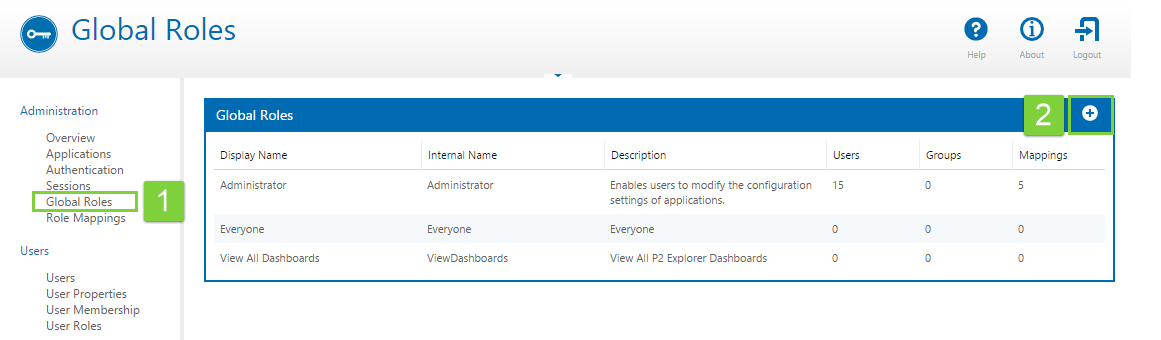
1. On the left, click Global Roles (under Administration).
2. In the top right of the blue toolbar, click the Add ![]() button .
button .
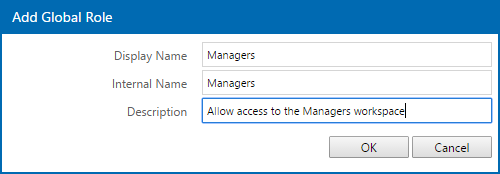
3. In the Add Global Role dialog box, type a name and description for the new global role, and then click OK.
Note that Internal Name is required, and it must be unique and contain no spaces.
Step 2. Assign users to global roles
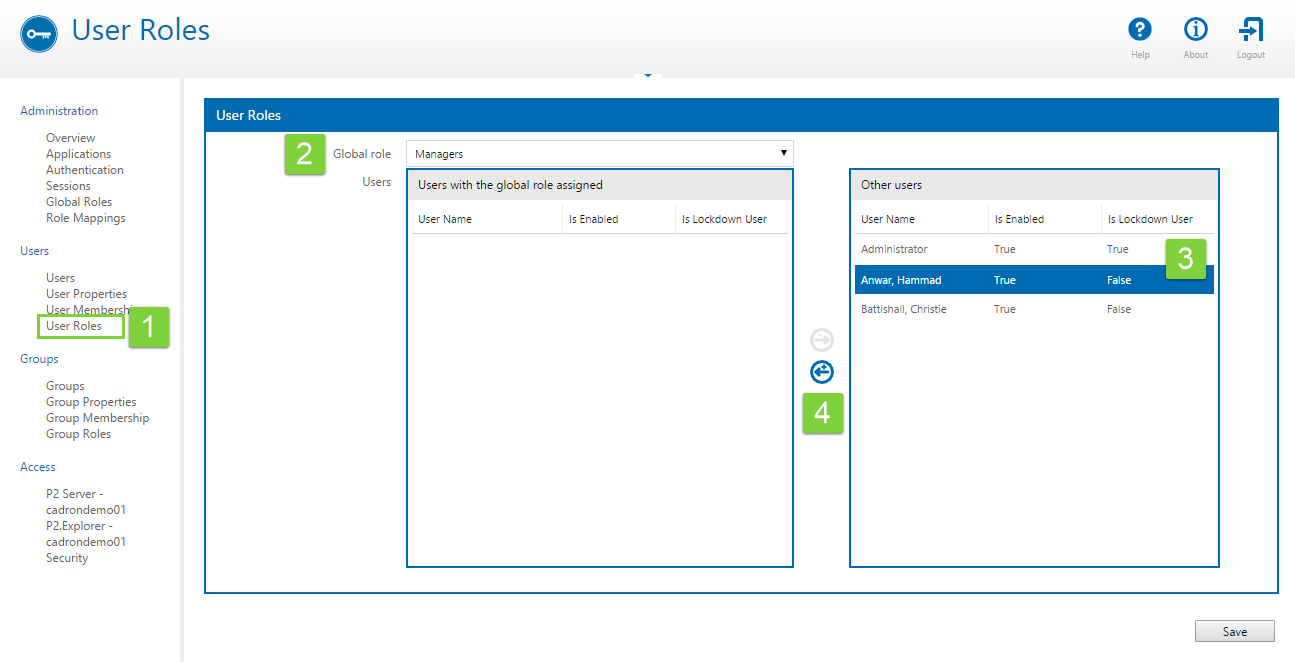
1. In P2 Security, click User Roles on the left.
2. In the Global role drop-down list, select the global role that you want to add users to.
3. Click the user you want to add to the role.
Tip: To add multiple users, use CTRL+click (hold down the CTRL key and click each user to select).
4. Click the left arrow ![]() button to add this user to the global role.
button to add this user to the global role.
5. Once this user has been mapped (see screenshot below), click the Save button.

You have now mapped the user to the global role. This user now has all the permissions associated with this global role.
To see how global roles are used to grant permissions for workspaces, pages, and trends, see Configuring Default Security.
Tutorial 2: Manually Adding Users to P2 Security
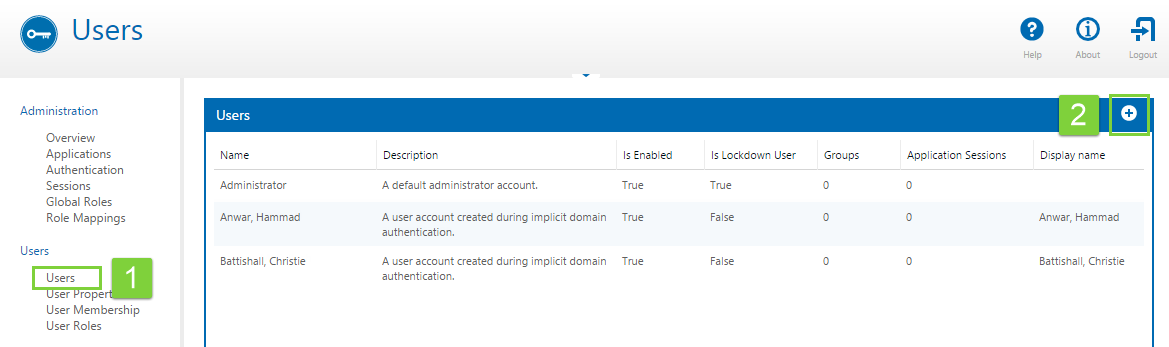
1. In P2 Security, click Users on the left.
2. Click the Add ![]() button on the right.
button on the right.
3. Fill in the fields on the page as follows:
- In the General box, type the user's name and description.
- Is Enabled: Selecting this check box indicates that the user is an active user.
- Is Lockdown User: Select this check box if the user is to be an administrator. This allows the user to use the system when it is in a lockdown state.
- In the Custom Properties, type a display name for the user.
- In the Password Authentication box, type a login user name and password for the user.
- If you prefer to use Implicit or Explicit Domain Authentication, specify the fully qualified login name required for Windows authentication (of the form domain\username) in the appropriate box.
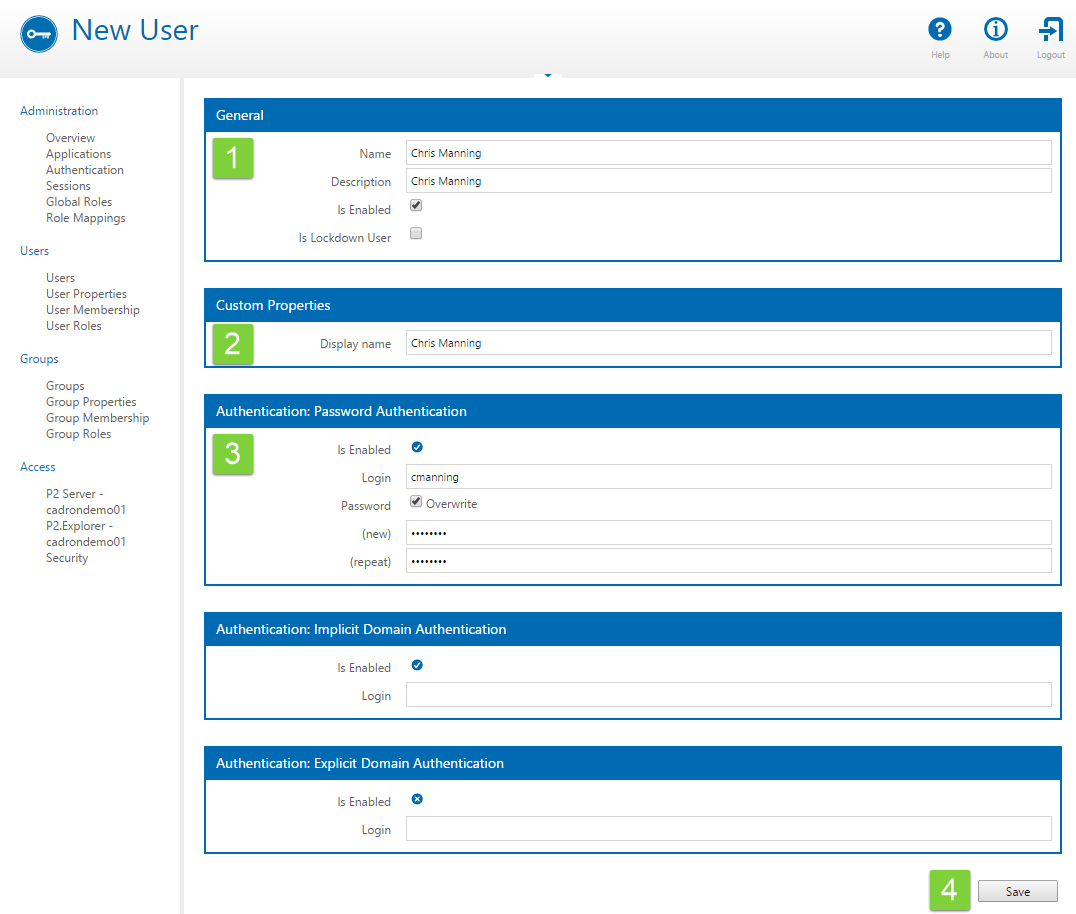
4. When you've finished, click Save.