ON THIS PAGE:
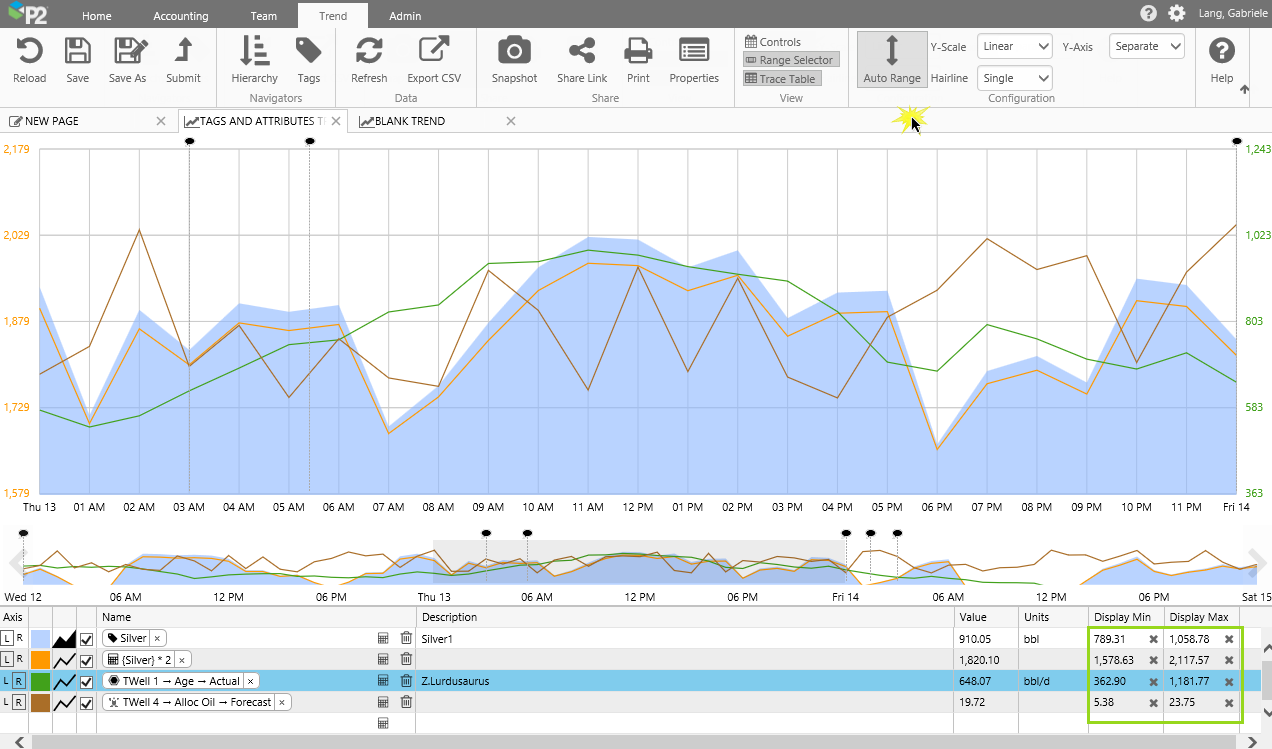
The trace window is the main area on the trend, and is used for showing the trace lines and adding comments.
Data is plotted in the trace window, along an X and one or two Y-Axes (left and right).
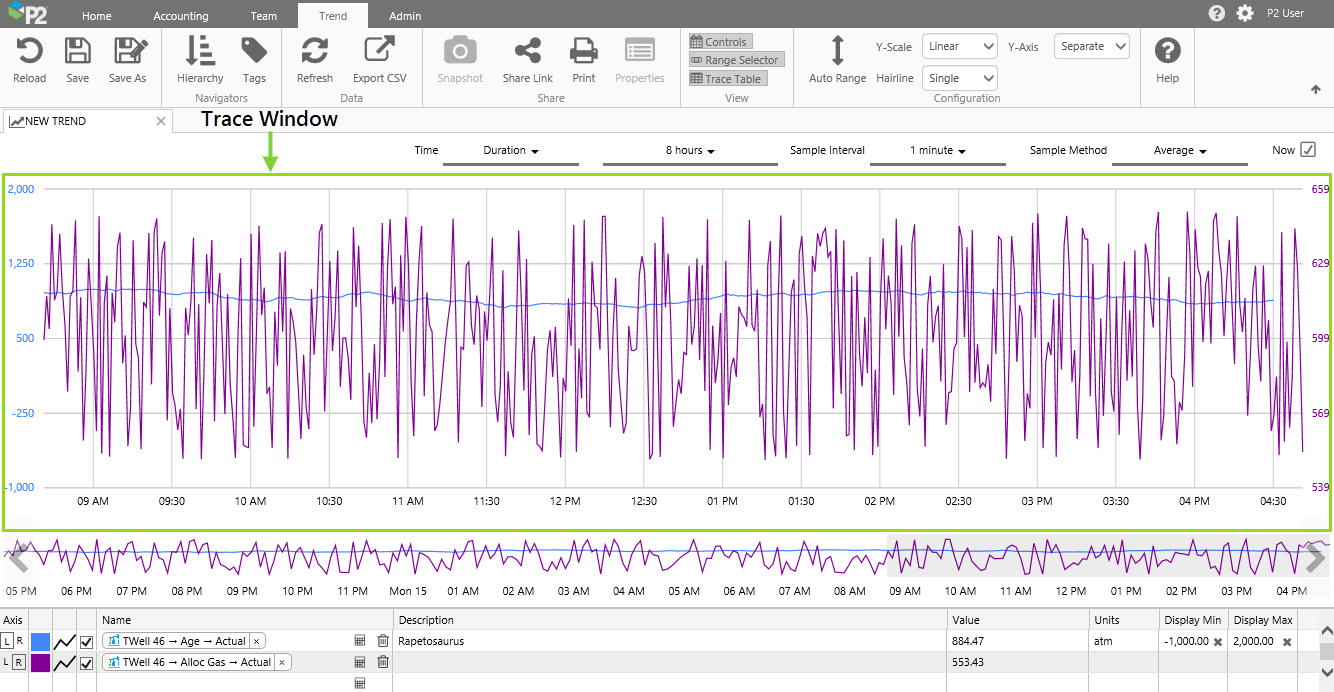
You can place one or more hairlines on the trace window, to see the trace data in more detail for a particular point in time; you can also add comments from a hairline's information box.
The Trace Window with two hairlines
Maximising the Trace Window
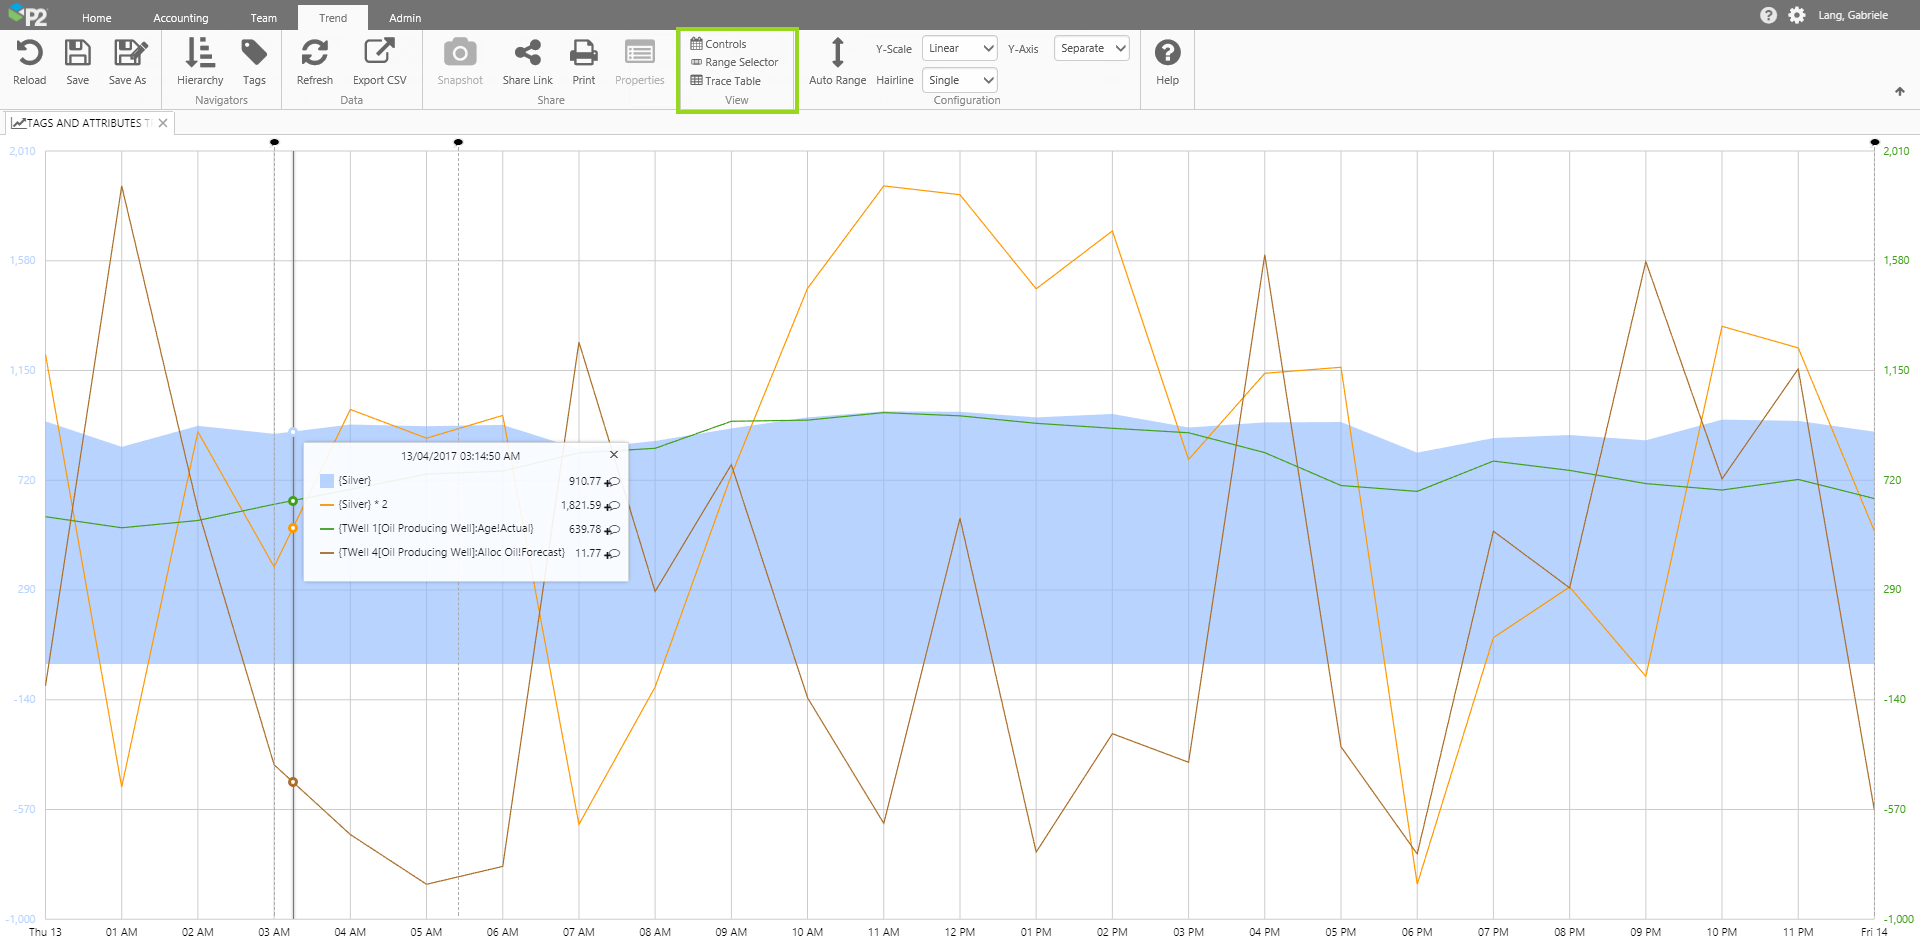
You can change the trend view to allow more space for the trace window.
- Click any of the buttons in the View group of the Trend ribbon, to hide the respective sections: Controls, Range Selector, Trace Table.

This is how the trend looks without the Controls, Range Selector, or Trace Table. Click any of the toggle buttons to show that section again.
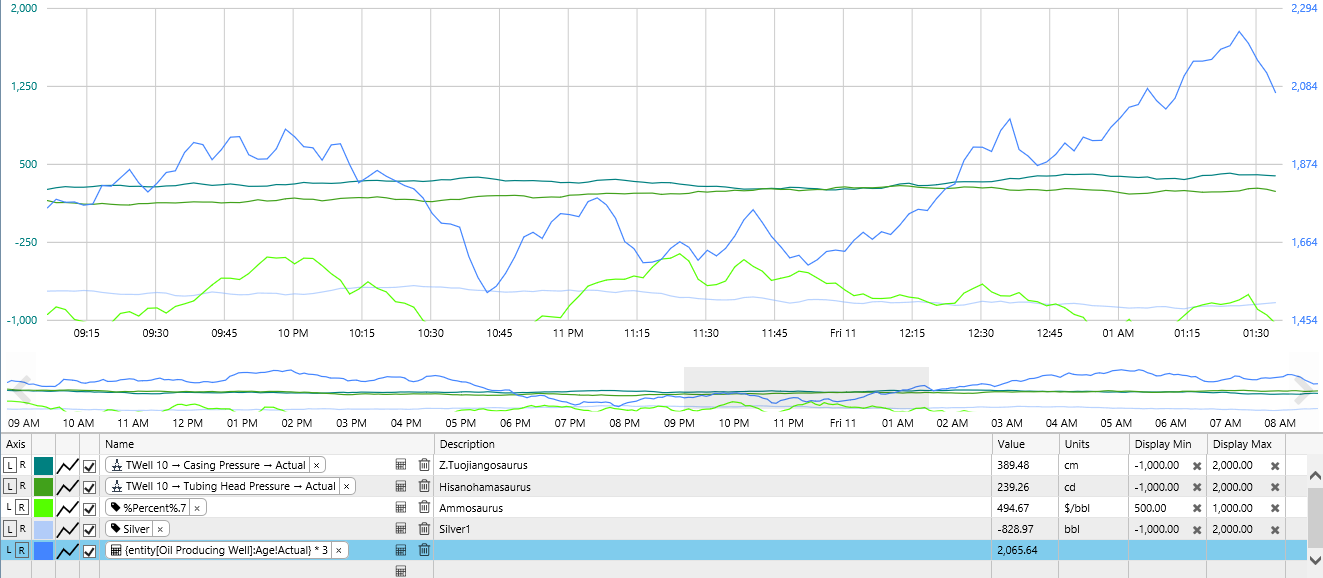
Y-Axes
The left and right y-axes can be rendered in various ways. Axes can be shared or separate. When separate axes are selected, you can update the default display minimum and display maximum by manually updating, clicking Auto Range, or resetting to their stored values. The different display minimums and maximums help to determine how the axes are rendered, and also how the traces are plotted within the trace window.
Use the trace table and the configuration buttons on the ribbon to manipulate the Y-Axes, as described in the next sections.
You have the option of plotting each trace item against its own axis (Left or Right). Note that even if you choose separate Y-Axes, there is still only one rendered Y-Axis for Left, and one for Right.
Separate Y-Axis
If you want each trace to be plotted against its own axis, select Separate from the Y-Axis drop-down list.

The left Y-Axis renders for the first left Y-Axis item in the trace table. The right Y-Axis renders for the first right Y-Axis item in the trace table.
If you select an item in the trace table, then the left or right Y-Axis re-renders for this item.
Selecting the Left and Right Y-Axes from the Trace Table
You can control the rendered Left and Right Y-Axes by clicking on one either a left Y-axis item, or a right Y-axis item. If there is no selection, then the most recently selected left/right Y-Axis is rendered.
Each Y-Axis (Left/Right) is rendered in the colours of the corresponding left Y-Axis/Right Y-Axis item.
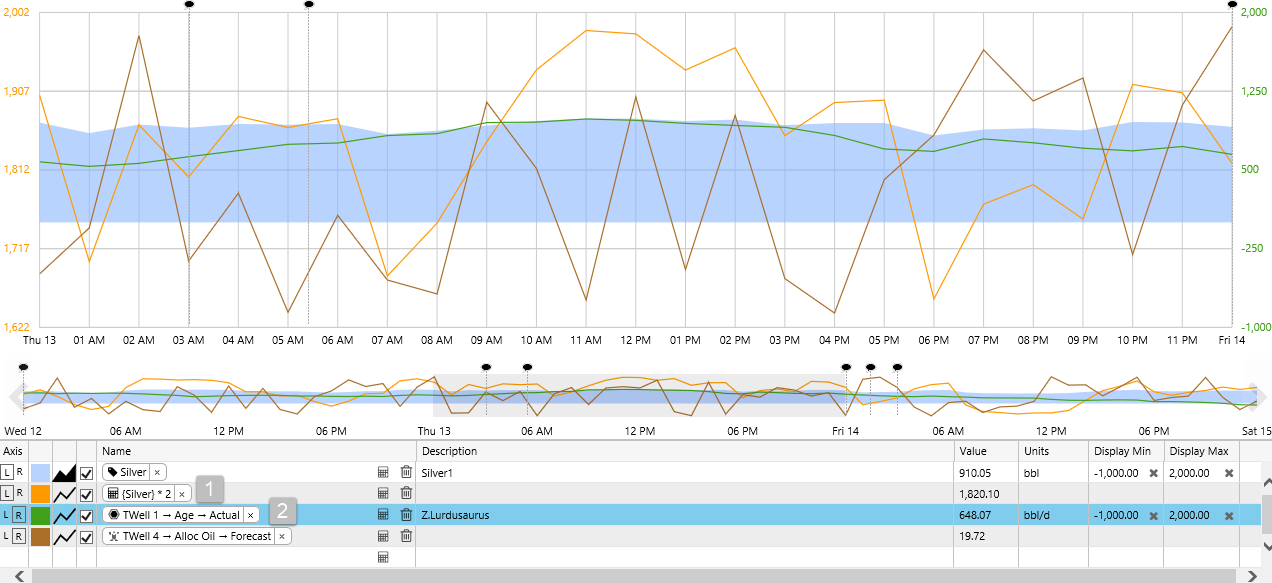
1: The most recently selected Left Y-Axis item is used for rendering the left Y-Axis. 2: The currently selected Right Y-Axis item is used for rendering the right Y-Axis.
Shared Y-Axis
If you want all traces to be plotted against a shared axis, select Shared from the Y-Axis drop-down list.
All traces on the Left Y-Axis (L) are plotted against a single, shared Left Y-Axis, while all traces on the Right Y-Axis (R) are plotted against a single, shared Right Y-Axis.
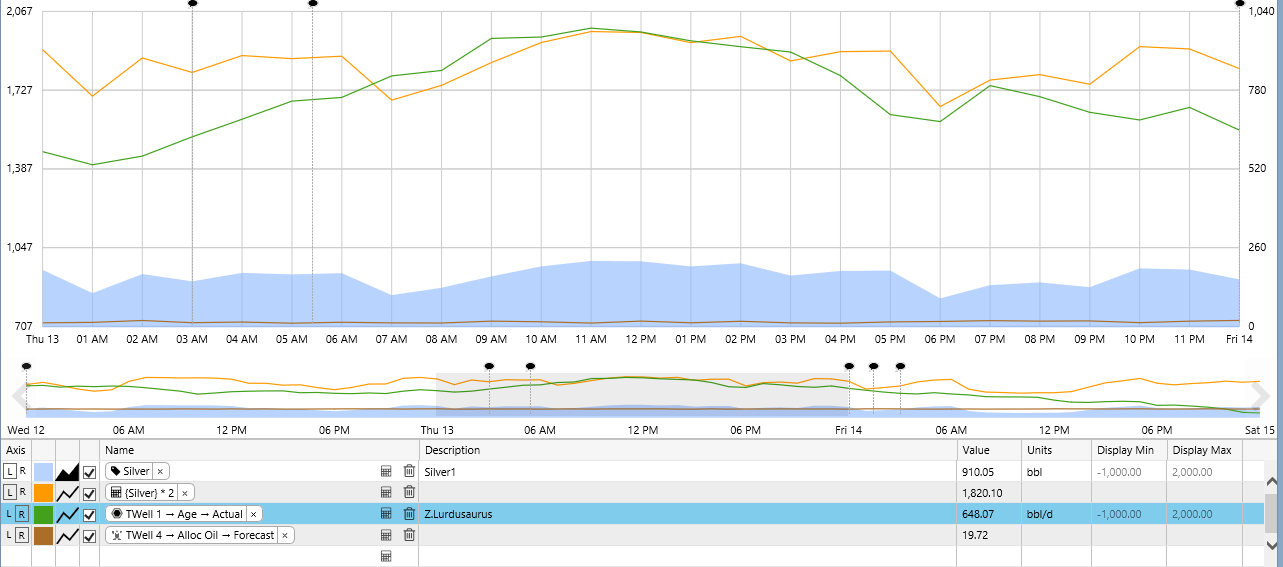
When there is a shared Y-Axis, the Left Y-Axis and the Right Y-Axis are both rendered in black.
Manual Adjustments to Display Minimums and Maximums
Minimum and maximum display values for items in the trace table can be edited, and saved with the trend. The minimum and maximum values help to determine the Y-Axes.
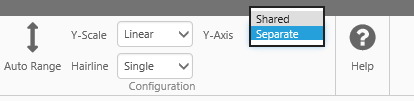
1. Select Separate from the Y-Axis drop-down list on the ribbon.

Select Separate Y-Axis on the ribbon
2. Edit individual Display Min and Display Max values in the Trace Table. Either overwrite with a new value or use the up and down arrow keys to increase/decrease the value by one.

Updating Display Min for a trace item
Note that the new Minimum and Maximum display values for items in the trace table are saved with the trend, but the stored minimum and maximum display values for the tags are not updated.
Resetting Display Minimums and Maximums
Trace item Display Minimums and Maximums that have been manually overwritten, or updated using Auto Range, can be reset to their stored value.
1. Select Separate from the Y-Axis drop-down list on the ribbon.
Select Separate Y-Axis on the ribbon
2. Click the ![]() on the right of the display minimum or display maximum value for a trace item, to reset to the stored value.
on the right of the display minimum or display maximum value for a trace item, to reset to the stored value.

Auto Range
Auto Range automatically updates the individual display minimum and maximum values, so that all of your trace data points are visible on the trend.
1. Select Separate from the Y-Axis drop-down list on the ribbon.
Select Separate Y-Axis on the ribbon
2. Click Auto Range on the Trend ribbon.
Auto Range calculates a new Display Min and Display Max for each item, based on the individual items’ data values for the selected time range, and plots the separate trace lines using the new minimums and maximums.
Note that the new Minimum and Maximum display values for items in the trace table are saved with the trend, but the stored minimum and maximum display values for the tags are not updated.
You can reset or manually adjust each trace's display minimum and maximum.
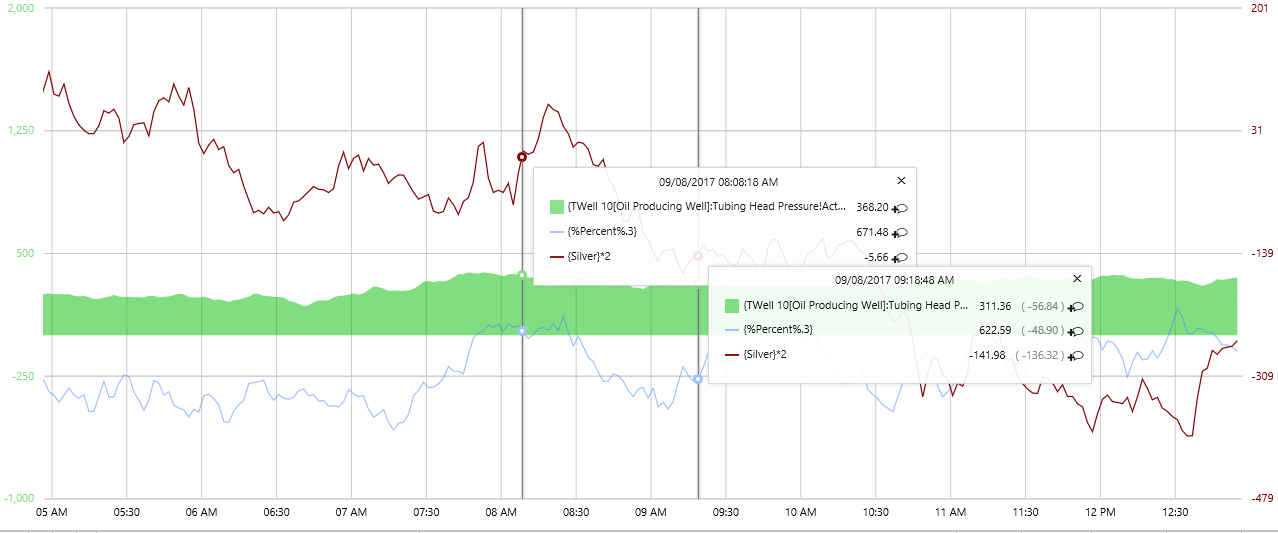
Hairlines
Depending on your selection of allowable hairlines on the trend ribbon, you can add single, dual, multiple or no hairlines to the trace window.

- Click on an area in the trace window to add a hairline.
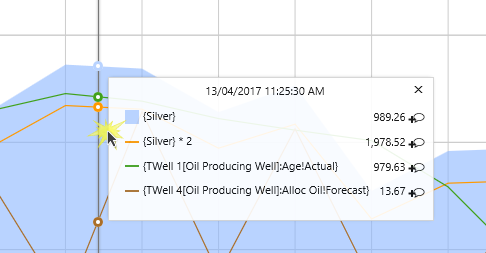
Clicking to add a hairline
- To move a hairline left or right, click the hairline and drag it to the left or right.

Dragging a hairline to the left or right
The position of your mouse as you click determines the horizontal position of the hairline, and also the vertical position of the hairline information panel.
You can re-position a hairline information panel by clicking on a hairline, and then moving your mouse up or down the hairline.
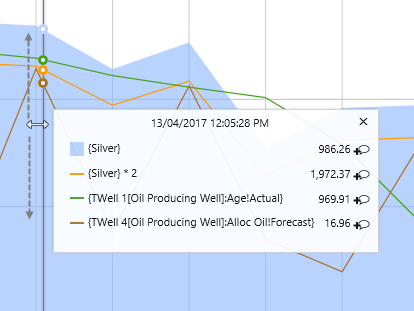
Dragging the information box up or down