ON THIS PAGE:
This article describes how to create sites and shift patterns, for use in Shift Log, using P2 Server Management. Shift Log allows you to define shifts on a per-site basis. For each site, you specify the details of the site (name, description, etc) and the shift pattern for that site.
Add the Site
1. Open P2 Server Management, and click the Sites ![]() icon.
icon.
If you are creating a site for the first time, you will see a Default Site seeded into the system. You can choose to edit the default site, or add a new one.
2. Click Create New Site, or click Default Site to modify it.
Note: If you want to edit an existing site, select it from the list below the Create button.

3. Give the site a name and a description. Note that the name cannot contain reserved characters.
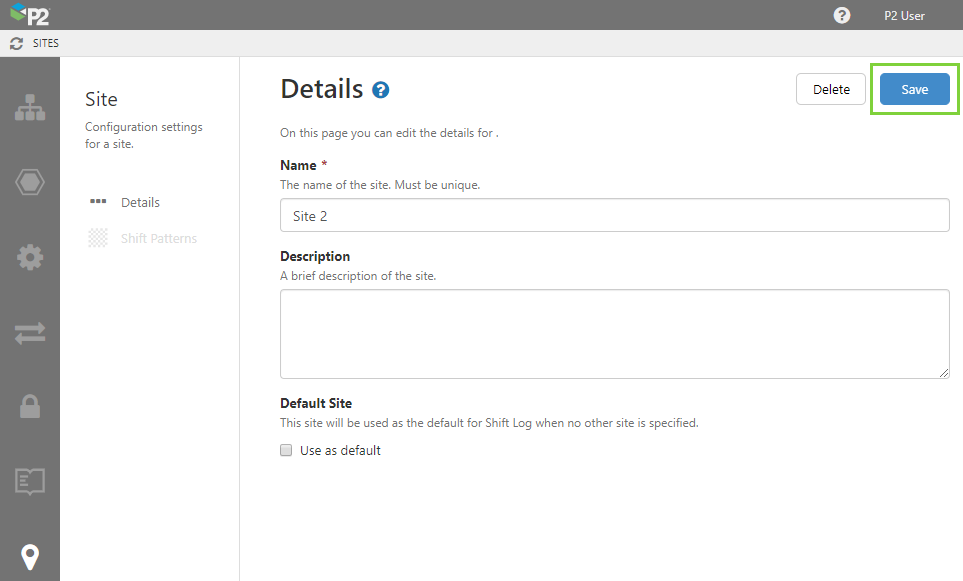
4. Click the Save button in the top right corner.
After you have saved, the Shift Patterns menu item becomes active. A shift pattern is a 24-hour period divided into equal portions of time, with a start time being the time the first shift starts. You can also specify the length of the shifts in that pattern. Shifts can be 6, 8, 12, 24 hours long.
Add Shift Patterns
Before you move to the next step, make sure you know what time your first shift starts, and how long a shift is.
5. Click Shift Pattern.
6. Click the Add Shift Pattern button.

7. In the Shift Pattern Details on the right, fill in the following:
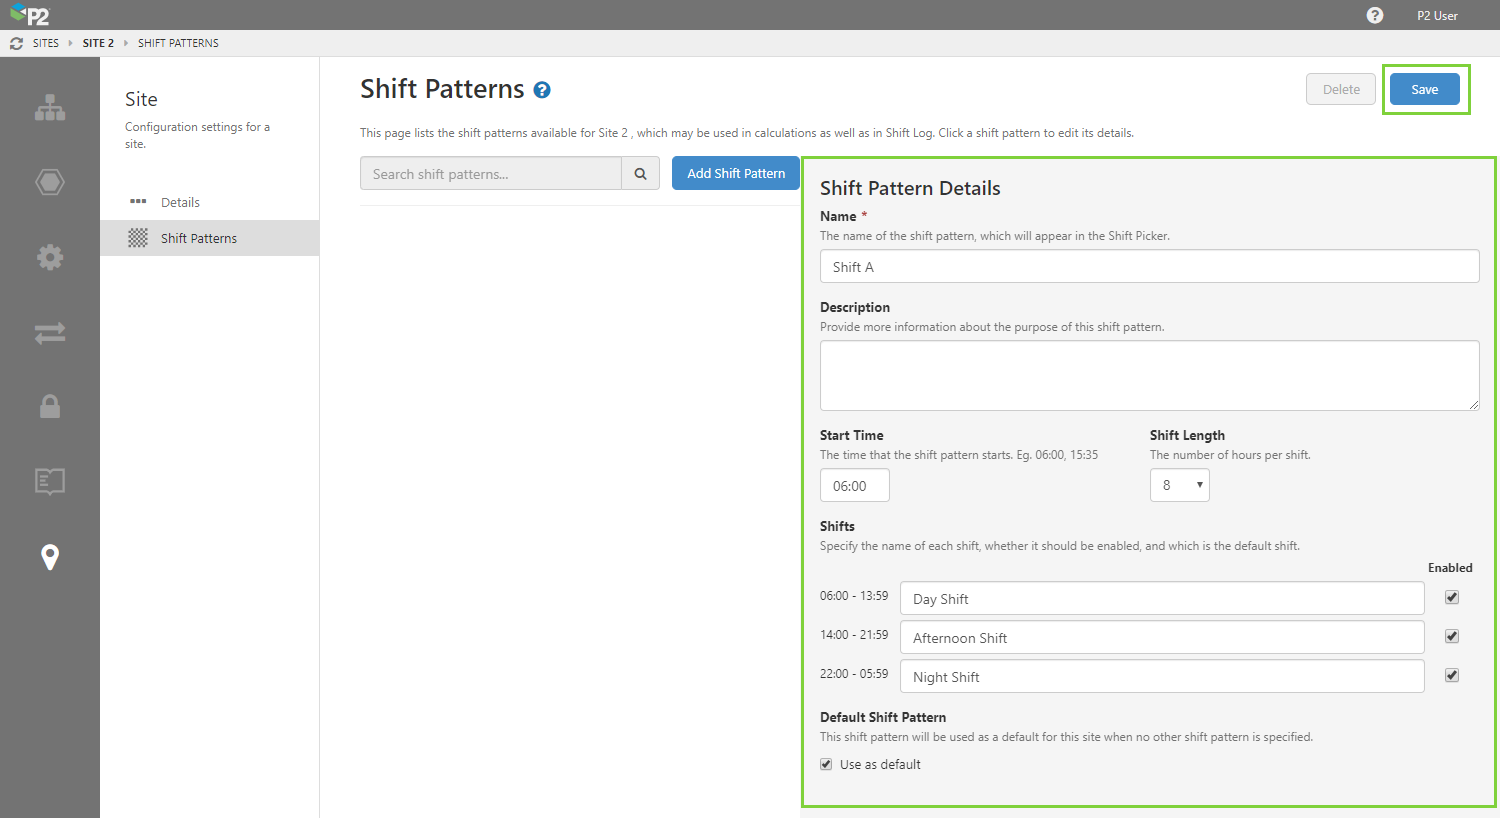
| Name | The name of the shift pattern, which will be listed in the workbook settings once the site has been chosen. |
| Description | Provide an optional description for the shift pattern. |
| Start Time | The time of day that the first shift starts. E.g. 06:00 |
| Shift Length | How long a shift is, in hours. The shift length determines how many shifts there are in a 24-hour period. |
| Shifts | The number of rows shown here depend on the shift length. Each shift comes with a default name, you can change the name if you want. There is also the option to disable a shift, by clearing the Enabled check box. This means that the disabled shift will not appear in the shift picker, and users will not be able to navigate to it. This is useful if you have a shift where no-one is rostered, for example you may only have a morning and afternoon shift, but no night shift. |
| Default Shift Pattern | A shift pattern can be specified as the default shift for that site. This will select it as the default shift in workbooks. In future, this will also be used by shift-based calculations. |
8. Click the Save button.
The Shift Pattern is added to the list below the search box. From here, you can click an existing shift pattern to edit it.
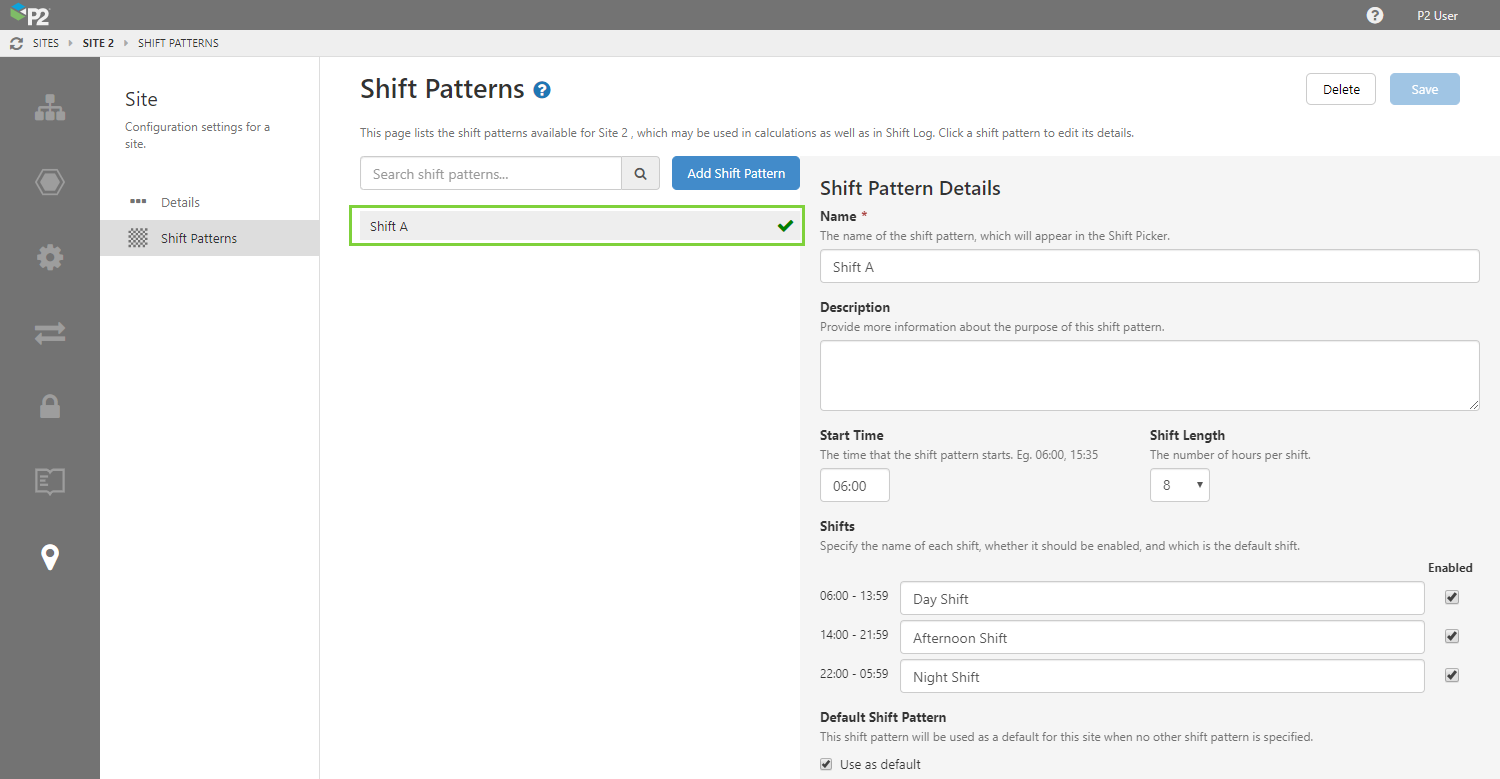
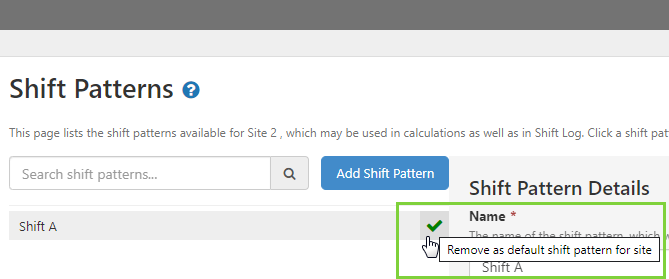
You can also hover over the check mark at the right of a shift pattern and click it to quickly set or remove the shift pattern as the default pattern.
When the check mark is green, this indicates that the shift pattern is the default pattern for the site.
Site Defaults
When you return to the Sites list, you will notice that one of the sites has a green check mark to indicate that it is the default site. You can quickly change the default site by hovering over another site and clicking the check mark on the right.
