ON THIS PAGE:
When you start using P2 Excel Add-in, you first need to connect to the P2 Explorer server in order to fetch entity data from P2 Explorer. This is done via the Connection task panel, which allows you to choose which P2 Excel Add-in server to connect to and retrieve data from.
Note: When targeting P2 Explorer 2.6, P2 Excel Add-in v3.3 and later will only support Improved Entities Securities if it's connected to a server with WebAPI v1.5 or later installed.
To connect to the server:
1. Click the Setup ![]() icon on the ribbon.
icon on the ribbon.
2. From the Server drop-down list, select the P2 Explorer server you want to connect to.
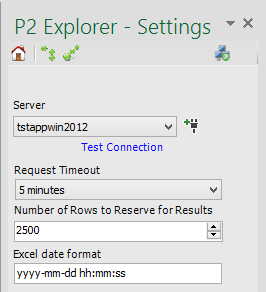
If the server is not in the list, click the Connection ![]() icon (see below for details).
icon (see below for details).
When a successful connection is established, the success ![]() icon appears. This icon remains as long as the connection is established.
icon appears. This icon remains as long as the connection is established.
Server names are remembered between Excel sessions. Server names that have been saved from previous sessions can be deleted by clicking the delete ![]() icon.
icon.
3. Enter the remaining details for the P2 Explorer connection:
Request Timeout: The maximum time to wait for a response from the server before reporting a failure. The default is 2 minutes.
Number of Rows Reserved for Results: This setting controls the number of rows reserved for array formula results. This number can be increased if your fetches return a large number of rows. The default is 2500.
Excel date format: The Excel date format is used when P2 Excel Add-in outputs dates into the worksheets. The format of date cells will be set to this custom format. This format is used for each request and will change the cell format if this format changes.
Connecting to a New Server
Clicking the Connection ![]() icon opens the Data Connections dialog box.
icon opens the Data Connections dialog box.
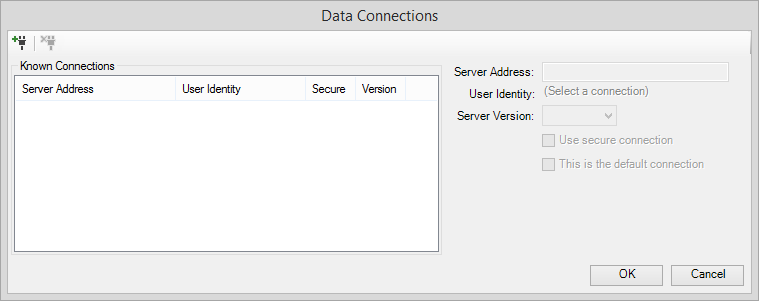
1. Click the Add Connection ![]() icon to connect to a new server.
icon to connect to a new server.
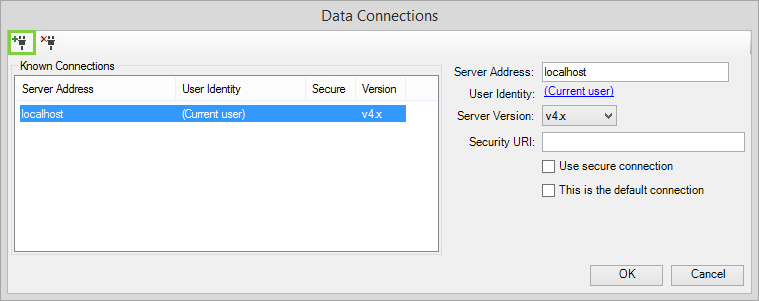
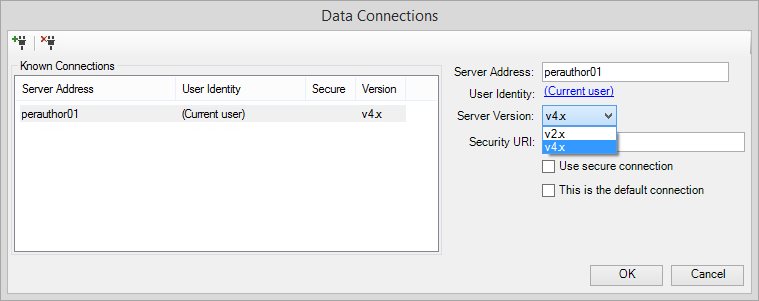
The new server will initially be added as 'localhost'.
a. Change the server name in the panel on the right.
b. Select the correct version of P2 Explorer that you are connecting to.
c. The Security URI displays the corresponding URI for P2 Security. This will usually be the same as the Server Address, as P2 Security is usually installed on the same server as P2 Explorer. You should change this if P2 Security is installed on a different server.
d. If P2 Explorer has HTTPS enabled (this is usually the case), select the Use Secure Connection check box.
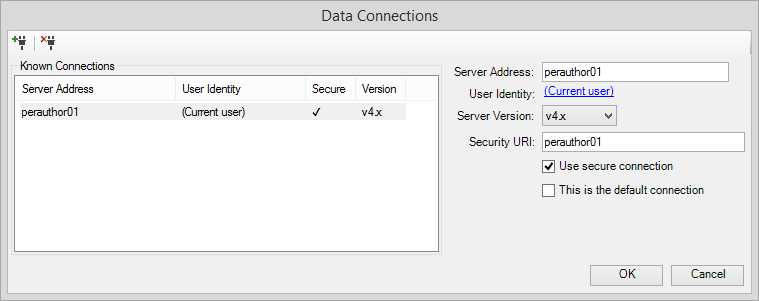
e. If you have more than one connection, you can select one of them to be the default, by selecting the This is the default connection check box.
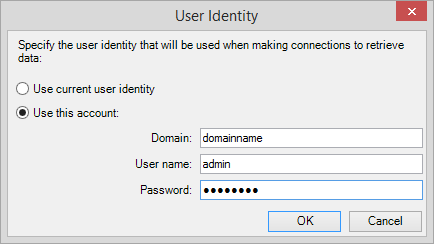
2. If you want to connect to the server as a different user, click the Current User link. Fill in the appropriate information for the new credentials, and then click OK.
3. Click OK again to return to the Settings panel.
4. Select the new server from the drop-down list, and then click Test connection.
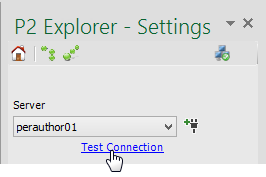
When a successful connection is established, the success ![]() icon appears.
icon appears.
If Your Connection Fails
If your connection fails, you will see a red indicator ![]() next to the Server box.
next to the Server box.
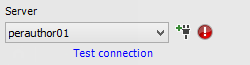
Click this icon to open the Connection Status panel.
Click the messages to see more information about them in the panel below the list, to assist you with troubleshooting.
Click the Setup ![]() button on the ribbon to go back to the Settings panel and try again.
button on the ribbon to go back to the Settings panel and try again.
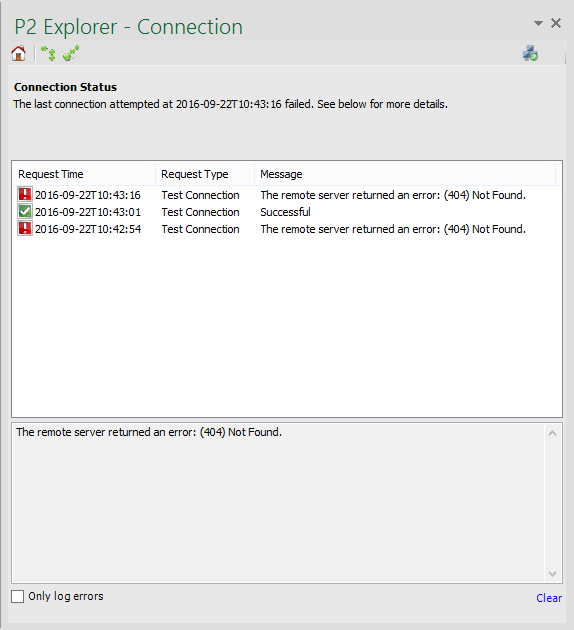
Click the Clear link in the bottom right corner to remove the messages from the list.