ON THIS PAGE:
Overview
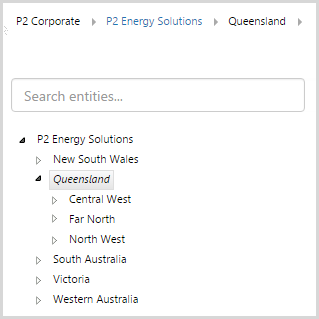
In IFS OI Explorer, breadcrumbs allow users to easily traverse a hierarchy to find an entity, and also helps users to visualise where an entity is in the hierarchy.
You should use this navigation tool when you want to provide a way for users to drill down into a hierarchy, or find their way back up the hierarchy. When users click an entity in the hierarchy, other components on the page can be updated to display data for the selected entity. The following image shows a typical breadcrumb:

Configuring Breadcrumbs
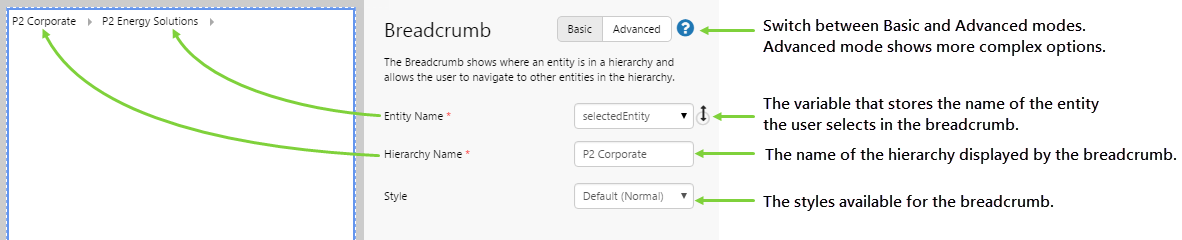
There are 2 configuration modes. Basic mode shows the options most commonly used. Advanced mode allows you to change the type of properties used.
Basic Mode
Advanced Mode
In Advanced mode, you have the option of choosing a variable to drive the Hierarchy Name. To do this, you first need to add the variable to the default values, then you will be able to select it from the drop-down list.

| Entity Name: | The name of the entity to display in the Breadcrumb. This is always a variable so that it can interact with other components on the page. |
| Hierarchy Name: | The name of the hierarchy that the Breadcrumb uses to get the entities from. This setting can either be a text value or a variable. When set to a variable, it is the name of the variable that the Breadcrumb listens to in order to determine the hierarchy to display. |
| Style: | The style you want to apply to the Breadcrumb component. If you are a Style Administrator, you can add a new Breadcrumb style. |
Tutorial: Creating a Breadcrumb That Shows the Hierarchy of a Selected Entity
If you're unfamiliar with the process of building pages, read the article Building an Explorer Page.
In this tutorial, we'll look at adding a Breadcrumb to a page. This Breadcrumb will display the path of an entity chosen in a Hierarchy.
Let’s go through this process, step-by-step.
Step 1. Prepare a Studio Page
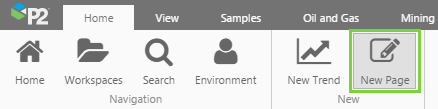
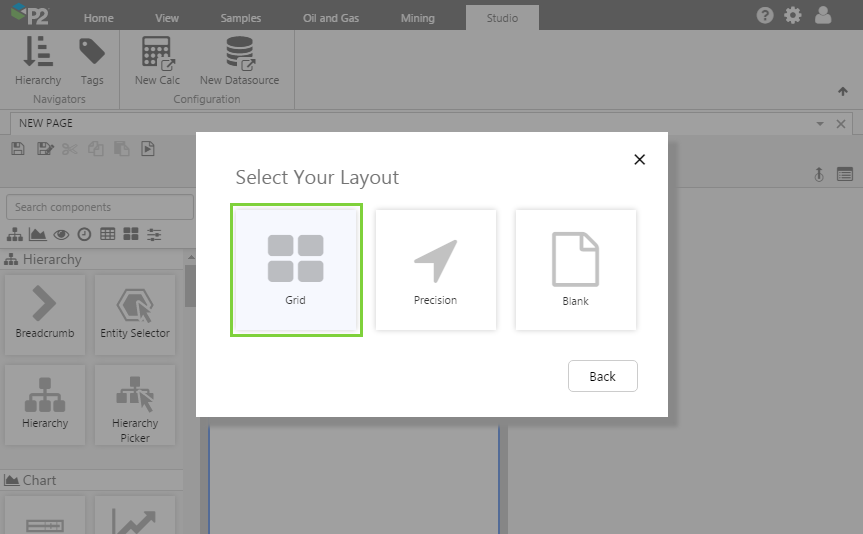
Before you start, click the New Page button on the Home tab of the ribbon. Choose the Grid layout.
- For this exercise, we'll keep the 4 grid cells.
- Assign a column spacing of 10.
- Assign the first row a height of 100.
- Assign a row spacing of 10.
Step 2. Add the Breadcrumb to the page
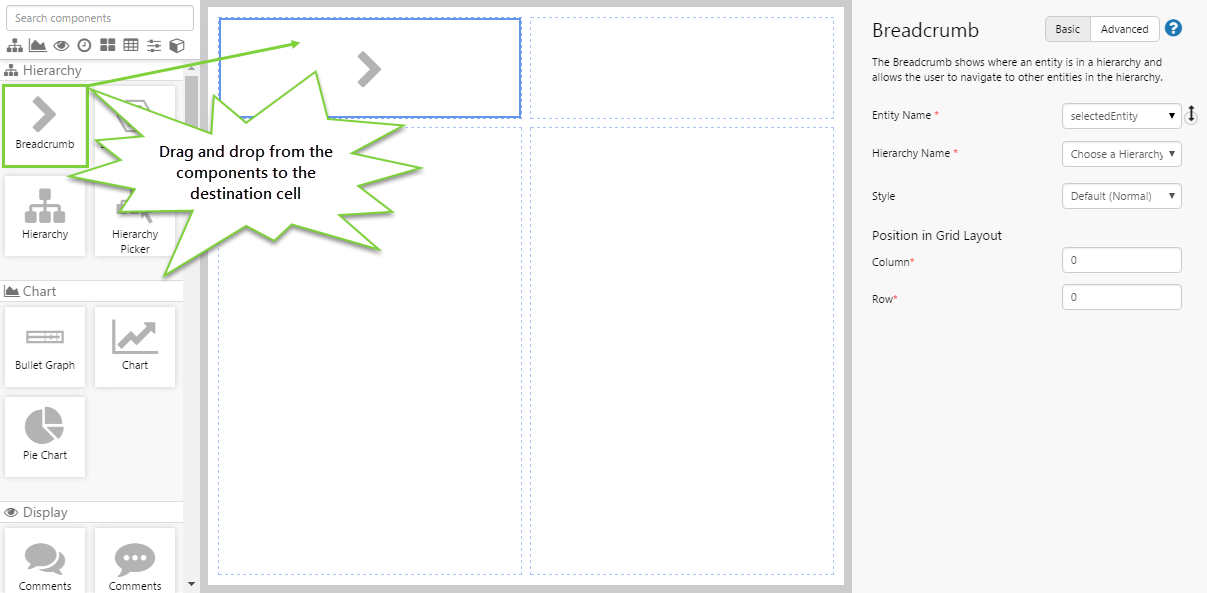
Drag and drop the Breadcrumb component onto a grid cell. The Breadcrumb is in the Hierarchy ![]() group.
group.
Step 3. Configure the Breadcrumb
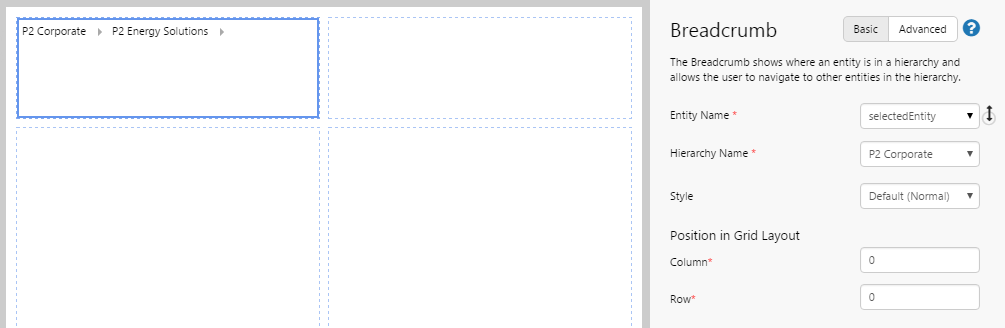
In this step, we choose the hierarchy that we want the Breadcrumb to display. We can use the basic configuration for this.
Configure the Breadcrumb as follows:
- Entity Name: selectedEntity
Note: You'll notice that this field is already populated with a default variable name. You can change this name if you want, but often there's no real need to. - Hierarchy Name: P2 Corporate
Tip: The drop-down list shows all the hierarchies that are available in the system. User permissions apply. In Advanced Mode, you can populate the hierarchy name by using a variable.
Entity Name is always a variable, so that the Breadcrumb will dynamically update when another component on the page uses the same variable.
Step 4. Add and Configure a Hierarchy
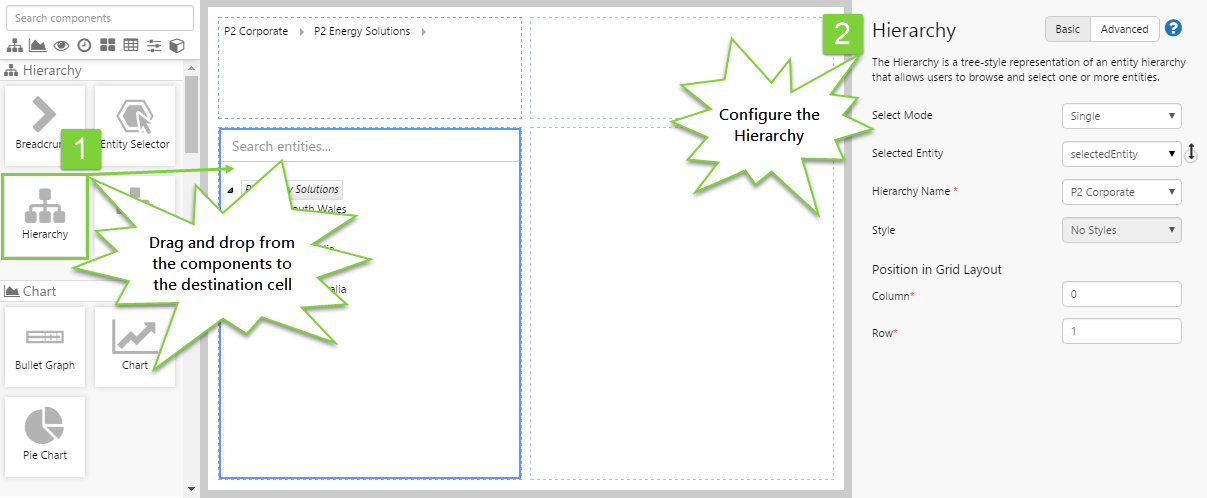
In this step, we want to allow users to select a single entity from a hierarchy that we have specified. We can use the basic configuration for this.
Drag and drop the Hierarchy component onto a grid cell, and configure it as follows:
- Select Mode: Single
- Selected Entities: selectedEntity
Note: This variable is also used in the Breadcrumb — this is what links the two components together. - Hierarchy Name: P2 Corporate
Step 5. All done!
Congratulations! You now have a fully functioning Breadcrumb that changes depending on the entity you select from the Hierarchy.
- Click the preview
 button on the Studio toolbar to see what your page will look like in run-time.
 - Watch the Breadcrumb change as you choose different entities from the Hierarchy.
- When you select an entity from the Breadcrumb, the Hierarchy is also affected.
![]() Don't forget to save your page!
Don't forget to save your page!