ON THIS PAGE:
Overview
P2 Explorer now allows you to add a button to a page that can be configured to change the status of a case.
The Case ID is passed to this component from a page variable, which the user can select (from, for example, a Combo Box), or which they can update by typing into a Text Input component.
When the user clicks the Action Button, the selected Case ID is updated to the Case Status selected for the component (such as Investigating or Closed).
After the button is clicked, a message appears to confirm that the action has been completed: ‘Update Successful’. If the Case ID does not exist, an error message appears.
The Action Button can have 3 states:
- Disabled: The button will be disabled if no default value has been specified and the user has not specified a Case ID, or if the input Case ID is not a number.

- Enabled: The button will be enabled when a valid default has been specified, or if the user inputs a number for the Case ID.

- Hover: When a user hovers the cursor over an enabled button, the hover state is enabled. The button can be designed to show a different colour when the user hovers over it.

The following diagram shows an Action Button being configured:
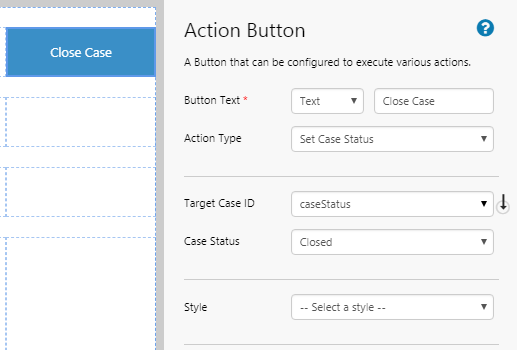
| Button Text: | The text that appears on the button. Ideally, this should indicated the action that will be performed when the button is clicked (e.g. Close Case). |
| Action Type: | The action that will be performed when the button is clicked. In version 4.6.4, the only action available is Set Case Status, which is used to change the status of a particular case. |
| Target Case ID: | The Case ID of the case whose status will change. This can only be a variable. Note that the button will not be able to be clicked if the user does not specify a Case ID or if there is no default set for the variable. If specifying the variable using Page Defaults, it should be a Number type. |
| Case Status: | The status that will be set when the button is clicked. |
| Style: | The style to apply to the Action Button. If you are a Style Administrator, you can add a new Action Button style. |
Tutorial: Closing a Case
If you're unfamiliar with the process of building pages, read the article Building an Explorer Page.
In this tutorial, we’ll show you how to use the Action Button to close a case, which is specified by the user by entering the ID into a text box. At the end of the tutorial, your page should look something like this:
![]()
Let’s go through this process, step-by-step.
Step 1. Prepare a Studio Page
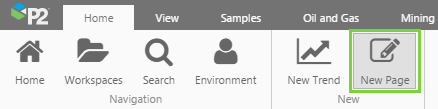
Before you start, click the New Page button on the Home tab of the ribbon. Choose the Grid layout.
- For this exercise, we'll keep the 4 grid cells.
- Assign the first column a width of 200.
- Assign the second column a width of 100.
- Assign a column spacing of 20.
- Assign the first row a height of 30.
- Assign a row spacing of 20.
Step 2. Add the Action Button
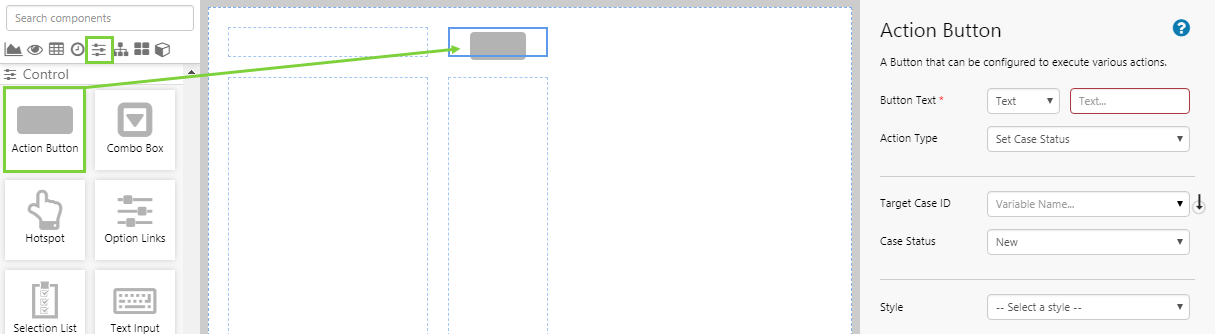
Drag and drop the Action Button component onto a grid cell. The Action Button is in the Control ![]() group.
group.
Step 3. Configure the Action Button
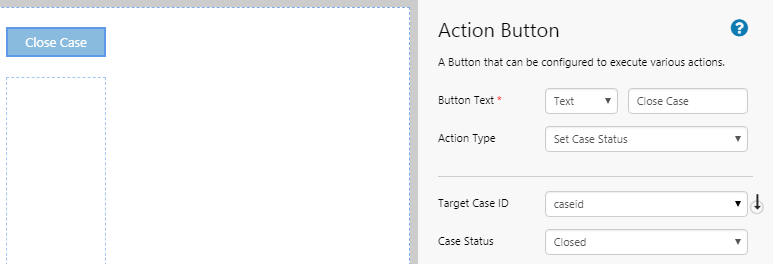
In this example, we want the Action Button to pass the status of 'Closed' to the specified Case ID. Configure the Action Button as follows.
| Field | Click This First | Parameter to Enter | Notes |
| Button Text | Text | Close Case | This text will be displayed on the button. |
| Action Type | Set Case Status | This is the only action available. | |
| Target Case ID | caseid | This is the variable that holds the Case ID. Later in the tutorial, we'll see that the user will be able to enter a Case ID into a box, which this button will be able to understand. | |
| Case Status | Closed | Select this from the drop-down list. |
Step 4. Add and Configure a Text Input
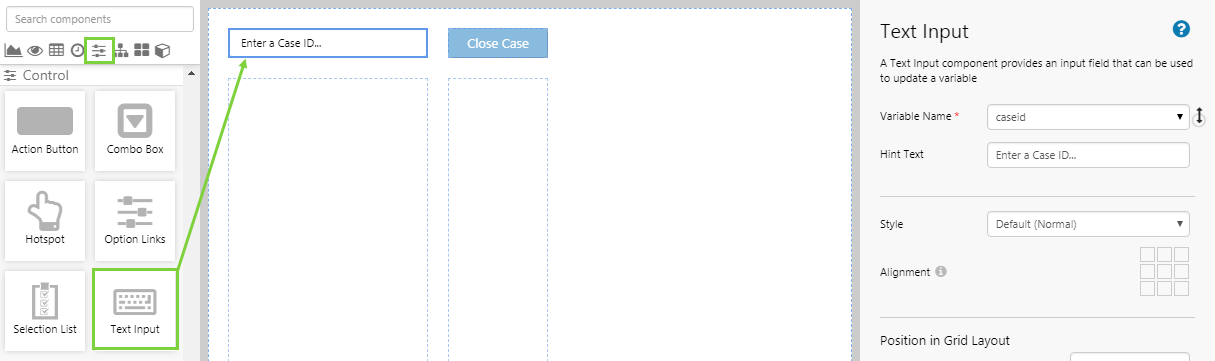
This Text Input box will store the Case ID in the caseid variable, which will be used by the Action Button to understand which case to change the status for.
Drag and drop a Text Input component onto the page, and configure it as follows:
| Field | Parameter to Enter | Notes |
| Variable Name | caseid | This must be the same variable used by the Action Button for the Target Case ID field. |
| Hint Text | Enter a Case ID... | This will be displayed in the input box when waiting for the user to enter a Case ID. |
Step 5. All done!
![]()
Congratulations! You now have am Action Button that will close a case specified by the user.
- In the Cases Home page, find the Case ID of a case that you want to close.
- On the page you just created, click the preview
 button on the Studio toolbar to see what your page will look like in display mode.
 - Type the Case ID into the Text Input box.
- Change back to the Cases Home page, and observe that the Status has changed to 'Closed'.
![]() Don’t forget to save your page!
Don’t forget to save your page!
Release History
- Action Button 4.6.4 (this release)
- Initial release of the component