Overview
The Embed Page control allows you to insert another web page into an Explorer page.
The following diagram shows an Embed Page control being configured to show a weather map:

| Content: | The URL of the web page you want to embed. The URL must be a secure https:// address. Note that you cannot embed a Google website. |
| Add Events: | You can add an event published by another control on the page (or set as a page default) to dynamically update the displayed web page.When you add an event, it is automatically appended to the URL. If the event needs to be added to a different position in the URL, you can manually rewrite the URL to include the event in the correct way. For example, in the following URL:
https://weather.yahoo.com.au/forecast/{{region}} {{region}} indicates the event. |
| Move Up: | When you embed the page, the content is automatically positioned such that the top left of the web page sits in the top left corner of the canvas in Studio (i.e. it is positioned at 0,0).You can reposition the content of the URL to only view a certain portion of that web page. For example, you may only want to see a portion of a larger map displayed on another site.The number of pixels to move the content up to view the desired area. |
| Move Left: | The number of pixels to move the content left to view the desired area. |
Tutorial
The Embed Page control works best on pages with a fixed element that you want to display, such as a picture.
If the website you are intending to embed has a responsive layout, the browser will attempt to resize the page to fit the grid space, and the result may not be what you expect.
In this tutorial, we’ll look at adding an embedded page that will display a weather map for Australia. We'll also look at adding some links that will let the map zoom in on a selected state.
Let’s go through this process, step-by-step.
Step by Step: Displaying an Embedded Page
Before you start, open a new tab in Explorer and click the “Create a New Page in Studio Mode” thumbnail. Choose the grid layout – you can adjust the rows and columns if you like but it’s not important for this exercise.
You will need to adjust the configuration to suit your data at your site.
Step 1. Add the Embed Page component to the page
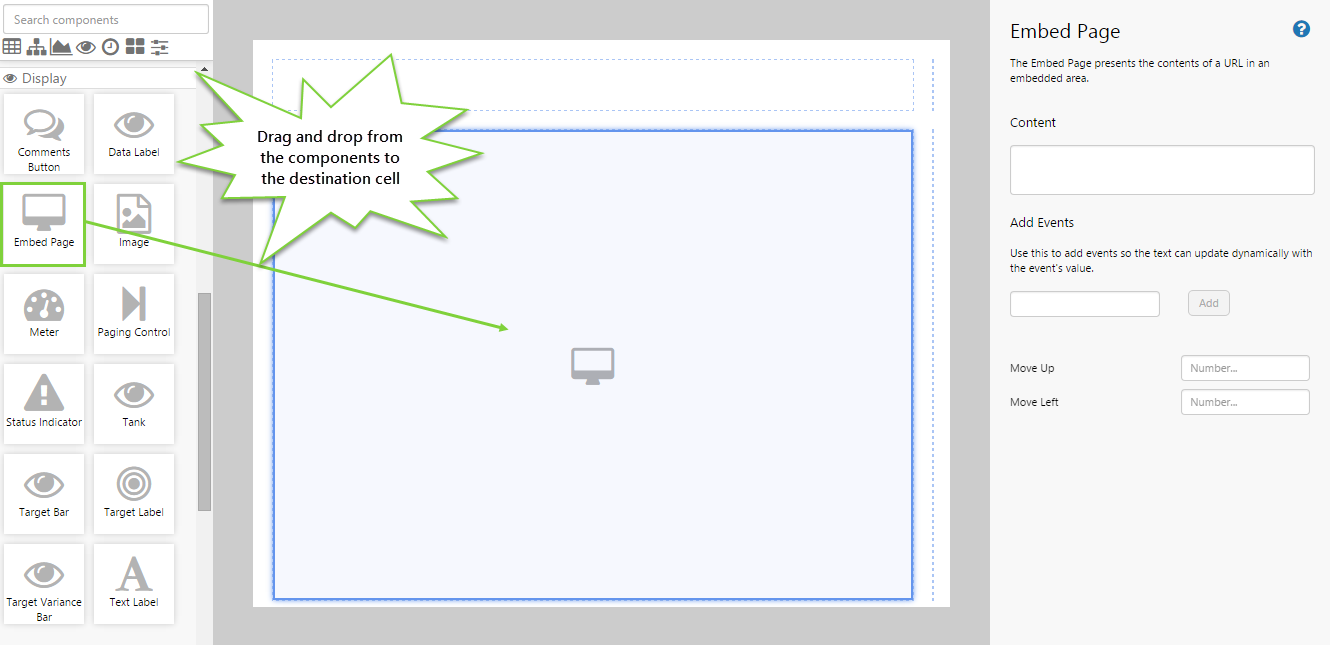
Drag and drop the Embed Page component onto a grid cell.
Step 2. Configure the Embed Page component
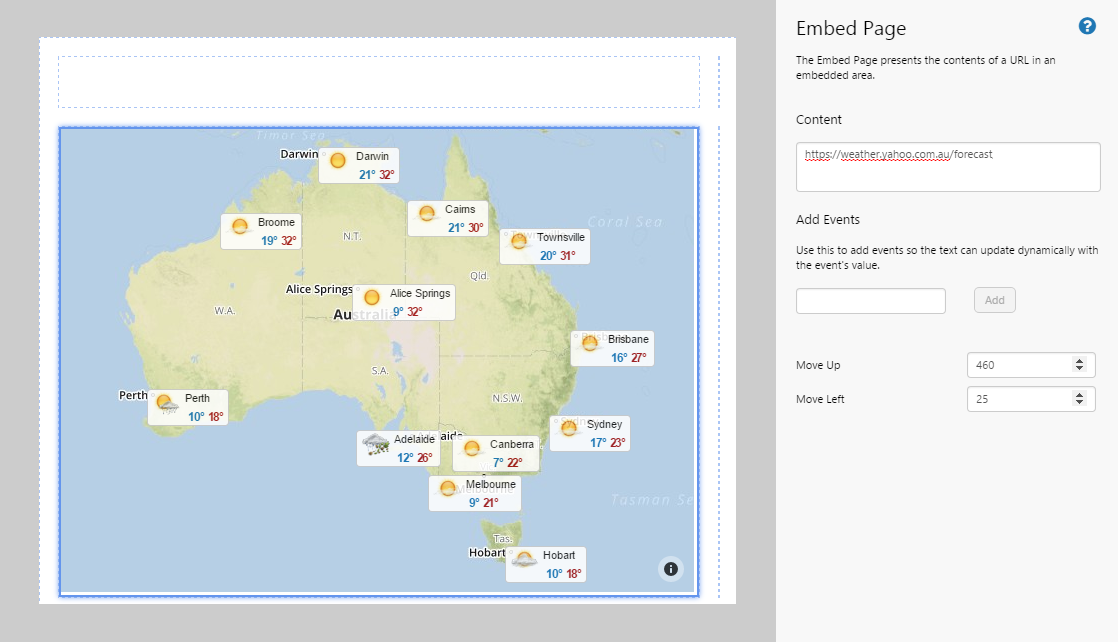
Configure the Embed Page component as follows:
- Content: https://weather.yahoo.com.au/forecast/
You will see that the web page immediately appears on the canvas. If you open the web page in a new browser tab, you will see that it looks exactly the same. However, we don't want the entire web page, we just want the map. We can do this by manipulating where we want the top left corner of the web page to start, so that it will fit in our container. Add the following configurations:
- Move Up: 460
- Move Left: 25
Preamble for the Next Step: How to Change the URL to Display Different Parts of the Map
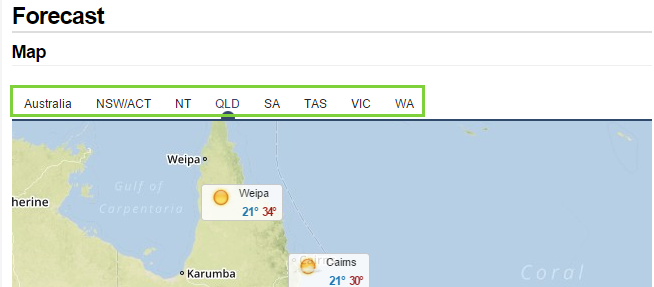
Let's go back to that URL in the browser tab you just opened. You'll notice that above the map, there is a set of links to the states of Australia. When you click on a state, you will notice that not only does the map change, but the URL itself also changes. For example, if you click on QLD, the URL changes to https://weather.yahoo.com.au/forecast/qld. In the next step, we want to tap into that last portion of the URL and create an event that changes that.
- For now, click through the different states and take note of how the URL changes with each state. We will be taking advantage of this in the next step.
Step 3. Add events

In the "Add Events" setting of the Embed Page component, type region and then click the Add button. You will see it being added to the Content URL, enclosed in double curly brackets.
Step 4. Add an Option Links component
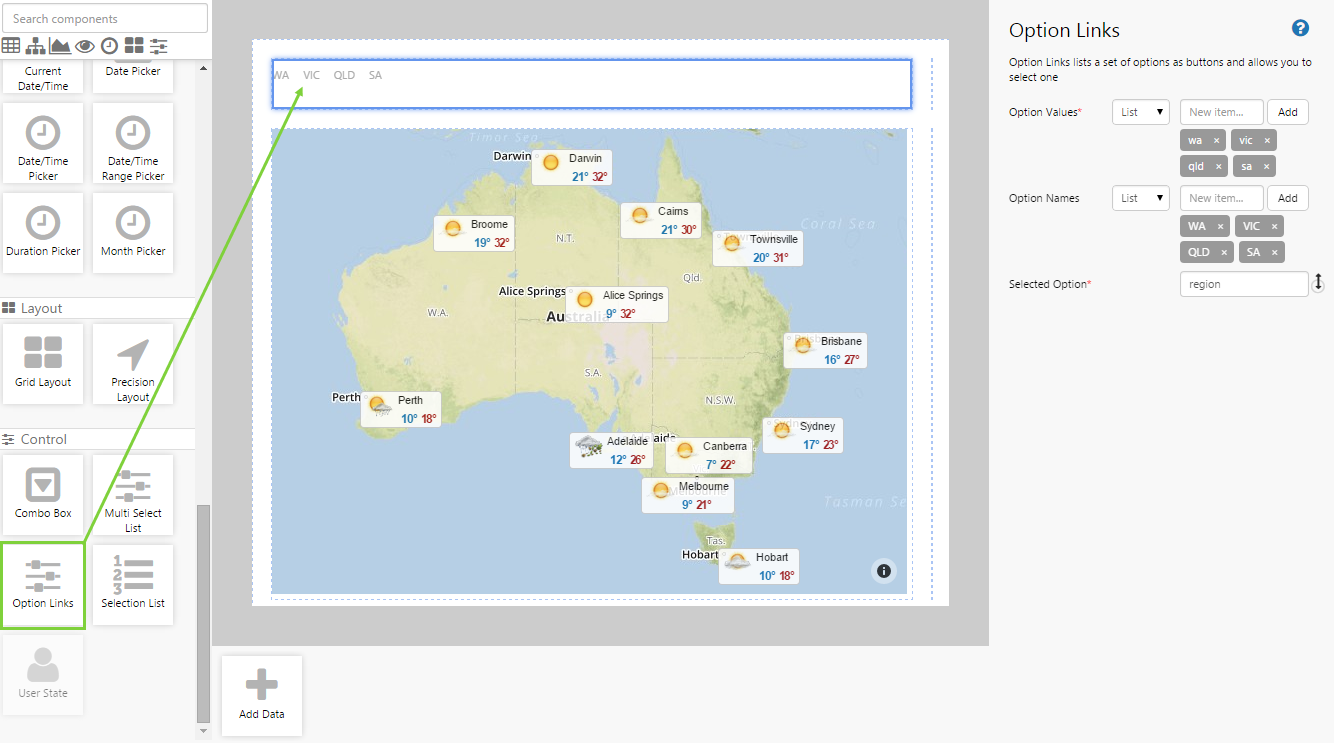
Drag and drop the Option Links component onto the page, and configure it as follows:
- Option Values: (List) wa, vic, qld, sa
- Option Names: (List) WA, VIC, QLD, SA
- Selected Option: region
Step 5. All done!
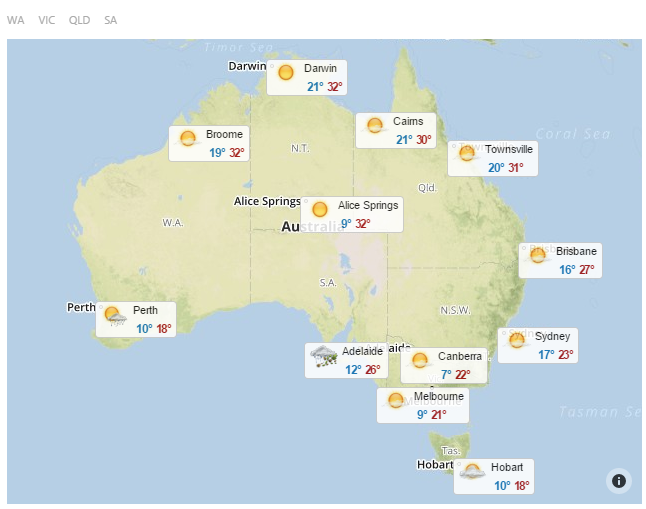
Great work! You now have a fully functioning embedded page that changes depending on the option selected by the user.
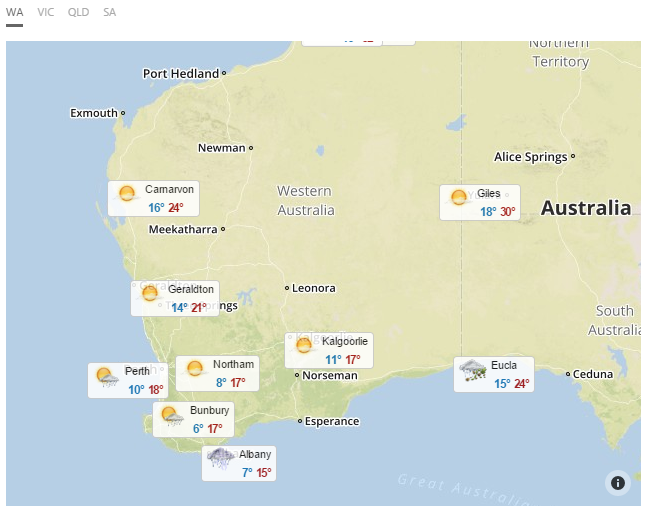
- Click the preview
 button on the Studio toolbar to see what your page will look like in run-time.
 - Click through the different states to see the map change.
![]() Don’t forget to save your page!
Don’t forget to save your page!