Every now and then, you may need to edit a tag in your system after it has been fetched from the historian. You can edit a tag using Server Management or the Import/Export spreadsheet.
Server Management
In P2 Server Management, editing a tag is performed through the Configuration ![]() menu option:
menu option:
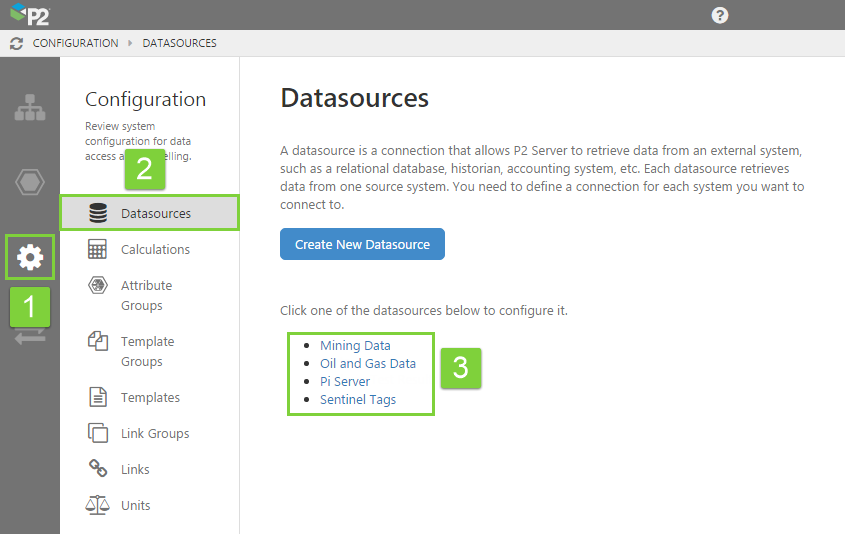
1. Open P2 Server Management, and click the Configuration icon.
2. Click Datasources.
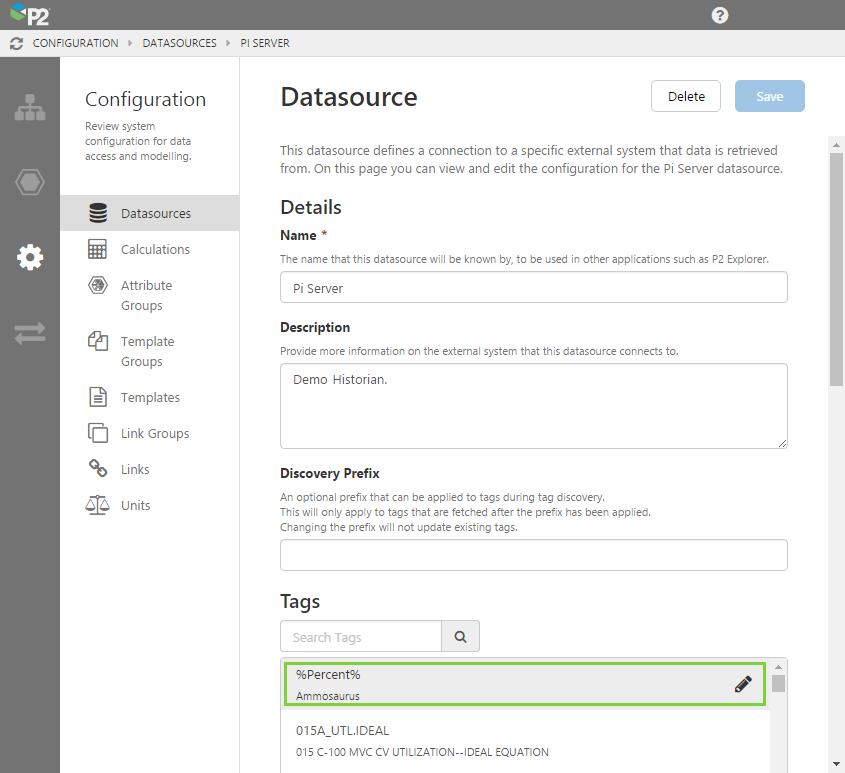
3. Below the Create New Datasource button, click the datasource containing the tag you want to edit.
4. When you hover over a tag in the list, an edit ![]() icon appears. Click this edit icon for the tag you want to edit.
icon appears. Click this edit icon for the tag you want to edit.
5. Edit the fields as required.
You are able to edit the following fields:
- Name: Note that the name cannot contain reserved characters.
- Description: For the description, it's often useful to provide a broader explanation of what the tag represents.
- Native Name: The unique name of the tag in its originating system. Note that the native name cannot contain reserved characters.
- Display Range: Allows consuming applications (e.g. P2 Explorer Trend) to tell what the expected minimum/maximum value is for a tag. This information may be imported by the adaptor.
- Default Timebase: The time range that will be used by default when the tag is displayed in consuming applications, such as being added to a P2 Explorer trend. The default is 12 hours. This property was introduced in version 4.4.5.
- Interpolation: The type of interpolation to assume for the data returned by this tag. This affects how the data is displayed on a chart or trend. The default is Continuous. This property was introduced in version 4.4.5.
- Continuous: Use for continuous data, such as temperature, where you can extrapolate forward from a value.
- Discrete: Use for discrete data points, such as laboratory data, where the result is only valid at that point in time.
- Forward Extrapolated: The tag value is extrapolated forwards over the sample interval.
- Backward Extrapolated: The tag value is extrapolated backwards over the sample interval.
- Decimal Places: The number of decimal places to display for the tag. An example of this being used is when the tag is displayed in the Status Tile of P2 Explorer. The default is 2. This property was introduced in version 4.4.5.
- Scan Rate: The scan rate supplied by the historian, which specifies the frequency with which the tag is updated with live values in the data source. Consuming applications can use this to limit the range of a raw fetch on data which has a high scan rate. This property was introduced in version 4.4.5.
- Unit: The unit of measure for this tag. Select this from the drop-down list, which contains all units defined in the master list.
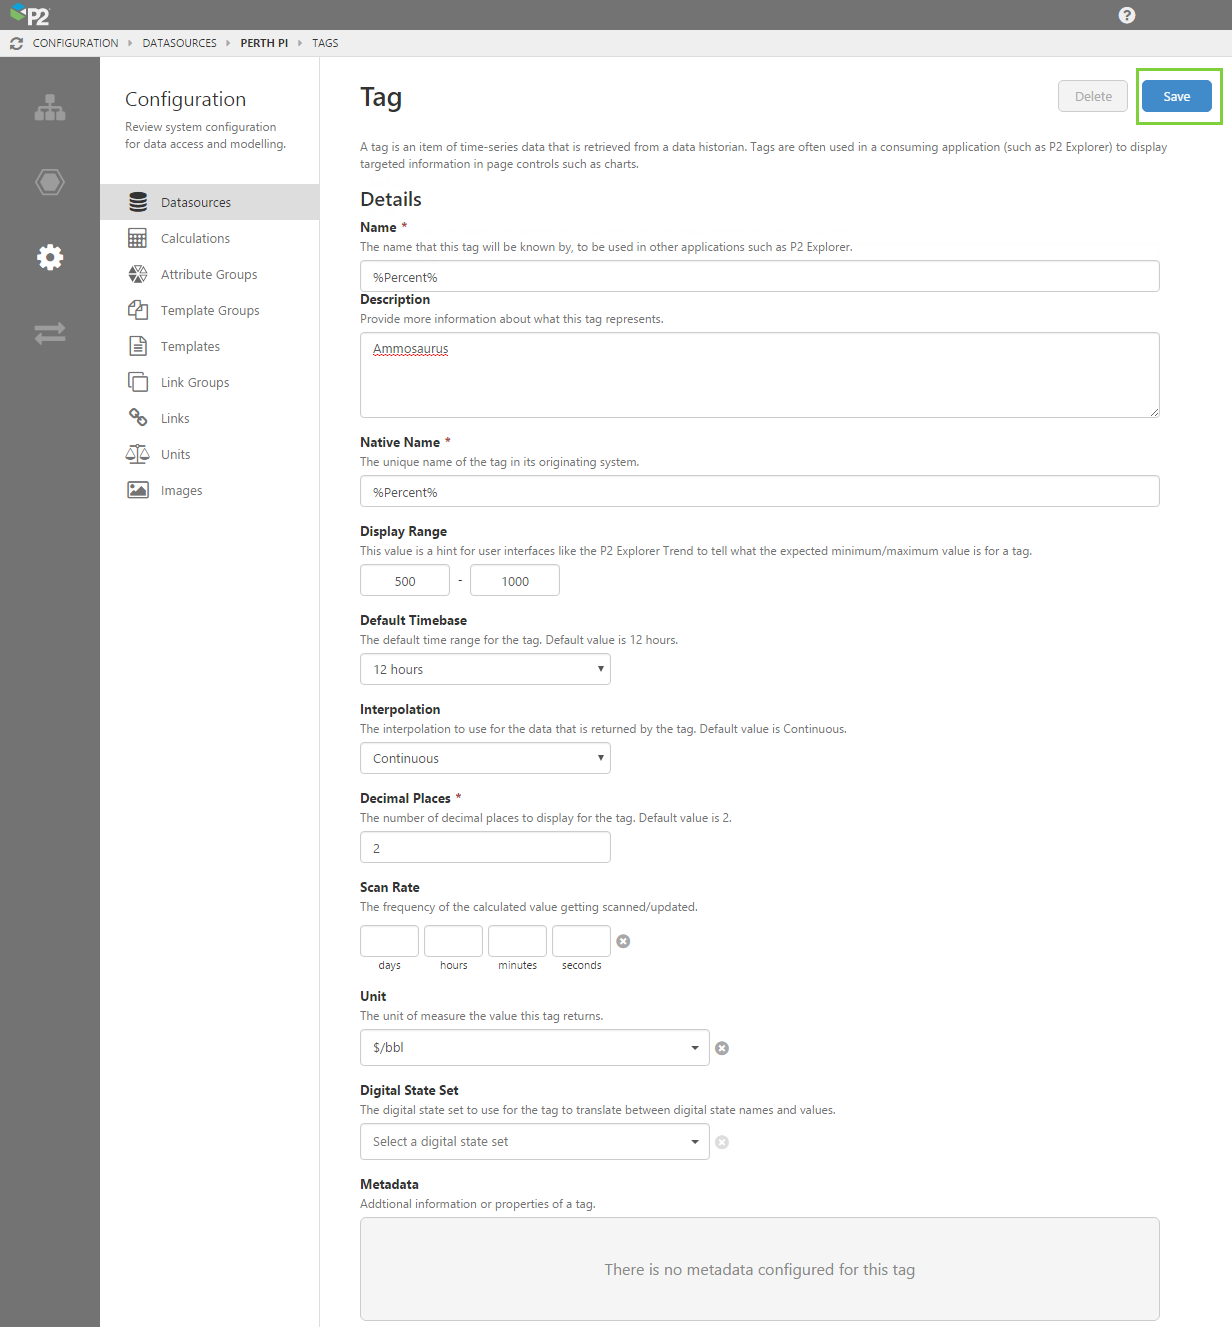
6. Click the Save button in the top right corner.
Import/Export Spreadsheet
If you want to edit tags as part of a bulk configuration, you can use the Tag and Tag Property tabs in the Import/Export spreadsheet.
Look for the red comment ![]() icon in the row headers, to get help with each column.
icon in the row headers, to get help with each column.
DO NOT change anything in the Global Id field - this is the unique identifier for the attribute group that allows it to be tracked across systems, and when it is renamed. It is automatically generated by the system.
Tag Tab
The screenshot below shows an example of a configured tag (click to enlarge). The fields are the same as the ones in the first step of configuring a tag in Server Management, using the above instructions on this page.

Notes:
- The choices for Default Timebase and Interpolation are available from drop-down lists on those cells.
- Default Timebase, Interpolation, Decimal Places, and Scan Rate were introduced in version 4.4.5.
Dependencies
The Tag has dependencies on information from other tabs. Understanding these dependencies assists in resolving import errors.
Direct Dependencies
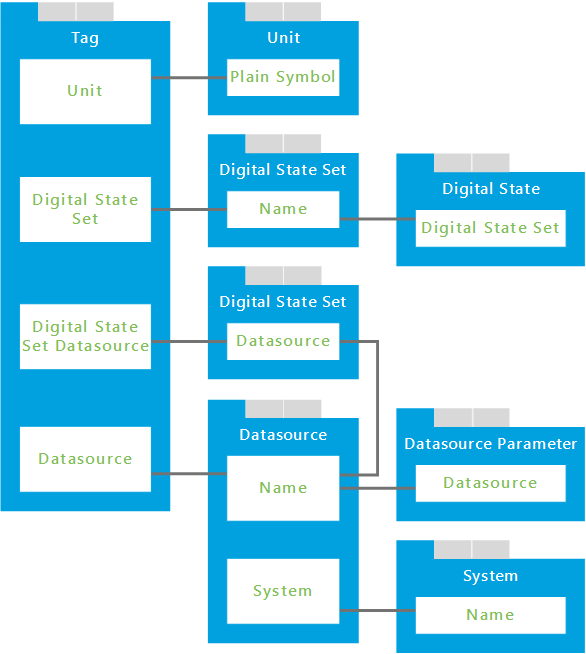
The Tag tab is directly dependent on 3 other tabs; Datasource, Unit and Digital State Set; because columns on the Tag tab directly reference columns on those tabs.
| This column | On this tab | Why you need to pay attention |
| Plain Symbol | Unit | Required by the 'Unit' column on the Tag tab. |
| Name | Digital State Set | Required by the 'Digital State Set' column on the Tag tab. |
| Datasource | Digital State Set | Required by the 'Digital State Set Datasource' column on the Tag tab. |
| Name | Datasource | Required by the 'Datasource' column on the Tag tab. |
Cascading Dependencies
A cascading dependency exists when a dependent tab (above) has additional dependencies. These are the columns that you need to pay attention to:
| This column | On this tab | Why you need to pay attention |
| Digital State Set | Digital State | References the 'Name' column on the Digital State Set tab. |
| Name | Datasource | References the 'Datasource' column on the Digital State Set tab. |
| Datasource | Datasource Parameter | References the 'Name' column on the Datasource tab. |
| Name | System | References the 'System' column on the Datasource tab. |
Here is a diagram of the dependent tabs and columns. Use this to help you visualise how the dependencies work, and ensure all required columns are completed. Use the comments inside the spreadsheet to help you.
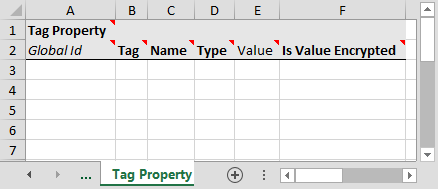
Tag Property Tab
You can also use the Tag Property tab, if you need to edit any of the Tag Metadata. Tag metadata is not editable from within P2 Server Management.
Dependencies
The Tag Property tab has no dependencies on information from other tabs.