ON THIS PAGE:
The Shift Log Entry Form ("entry form") is where you create and edit entries in Shift Log.
These entries are the record of activities that occurred during that shift, and can be included in a handover report.
The fields on an entry form will often be different from form to form. If you are unsure what a particular field means, you should ask your supervisor. This article will focus on the general types of fields that can be present, and how to use various controls on the entry form itself.
Here are the main parts of the entry form:
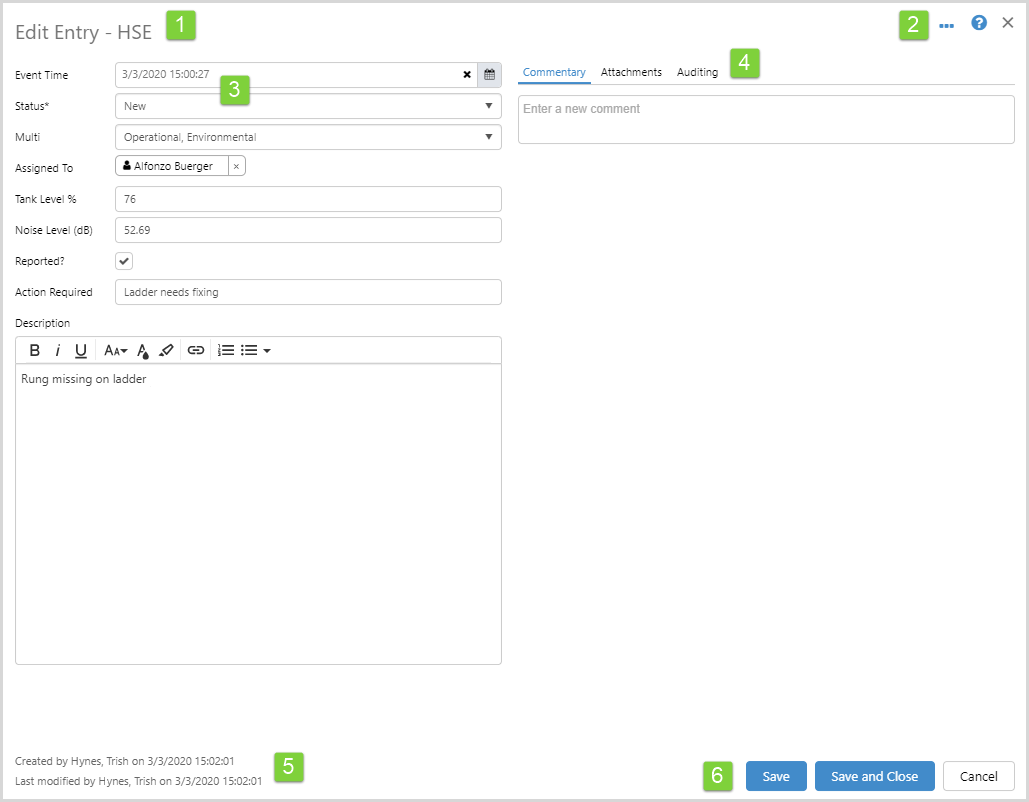
| 1 | The title of the form - this shows if you are adding or editing and entry, and the log you are adding it to. |
| 2 | Entry actions - copy or delete the entry, access online help, or close the dialog. |
| 3 | Fields that should be filled in for the entry. A grey background means that the field cannot be changed (these are updated automatically by the system). A red background means the entry is overdue. |
| 4 | Click the relevant tab to add a comment, add attachments, or to view the audit history of the entry. |
| 5 | System fields that show who created and modified the entry, and when. |
| 6 | Action buttons to save the entry. 'Save' will save the entry but leave the dialog open. |
How to Open the Entry Form
You can open the entry form by adding a new entry, or editing an existing entry.
Add an Entry
To add an entry:
In your Shift Log Workbook, click the + plus button for the log that you want to add the entry to.

The entry form opens, and you can now fill in the details of your entry.
Note: The sections in the panel on the right will not be available until you save the entry.
Here are the types of fields that you may need to fill in:
|
Text
|
|
| Datetime This is a date, time, or a combination of date and time. Click the calendar button on the right to open the Date/Time Picker and select a date and time. |
|
| User A user is any person who is entitled to use the system. Start typing their name, and then select the correct one from the list that appears. |
|
| Entity An entity is usually some piece of equipment, although in some situations it could refer to another type of object or something like an area. |
|
| Number A numerical value. Depending on the configuration, it would either be a whole number or a decimal number. |
|
| Yes/No A yes/no or true/false value is shown by a check box - tick the check box for yes (or true), or clear the check box for no (or false). |
|
| Selection An arrow pointing down indicates that you can choose an item from a list. Click the arrow to see the options available, and then click one of the options to choose it. |
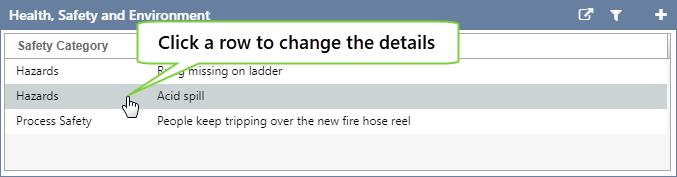
Edit an Entry
To make changes to an entry, click the entry row in the log table. The entry form will open, and you can make the changes you need.
When you open the form for editing, you will notice that the right hand side will contain additional sections. These are only available when you are editing an entry, and allow you to:
Save an Entry
To save an entry, click the Save or Save and Close button at the bottom right of the entry form.
![]()
Save: Save the entry but keep it open. This allows you to immediately add further information such as a comment.
Save and Close: Click this button to save the entry, close the form, and return to the workbook.
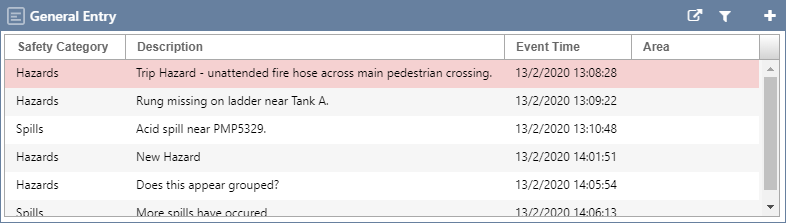
Overdue Entries
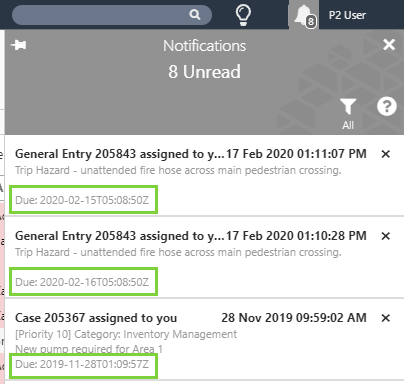
Entries become overdue if the current date/time is past the date/time in the Due Date field. When this happens, those entries have a pale red background colour in the entry table in Shift Log, as well as the Due Date field in the entry dialog and on the Case Details page.
When someone is assigned an entry that has a Due Date field, the due date is also shown on the notification in the Info Zone.
Delete an Entry
Deleting an entry will remove it from the system, along with any comments on that entry.
Note: You will only be able to delete an entry if you created it, or if you are a Shift Log administrator.
To delete an entry:
- Click on the entry to open the entry form.
- Click the 3 dots next to the Help button in the top right corner.
- From the menu, click Delete this entry.

Add a Comment
To add a comment for an entry:
- Click on the entry to open the entry form.
- On the right hand side, click the Commentary tab (if it is not already selected).
- Click the "Type a comment" box, and start typing the comment.
- Click the "Save" link to finish the comment and save it.
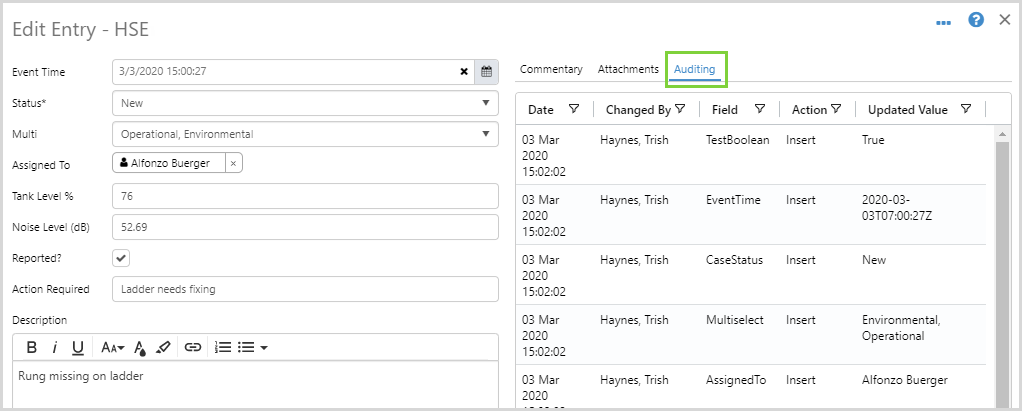
View History
Every time a change is made to an entry, the system will keep a record of what has changed. You can see these changes in the History section on the right hand side of the entry.
To view an entry's history:
- Click on the entry to open the entry form.
- On the right hand side, click the Auditing tab (if it is not already selected).
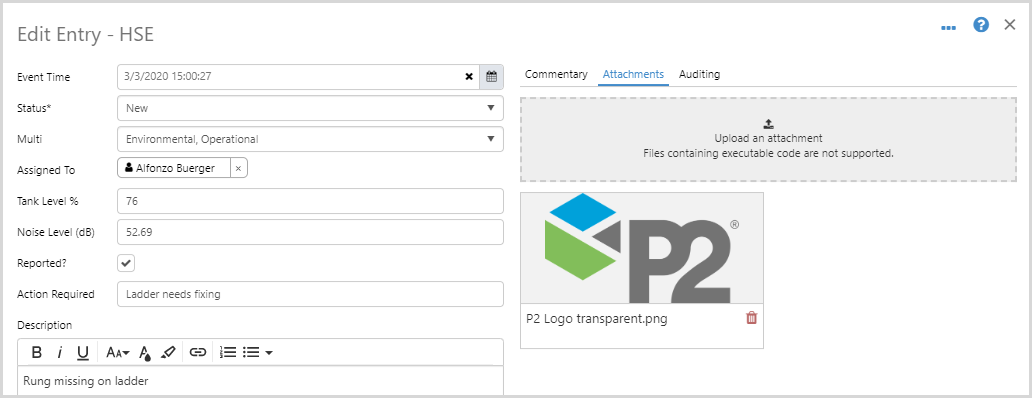
Add an Attachment
You can attach photos and documents to an entry. Note that an entry must first be saved before you can add attachments, and only certain file types are allowed.
1. Click on the entry to open the entry form.
2. On the right hand side, click the Attachments tab (if it is not already selected).
3. Click the grey "Upload an attachment" box, and use the Windows file selector to find the file you want to add.
Alternatively, you can drag and drop from your desktop or another location on your computer.
If you're using a mobile device, such as a tablet, you can tap the attachment box to take a photo or choose one of your existing photos.

4. You will have the opportunity to change the title and description of the attachment. When you are done, click the Upload button.

5. The file is attached, and you do not need to save the entry again.
To open the attachment, click the preview image and save it to your computer.
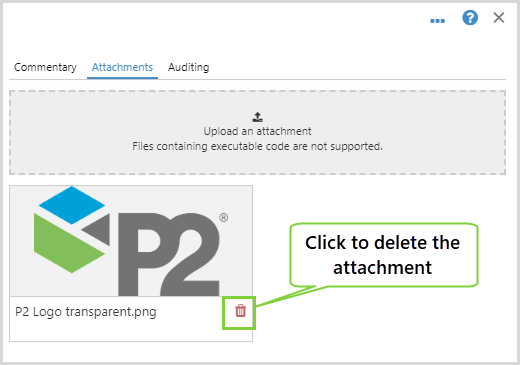
Delete an Attachment
To delete an attachment from an entry, click the red Delete icon next to the attachment you want to remove.
Banned Attachment Types
The following file types are not permitted as attachments in Shift Log.
| ade | hpj | mcf | plg | sct |
| adp | hta | mda | prf | settingcontent-ms |
| app | inf | mdb | prg | shb |
| appcontent-ms | ins | mde | printerexport | shs |
| asp | isp | mdt | ps1 | theme |
| bas | its | mdw | ps1xml | tmp |
| bat | jar | mdz | ps2 | url |
| cer | jnlp | msc | ps2xml | vb |
| chm | js | msh | psc1 | vbe |
| cmd | jse | msh1 | psc2 | vbp |
| cnt | ksh | msh1xml | psd1 | vbs |
| com | lnk | msh2 | psdm1 | vsmacros |
| cpl | mad | msh2xml | pst | vsw |
| crt | maf | mshxml | py | webpnp |
| csh | mag | msi | pyc | website |
| csx | mam | msp | pyo | ws |
| der | maq | mst | pyw | wsc |
| diagcab | mar | msu | pyz | wsf |
| exe | mas | ops | pyzw | wsh |
| fxp | mat | osd | reg | xbap |
| gadget | mau | pcd | scf | xll |
| grp | mav | pif | scr | xnk |
| hlp | maw | pl |
|
|