ON THIS PAGE:
Overview
The hotspot allows a user to click on a designated area of the page, and navigate to a specified location.
The hotspot component is similar to the Hyperlink. Unlike the Hyperlink with its visible Content, the Hotspot is transparent and is ideal for overlaying images, text labels, and other components.
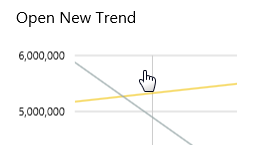
A Hotspot in display mode
When a user hovers over a hotspot, a cursor indicates that this is a hyperlink. The hotspot borders should line up to the overlayed component, for example a text label and image.
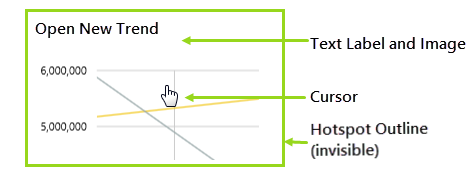
Features of a Hotspot
Because you are overlaying another component with a hotspot, you need to use precision mode. If you drag a precision mode layout onto a grid cell, then you will be able to move the 'set' of components easily, by moving the grid cell around.
The Hotspot Component
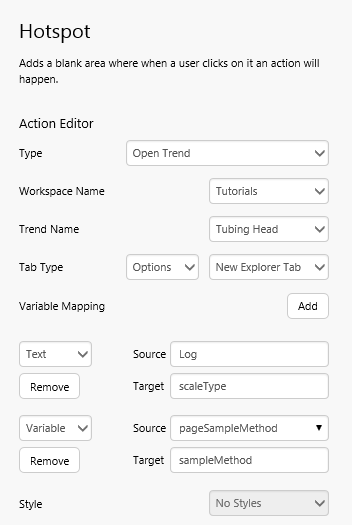
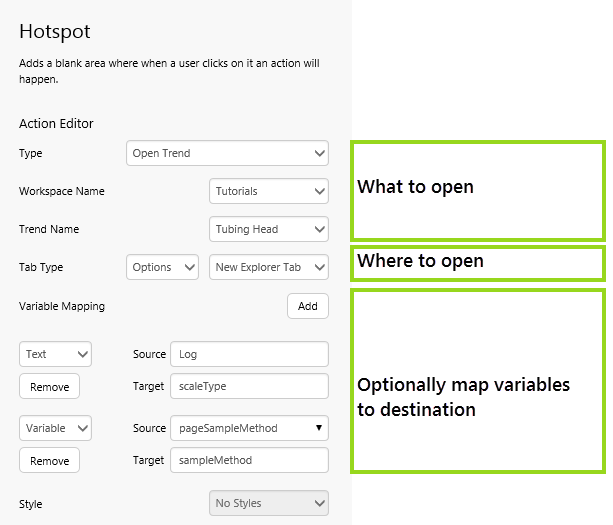
When configuring a hotspot component, specify what to open, where to open it, and optionally add variable mapping.
Using Multiple Hotspots
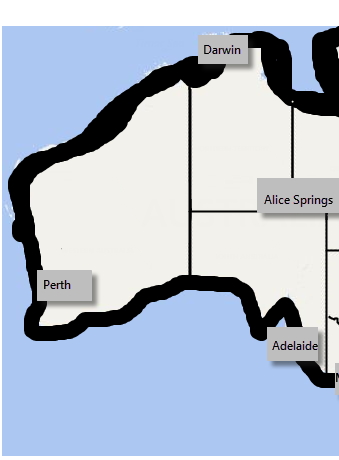
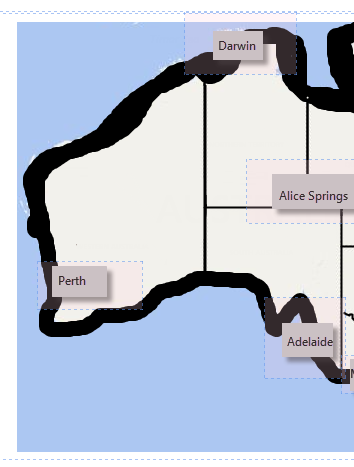
You can have multiple hotspots over a single image, as shown in this example. Or if you have a labelled image, you can place hotspots over the labels.
| In Display Mode | In Design Mode | ||
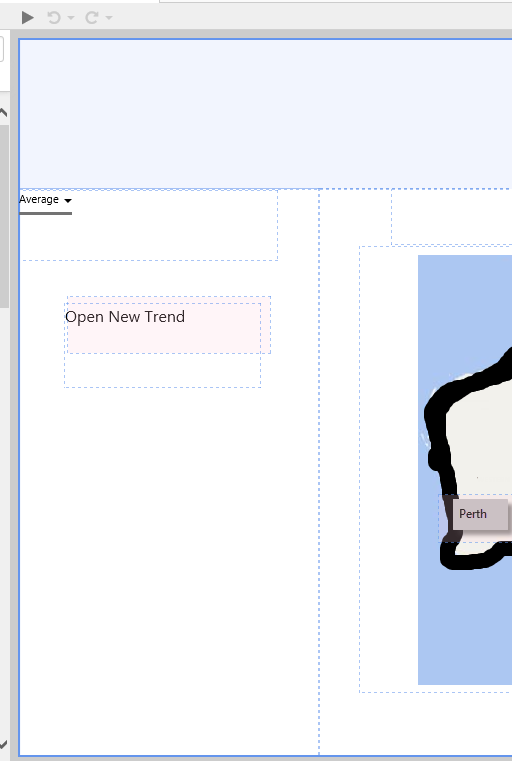
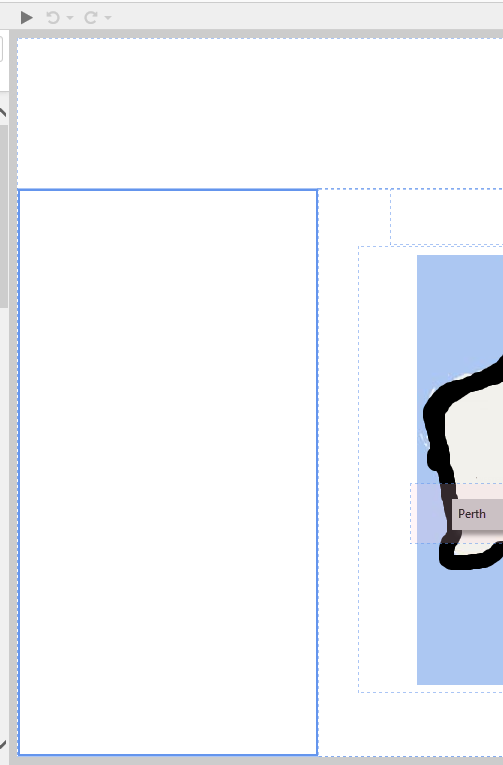
| In display mode, you can see the cursor as the user hovers over a hotspot. | In design mode, each hotspot is coloured in light pink. | ||
|
|
|
Tutorial 1: Hotspot for Weather Sites
If you're unfamiliar with the process of building pages, read the article Building an Explorer Page.
In this tutorial we'll practise adding two hotspots onto an image. We'll configure each hotspot to open a URL to another site: Perth Weather and Adelaide Weather, respectively.
There are three steps in the tutorial:
- Step 1. Prepare a Studio Page
- Step 2. Add an Image and a Text Label
- Step 3. Add and Configure a Hotspot
Step 1. Prepare a Studio Page
In this step, we're going to open a new Explorer page in Grid layout, then add a Precision layout to one of the grid cells.
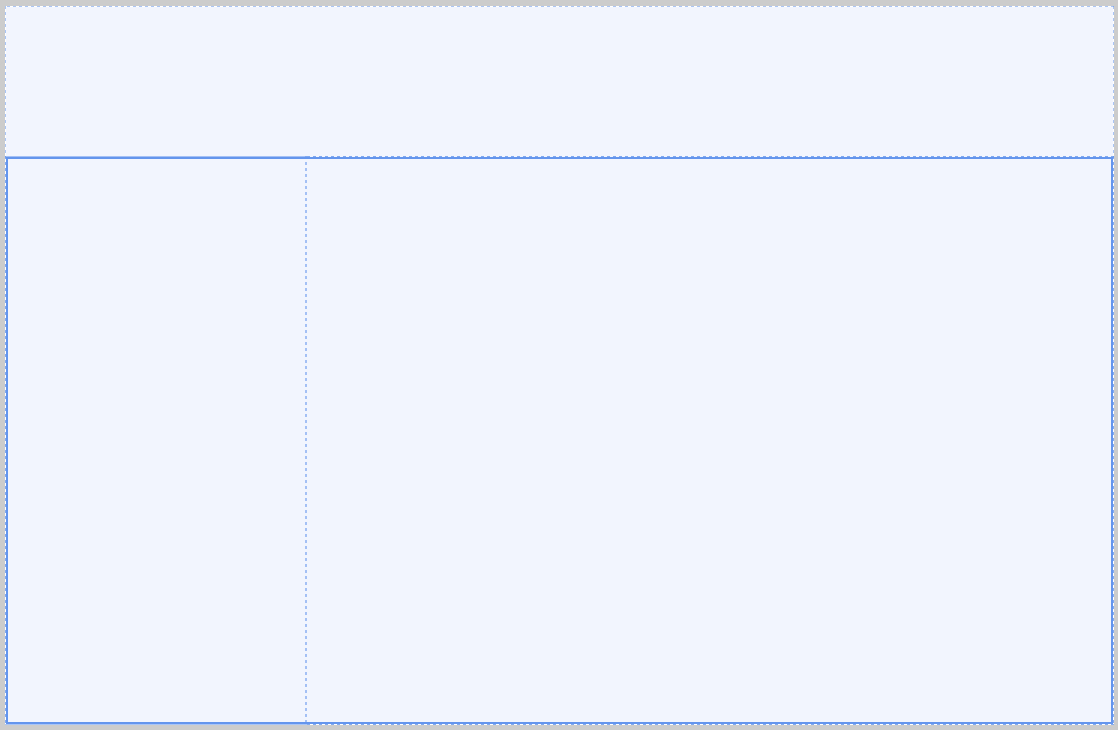
1. First, prepare a Studio page in Grid Layout.
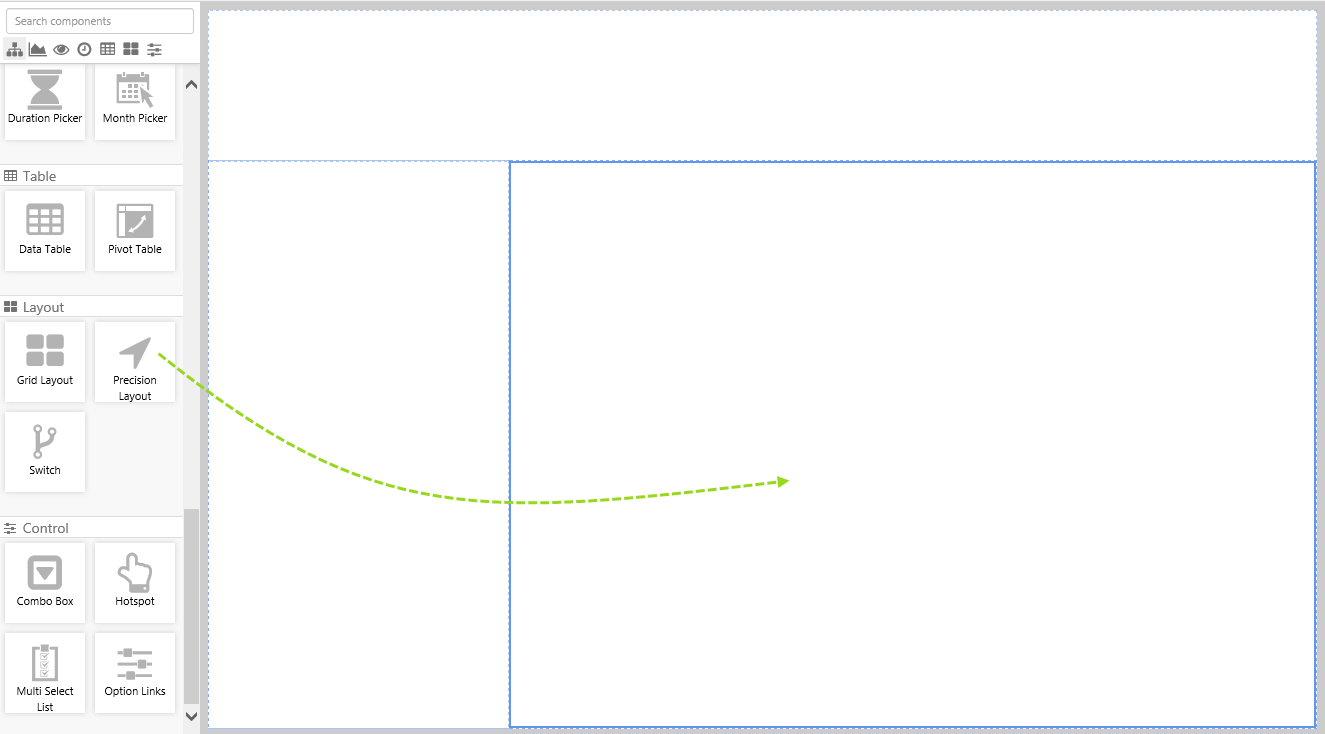
Format the page so that there is a main grid with two rows, then add another two-column grid in the bottom row, with the left grid narrower than the right as shown:
Related: Grid Layout
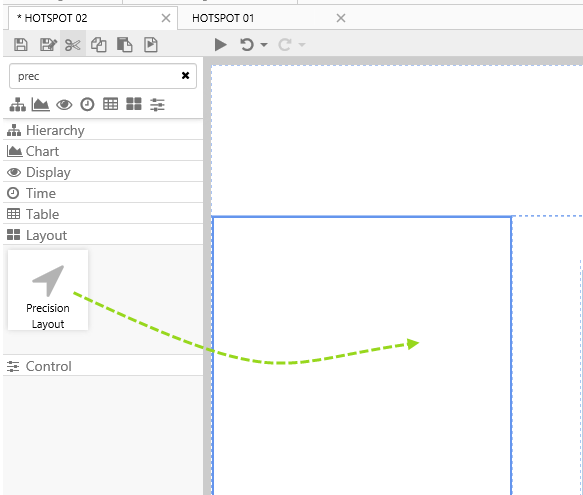
2. Now drag a Precision Layout component onto the right cell of the secondary grid.
Related: Precision Layout
Step 2. Add an Image and a Text Label
In this step, we're going to add and configure an Image and a Text Label.
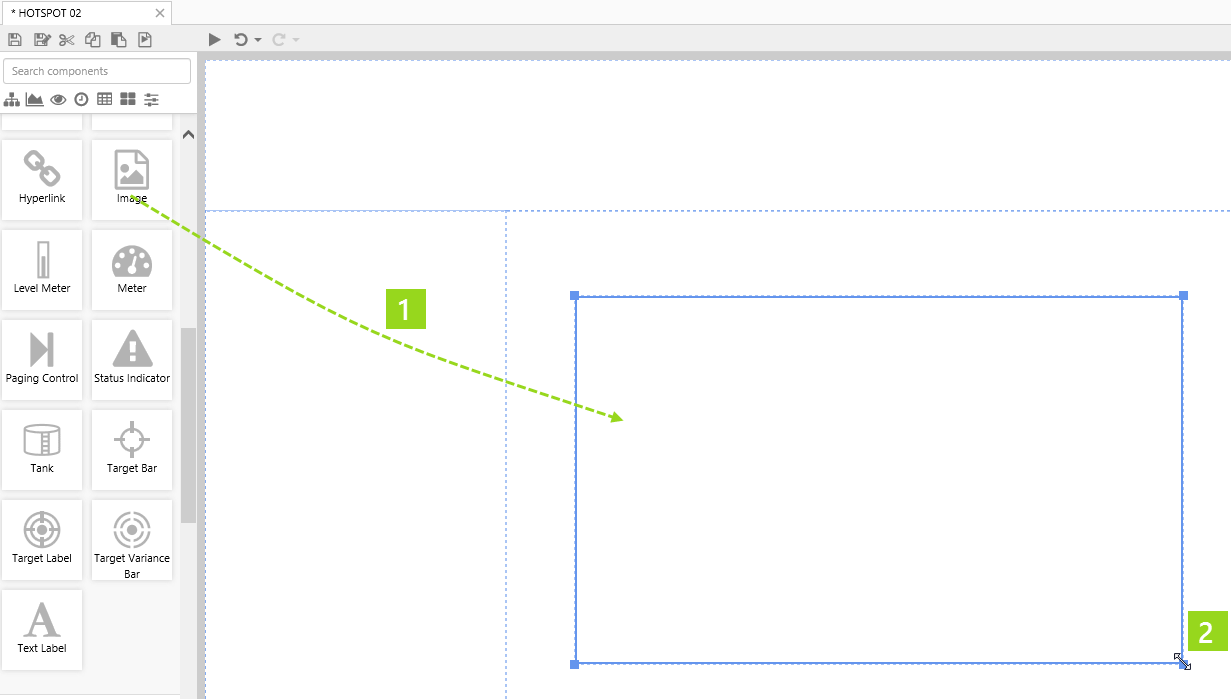
1. Drag an Image onto the precision layout.
Related: Image
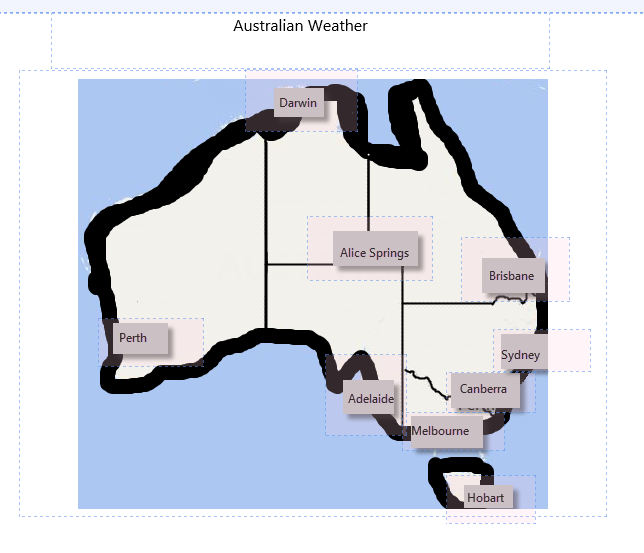
2. Resize and position the image.
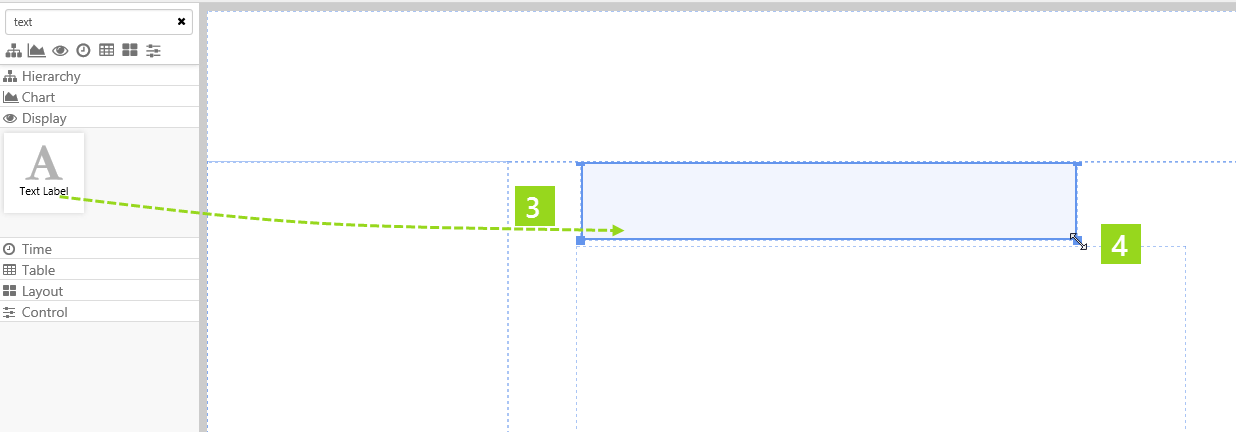
3. Drag a Text Label onto the precision layout, directly above the image.
Related: Text Label
4. Resize and position the Text Label.
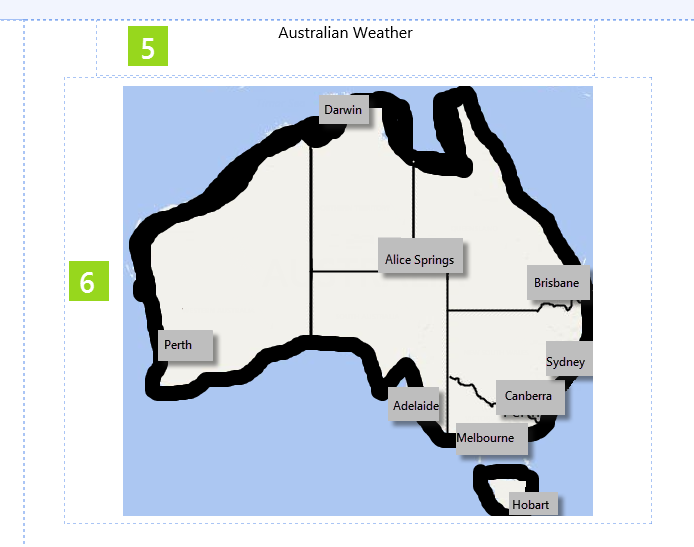
5. Configure the Text Label to show the content "Australian Weather", and apply a centered style.
6. Configure the image to have a Default Image URL of https://e4helpcenter.petroleumplace.com/help/wp-content/uploads/2016/04/Map-of-Australia.png.
Step 3. Add and Configure a Hotspot
In this step, we're going to drag a hotspot onto part of the image, and then configure it to open a weather page in a new Explorer tab.
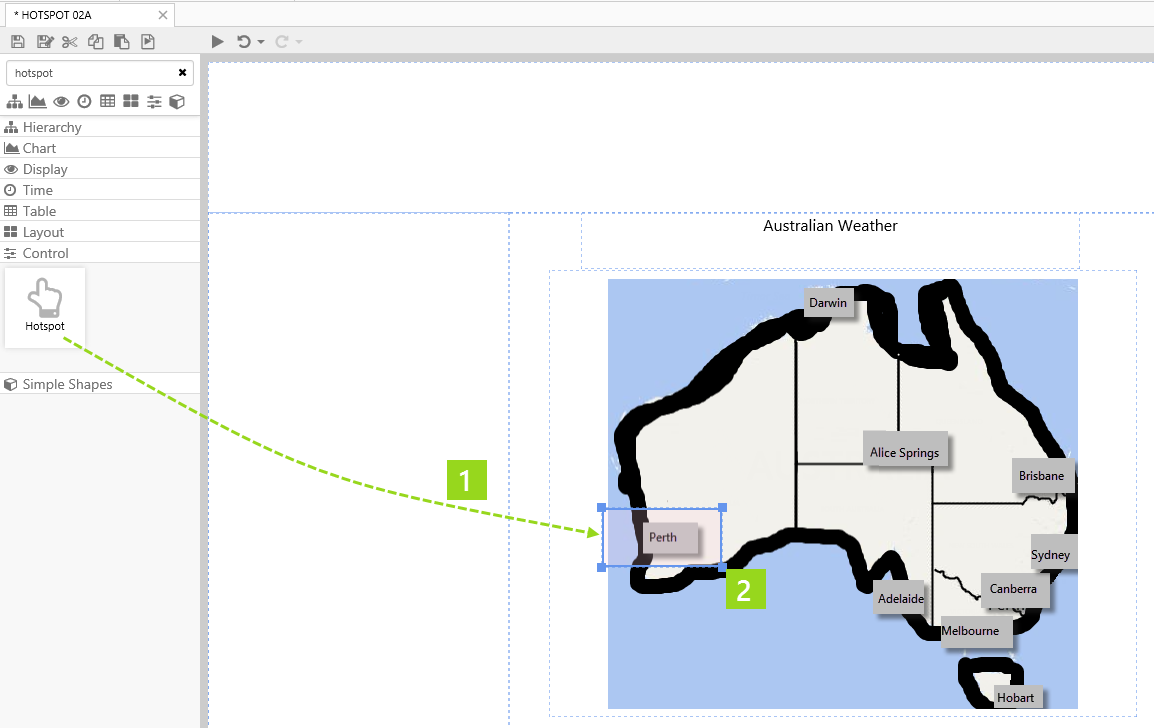
1. Drag a Hotspot component onto the page, and position it directly over the "Perth" area in the image. The Hotspot is in the Control ![]() group.
group.
2. Resize the hotspot to fit this area.
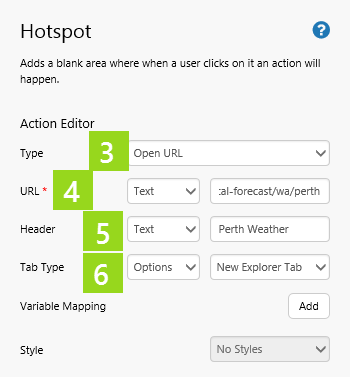
Now click on the hotspot, to configure it in the component editor:
3. Select Open URL from the Type drop-down list.
4. Select Text from the drop-down list, and type https://weather.yahoo.com.au/local-forecast/wa/perth in the URL text box.
5. Select Text from the drop-down list, and type Perth Weather in the Header text box. Note: if you leave out the Header, Explorer will open this URL with a header of "New Page".
6. Select Options from the first drop-down list, then New Explorer Tab from the second drop-down list.
7. Add another hotspot, position it over Adelaide on the map, and give the component the following properties:
- Type: Open URL
- URL: https://weather.yahoo.com.au/local-forecast/sa/adelaide
- Header: Adelaide Weather
- Tab Type: New Explorer Tab
Test the Hotspot
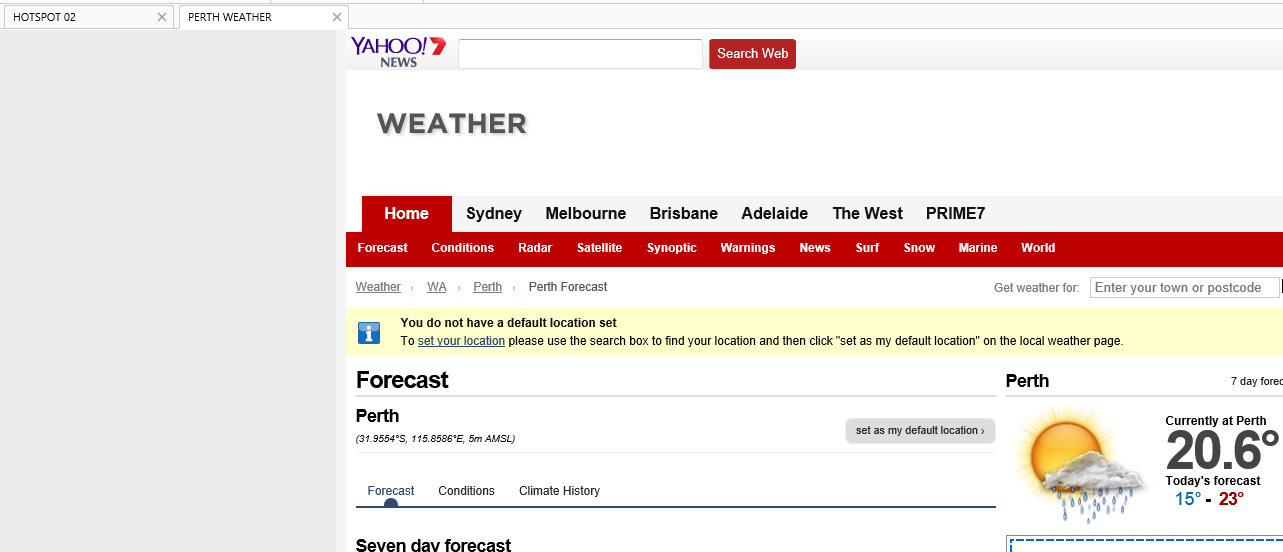
You now have a fully functioning hotspot, that will open the Perth Weather page, in a new Explorer tab, when clicked.
- Click the Preview
 button on the Studio toolbar to see what your page will look like in run-time.
 - Hover over the Perth section of the image, then click.
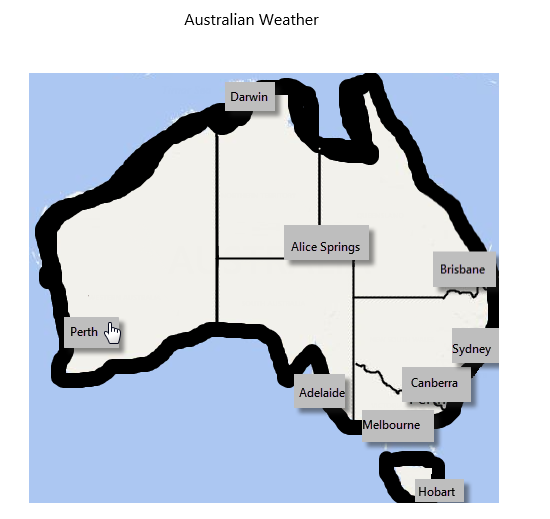
The Perth Weather page opens in a new Explorer Tab.
The next tutorial describes how to open a new trend, and includes Variable Mapping.
Tutorial 2: Hotspot for Opening a New Trend
In this tutorial we'll practise adding a hotspot onto a text label, to open a New Trend in a separate Explorer Tab.
Using Variable Mapping, we'll configure the hotspot to send the selected Sample Method to the new trend.
This is a follow-on from Tutorial 1. There are three steps in the tutorial:
- Step 1. Prepare the Page
- Step 2. Add a Text Label and a Combo Box
- Step 3. Add and Configure a Hotspot
Step 1. Prepare the Page
In this step, we're going to add to the page used in Tutorial 1. Well add another Precision Layout to one of the grid cells.
1. Open the page used in Tutorial 1.
2. Now drag a Precision Layout component onto the left cell of the secondary grid.
Step 2. Add a Text Label and a Combo Box
In this step, we're going to add and configure a Text Label and a Combo Box.
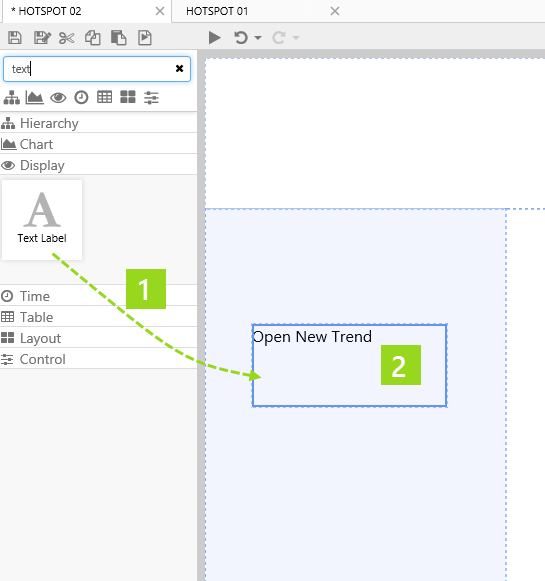
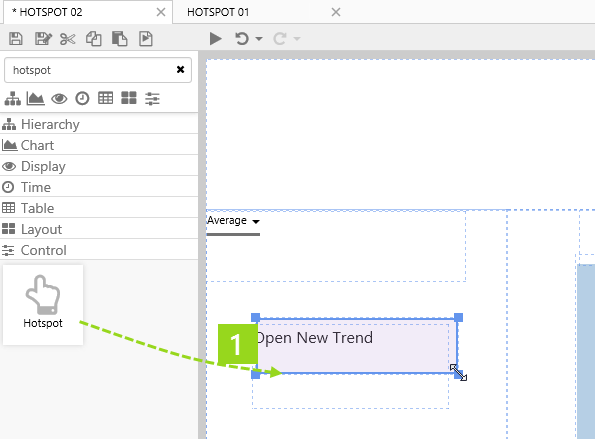
1. Drag a Text Label onto the precision layout.
2. Update the Text Label's Content to: Open New Trend.
3. Drag a Combo Box onto the precision layout, above the text label.

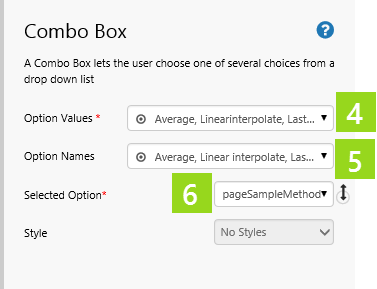
Configure the Combo Box to interact with the Page Default pageSampleMethod.
4. Add the following list of values to Option Values: Average, LinearInterpolate, LastKnownValue, Raw.
5. Add the following list of values to Option Names: Average, Linear interpolate, Last known value, Raw.
6. In the Selected Option drop-down list, select pageSampleMethod. This is one of the Page Defaults.
Step 3. Add and Configure a Hotspot
In this step, we're going to drag a hotspot onto part of the image, and then configure it to open a New Trend in a new Explorer Tab.
1. Drag a Hotspot component onto the page, and position it over the text label.
Now click on the hotspot, to configure it in the component editor:
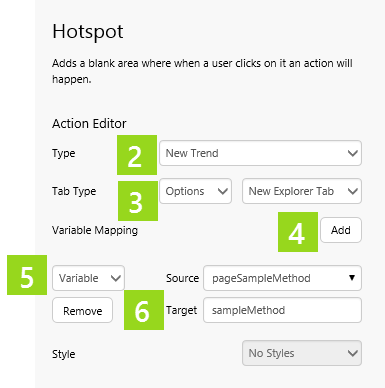
2. Select New Trend from the Type drop-down list.
3. Select Options from the first drop-down list, then New Explorer Tab from the second drop-down list.
4. Click Add to add a Variable Mapping.
5. Select Variable from the drop-down list, and pageSampleMethod from the Source drop-down list.
6. Type sampleMethod in the Target edit box.
Test the Hotspot
You now have a fully functioning hotspot, that will open a new trend when clicked.
- Click the Preview button on the Studio toolbar to see what your page will look like in run-time.
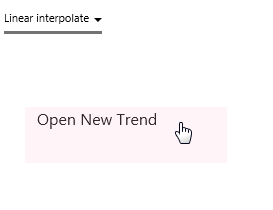
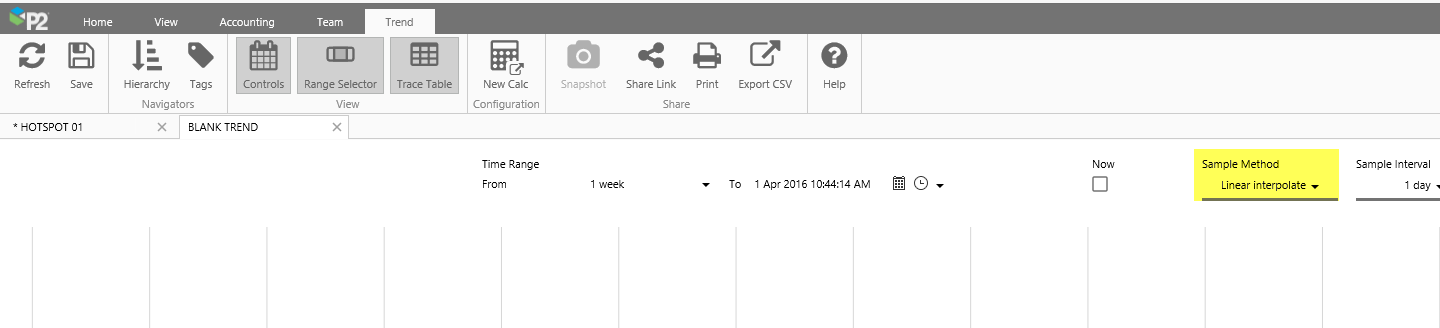
- Select Linear interpolate from the Combo Box.
- Hover over the text: Open New Trend, then click.
- A blank trend opens in a new Explorer tab.
Note how Linear interpolate is the selected Sample Method.
Comprehensive Reference
This section describes the properties of the Hotspot component.
|
|