ON THIS PAGE:
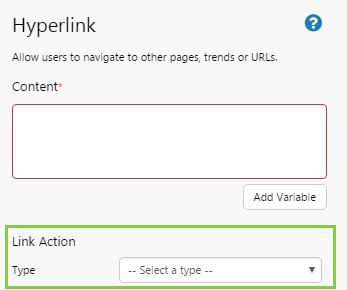
The Link Action is a feature that allows you to set variables on a page, or to open a different Explorer page, trend, or URL, optionally mapping variables from the current Explorer page to the destination page/trend/URL.
This feature is available for Hyperlinks, Hotspots, Status Tiles, Images, and some Charts.
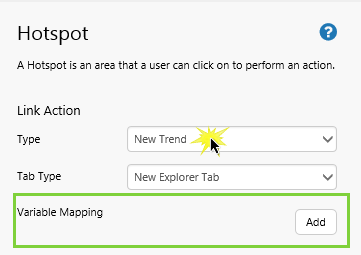
Variable Mapping appears in the component editor once you have selected a link action type.
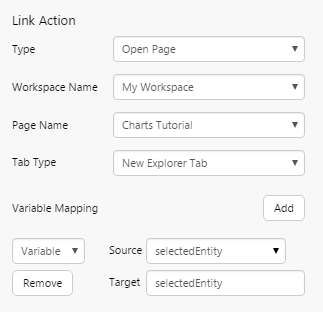
Here are two examples of link actions and variable mappings:
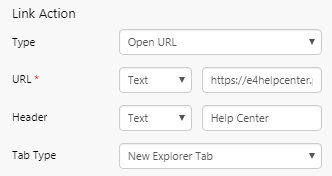
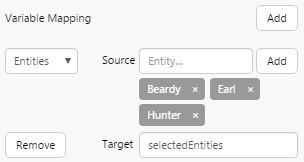
| Fully configured Link Action with Variable Mapping. With this configuration, the value of the selectedEntity variable from the current page is mapped to the selectedEntity variable of the linked page | Fully configured Link Action to set variables. With this configuration, the selectedEntity variable is updated with the value 'Archer' when the link is clicked |
 |
 |
Link Actions
Link actions allow you to link to a page, trend, or URL, or otherwise to set variables on the current page. There are five types of link actions:
|
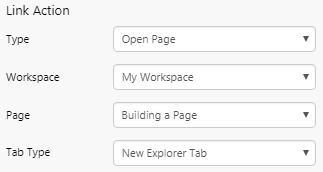
Open an Explorer Page:
|
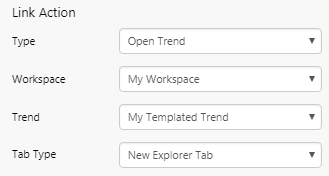
Open an existing Explorer Trend:
|
|
Open an external web page:
|
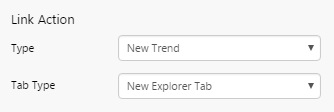
Open a new, blank Explorer Trend:
|
|
Set Variables:
|

Variable Mapping
Variable Mapping appears in the component editor when you select one of the following link action types: Open Page, Open Trend, Open URL, New Trend.
The variables you can use depend on what you are opening, and can be different for trends, pages, and URLs. Note that variables are case-sensitive.
Each variable mapping needs a source (coming from the page you are on) and a target (for the trend/ page/ URL you are opening). The source and the target should have matching data types.
How to Map Variables
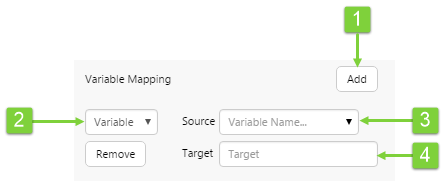
Step 1. Click Add to add a new variable mapping
You can add several variable mappings, to pass values to the destination page, trend or URL.
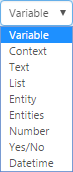
Step 2. Choose the value type for the Source
The drop-down list on the left shows a list of types that you can pass via the link. Often, you will want to pass a variable (e.g. selectedEntity), but you can also pass specific values. See the table below for details.
Step 3. Specify the Source value
The Source box is where you specify the value you want to pass. The value you specify here will depend on what you selected from the drop-down list. The table below explains the options available.
| Variable | Specify a variable for the source. The target must be a variable of the same data type. When this is selected, you can select the variable from the Source drop-down list. E.g. selectedEntity | |
| Context | This is only available for Charts where the X axis is a string (discrete charts). Select xValue from the Source drop-down list. The target must be a variable of the same data type as the value of the X axis of the chart. For a configuration example, see the tutorial. | |
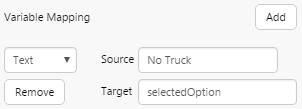
| Text | In the Source box, type the text you want to pass to the target variable. The target must also be a text variable. E.g. You could use this pass the selected option to a combo box, or to pass some text to a variable for a URL. | |
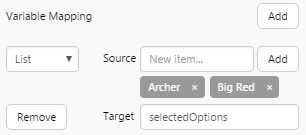
| List | In the Source box, add a list of items for the source. Type the item name, and then click 'Add'. Keep adding more until you are done. The target must also be a list variable. E.g. You could use this to pass a list of options to an option links component. | |
| Entity | The name of the entity you want to pass to the target. Type the internal name of the entity in the Source box. The target must also be an entity variable. E.g. You could pass an entity to a hierarchy. | |
| Entities | The list of entities you want to pass to the target. Type the internal name of the entity, and then click 'Add'. Keep adding more until you are done. The target must also be an entity variable. E.g. You could pass a list of entities to the entity selector. | |
| Number | In the Source box, type the number you want to pass to the target. The target must also be a number variable. E.g. You could use this to pass a wind direction value to the wind vane. | |
| Yes/No | Specify a Yes or No value for the source. The target must also be a yes/no (Boolean) variable. When this is selected, you can specify Yes by selecting the check box. E.g. You could use this to pass a 'yes' value to the current date/time toggle. | |
| Datetime | Specify a specific data/time value for the source. The target must be a date/time variable. When this is selected, you can choose the date/time using the calendar and time pickers. E.g. You could use this to pass a value to a date/time picker. |
Step 4. Choose the target variable
Type in the name of the variable on the target page/trend/URL. The target will always be a variable that exists on the page or trend that you are linking to. In the case of a URL, this will be a query parameter. This must be an accurate match and is case-sensitive. See below to understand what variables can be configured for pages, trends, and URLs.
Tip: Click Remove to remove the variable mapping.
Trend Variable Examples
Trends use specific, case sensitive variables which can be mapped. The variable mapping in the following examples can be used for both new and existing trends.
|
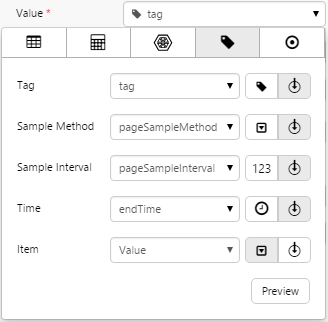
Open a trend with tags This example applies when you want to specify one or more tags to open in a new trend. Note: Tag names must be enclosed in curly brackets e.g. {tagname} Target variables used: tags |
 |
|
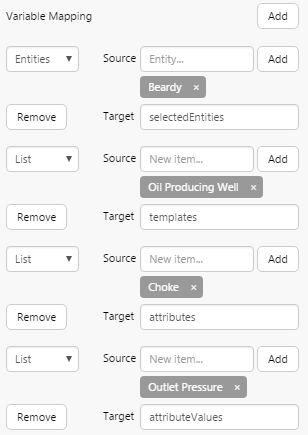
Open a trend with an attribute This example applies when you want to specify an attribute to open in a new trend. This will also work if you want to specify multiple entities with the same same attribute, or a single entity with multiple attributes. Target variables used: selectedEntities, templates, attributes, attributeValues Notes:
|
 |
|
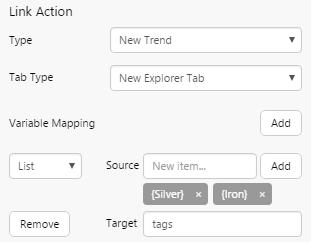
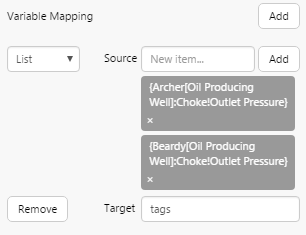
Open a trend with multiple attributes This example applies when you want to open multiple entities with more than one attribute in a new trend. To do this, you need to specify them as a list of tags with fully qualified names, enclosed in curly brackets. E.g. {Archer[Oil Producing Well]:Choke!Outlet Pressure} Target variables used: tags |
 |
|
Open a trend with specific start and end times This example shows how to specify the start and end times on the trend, using a date/time picker. Note: Specifying a start and end time is incompatible with isNow, duration, and refreshRate variables. Target variables used: startTime, endTime |
 |
| Open a trend with specific start and end times
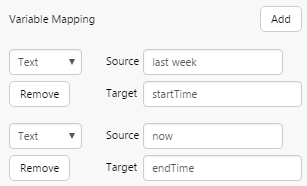
This example shows how to specify the start and end times on the trend, using the friendly text format. Target variables used: startTime, endTime Note: These variables are incompatible with isNow, duration, and refreshRate variables. |
 |
|
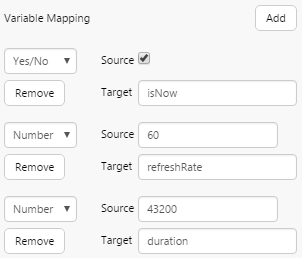
Open a trend using a specific refresh rate This example shows how to set the end time time of the traces to the current time, with a specified duration and refresh rate. Note: These variables are incompatible with startTime and endTime variables. Target variables used: isNow, duration, refreshRate Note: For the isNow variable, you can use a variable type of either Yes/No or Text. If using Text, specify True or False. |
 |
|
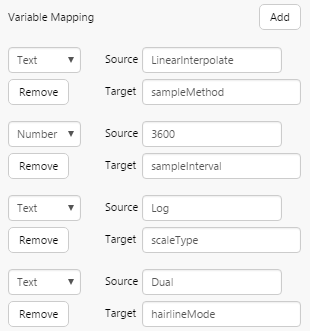
Open a trend using a specific sampling parameters and options This example shows how to set the sampling parameters and other options for the trend. Target variables used: sampleMethod, sampleInterval, scaleType, hairlineMode |
 |
|
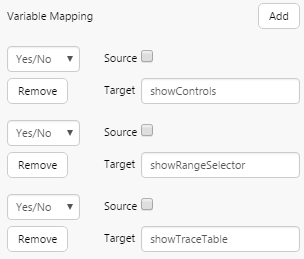
Open a trend with hidden controls This example shows how to hide the controls and certain sections of the trend. Target variables used: showControls, showRangeSelector, showTraceTable Note: For these variables, you can use a variable type of either Yes/No or Text. If using Text, specify True or False. |
 |
Page Variable Examples
Unlike trends, variables on pages are up to the page designer to define. However, some variables are supplied by the system as defaults. The variable mapping in the following examples use system default variables, and can be used for both new and existing pages.
|
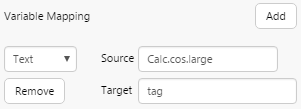
Open a page with a specific tag This example applies when you want to specify a tag in the Data Selector for a component. This example will only work if you set the Data Selector to use the tag variable tag. You can also use this method to pass in an attribute value, however the attribute must be specified using the fully qualified name (e.g. Archer[Oil Producing Well]:Choke!Outlet Pressure). Note: In this usage example, the tag name must not be enclosed in curly brackets.
|
|
|
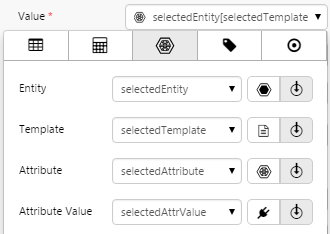
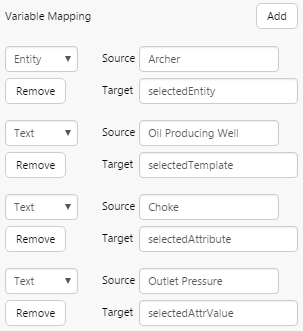
Open a page with a specific attribute This example applies when you want to specify an attribute in the Data Selector for a component. To do this, you need to add variables for the entity, template, attribute, and attribute value. Note: For selectedEntity, you can use a variable type of either Entity or Text.
|
|
|
Open a page with specific start and end times This example shows how to specify the start and end times on a page. You can see this in action when you have a page with a Date Picker, Date/Time Picker, or Date/Time Range Picker, and on the Default Values page.
Note: Specifying a start and end time is incompatible with the isNow variable. Target variables used: startTime, endTime |
|
|
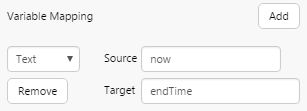
Open a page with end time set to the current time There are two ways to do this: you can use either the isNow variable or the endTime variable with friendly text format. Target variables used: isNow, endTime Notes:
|
|
|
Open a page using a specific sampling parameters This example shows how to set the sampling parameters on a linked page. Target variables used: pageSampleMethod, pageSampleInterval, confidenceThreshold |
 |
|
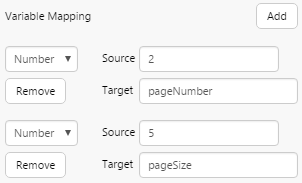
Open a page with specific paging controls This example shows how to change the defaults when opening a linked page with a paged table. Target variables used: pageNumber, pageSize |
 |
|
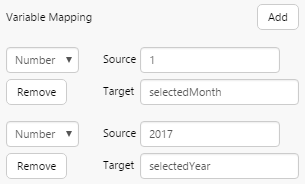
Open a page with a specific month and year in a Month Picker This example shows how to specify the selected month and year for the Month Picker component, when opening a page from a link. This assumes that the default selectedMonth and selectedYear variables are used. Target variables used: selectedMonth, selectedYear |
 |
|
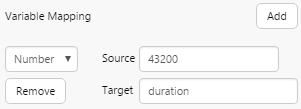
Open a page with a specific duration set in a Duration Picker This example shows how to specify the duration for a Duration Picker, when opening a page from a link. This assumes that the default duration variable is used. Target variables used: duration |
 |
|
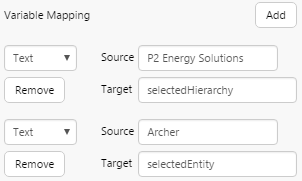
Open a page with a specific hierarchy and entity set in a Breadcrumb This example shows how to specify the hierarchy and entity in a Breadcrumb, when opening a page from a link. This assumes that the default selectedHierarchy and selectedEntity variables are used. Target variables used: selectedHierarchy, selectedEntity Note: For selectedEntity, you can use a variable type of either Entity or Text. |
 |
|
Open a page with specific entities set in an Entity Selector This example shows how to specify the entities in an Entity Selector or Hierarchy, when opening a page from a link. This assumes that the default selectedEntities variable is used. Target variables used: selectedEntities Note: For selectedEntities, you can use a variable type of either Entities or List. |
 |
|
Open a page with a specific option set in a Combo Box This example shows how to set the initial selection in a Combo Box, Option Links, or Selection List when opening a page from a link. This assumes that the default selectedOption variable is used. Target variables used: selectedOption |
 |
|
Open a page with specific options set in a Selection List This example shows how to set the initial options in a Selection List when opening a page from a link. This assumes that the default selectedOptions variable is used. Target variables used: selectedOptions |
 |

URL Variable Examples
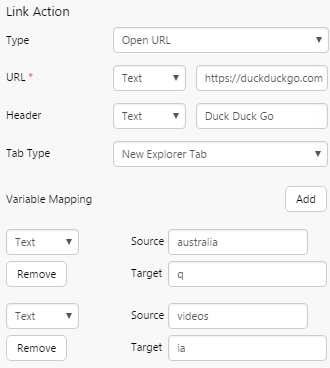
In order to successfully pass variables to the URL of an external web page, you must understand the structure of the target URL's query parameters.
For example, to search the Duck Duck Go search engine for videos of Australia, the URL would look like this:
https://duckduckgo.com/?q=australia&ia=videos
Where the parameter q indicates the search term, and ia indicates type of search. The resulting variable mapping would look like this:
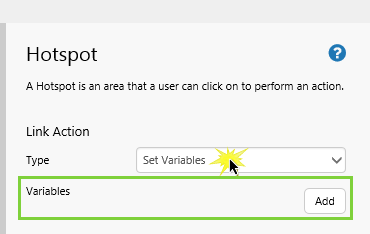
Variables
Variables appears in the component editor when you select Set Variables link action type.
Note that variables are case-sensitive.
Each variable needs a source and a target. The source and the target (which must be a variable) should have matching data types.
How to Add Variables

Step 1. Click Add to add a new variable pair
You can add several variable pairs, to set variable values on the page.
Step 2. Choose the value type for the Source
The drop-down list on the left shows a list of types that you can use as the source. If you want a variable for your source, select Variable here. If you are going to use a constant (such as 'Archer' or 123), then select the appropriate type here (e.g. Text or Number). See the table below for details.
Step 3. Specify the Source value
The Source box is where you specify the value you want, to update the target. The value you specify here will depend on what you selected from the type drop-down list. The table below explains the options available.
| Variable | Specify a variable for the source. The target must be a variable of the same data type. When this is selected, you can select the variable from the Source drop-down list. E.g. selectedEntity. | |
| Context | This is only available for Charts where the X axis is a string (discrete charts). Select xValue from the Source drop-down list. The target must be a variable of the same data type as the value of the X axis of the chart.td> | |
| Text | In the Source box, type the text you want to pass to the target variable. The target must also be a text variable. E.g. You could use this pass the selected option to a combo box, or to pass some text to a variable for a URL. | |
| List | In the Source box, add a list of items for the source. Type the item name, and then click 'Add'. Keep adding more until you are done. The target must also be a list variable. E.g. You could use this to pass a list of options to an option links component. | |
| Entity | The name of the entity you want to pass to the target. Type the internal name of the entity in the Source box. The target must also be an entity variable. E.g. You could pass an entity to a hierarchy. | |
| Entities | The list of entities you want to pass to the target. Type the internal name of the entity, and then click 'Add'. Keep adding more until you are done. The target must also be an entity variable. E.g. You could pass a list of entities to the entity selector. | |
| Number | In the Source box, type the number you want to pass to the target. The target must also be a number variable. E.g. You could use this to pass a wind direction value to the wind vane. | |
| Yes/No | Specify a Yes or No value for the source. The target must also be a yes/no (Boolean) variable. When this is selected, you can specify Yes by selecting the check box. E.g. You could use this to pass a 'yes' value to the current date/time toggle. | |
| Datetime | Specify a specific data/time value for the source. The target must be a date/time variable. When this is selected, you can choose the date/time using the calendar and time pickers. E.g. You could use this to pass a value to a date/time picker. |
Step 4. Specify the Target value
Select an existing variable from the drop-down list, or type in a new one. The variable must be the same type, e.g. Text, Datetime, etc. as that of the Source.
Release History
- Link Action and Variable Mapping 4.6.2 (this release)
- New Link Action type 'Set Variables' is now available for all components using the link action type
- Link Action and Variable Mapping 4.5.4
- Tab Action 'New Browser Tab' is now available for all Link Action Types
- Whenever HTTP content is accessed from an HTTPS instance of Explorer, a New Browser tab opens, regardless of the Tab Type specified in the Link Action editor
- Link Action and Variable Mapping 4.5.0
- Initial release