ON THIS PAGE:
Overview
Tags and attributes have values that can be added to trends or viewed on pages, with or without calculations, to help you diagnose problems and visualise value changes over time.
Data that has been organised into a hierarchy in P2 Server can be located using Hierarchy Search or Navigation. The actual flat list of tags can be located using Tag Search.
This article shows you how to select a hierarchy, then navigate or search for entities, to pick attributes and attribute values. The article also describes how to search for tags.
| HIERARCHY | TAGS | ||||||||||||||||||||||
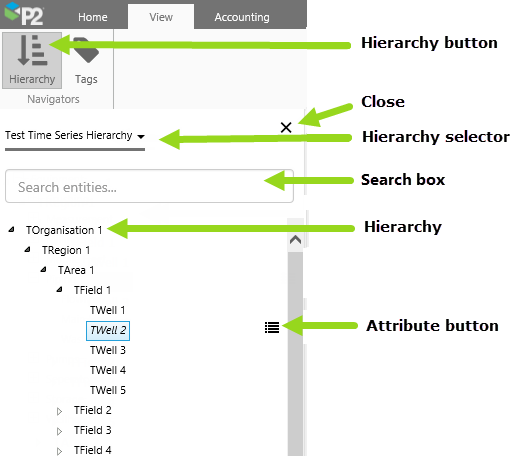 Overview of the Hierarchy Tab |
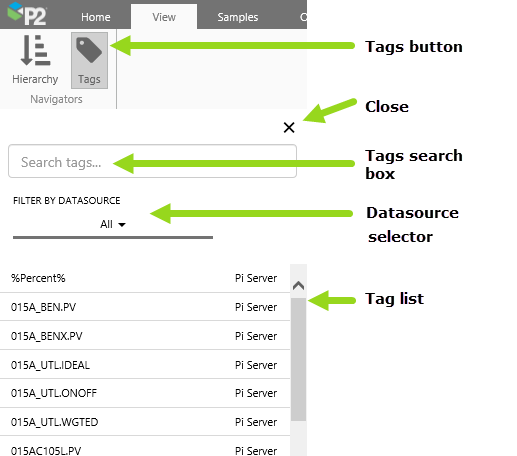 Overview of the Tags Tab |
||||||||||||||||||||||
|
|
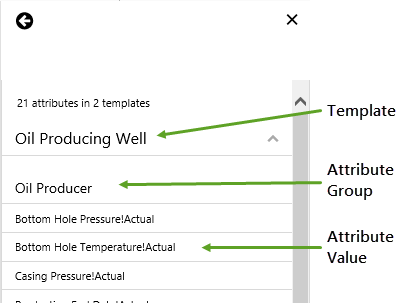
Pictured below is the attribute panel, opened for a selected entity on a hierarchy.
| ATTRIBUTE PANEL | |||||||||||||||||
|
 Attribute Panel for an Entity on the Hierarchy |
 Attributes and Tags in a Trend's Tag List |
||||||
|
This video shows how to add attributes and tags onto a trend.
In this tutorial we'll navigate through the hierarchy until we find a particular entity. Then, we'll drop some of this entity's attributes onto a trend.
Hierarchy navigation is structured over two panels: the hierarchy panel and the attribute panel, as shown below:
|
|

|
|
Step by Step: Dropping an Attribute onto a Trend
We're going to search for some attributes to drop onto a trend. First we'll navigate to an entity and use some of its attributes, and then we'll search for another entity and use some of its attributes.
First we'll open a new trend.
If you have access to the training environment, you can follow the steps exactly as outlined here. Otherwise, you will need to adjust the configuration to suit your data.
Step 1. Add a New Trend
Open the Home tab on the Explorer ribbon, and click New Trend.
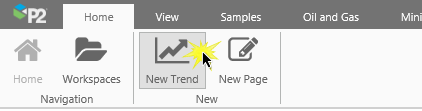
Click New Trend
This opens a new Blank Trend. We're going to search for tags to use on this trend.
Step 2. Navigate to a Hierarchy's Entity
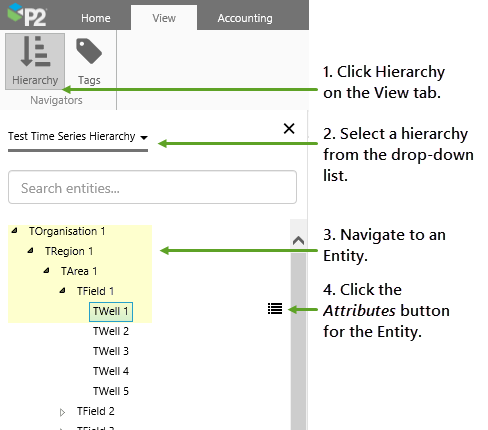
1. Open the View tab on the Explorer ribbon, and click Hierarchy.
2. Select Test Time Series Hierarchy from the hierarchies drop-down list.
3. Click to expand TOrganisation 1, then TRegion 1, then TArea 1, TField 1 and TWell 1.
4. Click the Attributes button to the right of TWell1 entity, to open the Attributes panel.
Navigate to an Entity in the Selected Hierarchy
Step 3. Select an Attribute from the Attribute panel
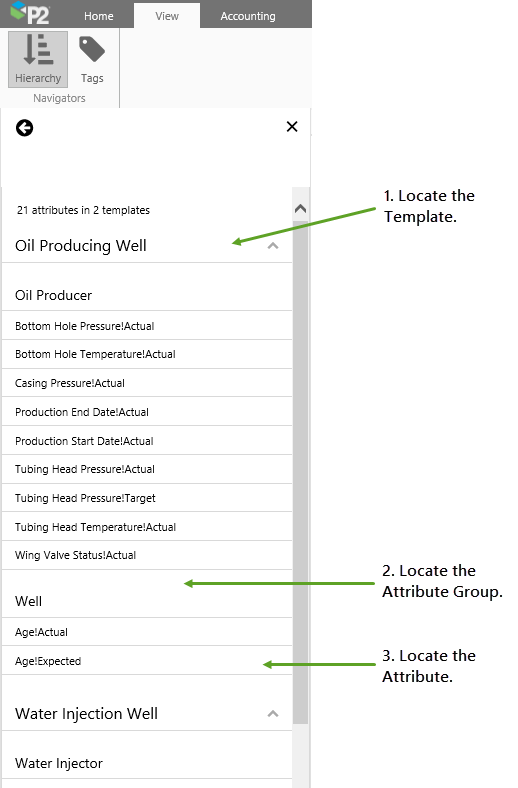
The Attributes panel lists all the attribute values for your selected entity, TWell 1.
1. Locate the Oil Producing Well template on the Attribute panel.
2. Locate the Well attribute group within the Oil Producing Well template.
3. Locate the Age!Expected attribute value within the Well attribute group.
Locate and Attribute
Step 4. Drag the Attribute Value onto the Trend Tags list
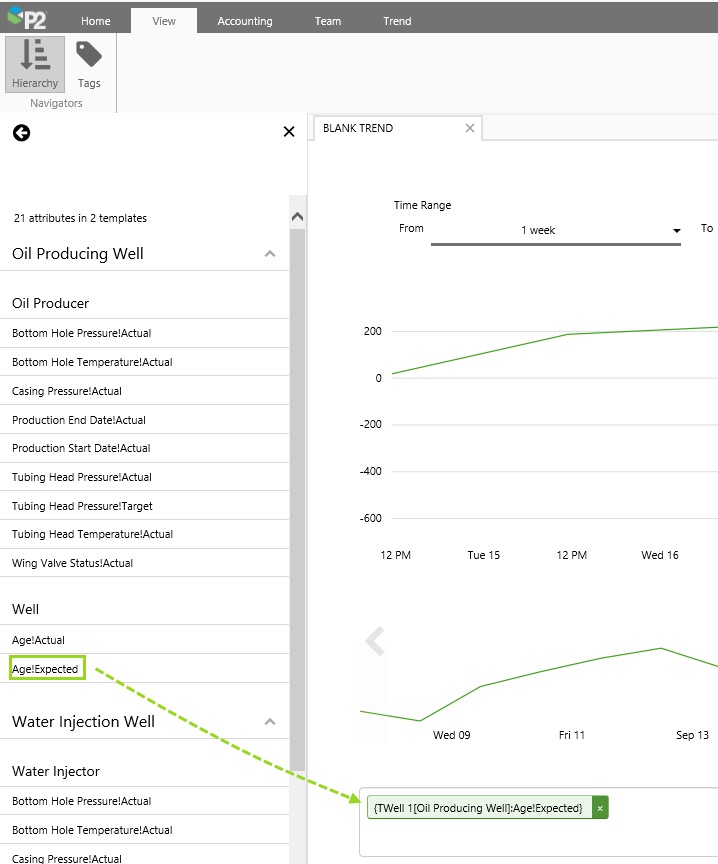
Drop the Attribute Value onto the Tag list
Now that you have found your attribute value, drop it onto the trend's Tag List.
Step 5. Add another Attribute Value to the Trend Tags list
Now search for attribute Age!Actual within the same attribute group and drop it onto the trend's Tag list.
Step 6. All Done!
You've managed to navigate to an entity, and add two of that entity's attributes to a trend. You can see the how the tag values change over time, if you use a trend hairline.
![]() Don't forget to save your trend!
Don't forget to save your trend!
Tutorial 2 - Hierarchy Search
In this tutorial we'll search for an entity in the hierarchy.
Search the Hierarchy
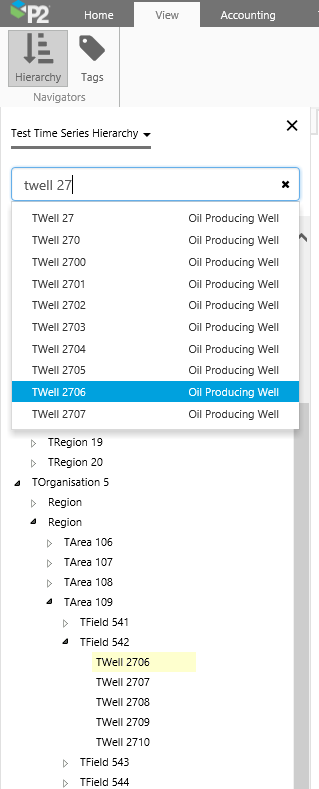
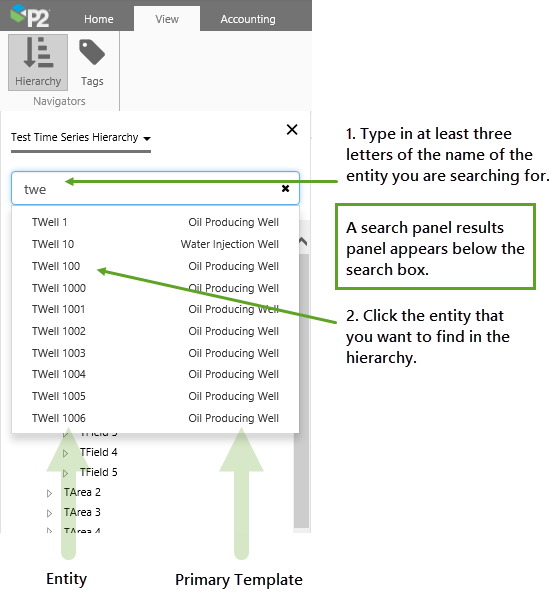
1. In the Hierarchy panel search box, type in the name of the entity you are searching for. As soon as you have typed three letters, a search results drop-down list appears below the search box. The list contains a maximum of ten entities, each with its primary template. If your entity is not in the list, you can type more letters into the search box, to get the next list of up to ten entities.
2. Click the entity you want to find in the hierarchy.
The drop-down list disappears, and the chosen entity is selected in the hierarchy.
| Search for the Entity | The Chosen Entity is selected in the Hierarchy |
 Searching for an Entity in the Hierarchy |
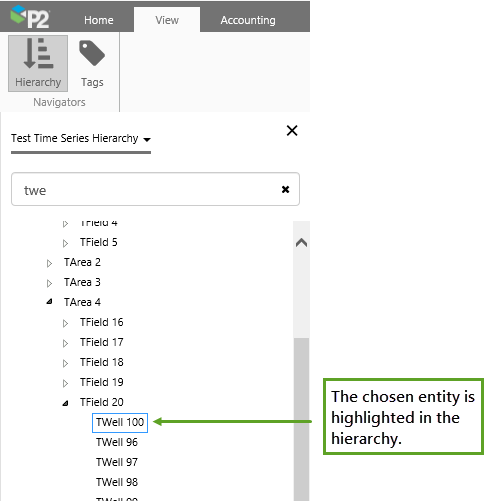 The Chosen Entity is Selected in the Hierarchy |
Tutorial 3 - Tag Search
In this tutorial we'll search for some tags to drop onto a trend.
Locate and Drop Tag 015A_BENX.PV onto a Trend's Tag List
Let's go through this process, step-by-step.
Step by Step: Dropping a Tag onto a Trend
We're going to search for some tags to drop onto a trend. First we'll open a new trend.
If you have access to the training environment, you can follow the steps exactly as outlined here. Otherwise, you will need to adjust the configuration to suit your data.
Step 1. Add a New Trend
Open the Home tab on the Explorer ribbon, and click New Trend.
Click New Trend
This opens a new Blank Trend. We're going to search for tags to use on this trend.
Step 2. Search for a Tag
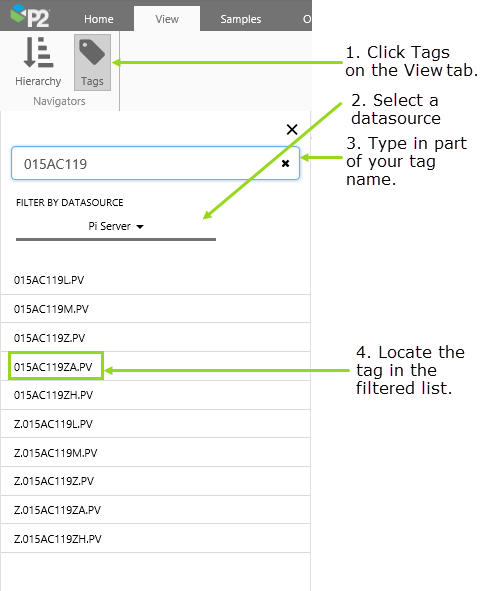
1. Open the View tab on the Explorer ribbon, and click Tags.
2. Select Pi Server from the datasource drop-down list.
3. Type 015AC119 in the Pi Server from the Search tags Search box.
4. Look for the 015AC119ZA.PV in list of tags.
Search for a Tag
Step 3. Drop the Tag onto the Trend Tags list
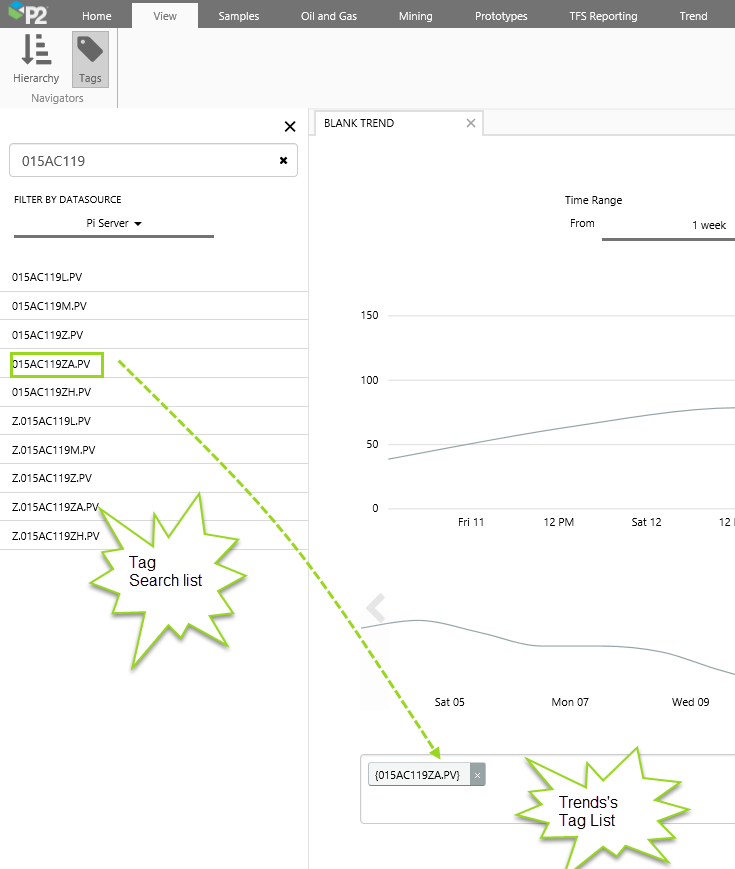
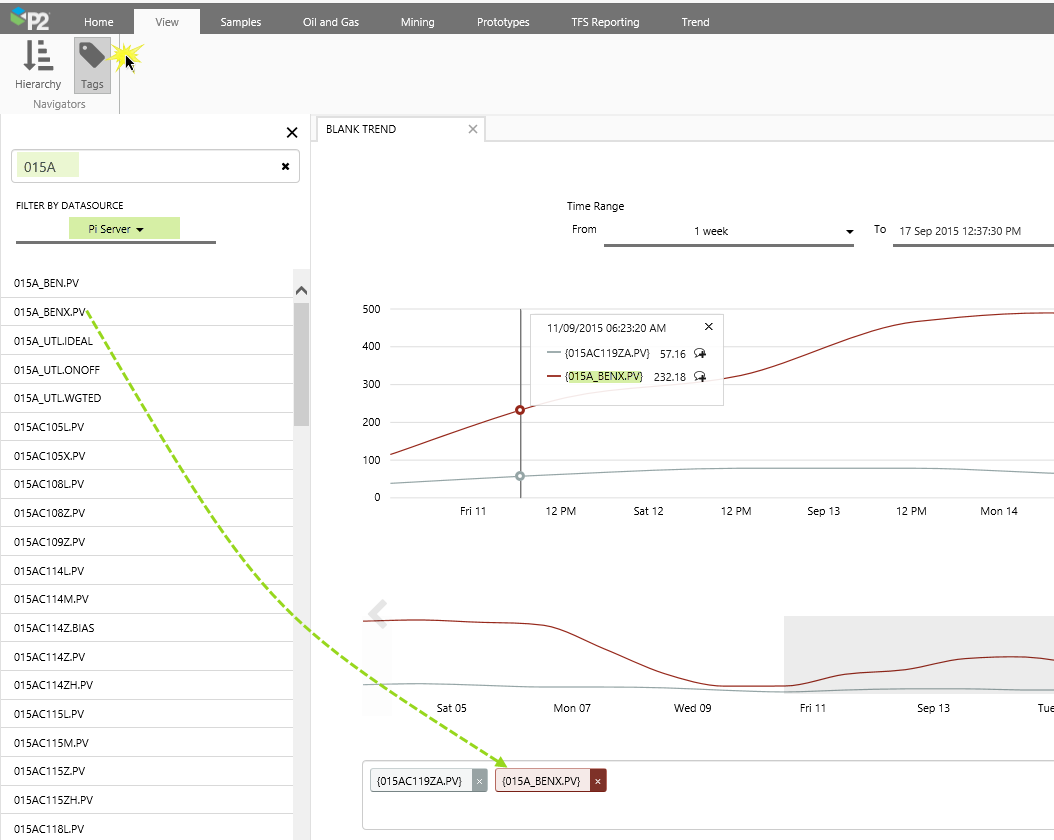
Drop the Tag onto the Tag List
Now that you have found your tag, drop it onto the trend's Tag List.
Step 4. Add another Tag to the Trend Tags list
Now search for tag 015A_BENX.PV and drop it onto the trend's Tag list.
Step 5. All Done!
Well done. You've managed to find some tags and add them to a trend. You can see the how the tag values change over time, if you use a trend hairline.
![]() Don't forget to save your trend!
Don't forget to save your trend!