ON THIS PAGE:
Overview
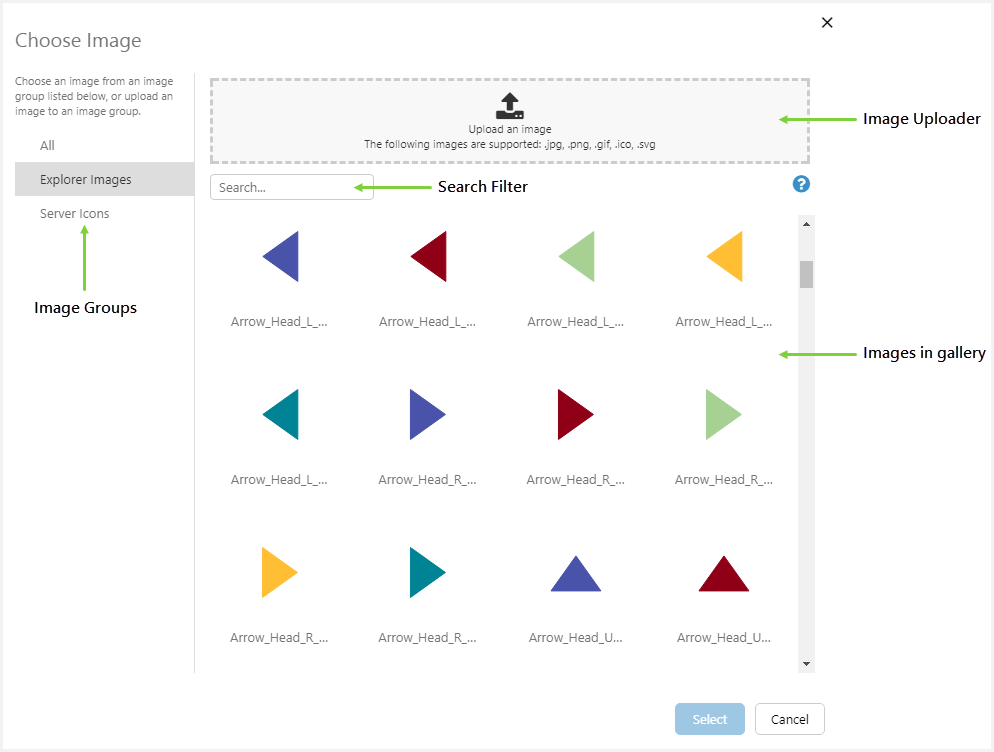
The Image Gallery allows you to insert an image from P2 Server, into a P2 Explorer page. If you have the required permissions (Editor application role for P2 Server), you can also upload an image.
Inserting an Existing Image
1. In the Image Gallery, first choose the group your image is in [A]. In most cases, this will be 'Explorer Images'. If you don't know, select 'All'.
If the list of images is long, you can type into the Search box to filter the list by name [B]. The list is filtered as you type.
Or, you can use the scrollbar to browse through the images.
2. When you have found the image you want to insert, click it once [C].
3. Click the Select button [D].
The image is inserted into P2 Explorer. You can also double-click the image to insert it immediately.

Uploading an Image
1. In the Image Gallery, first choose the group you want to put your image in. In most cases, this will be 'Explorer Images'. You cannot upload to 'All'.
2. Click the Upload an image box.

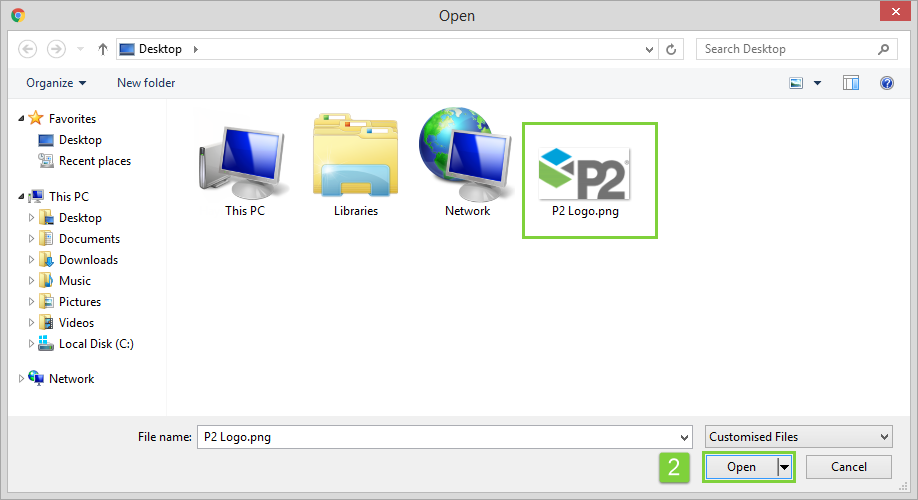
3. Select the image to upload, using the standard Windows 'Open' dialog box. Click the file, and then click 'Open'.
A preview of the image appears in the Image Gallery.
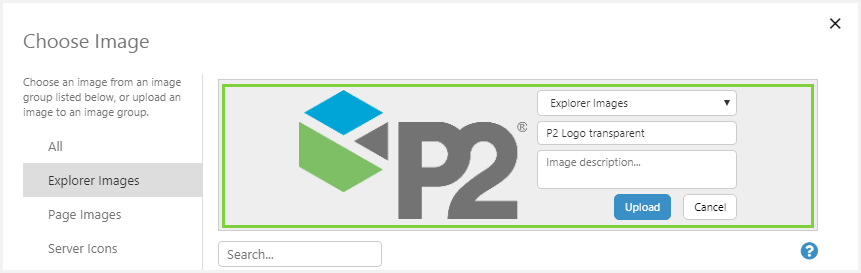
3. Finalise the image properties:
- Verify or change the group for the image from the drop-down list. By default, this is Explorer Images.
- By default, the file name becomes the name of the image. Note that file names must be unique.
You can change the name here if you wish. If you want to change it later, you will need to do this in P2 Server Management. - Add a description for the image. This is optional.
4. When you have finished updating the properties, click the Upload button. If the Upload button is not enabled, check that you have chosen a group.
The image is uploaded, the Image Gallery closes, and the image is inserted into onto the Explorer page.
Note: The maximum file size is set by your system administrator. By default, it is 5MB.
Replacing and Deleting an Image
Replacing or deleting an image must be done in P2 Server Management, and is only available for users with Server Editor permissions.
Release History
- Image Gallery 4.5.4 (this release)
- Added support for .gif images
- Image Gallery 4.4.6
- Initial release
How can i remove an image or replace an image in the library?
Thank you for your feedback, Angelika, we appreciate you taking time out of your busy day. Currently this functionality is only available in P2 Server Management, for users with Server Editor permissions. I’ve updated the article with this information, and we’re also happy to let you know that in Q2 of this year, we will be further enhancing security to enable image edit permissions for selected users in Server Management.