ON THIS PAGE:
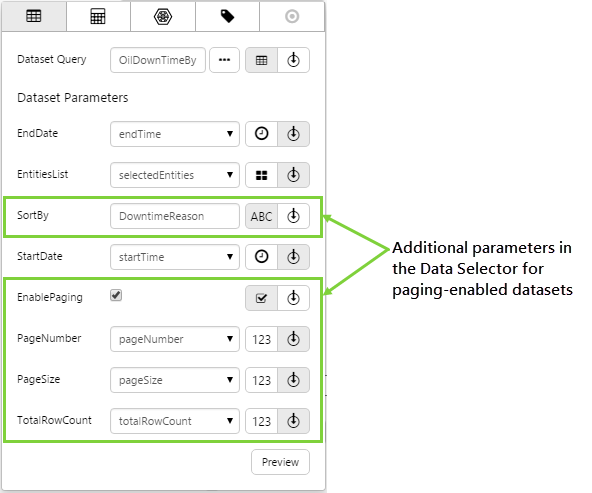
In order to use the Paging Control in P2 Explorer, your dataset must be written such that paging is enabled. When paging has been enabled for a dataset, P2 Explorer displays additional dataset parameters on the Data Selector to enable paging.
When P2 Explorer retrieves a dataset from P2 Server, the following information is provided to P2 Server:
- EnablePaging
- PageNumber
- PageSize
This information determines if the dataset has been enabled for paging in P2 Explorer. Explorer will only allow a dataset to return paged data if the query in the dataset contains the following keywords:
- FirstRow
- LastRow
P2 Server's role is to send the number of rows involved to P2 Explorer.
Here is an example of a query that has been written with paging in mind:
WITH pagedQuery AS ( SELECT ROW_NUMBER()
  OVER (SORTBY(PRODUCTION_ENTITY_NAME DESC)) p2RowNumber, PRODUCTION_ENTITY_NAME, PRODUCTION_DATE, PROD_GAS_ALLOC_GROSS_VOL, PROD_OIL_ALLOC_GROSS_VOL, PROD_WATER_ALLOC_GROSS_VOL
  FROM PRV_PRODUCTION_METRICS
  where PRODUCTION_ENTITY_NAME in (PARAMS(names,entity))
  and PRODUCTION_DATE >= PARAM(prodStartTime,datetime)
  and PRODUCTION_DATE < PARAM(prodEndTime,datetime)
  and UPPER(READING_TYPE) = PARAM(readingType,string) )
SELECT (SELECT count(1) from pagedquery) P2TOTALROWCOUNT, pagedQuery.*
 FROM pagedQuery
 WHERE p2RowNumber
 BETWEEN FIRSTROW() AND LASTROW()
The paged query consists of an inner query and an outer query.
Inner Query
The inner query (lines 3-10) is the part that determines the data displayed in the table. The inner query is essentially the query that you will construct to return the data you need, regardless of whether or not it is displayed in pages. You can find more information on writing the inner query in the topic, "How to Write a Dataset Query". There is one important element of the inner query that must be used in the outer query:
- p2RowNumber, which is an identifier for the number of that rows within the dataset (this can be named anything, it doesn't have to be called p2RowNumber, but it must be used consistently).
Outer Query
The outer query is a CTE (common table expression) that is used to produce a temporary result set consisting of a restricted number of rows in the dataset, which P2 Explorer will display as "pages" of data in a tabular format. Thus the outer query determines how the inner query is displayed.
Note: Though the syntax is fairly standardised, the MSDN documentation may be inaccurate when writing queries against Oracle in some cases.
The outer query is what we will concentrate on in this topic. The important elements of the outer query are:
- pagedQuery - an identifier for the query (this can be named anything, it doesn't have to be called pagedQuery, but it must be used consistently everywhere to identify the CTE)
- P2TOTALROWCOUNT - needed for P2 Explorer to know the total number of rows returned from the inner query.
- p2RowNumber - the row number of an individual row returned from the inner query.
- FIRSTROW - a keyword that returns the row number that P2 Explorer will use as the first row in the paged dataset.
- LASTROW - a keyword that returns the row number that P2 Explorer will use as the last row in the paged dataset.
Let's examine each line of the outer query and explain what it does.
| WITH pagedQuery AS | This identifies the CTE. |
| SELECT (SELECT count(1) from pagedquery) P2TOTALROWCOUNT, pagedQuery.* | The outer query referencing the CTE name.
|
| FROM pagedQuery WHERE p2RowNumber BETWEEN FIRSTROW() AND LASTROW() | Specifies the location of the individual row in relation to the first row and last row of the table. |
Example Paged Query with Grouping
This query displays downtime hours grouped per entity and downtime reason, and excludes the downtime reason 'No Issues'. It requires 2 dataset parameters: StartDate, EndDate.
WITH pagedQuery AS ( SELECT ROW_NUMBER()
  OVER (SORTBY(ENTITY ASC, downtimeReason ASC)) p2RowNumber, grouped.*
  FROM ( select entity, downtimereason, sum(downtimehours) TotalDowntimeHours
       from sampledata Where StartDate
       Between PARAM(StartDate, datetime)
       and PARAM(EndDate, datetime)
       and downtimereason <> 'No Issues'
       group by entity, DowntimeReason )
  GROUPED )
SELECT(select count(1) from pagedquery) P2TOTALROWCOUNT, pagedQuery.*
  FROM pagedQuery
  WHERE p2RowNumber
  BETWEEN FirstRow()
  AND LastRow();
End-To-End Example
Let's look at an end-to-end example of this in action. This example uses dataset queries from the Sample Data that can be optionally made available during initial installation and setup.
Part 1. Create Your Non-Paged Query in P2 Server Management
In this query, downtime data is grouped by downtime reason:
Select Sum(DowntimeHours) as SumDowntimeHours, DowntimeReason
From SampleData
Where StartDate Between PARAM(StartDate, datetime) and PARAM(EndDate, datetime)
And Entity in (PARAMS(EntitiesList, entity))
It's a standard query with 3 parameters: StartDate, EndDate, and EntitiesList.
Part 2. Change the Query to a Paged Query
This query is the same query as above, but has paging enabled:
WITH pagedQuery AS
(
Select ROW_NUMBER() OVER (SORTBY(DowntimeReason DESC)) p2RowNumber,
Sum(DowntimeHours) as SumDowntimeHours, DowntimeReason
From SampleData
Where StartDate Between PARAM(StartDate, datetime) and PARAM(EndDate, datetime)
And Entity in (PARAMS(EntitiesList, entity))
)
SELECT (SELECT count(1) from pagedquery) P2TOTALROWCOUNT, pagedQuery.*
FROM pagedQuery WHERE p2RowNumber BETWEEN FIRSTROW() AND LASTROW()
The highlighted section is the inner query (i.e. the same query that was used in the non-paged query). The rest forms the outer query (i.e. what is required for a paged query). You should copy this exactly as written to form the paged query.
Examining the outer query in closer detail:
| WITH pagedQuery AS | This identifies the CTE. |
| SELECT (SELECT count(1) from pagedquery) P2TOTALROWCOUNT, pagedQuery.* | The outer query referencing the CTE name.
|
| FROM pagedQuery WHERE p2RowNumber BETWEEN FIRSTROW() AND LASTROW() | Specifies the location of the individual row in relation to the first row and last row of the table. |
There is also a small addition to the inner query, indicated above in black. For datasets using the SQL Server adaptor, you should copy this as written but substitute the ordering clause as appropriate for your data.
Select ROW_NUMBER() OVER (SORTBY(DowntimeReason DESC)) p2RowNumber,
| ROW_NUMBER | ROW_NUMBER is an SQL function; in a result set it returns the number of the row in that result set (1, 2, 3, 4, etc). The OVER keyword forms part of this construct. |
| SORTBY() | SORTBY() is a keyword in the SQL Server adaptor, and is not standard SQL. It contains the default ordering clause, in this case DowntimeReason descending. Because the ordering clause is contained as a keyword parameter, it also informs the adaptor of where the ordering clause is. The incoming request can therefore supply a different clause to override the default. |
| P2RowNumber | P2RowNumber is the name of the column that the row number is returned under. Doing this means the CTE declared by the opening WITH will have numbered rows. This allows the WHERE clause at the end of the statement to determine which rows are supposed to come back. |
Part 3. Implement the Paged Query in P2 Explorer
In this example, we'll create a page in P2 Explorer that shows both the non-paged query and the paged query in conjunction with a Paging Control component.
Step 1. Prepare a Studio Page
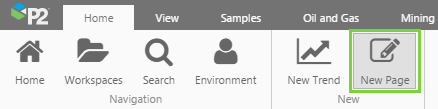
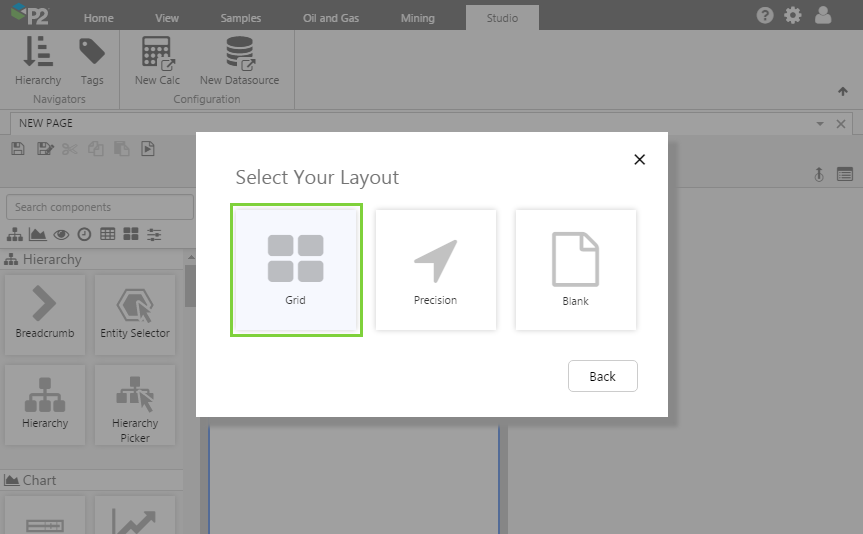
Before you start, click the New Page button on the Home tab of the ribbon. Choose the Grid layout.
Let's set up the page in this format:
- Create 3 columns.
- Create 2 rows.
Step 2. Add 2 Data Tables to the Page
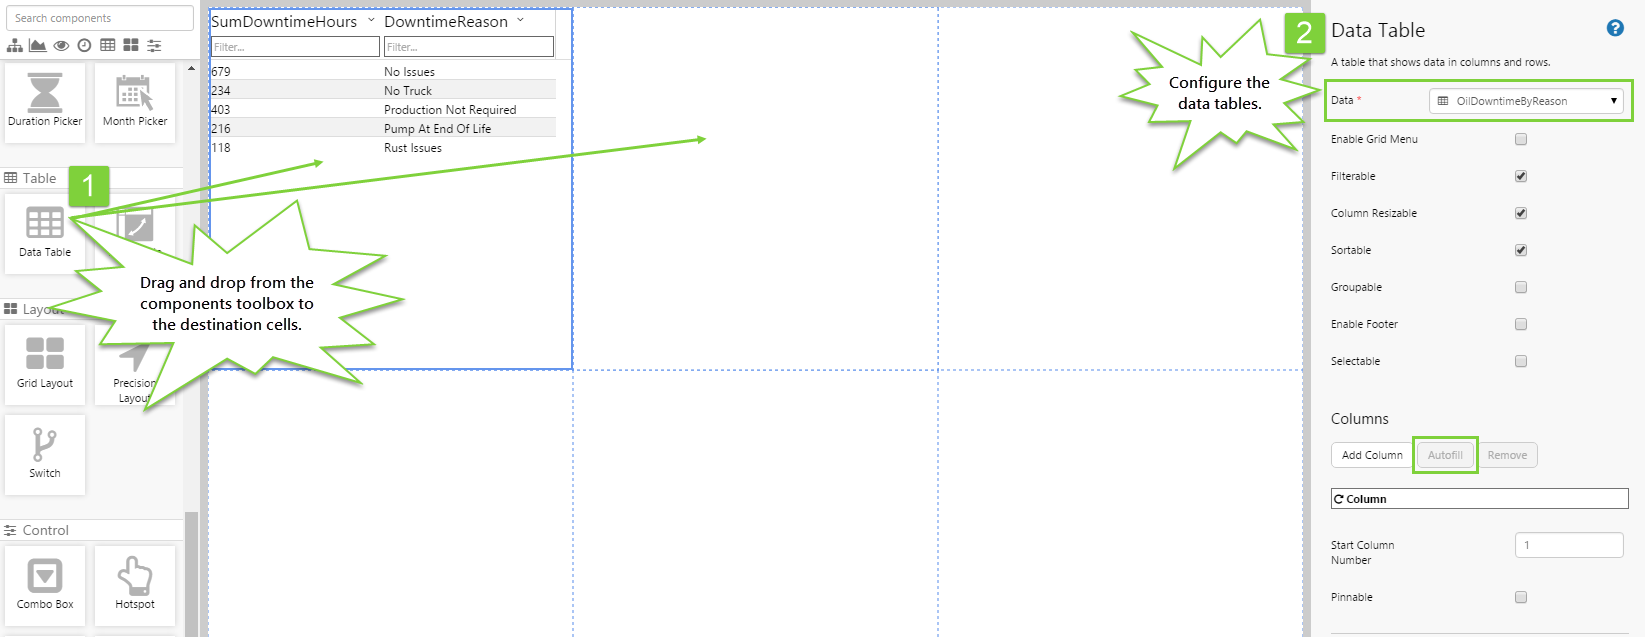
1. Set the columns for both tables to Autofill.
2. Configure the first table with the non-paged dataset OilDowntimeByReason:
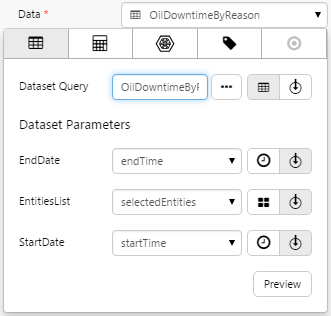
3. Configure the 2nd table with the paged dataset OilDowntimeByReason_Paged:
Click the EnablePaging check box to see the additional parameters, as paged datasets can still be viewed unpaged if required.

Step 3. Set the Defaults
At the moment, the page shows the default values that have been set for the OilDowntimeByReason dataset in P2 Server.
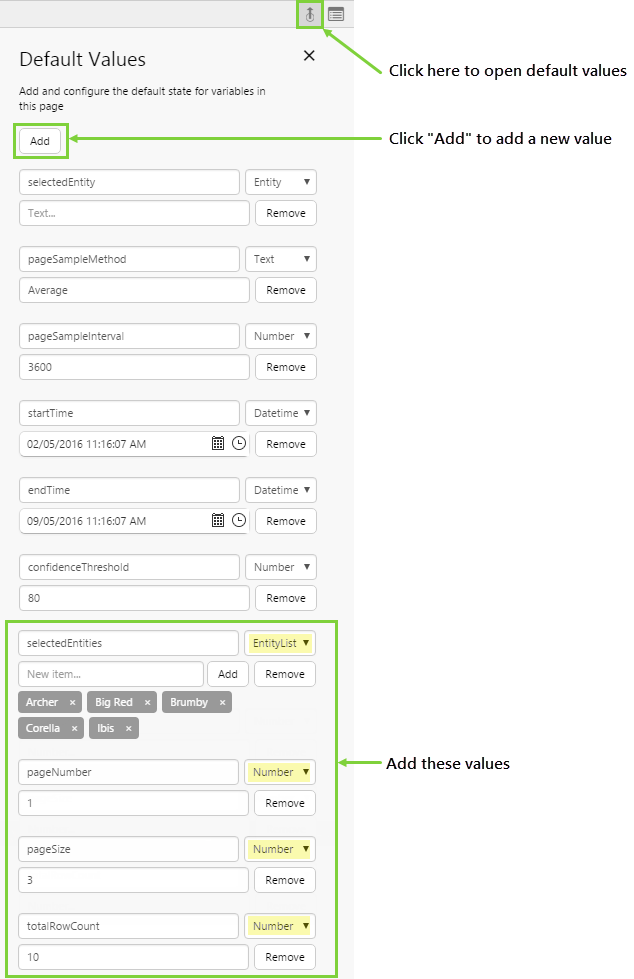
Let’s change the default data that is displayed. We do this by creating defaults for the variables specified in the components in the previous steps. The variables we are interested in are selectedEntities, pageNumber, pageSize, and totalRowCount.
- Click the Default Values button on the Studio toolbar.
- Click the Add button.
- Add the above variables as per the screenshot.
You should now see the Data Tables update to reflect the new defaults.
Step 4. Add the Paging Control

Add a Paging Control component below the paged data table and configure it with the following variables:
- Page Number: pageNumber
- Page Size: pageSize
- Total Record Count: totalRowCount
Step 5. Add an Entity Selector
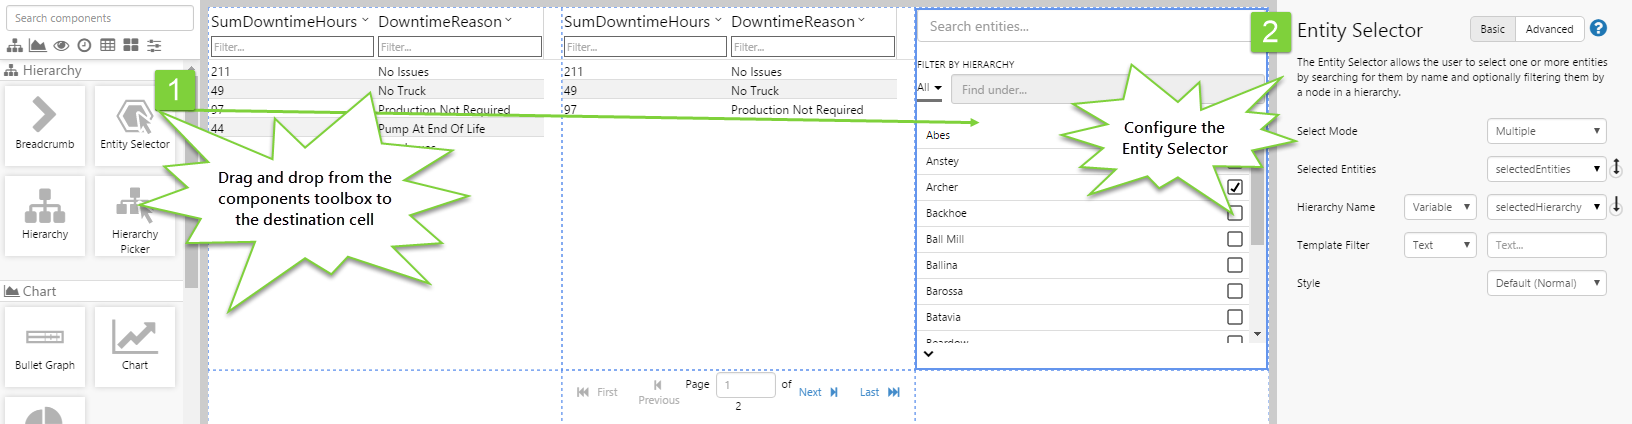
Finally, let's add an Entity Selector component so you can play around with the finished page. No configuration is required, you can just use the defaults here.
Step 6. All Done!

Congratulations! You now have a paged data table that uses the Paging Control. When you select entities from the Entity Selector, downtime data for the selected entities is displayed in both the paged and non-paged tables.
![]() Don’t forget to save your page!
Don’t forget to save your page!