ON THIS PAGE:
Overview
Note: For this component to work with a dataset, paging must be enabled on the dataset.
The Paging Control allows page designers to split up large amounts of tabular data into smaller chunks, or pages, to make it easier to display many rows of data in a small space. This allows the user to move through those pages to view the data in a table.
The following screenshot shows a Paging Control being configured:
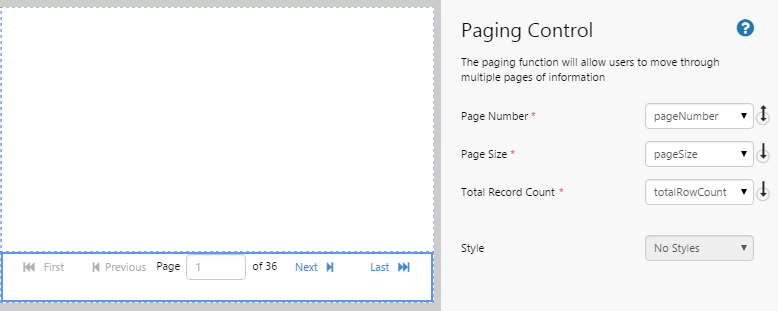
| Page Number: | The number that is published when the user clicks through the page control. This is effectively the page of data that the user is viewing. This variable is a parameter of the paging-enabled dataset. |
| Page Size: | The number of rows of data to display in the table. This variable is a parameter of the paging-enabled dataset. |
| Total Record Count: | The total number of records in the dataset, rounded up. This is an attribute of the paging-enabled dataset. |
| Style: | The style you want to apply to the Paging Control component. If you are a Style Administrator, you can add a new Paging Control style. |
About Paged Datasets
The Paging Control will only work on datasets that have been enabled for paging. This is done by modifying the dataset query in IFS OI Server. When a dataset is paging enabled, the configuration panel for a Data Table will display additional parameters. These are:
| Total Row Count: | The total number of records in the dataset, rounded up. This is always a variable (totalRowCount) that is published by the paging-enabled dataset. |
| Enable Server Paging: | Select this check box to indicate that you want to take advantage of dataset paging. |
| Page Number: | The page number to display when the display is first opened. |
| Page Size: | The number of rows of data to display in the table. |
| SortBy: |
The name of the column in the dataset by which to sort the table. Columns containing text will sort alphabetically, those containing numbers will sort numerically, and those containing dates will sort chronologically. You can also specify whether you want to sort the column in ascending or descending order. Here are some examples:
|
Tutorial: Displaying a Paging Control for a Large Dataset Table
If you're unfamiliar with the process of building pages, read the article Building an Explorer Page.
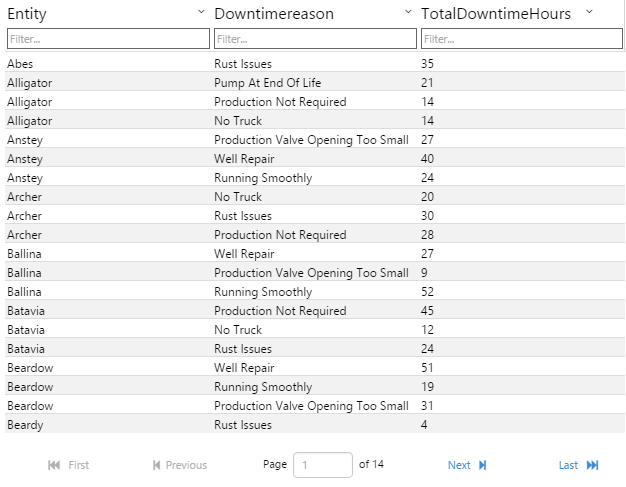
In this tutorial, we’ll look at adding a Paging Control component that will display pages of downtime information in a data table.
Let’s go through this process, step-by-step.
Step 1. Prepare a Studio Page
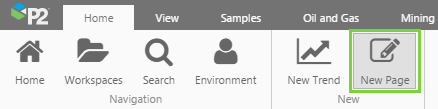
Before you start, click the New Page button on the Home tab of the ribbon. Choose the Grid layout.
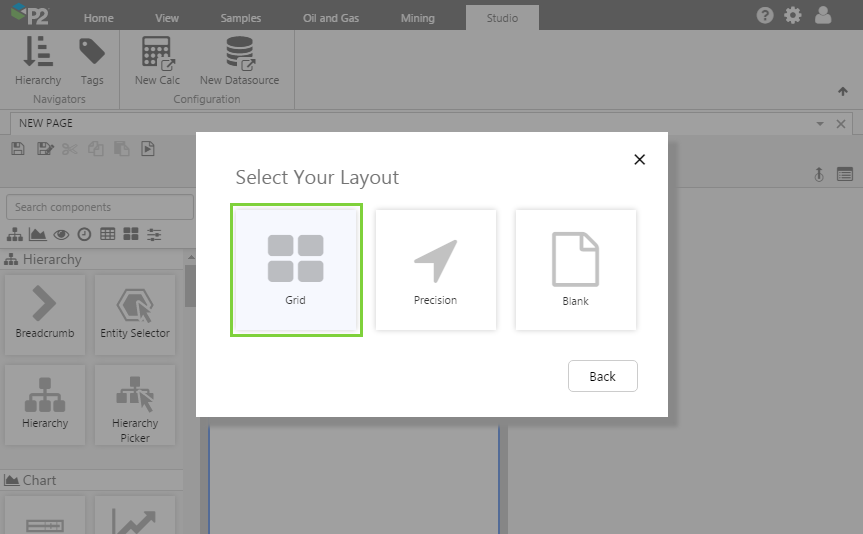
- For this exercise, we'll keep the 4 grid cells.
- Assign the first row a height of 450.
- Assign the second row a height of 50.
Step 2. Add the Paging Control component to the page
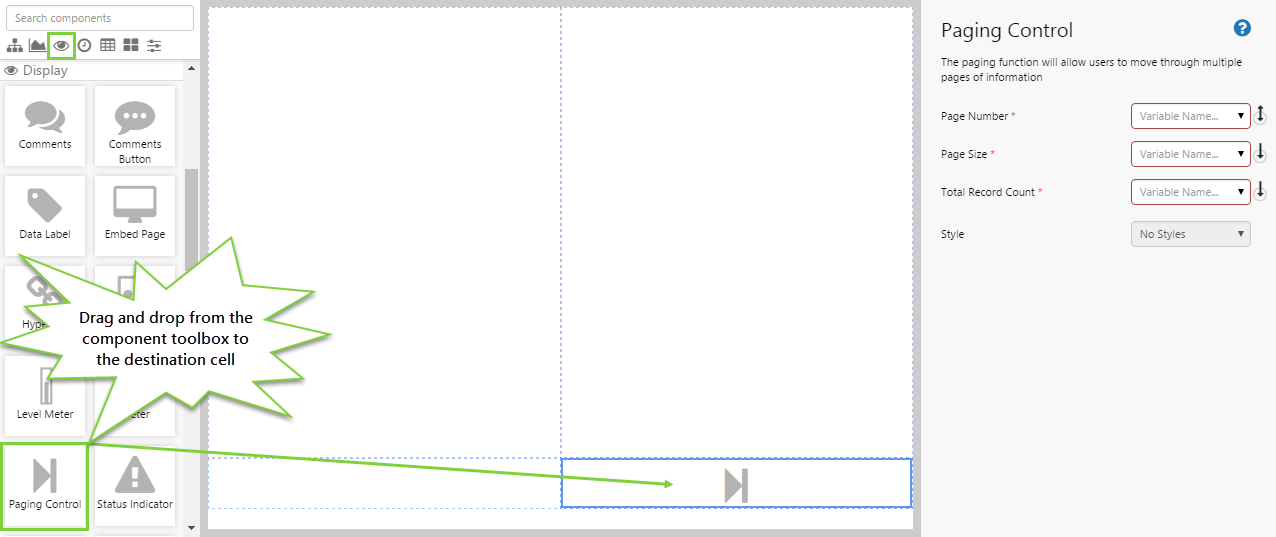
Drag and drop the Paging Control component onto a grid cell. The Paging Control is in the Display ![]() group.
group.
Step 3. Configure the Paging Control component
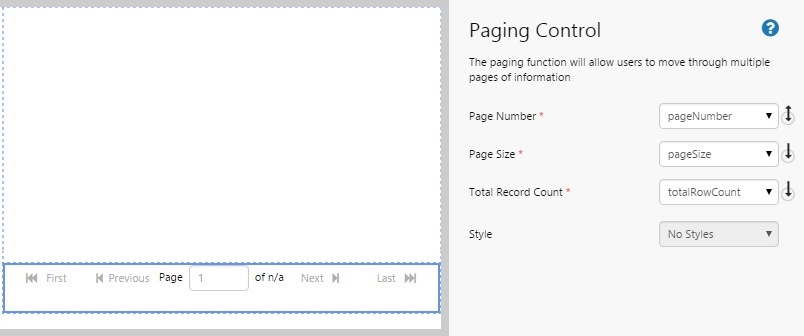
Configuring the Paging Control consists of assigning variables to each field.
- Page Number: pageNumber
- Page Size: pageSize
- Total Record Count: totalRowCount
Note: totalRowCount is a special variable that is automatically published by a dataset, so you should not rename this to something else.
We will add defaults for these later in this tutorial.
Step 4. Add and configure a Data Table
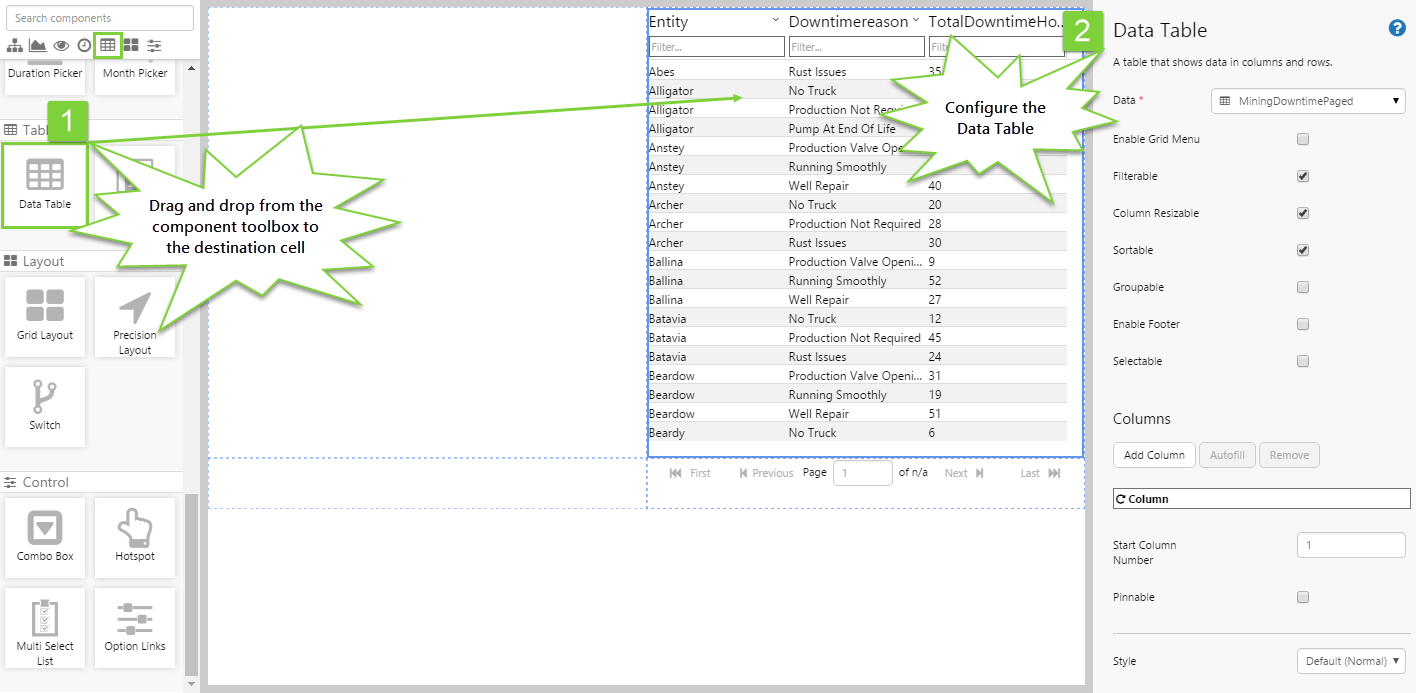
The Paging Control on its own doesn't do anything, it's designed to be used with a Data Table. Drag and drop a Data Table component onto the canvas, and configure it as follows.
Configuring the Data:
- Open the Data Data Selector by clicking on the field. You will notice that the Dataset
 tab is automatically selected. Staying on that tab, fill in the fields as follows:
- Dataset Query: MiningDowntimePaged
- EndDate: (Variable) endTime
- Sortby: (leave blank)
- StartDate: (Variable) startTime
- EnablePaging: select the check box
Note: This check box only appears on datasets that are enabled for paging. If the check box is not present, your data cannot be paged. You will first need to modify the dataset appropriately in IFS OI Server.
- PageNumber: (Variable) pageNumber
- PageSize: (Variable) pageSize
- TotalRowCount: (Variable) totalRowCount
- Dataset Query: MiningDowntimePaged
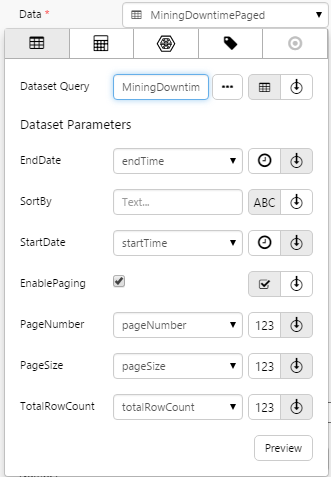
Click the Preview button to check that you are getting data. If the preview window is blank, you may have filled in a parameter incorrectly.
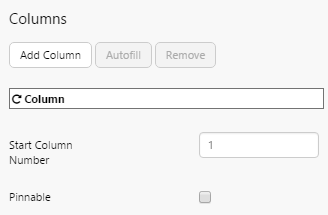
Configuring the Columns:
You must specify the columns that you want to display, otherwise your data table will appear blank. Let's keep the data table simple, and use the Autofill function.
- Click the Autofill button.
Step 5. Set the Defaults
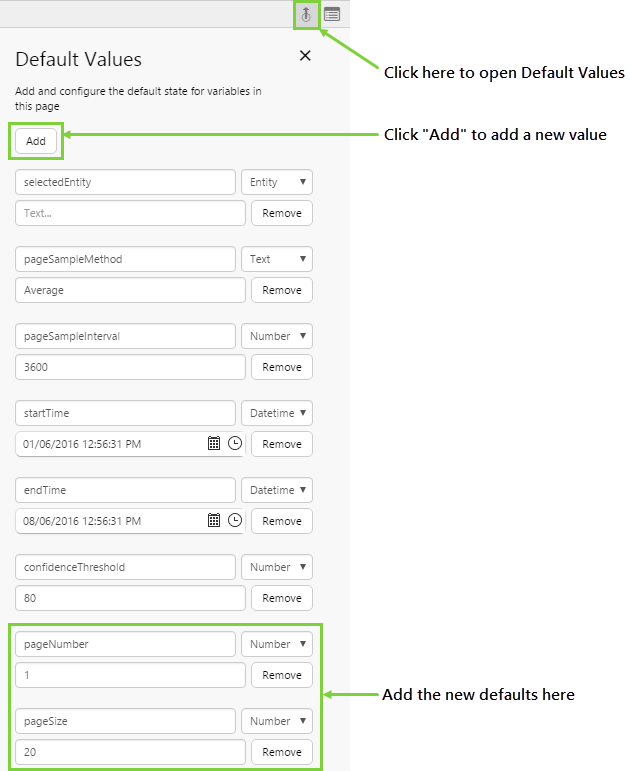
We need to set the defaults for the pageNumber and pageSize variables in order for the Paging Control to work properly.
- Click the Default Values button on the Studio toolbar.
- Click the Add button.
- Add a variable called pageNumber with a type of Number. Type in the following value: 1
This will show the first page of data when the Explorer page is loaded. - Click the Add button.
- Add a variable called pageSize with a type of Number. Type in the following value: 20
This will page the data so that it will show 20 rows per page.
Note: You do not need to add a default for totalRowCount, as this is automatically published by the dataset.
Step 6. All done!
Great work! You now have a fully functioning Paging Control that displays tabular data in pages.
- Click the preview
 button on the Studio toolbar to see what your page will look like in run-time.
 - Click through the pages to get a feel for the behaviour of the control.
- In the defaults, change the page number and page size to see what happens.
![]() Don’t forget to save your page!
Don’t forget to save your page!