ON THIS PAGE:
Overview
IFS OI Explorer (previously known as P2 Explorer) is a front-end application, for displaying IFS OI Server's data in various formats on pages and trends.
Explorer page designers build pages using a combination of layouts and controls. Many of the controls are data-aware, sourcing their data through Server and its datasources.
IFS OI Server's data, available to the Explorer environment, is a combination of source data (from historians and relational databases) and IFS OI Server's own data (hierarchies with templated entities, as well as calculations).
End-users can navigate or search through pages and trends, selecting options from various page controls, to focus on relevant data. Users can also navigate and search through hierarchies, or search for tags.
The Different Explorer Users
There are three types of user in Explorer: Administrators, Page Designers, and End-Users.
Explorer Administrators
Explorer administrators perform a variety of functions to prepare Explorer for page designers and end-users, and to grant the appropriate security permissions. An administrator can configure styles for the page components, as well as set the home page, at user role level. Administrators are also responsible for approving or rejecting submitted pages and trends
Studio for Page Designers
Explorer page designers are responsible for building pages in Studio mode, using a combination of layouts, components and data. Pages need to follow some sort of navigation, using a combination of Workspaces navigation and hyperlinks. Hyperlinks can be configured as part of page design.
Explorer for End-Users
As an end-user, you can navigate through the pages for which you have permissions. Many of the pages are designed with controls that you can use to make selections or change date periods. End-users are also able to create and save trends, and to save copies of trends and pages.
All users have access to Workspaces (this may be limited), Hierarchy Search and Navigation, and the Search page.
Search for Tags within datasources, or search/navigate for Entities in a hierarchy.
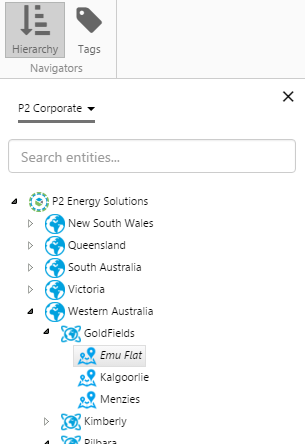
Navigating a Hierarchy
As an Explorer end-user, you can:
- Open point details for tags or attribute values. Some of the tags and attribute values can be written to.
- Open the links for an entity (shown as a new tab in the ribbon).
- Open an entity's primary link (page, trend, or URI), as defined in that entity's current primary template (in Server's user interface, Server Management).
- Drag a tag or attribute value onto a trend.
As a page designer, you can access the navigators from Studio, to use on pages or as data for components.
As an Explorer end-user, there are many different ways to navigate through the pages and trends; some of these depend on page design, or administrator settings:
- Home page: This is the page that appears when you first open Explorer, or when you refresh the browser. The home page is optional, and is configured by an administrator.
- Hyperlink navigation: Some pages are designed to link to other pages or trends through hyperlinks.
- Workspace navigation: Search All workspace, or a particular workspace for a trend or page, by name.
- Search navigation: Open a page or trend from the search results (click Search on the Home ribbon tab).
- Links: Some of the entity links that appear as a ribbon tab are used to open pages or trends. (Links are applied to the entity's template, in Server Management.)
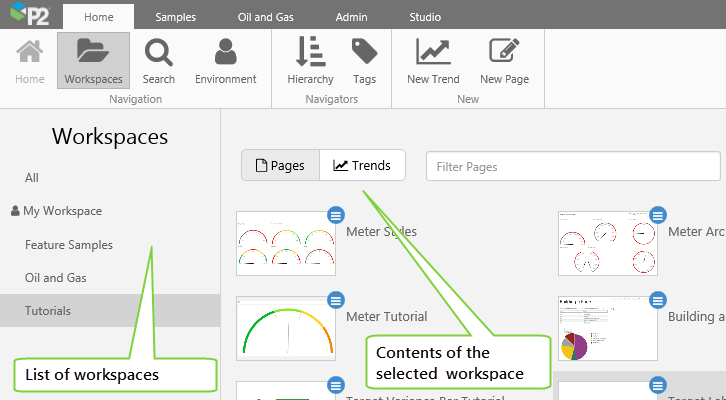
Workspaces
Trends and Pages are saved into logical groups, called workspaces. You can save to an exiting workspace, or create a new one.
You can search for and open pages or trends in a workspace.
Ribbon
The Explorer Ribbon gives access to IFS OI Explorer's functionality.
Examples of ribbon functionality for various types of Explorer users:
- View styles by clicking the Styles button on the Admin tab (Administrators).
- Open the Import page by clicking the Import button on the Admin tab (Administrators).
- Create a new page by clicking the New Page button on the Home tab (Page Designers).
- Edit a page by clicking the Edit button on the Page tab (Page Designers).
- Share a page by clicking the Share Link button on the Home tab (End-users).
- Export a page's data by clicking the Export CSV button on the Home tab (End-users).
- Save a trend by clicking the Save button on the Trend tab (End-users).
- Copy a trend by clicking the Save As button on the Trend tab (End-users).
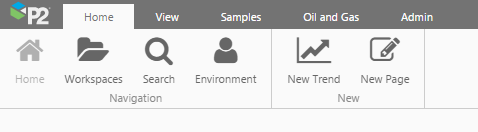
The Explorer Ribbon has Several Tabs
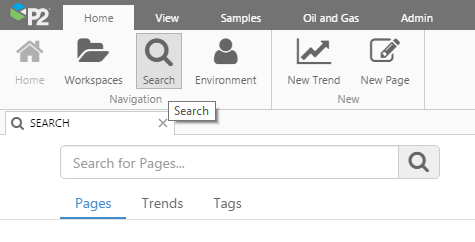
Search Page
Search for Pages, Trends or Tags in Explorer, in the Search Page.
Click Search on the Home tab to open a Search tab.
Administrator Functions
Administrators perform some of the high level functions in Explorer: configuring styles, importing and exporting, and setting the home pages for different user roles, in an Explorer environment. Administrators are able to approve or reject submitted pages and trends.
Styles
Studio has built-in styles for its components. If the styles are not right for your organisation's look you can build custom styles in the Style Editor (for example, you may want a text label style in a large, bold font, centre-aligned), if you have the Style Administrator role.
Styles can be added using standard properties, or using Style Constants, which can also be added and updated, for a consistent look.
Import and Export
If you have the Explorer Administrator role, you can export and import pages and trends in IFS OI Explorer, using .zip files. This is useful for backup and migration purposes.
Setting the Home page
Administrators can set the home page/ landing page for Explorer Users, at a user role level.
As a user, when you log into Explorer, the home page (if one is configured) is opened in the main Explorer panel.
Approving or Rejecting Pages and Trends
Administrators can approve or reject pages or trends that have been submitted by page designers.
Designing and Configuring in Explorer
Explorer has many parts. Some of these are available to you, and others might not be - depending on your role and permissions, or where you are (for example, you may have access to some of the pages on some of the workspaces).
If you are editing a page, navigate using workspaces or find the page using the search option available on the Home ribbon tab. See General Navigation for All Users, for searching, navigating and ribbon functionality
Studio
Explorer Studio is where pages are built and saved. You can drag components from the Component toolbox onto a page (the design space), which has a base layout mode (precision, grid or blank) and then connect the data-driven components up to Server's data, or to fixed values.
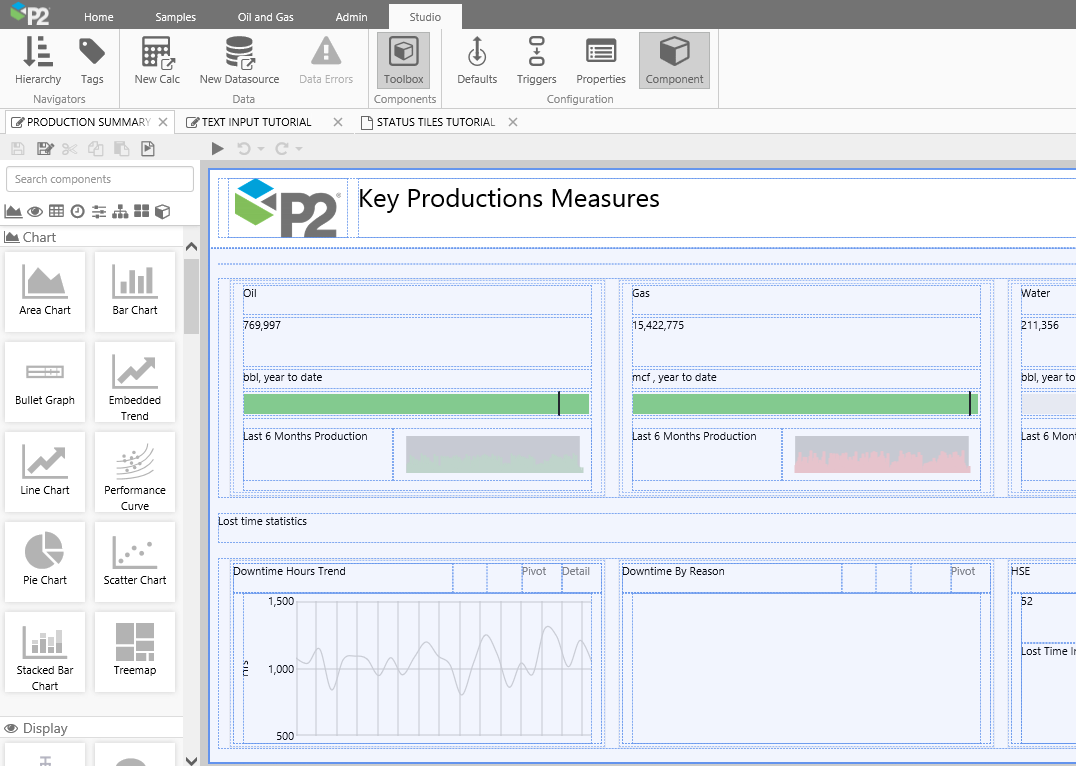 |
| An Explorer Page in Design Mode |
Opening Explorer Studio
There are several ways to open Explorer Studio:
- Open a page from its workspace, selecting the Studio button.
- Open a page in display mode (from a workspace or a link), then click Edit on the Explorer Ribbon's Page tab.
- Create a new page, by clicking New Page on the Explorer Ribbon's Home tab.
Note that you can also toggle between preview mode and design mode, to get immediate design feedback.
Studio Features
Studio has the following parts to enable you to design a page effectively:
- Component Toolbox: Contains groupings of components to use on your page. Types of components: Display, Chart, Table, Layout, Time, Image, and others. Some of the components are interactive, others are for display purposes only. Some are static, others are changeable. Many of the components are data-driven.
- Component Editor: Each component has properties, including data-related, that can be edited.
- Studio Toolbar: Editing functions for the page are available here. These include Save, Save As; Redo, Undo, Cut, Copy and Paste; Preview and Finish & Open (which opens the page in Display Mode).
- Studio Ribbon Tab: Contains buttons that open the Navigators (Hierarchy and Tags, links to Data in Server Management, Controls on the page, and the page Configuration (such as page Defaults, and page Properties).
- Hierarchy and Tag Search and Navigation: In Studio, use this for dragging tags and attribute values directly onto a page, or onto a component's property in the component editor.
Submitting Pages and Trends
When a page is ready to be published, you need to submit it. An administrator will either approve or reject the page or trend.
Access to IFS OI Server
If you have the appropriate permissions, you can access Server Management by clicking the Server Management button in the Settings menu.

Explorer in Display Mode
Explorer is an interactive interface, made up of pages, trends and the hierarchy and tag navigators.
Pages
As a user, you will navigate through the different pages (and trends), using controls on the pages or trends to change dates, or select variables. On the Page ribbon tab, there are buttons that enable you to do the following:
- Reload a page, if you anticipate updates to the page.
- Edit the page, if you have permissions.
- Refresh a page's data, and export the page's data to CSV.
- Share the page (snapshot, print), or view the page properties. Published pages can also be shared (share link)
- Save a copy of the page.
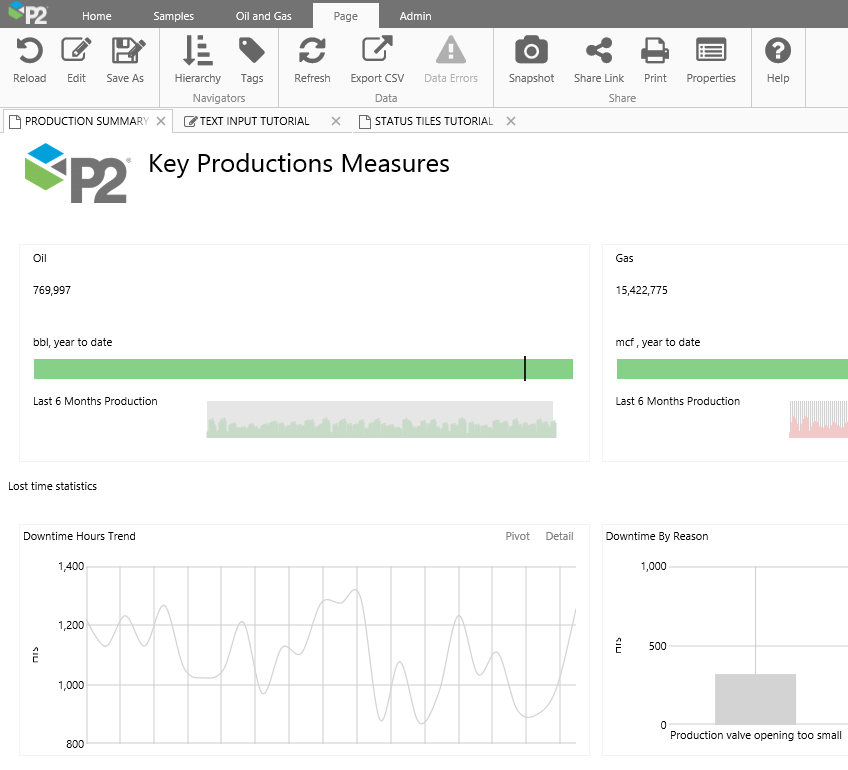 |
| An Explorer Page in Display Mode |
Trends
Trends, along with Pages, are a major feature of Explorer.
You can create your own trend (click New Trend on the Home Ribbon Tab) or open an existing trend, using one of the navigation methods.
When a trend is open, the Trend tab opens in the Explorer ribbon. The buttons on this tab are used to reload, save, or share the trend. The toggle buttons enable you to show or hide elements of the Trend (Controls, Range Selector and Trace Table). You can also refresh trend data, or export the data to a CSV file.
Drag tags or attributes onto the trend from the Tag and Hierarchy navigators. Or type values into the trace table (tags, attributes or calculations).
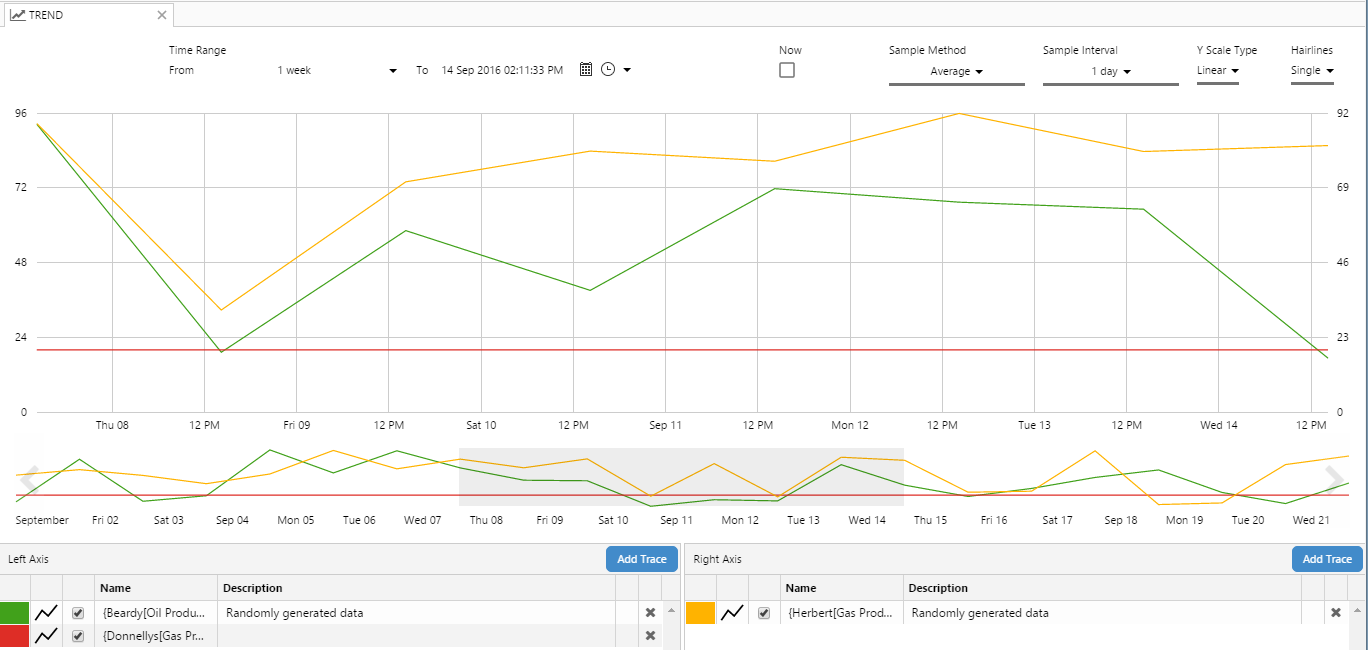
An Explorer Trend
Comments
It is possible to search for tag comments on a Trend, and reply to these or add new comments.
Some of the pages also have comment buttons next to entities (if comment components were added in the page design).
Writing to a Tag
Some of the tags can be updated.