ON THIS PAGE:
Overview
The hyperlink component can be used to open an Explorer page or trend, or to open an external URL.
Quick Start
This section explains how to set up a hyperlink in four steps.
Content: The Hyperlink on your Page
The hyperlink is similar to a text label in appearance.
Type in a meaningful Content, including optional variables; this is what the user will see on your page.
Type: What to Link to
You can link to any of the following:
- Open Page, to open an existing Explorer Page
- Open Trend, to open an existing Explorer Trend
- New Trend, to open a new Explorer Trend
- Open URL, to open an external URL
Select a Type from the drop-down list, then fill in its applicable details (Workspace Name/ Page Name/ Trend Name/ URL).
New Tab: Where to Open
New Tab is selected by default. De-select if you want to open a page, trend, or URL in the current Explorer tab.
Note, for URLs: For an address beginning with https the URL opens in Explorer; otherwise, it opens in a separate tab in your browser.
Variable Mapping: Sending Parameters from the Source Page
Use Variable Mapping to send values to the destination page, trend or URL.
Type in a Source and Target value for each Variable Mapping you want to add. This must be an accurate, case-sensitive match.
Your Source is either a constant or a variable from your page. Your Target must match the variable name on the destination page, trend or URL. For pages and trends, this overrides Default Values.
Tutorial Setup: Preparing an Explorer Page for Tutorials
To demonstrate the different types of hyperlinks, we're going to set up an Explorer page, and then re-use that for the separate tutorials.
This is what we need to do:
- Step 1. Set up a new P2 Explorer Page.
- Step 2. Add a Sample Method Combo Box with a Text Label, and a Default Value.
This is what your page should look like. You'll only be adding the hyperlinks in the tutorials, but it's helpful to prepare the grid rows now.

Page Setup for Tutorials
Step 1. Set up a new P2 Explorer Page
Create a new page in Grid Layout, then format this so that you have six rows in the top left quadrant of the grid.
Format the Grid
1. Click New Page on the Explorer Ribbon Home tab, and select Grid Layout.
2. Drag a new grid onto the top left quadrant, and add five rows. See how to add and format a grid.
3. If you like, you can adjust the row heights and add column and row spacing.
Step 2. Add a Sample Method Combo Box with a Default Value
We're adding this combo box to demonstrate how you would pass a variable as a hyperlink parameter, with Variable Mapping.
Sample Method Combo Box, with Text Label
1. Drag a Text Label into the top row, and type 'Sample Interval' in the Content edit box.
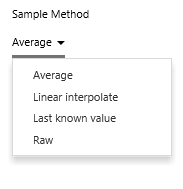
2. Drag a Combo Box into the middle row, and configure it as follows:
|
|

2. Now add a Default Value for the selectedMethod:
- selectedMethod
- average
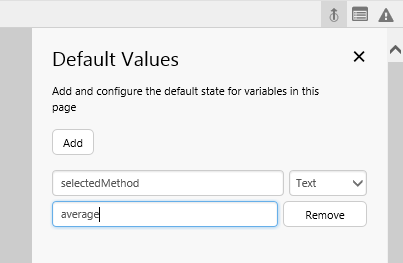
Add Default Value
This is how your grid cells should be looking (note how the default value for selectedMethod, average is already selected, displaying Average):
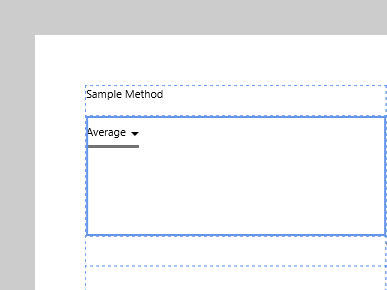
Label and Combo Box
Now that you have the page set up, you can add a hyperlink. There are four different types, each covered in a separate tutorial.
- Tutorial 1: Adding a Hyperlink to Open a Trend
- Tutorial 2: Adding a Hyperlink to Open a New Trend
- Tutorial 3: Adding a Hyperlink to Open an Explorer Page
- Tutorial 4: Adding a Hyperlink to Open a URL
Tutorial 1: Adding a Hyperlink to Open a Trend
In this tutorial, we're going to create a hyperlink to an existing trend, with a variable Sample Method and a fixed Sample Interval of 1 minute.
Before you start this exercise, make sure you have a trend to open.
- If you have access to the training environment, you should be able to use the Tubing Head Pressure trend, in the Tutorials workspace. You can search for the trend, to make sure you have it.
- Otherwise, add a new trend, and save it.
Or, just skip to Tutorial 2, where you get to open a new, blank trend.
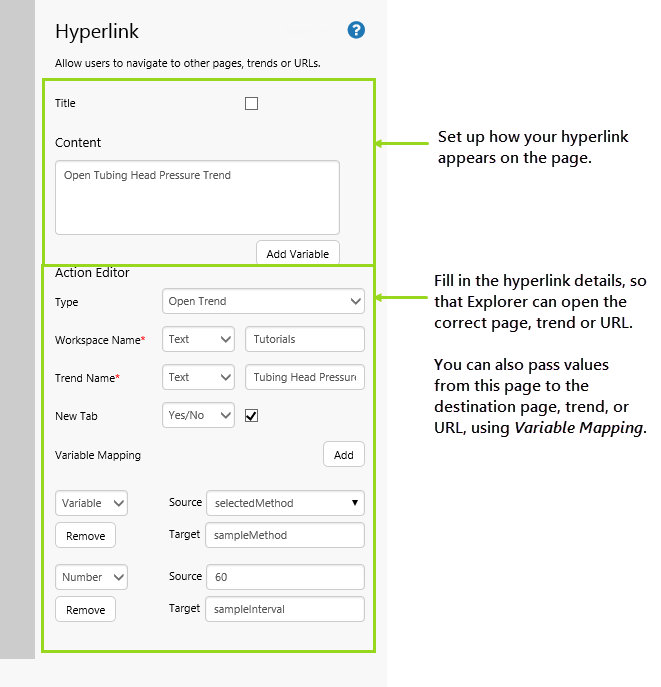
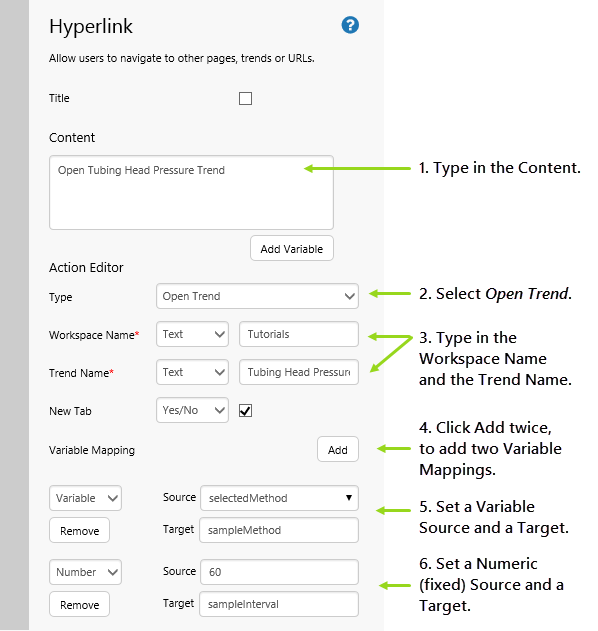
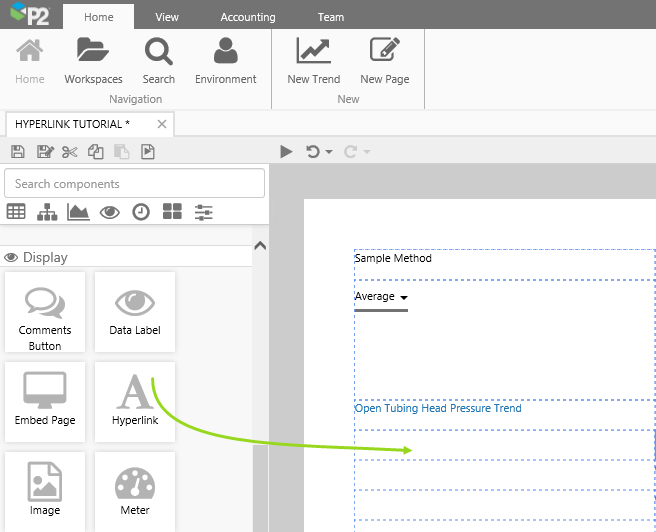
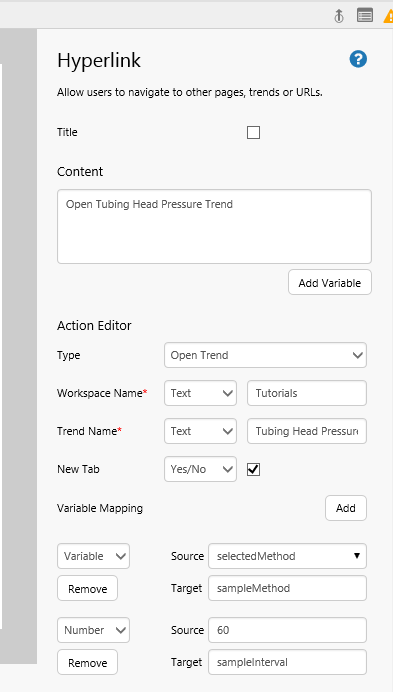
Step 1. Add and Configure a Hyperlink
1. Drag a hyperlink component onto the third row.
Adding a Hyperlink Component
2. Now configure the hyperlink:
|
 Configure the Hyperlink |
A note on Variable Mapping for Trends: Trends use specific default values, as outlined in the URL Formats section of how to Link to a Trend via a URL. For example, Trends have a parameter called sampleInterval, which uses seconds to control the sample interval in which trend data is collected.
This is how your grid cells should be looking now:
Step 2. Test your Hyperlink
Now that your hyperlink is set up, click the Preview ![]() button on the Studio toolbar to see what your page will look like in run-time.
button on the Studio toolbar to see what your page will look like in run-time.
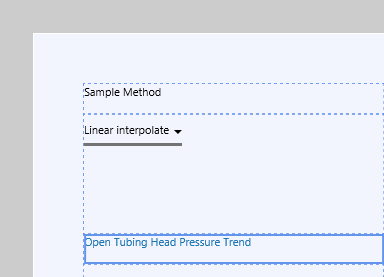
1. Select Linear interpolate from the Sample Method combo box. (This is setting the sampleMethod variable.)
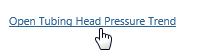
2. Now click the hyperlink.
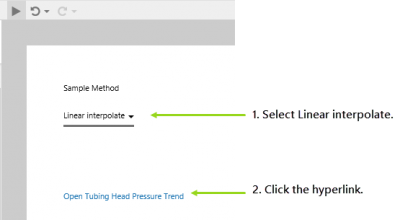
Test Hyperlink "Open Tubing Head Pressure Trend"
The Tubing Head Pressure trend opens. Note how the two Variable Mapping values have set the default values for Sample Method and Sample Interval on the trend.
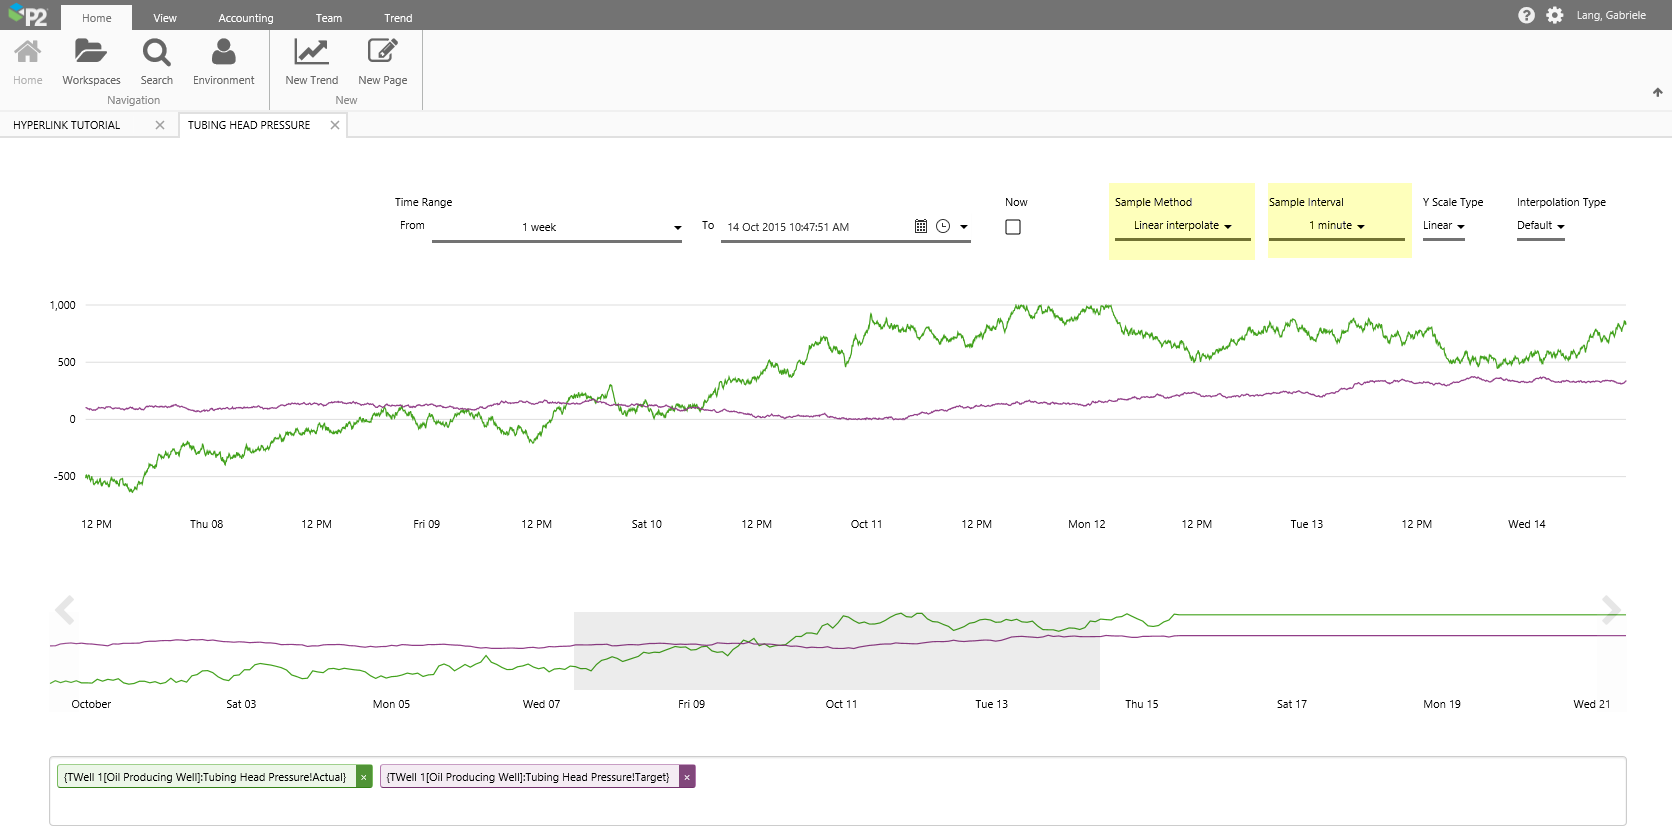
The Hyperlink opens this Trend
![]() Don't forget to save your page!
Don't forget to save your page!
Tutorial 2: Adding a Hyperlink to Open a New Trend
In this tutorial, we're going to create a hyperlink to a new trend, with a variable Sample Method and a fixed Y Scale Type of Log.

Step 1. Add and Configure a Hyperlink
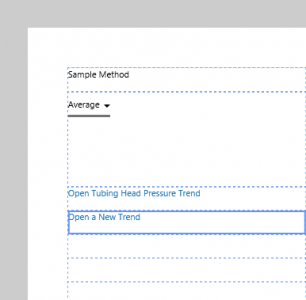
1. Drag a hyperlink component onto the fourth row of your grid.
2. Now configure the hyperlink:
|
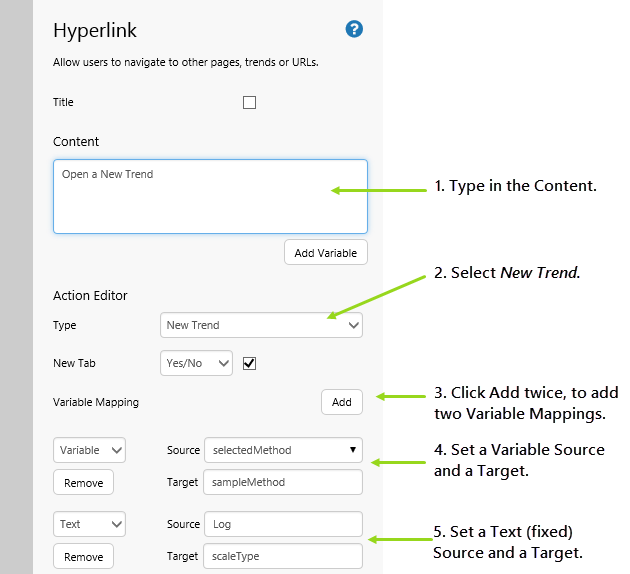 Configure the Hyperlink |
A note on Variable Mapping for Trends: Trends use specific default values, as outlined in the URL Formats section of how to Link to a Trend via a URL. For example, Trends have a parameter called sampleInterval, which uses seconds to control the sample interval in which trend data is collected.
This is how your grid cells should be looking now:
Step 2. Test your Hyperlink
Now that your hyperlink is set up, click the Preview ![]() button on the Studio toolbar to see what your page will look like in run-time.
button on the Studio toolbar to see what your page will look like in run-time.
1. Select Last known value from the Sample Method combo box. (This is setting the sampleMethod variable.)
2. Now click the hyperlink.
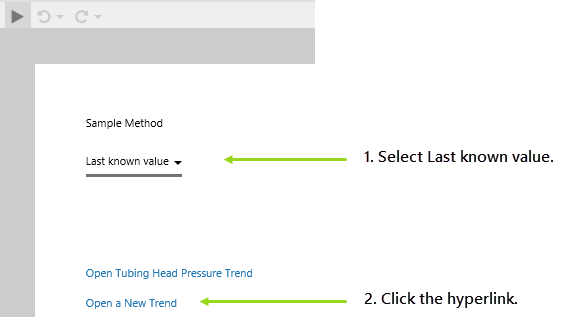
Test Hyperlink "Open a New Trend"
A blank trend opens. Note how the two Variable Mapping values have set the default values for Sample Method and Y Scale Type on the trend.
A New Blank Trend Opens, in a New Tab
![]() Don't forget to save your page!
Don't forget to save your page!
Tutorial 3: Adding a Hyperlink to Open an Explorer Page
In this tutorial, we're going to create a hyperlink to an Explorer Page.

Before you start this exercise, make sure you have a page to open.
If you have access to the training environment, you should be able to use the Chart Page page, in the Tutorials workspace.
Step 1. Add and Configure a Hyperlink
1. Drag a hyperlink component onto the fifth row of your grid.
2. Now configure the hyperlink:
|
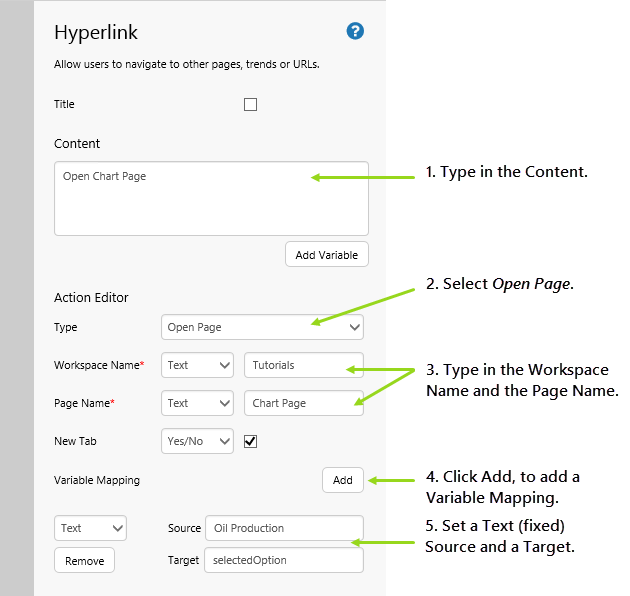 Configure the Hyperlink |
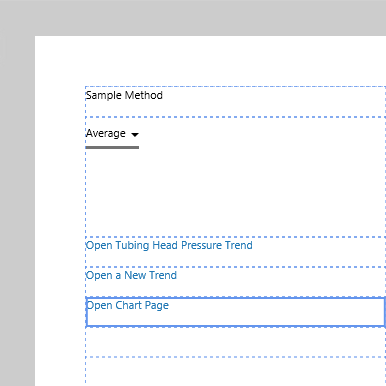
This is how your grid cells should be looking now:
Step 2. Test your Hyperlink
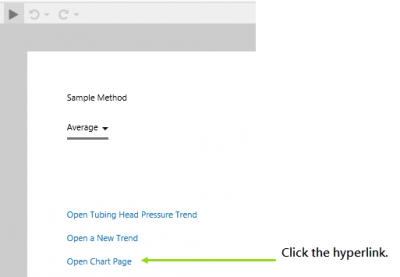
Now that your hyperlink is set up, click the Preview ![]() button on the Studio toolbar to see what your page will look like in run-time.
button on the Studio toolbar to see what your page will look like in run-time.
Click the hyperlink.
Test Hyperlink "Open Chart Page"
The Chart Page opens. Note how the Variable Mapping value (Oil Production) has set the default values for the Sample Method and Y Scale Type on the trend.
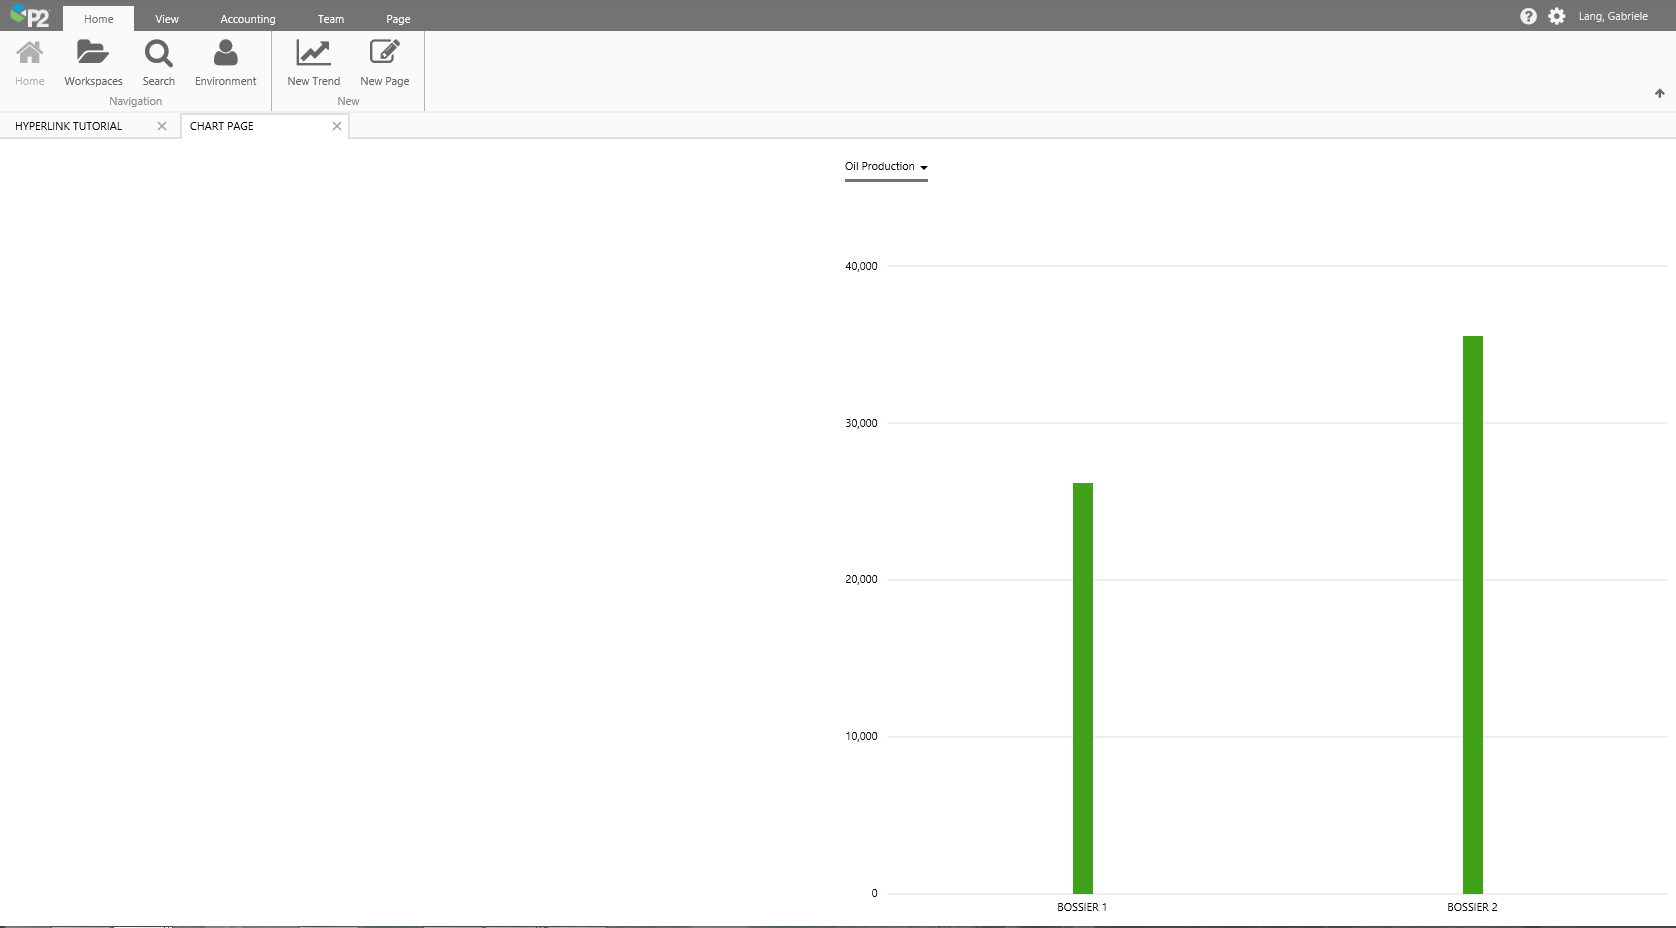
Chart Page
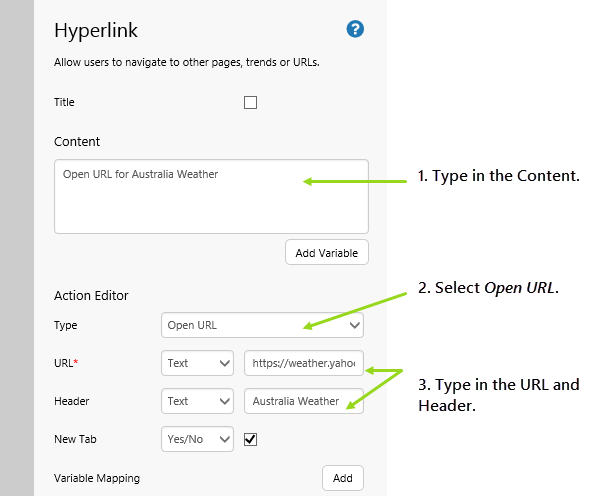
Tutorial 4: Adding a Hyperlink to Open a URL
In this tutorial, we're going to create a hyperlink to an external URL.
This tutorial does not use variable mapping; if you are going to use variable mapping with an external URL, ensure that you know which parameters are available. Then reference, by name, the ones you use in the Target of the Variable Mappings.
Step 1. Add and Configure a Hyperlink
1. Drag a hyperlink component onto the sixth row of your grid.
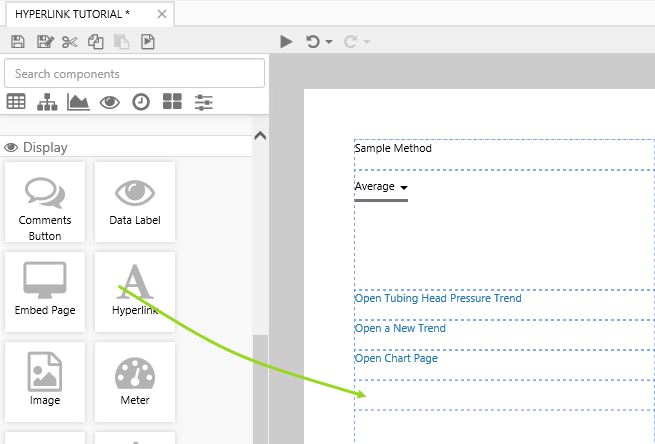
2. Now configure the hyperlink:
|
 Configure the Hyperlink |
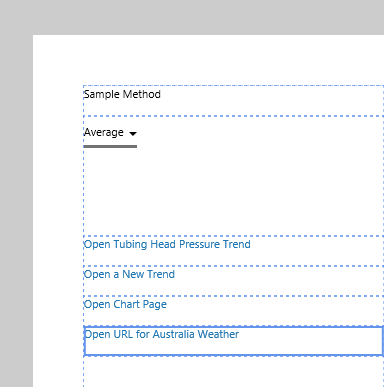
This is how your grid cells should be looking now:
Step 2. Test your Hyperlink
Now that your hyperlink is set up, click the Preview ![]() button on the Studio toolbar to see what your page will look like in run-time.
button on the Studio toolbar to see what your page will look like in run-time.
Click the hyperlink.
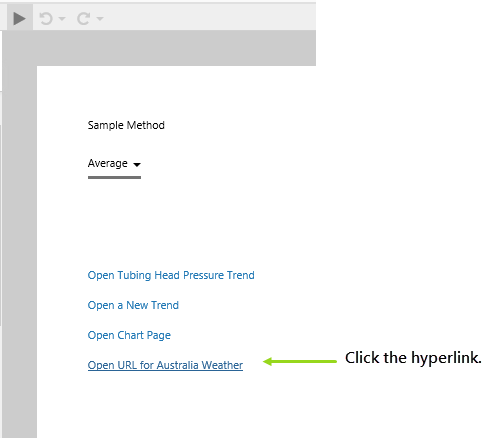
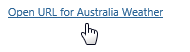
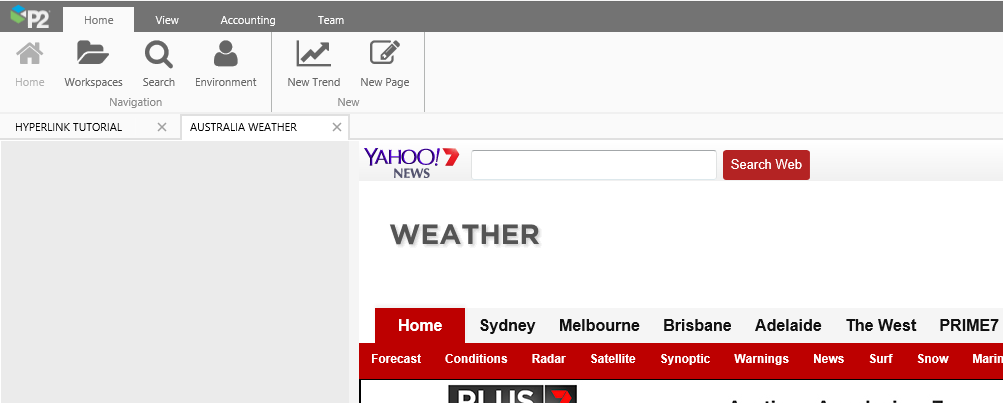
Test Hyperlink "Open URL for Australia Weather"
The Australia Weather opens in a new tab within P2 Explorer. Note how this page is named Australia Weather, using the Header property.
![]() Don't forget to save your page!
Don't forget to save your page!
Comprehensive Reference
This section describes the properties of the Hyperlink component.
| Title: | Select the check box if this label is going to be a page title. This will style the text to a font size of 20px. | ||||||||||||||||||||||||||||||||||||||||||||
| Content: | The text you want to display in the hyperlink. This styles the text to a font size of 11px (or 20px if this is a title). | ||||||||||||||||||||||||||||||||||||||||||||
| As soon as the hyperlink points to a valid address, it has a blue font. | |||||||||||||||||||||||||||||||||||||||||||||
| Add Variable: | Click Add Variable if you want to add a variable to the content. The text label article explains how to do this. | ||||||||||||||||||||||||||||||||||||||||||||
| Action Editor: | This is where you'll define the hyperlink, along with optional parameters. | ||||||||||||||||||||||||||||||||||||||||||||
|