ON THIS PAGE:
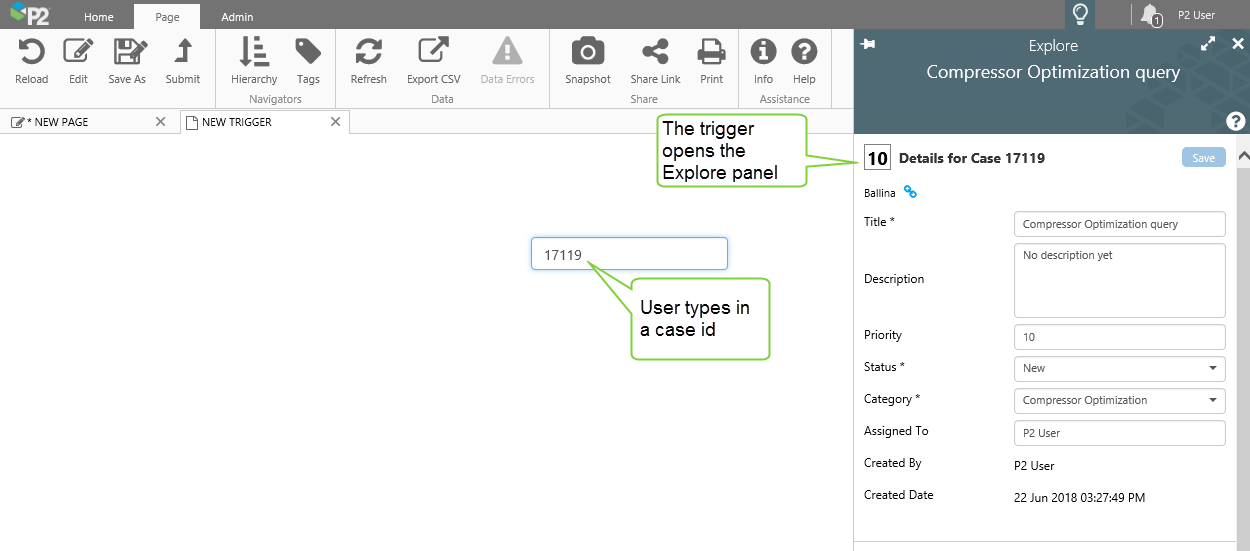
The Explore Panel trigger opens the Explore panel, every time the configured variable changes. In Explorer version 4.6.1, this trigger can be used to open Case details in the Explore panel, and the required variable is a case id.
This is useful for allowing a user to open case details in the Explore panel for a chosen case id, and then open a Case tab from there.
Configuration Overview
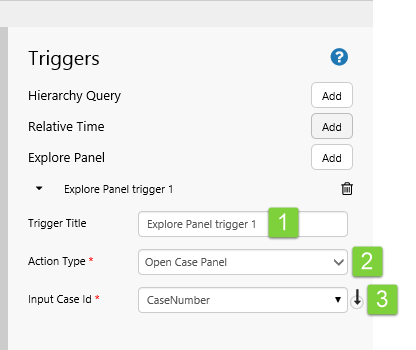
The following image shows how to use the configuration options of an Explore Panel trigger:
|
|
|
Tutorial
In this tutorial, we'll add an Explore Panel trigger. We'll configure the trigger to use a variable that gets updated with the case id.
We'll add a default for the variable, and a Combo Box containing some case ids.
Step 1. Prepare a Studio Page
If you're unfamiliar with the process of building pages, read the article Building an Explorer Page.

Before you start, click the New Page button on the Home tab of the ribbon. Choose the Precision layout.
Step 2. Update Default Values
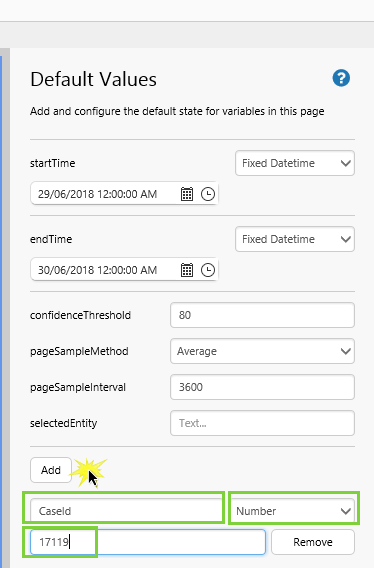
1. Open the Default Values panel.
2. Add a new default value:
- Variable Name: CaseId
- Type: Number
- Number: 17119 (or any other valid case id)
Step 3. Add an Explore Panel Trigger
In this step, we'll add an Explore Panel trigger that will use the changing of variable CaseId to open the Explore panel for the case.
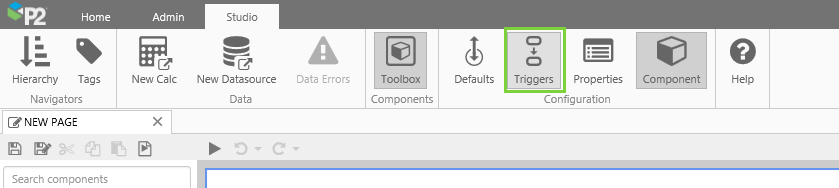
1. Click the Triggers ![]() button in the Configuration group on the Studio ribbon tab.
button in the Configuration group on the Studio ribbon tab.
The Triggers panel opens.
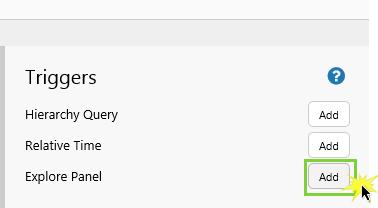
2. Click the Add button alongside Explore Panel.
Step 4. Configure the Explore Panel
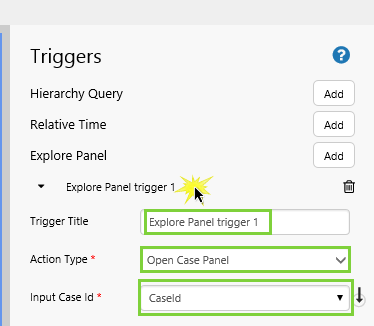
1. Click Explore Panel to expand the trigger.
2. Configure the trigger.
- Trigger Title: Type Explore Panel trigger 1 into the edit box.
- Action Type: Select Open Case Panel from the drop-down list.
- Input Case Id: Select the CasedId variable from the drop-down list.
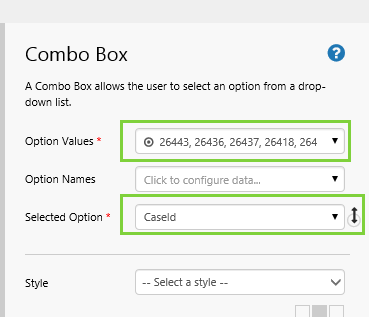
Step 5. Add and configure a Combo Box
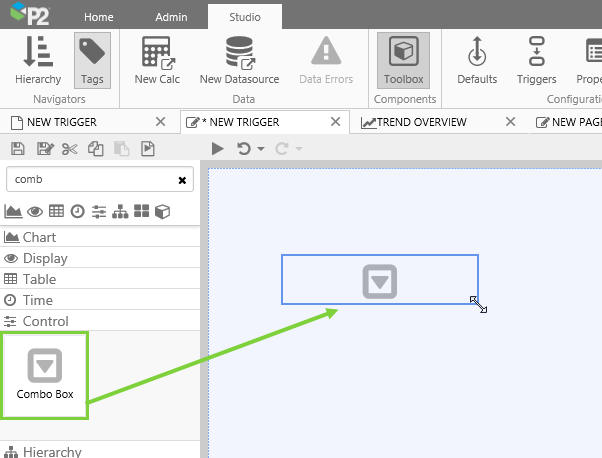
1. Drag and drop a Combo Box component onto the page, and drag the corners to resize it.
2. Click the comb box, then configure its properties:
- Option Values: Add a list of Case Ids: 26443, 26436, 26437, 26418, 26419, 26404, 26406 in our example, plus the one used for the CaseId default value: 17119.
- Selected option: Select the CaseId variable from the drop-down list.
Note: See how we chose our case ids: Choosing Case Ids
Step 6. Preview the Page
To try out the new functionality:
- Click the Preview
 button on the Studio toolbar to see what your page will look like in display mode.
 - Select a case id from the combo box.
- Notice how the Explore panel opens when you change the case id.
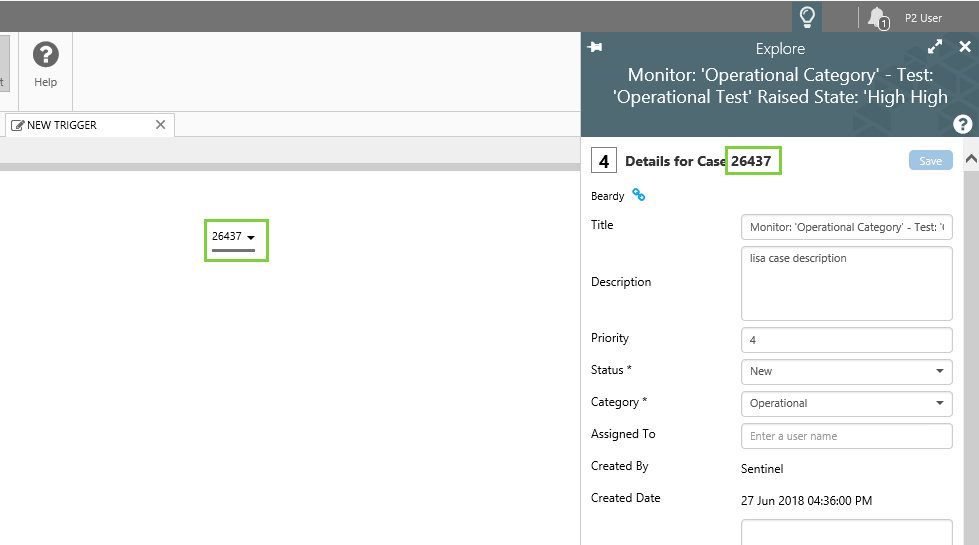
You now have a functioning Explore Panel trigger, whose CaseId variable is updated by the user's selection from the Combo Box.
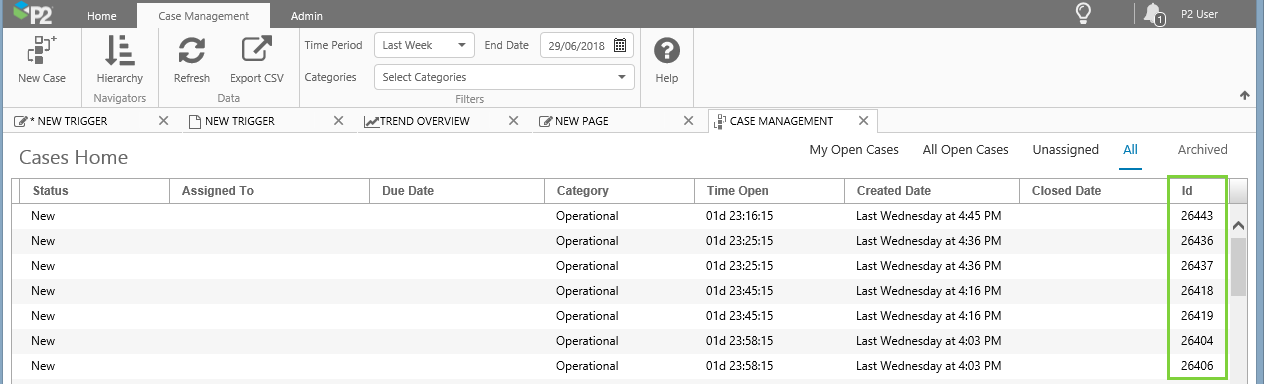
Choosing Case Ids
For this tutorial, you should choose Case Ids that already exist in your Explorer system.
To see some of your case ids, open the Case Management tab, choose some filters, and scroll to the right of the table where the Case Id column is.
This is where we found case ids for the tutorial: