ON THIS PAGE:
Overview
This article explains how to create a templated trend, with a link which appears on an entity's Table of Contents tab on the Explorer ribbon.
When you click on a link for a templated trend, the trace lines that use templated attributes use the entity that's currently selected in the hierarchy navigator.
Tutorial
This tutorial uses an example to describe how to create a templated trend. A link to the trend is added to one of entity Beardy Well's templates (Oil Producing Well), so that it appears on the ribbon's Table of Contents for Beardy Well, and for all other entities using the Oil Producing Well template.
Step 1: Create the Templated Trend in Explorer
Tip: Before you start, identify which template this trend will be associated with. In our example, we are using the Oil Producing Well template.
1. Add a new Trend by clicking New Trend on the Home ribbon tab.
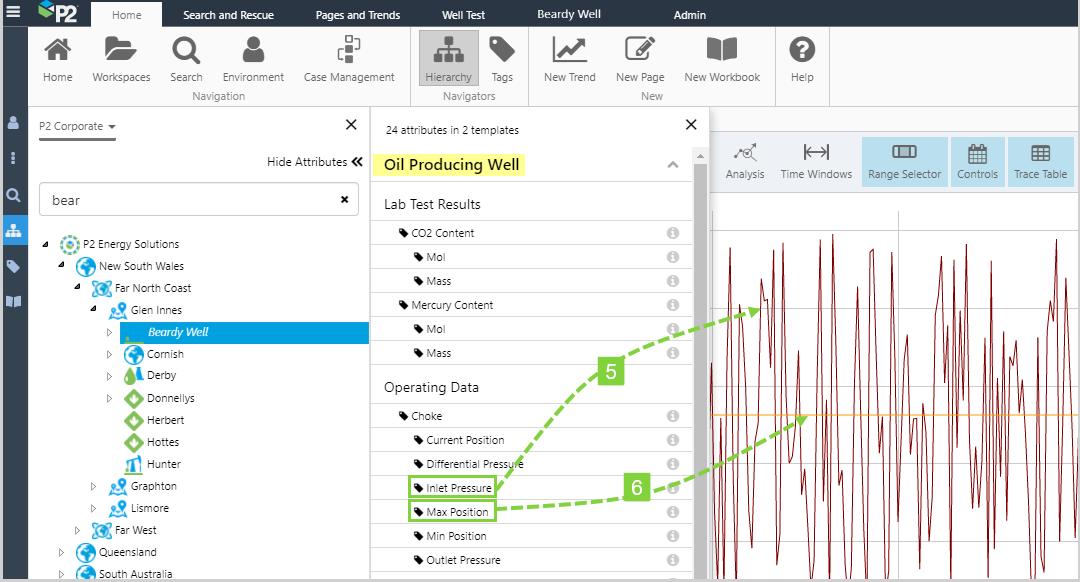
2. Open the Hierarchy Navigator and select the P2 Corporate hierarchy.
3. Select entity Beardy Well in the hierarchy navigator.
4. Click Show Attributes to open the Attributes Panel. (This button changes to Hide Attributes.)
5. In the Attributes panel, under the Oil Producing Well template, locate the Choke!Inlet Pressure attribute value. Drag and drop this attribute value onto the trend.
6. Now locate the Choke!Max Position attribute value. Drag and drop this attribute value onto the trend.
This adds {Beardy Well[Oil Producing Well]:Choke!Inlet Pressure} and {Beardy Well[Oil Producing Well]:Choke!Max Position} attribute values into the Trace Table, displayed respectively as ![]() Beardy Well-> Choke -> Inlet Pressure and
Beardy Well-> Choke -> Inlet Pressure and ![]() Beardy Well-> Choke -> Max Position.
Beardy Well-> Choke -> Max Position.
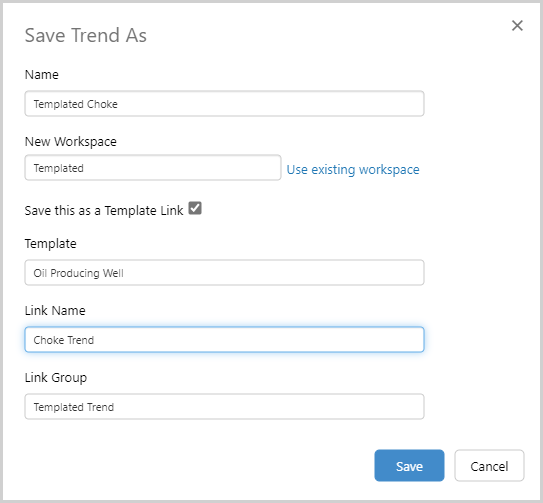
7. Select Save As, name the trend Templated Choke, and create a new workspace Templated.
8. Select Save this as a Template Link, and in this example, the Template is Oil Producing Well.
9. Name the link Choke Trend, and the link group Templated Trend.
10. Click Save.
Step 2: Try out the Link in Explorer
In this step, we're going to click on an entity to open its Table of Contents tab on the Explorer Ribbon, then click on the link to the trend. Once the trend is open, you can click on other entities in the hierarchy to change the entity context in the trend, or you can click the button on that entity's table of contents, to open another trend in a new tab.
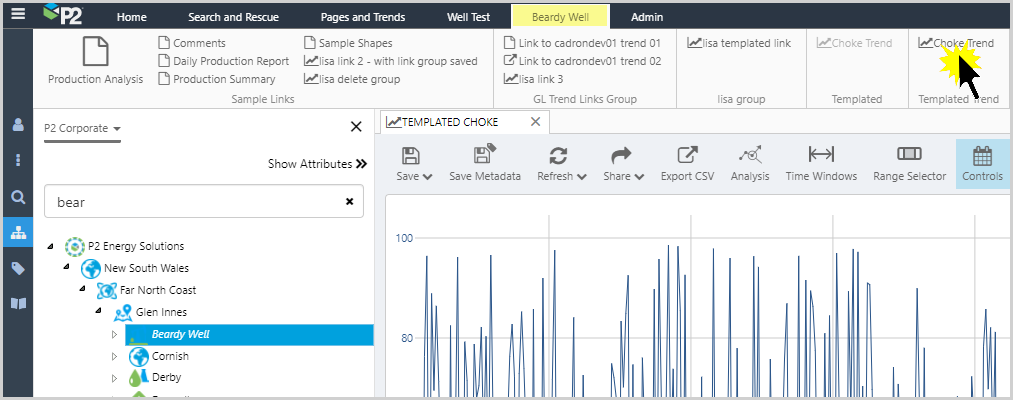
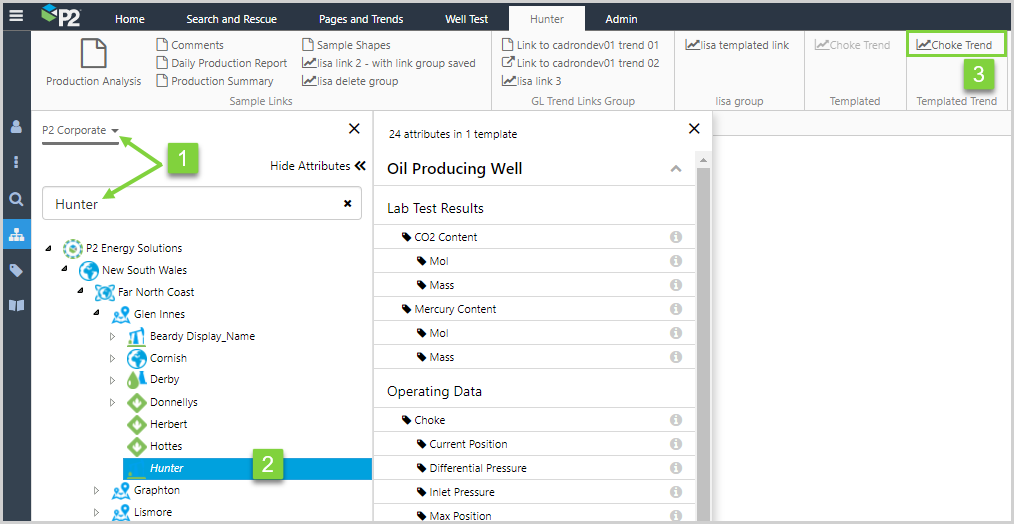
1. In the Hierarchy Navigator, locate entity Hunter in the P2 Corporate hierarchy.
2. Click Hunter to open its Table of Contents tab.
3. In the Table of Contents ribbon, click Choke Trend.
The trend opens in a new tab.
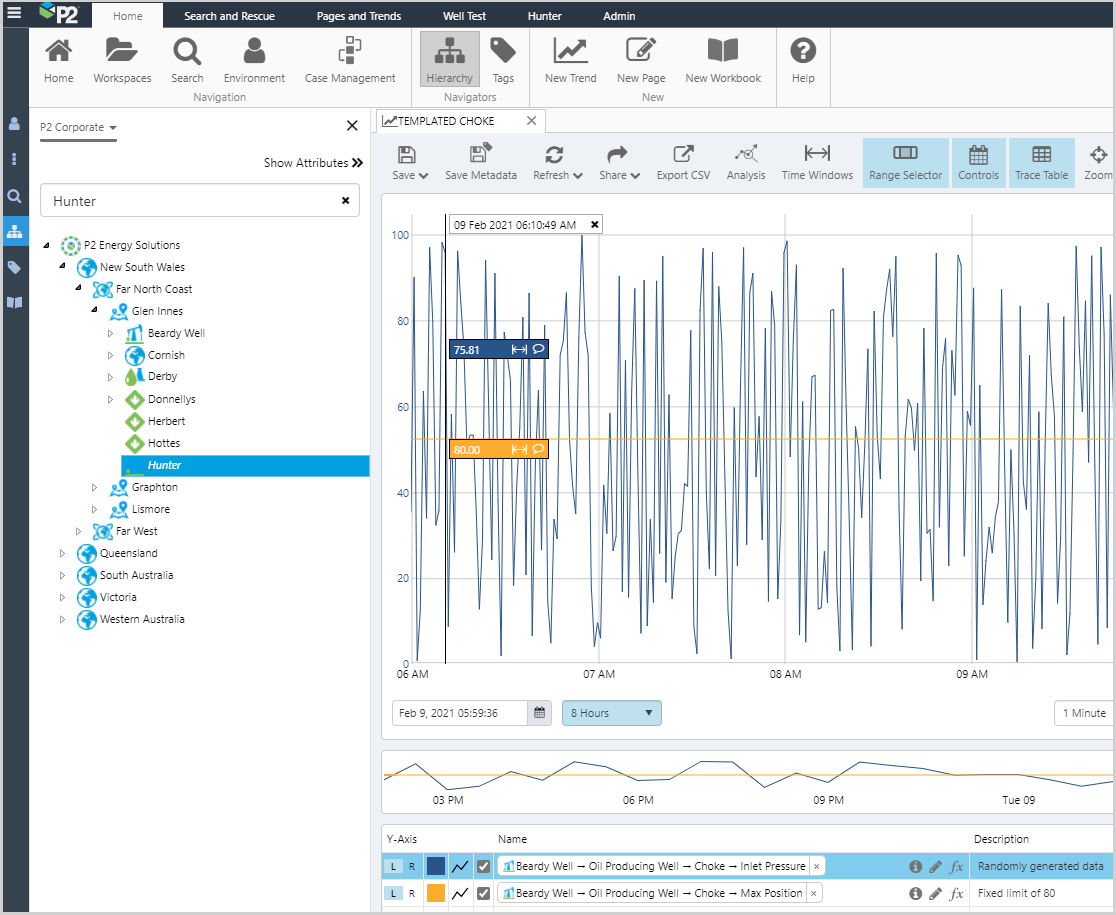
Note: In our example, The templated calculation trace has entity Hunter for context. If we click on another entity in the hierarchy the context changes, as shown below.
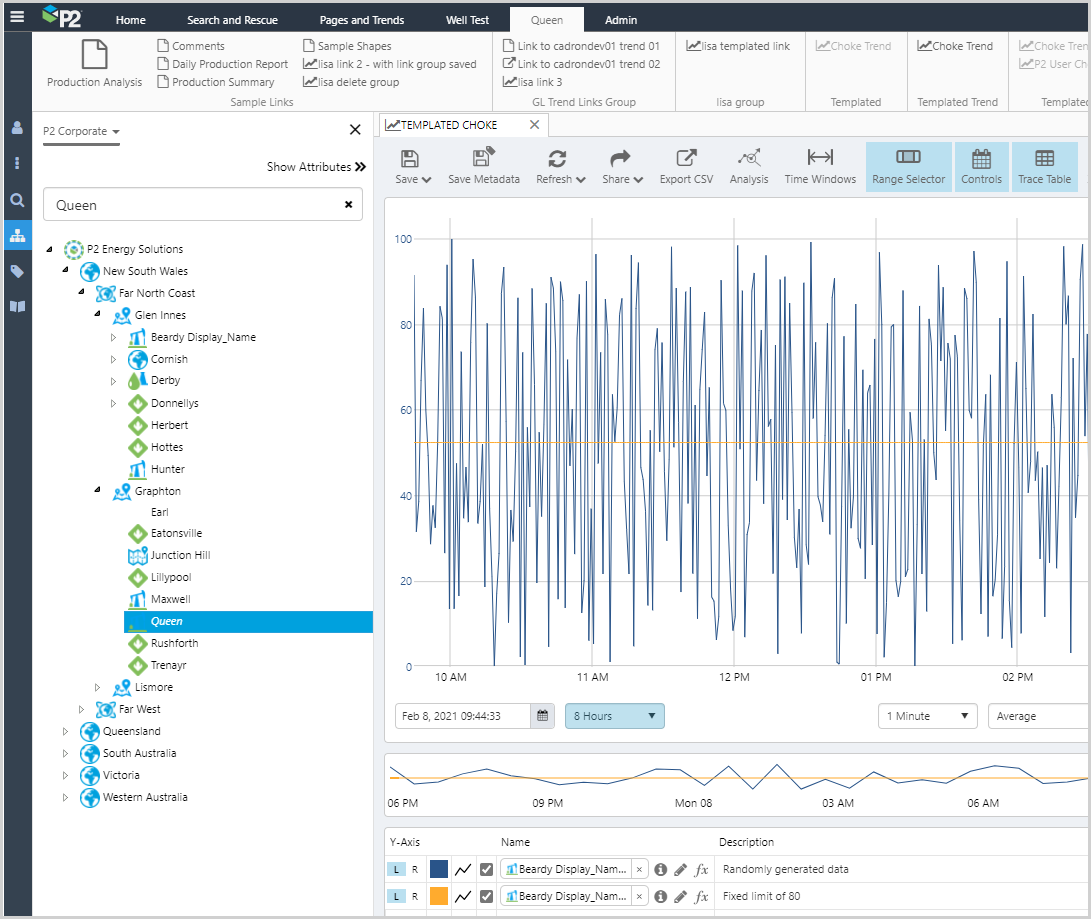
Click Queen in the Hierarchy Navigator, to change context for the templated traces.
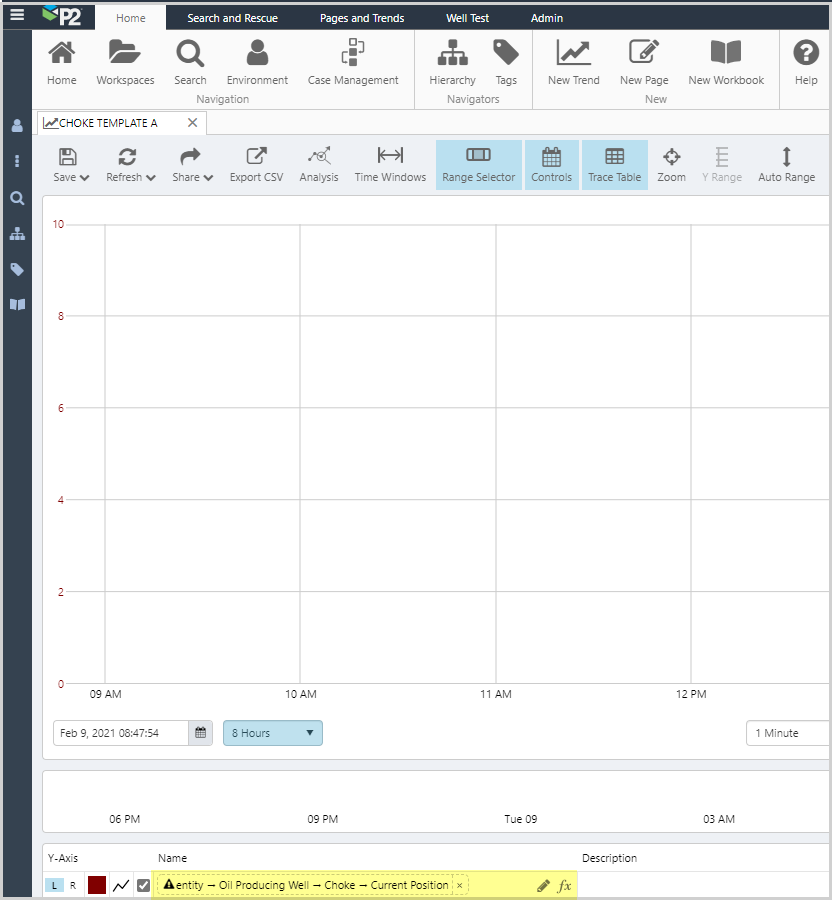
Creating an Unpopulated Templated Trend
You can create a templated trend by adding a calculation to a new trend. The saved Templated Trend will be blank and will be populated when you select an entity.
In the example below {entity[Oil Producing Well]:Choke!Current Position} was entered into the Name field and the template saved as Choke Template A.
Release History
- Templated Trends 4.8
- Entity names are replaced with "entity" keyword when opening the calculation when using the 'Save this as a Template Link' option.
- Templated Trends 4.6.7
- Save a link to the trend as a template link
- Templated Trends 4.6.5
- Comments can be added to entities in templated trends and charts
- Name of selected entity displays in trend templated entity
- Templated Trends 4.6
- Templated Trends 4.5.2