ON THIS PAGE:
Overview
This article explains how to create a templated trend, with a link which appears on an entity's Table of Contents tab on the Explorer ribbon.
When you click on a link for a templated trend, the trace lines that use templated attributes use the entity that's currently selected in the hierarchy navigator.
Note: Some of the steps are done in Server's management tool, P2 Server Management.
Tutorial
This tutorial uses an example to describe how to create a templated trend. A link to the trend is added to one of the entity's templates, so that it appears on an entity's Table of Contents tab on the Explorer ribbon.
Step 1: Create the Templated Trend in Explorer
Tip: Before you start, identify which template this trend will be associated with. In our example, we are using the Water Injection Well template.
1. Add a new Trend by clicking New Trend on the Home ribbon tab.
2. Open the Hierarchy Navigator and select the Test Time Series Hierarchy hierarchy.
3. Select entity TWell 10 in the hierarchy navigator.
4. Click Show Attributes to open the Attributes Panel. (This button changes to Hide Attributes.)
5. Under the Water Injection Well template, locate the Injection Rate attribute. Drag and drop this attribute onto the trend.
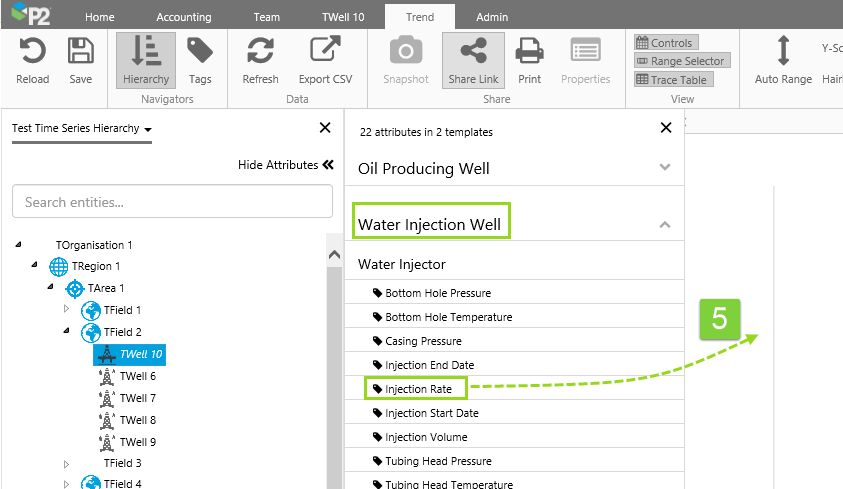
This adds {TWell 10[Water Injection Well]:Injection Rate!Actual} into the Trace Table, displayed as ![]() TWell 10 -> Injection Rate -> Actual.
TWell 10 -> Injection Rate -> Actual.

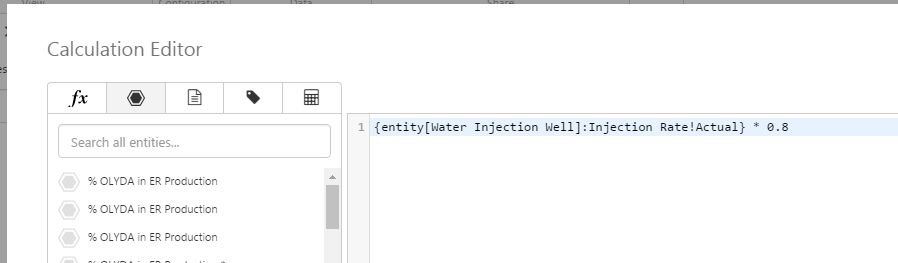
6. In the trend's Trace Table, use the Calculation Editor to replace the entity name with the entity keyword, and then multiply this definition by 0.8: {entity[Water Injection Well]:Injection Rate!Actual} * 0.8.
7. Save the trend as Trend Injection Rate in the Tutorials workspace.
8. Click Share Link on the Trend ribbon.
The Share Trend dialog box opens, with the trend's URL.
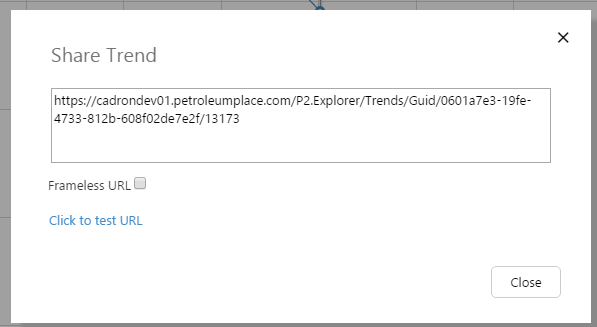
9. Copy the link to your clipboard.
Step 2: Add to the Table of Contents in Server
Note: This step requires P2 Server Editor permissions.
In Server Management:
1. Add a new Link Group called Templated Trends.
2. Add a new link called Trend Injection Rates with a description of Trend injection rates for Water Injection Wells. Select the new link group: Templated Trends. Paste in the URL from the share link in the previous step.
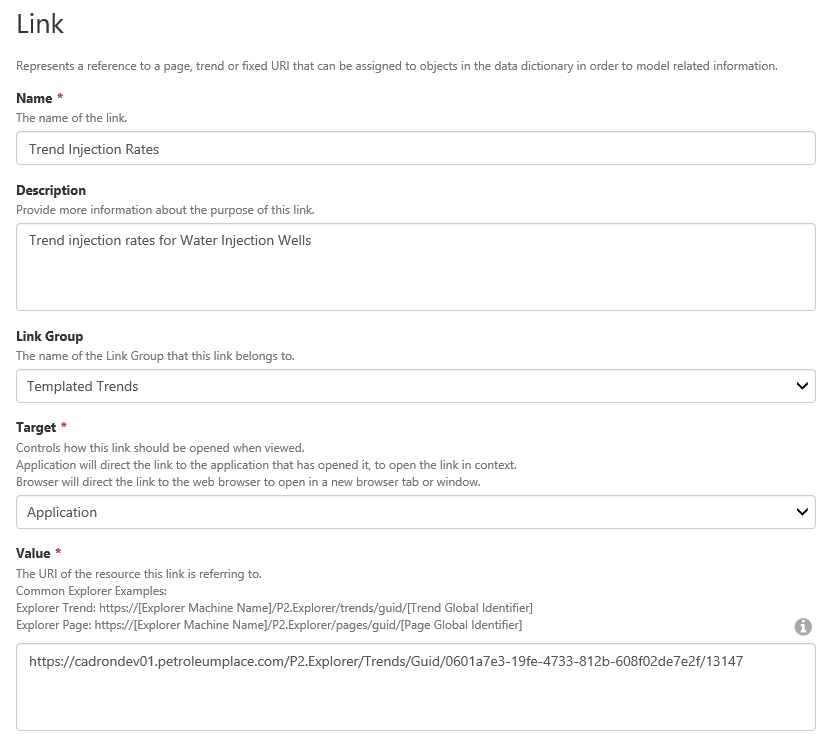
A link for the templated trend
3. Edit the template definition for the active primary template, Water Injection Well, to use the new Trend Injection Rates link.
We now have a templated trend for the Water Injection Well template.

A link to the new trend, on the Water Injection Well template
Step 3: Try out the Link in Explorer
In this step, we're going to click on an entity to open its Table of Contents tab on the Explorer Ribbon, then click on the link to the trend. Once the trend is open, you can click on other entities in the hierarchy to change the entity context in the trend.
1. In the Hierarchy Navigator, locate entity TWell 10 in the Test Time Series Hierarchy hierarchy.
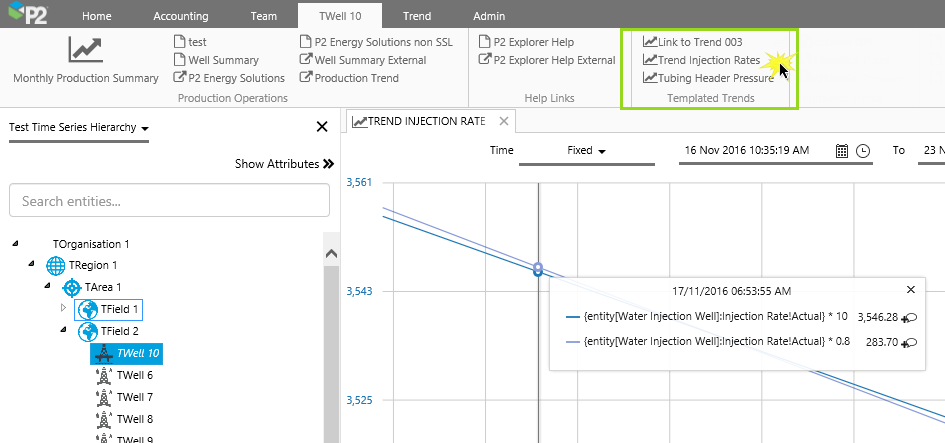
2. Click TWell 10 to open its Table of Contents tab.
3. In the Table of Contents ribbon, click Trend Injection Rates.
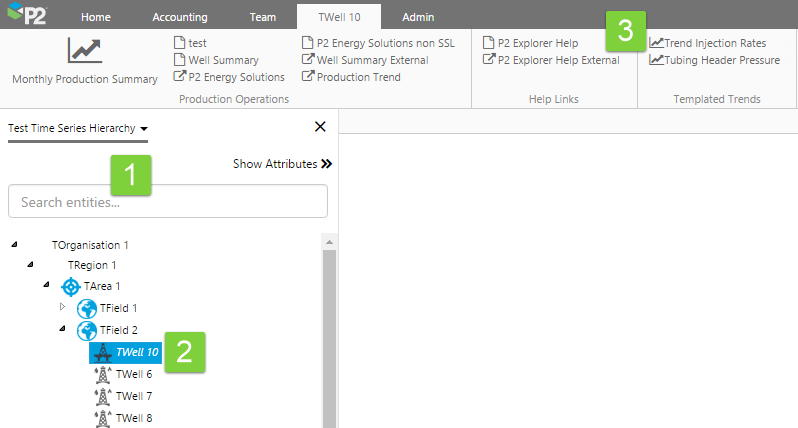
The trend opens in a new tab.

Here the templated trend is for entity TWell 10
Note: In our example, The templated calculation trace has entity TWell 10 for context. If we click on another entity in the hierarchy the context changes, as shown below.
Click TWell 2 in the Hierarchy Navigator, to change context for the templated traces.
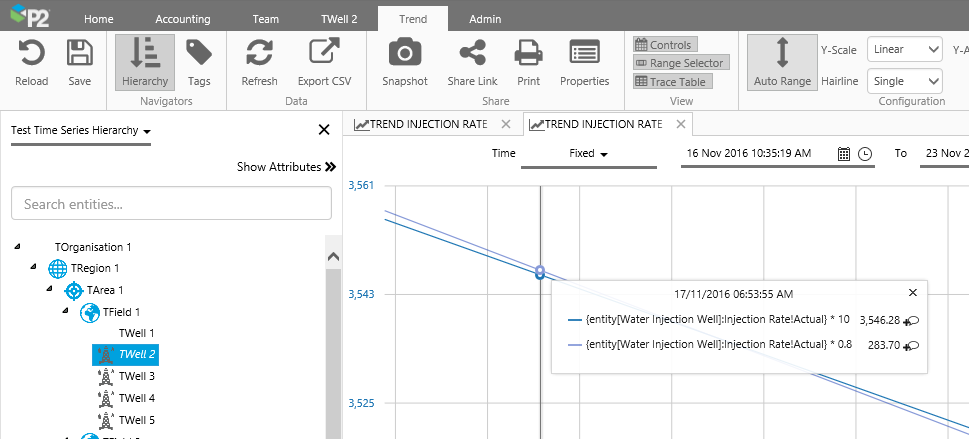
Here the templated trend is for entity TWell 2