ON THIS PAGE:
This article is about how to create templates and attributes using P2 Server Management or the Import/Export spreadsheet. For general information on templates and attributes, see: Templates and Attributes.
A template in P2 Server is a way of defining the attributes of an entity. All entities that are assigned a template take on the attributes of that template. For example, all Oil Producing Well templates will have attributes like Tubing Head Pressure, Tubing Head Temperature, and Choke Position; whereas Water Injection Wells might have Injection Pressure, Annulus Pressure, and Water Flowrate.
Note that a “template” is not a base object in P2 Server, and in common usage the meaning of template may change, depending on our frame of reference:
- When we talk about a template in reference to a particular entity, then we are normally referring to the template instance.
- When we otherwise talk about a template, then we are normally referring to the template definition.
Before you start, spend some time thinking about what this template represents, and what would be the attributes inherited by any entity that is assigned this template. Also think about the links that you want to display in the Table of Contents for any entity that has this template designated as its primary template.
Server Management
In P2 Server Management, creating a template with some attributes requires 3 steps, all performed through the Templates menu option:
- Creating the template definition, by giving the template a name, description, and template group.
- Creating attribute definitions within the template definition.
- Creating attribute value definitions.
There are 2 prerequisites: you must have already created both the template group that you want this template to belong to, and the links you intend to assign to this template.
Once the template is created, it can be assigned to an entity - this step will also define where the attribute values will come from for that particular entity.
Creating a Template Definition
1. Open P2 Server Management, and click the Configuration ![]() icon.
icon.
2. Click Templates.
3. Click Create New Template.
Note: If you want to edit an existing template or its attributes, select the template from the list below the Create button.

4. Give the template a name, description, template group, and icon.
- The name cannot contain any reserved characters.
- For the description, it’s often useful to provide a broader explanation of the purpose of the template and how it will be used.
- The template group must already exist in the system.

5. Assign the links you want to associate with this template.
- Links will appear in the Table of Contents for any entity that has designated this template as its primary template.
- Links must already exist in the system. If a link doesn't exist, you should add it after you have saved this template.
6. When you have finished, click the Save button in the top right corner.
Creating Attribute Definitions
7. After the template is saved, you will have the opportunity to create attributes and assign them to the template.

8. To assign an attribute to the template, click the "Create One Now" button.
The Attribute screen appears, which is where you create the attribute definition in the template you are editing.
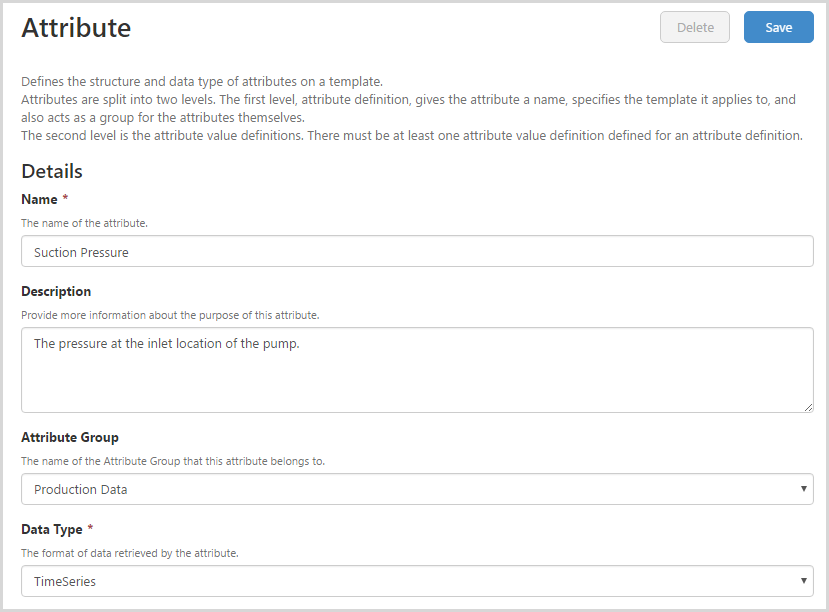
9. Give the attribute a name, description, attribute group, and data type.
- The name cannot contain any reserved characters.
- For the description, it’s often useful to provide a broader explanation of what the attribute represents.
- The attribute group must already exist in the system.
- If the attribute is coming from a dataset datasource, choose Matrix. If the attribute is coming from a tag datasource, choose TimeSeries.
10. When you have finished, click the Save button in the top right corner.
Creating Attribute Value Definitions
After the attribute is saved, you will have the opportunity to create and assign the attribute value definition (i.e. different aspects of the attribute such as planned, actual, max, min etc).
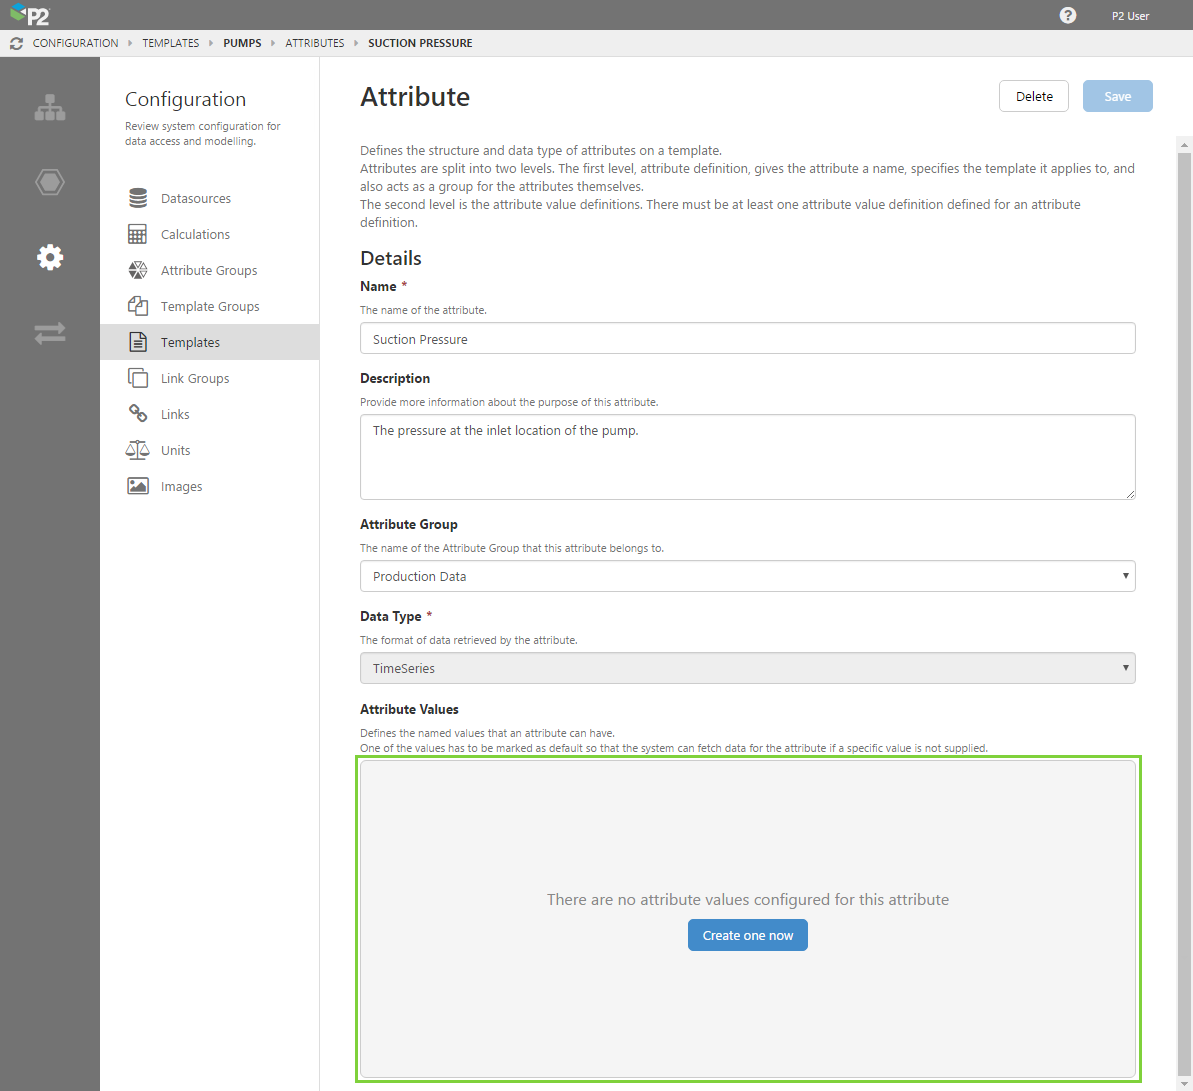
11. To assign an attribute value, click the "Create One Now" button.
The Attribute Value screen appears, which is where you create the attribute value definition.
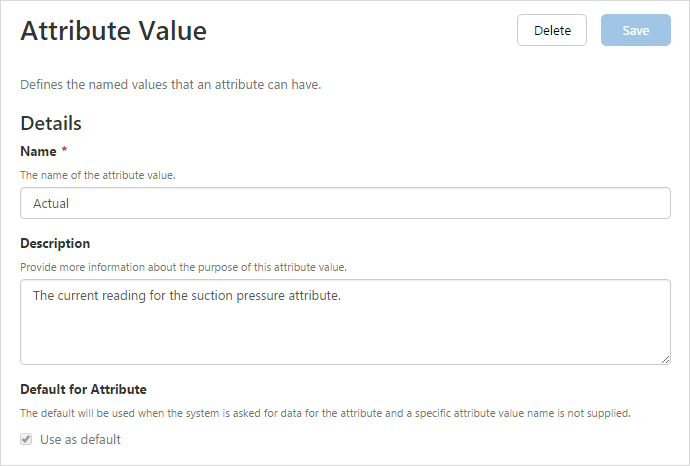
12. When you have finished, click the Save button in the top right corner.
Done! You now have a template with assigned attributes, which you can now assign to an entity.

Import/Export Spreadsheet
The Import/Export spreadsheet is generally only used to make bulk changes. If you want to create templates and attributes as part of a bulk configuration, you need to use the following tabs in the Import/Export spreadsheet:
- Template Definition
- Attribute Definition
Look for the red comment ![]() icon in the row headers, to get help with each column.
icon in the row headers, to get help with each column.
DO NOT fill in or change anything in the Global Id field – this is the unique identifier for the template group that allows it to be tracked across systems, and when it is renamed. It is automatically generated by the system.
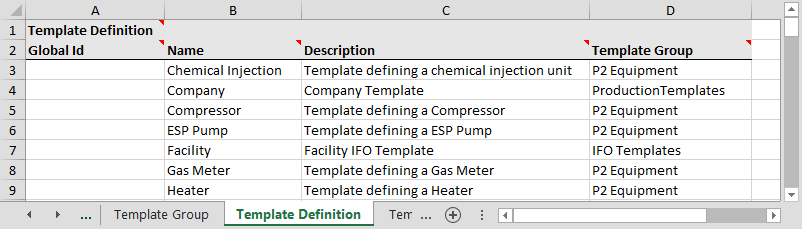
Template Definition Tab
The screenshot below shows an example of configured template definitions. The fields are the same as the ones in the first step of configuring a template definition in Server Management, using the above instructions on this page.
Attribute Definition Tab
Attributes and attribute values are both assigned to templates by using the Attribute Definition tab.
The screenshot below shows an example of a template that has some attributes and attribute values assigned (click to enlarge).

There are 2 important parts to this tab: the Attribute Definitions and the Attribute Value Definitions.
Let's first look at the Attribute Definitions.
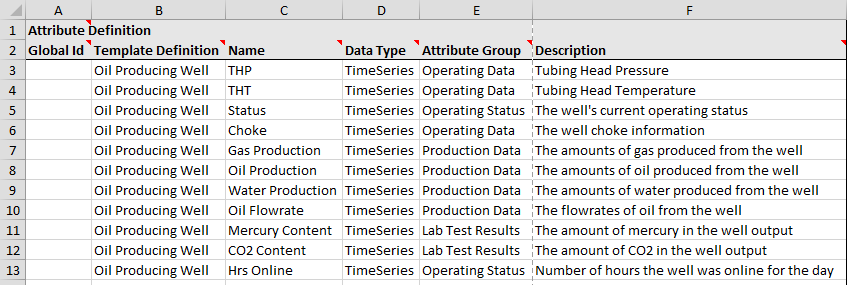
You can see that the Oil Producing Well template has been assigned the following attributes:
- THP
- THT
- Status
- Choke
- Gas Production
- Oil Production
- Water Production
- Oil Flowrate
- Mercury Content
- CO2 Content
- Hrs Online
Each attribute is on a different row, and each attribute has a Data Type, Attribute Group, and Description.
Now, let's focus on the THP attribute on row 3, and scan across to look at columns G-J. These columns define an attribute value definition for the planned THP value from the well.

To add more attribute value definitions for an attribute, you need to add more repeating sections like G-J. If you look at columns K-N, you will see that they add another attribute value definition - this time for the Actual THP value.
You can add as many attribute value definitions as you need to, such as Max or Min, by adding more repeating sections like columns G-J.
Note that ONE of these must be the default value (Is Default = TRUE) so that P2 Server knows what data to serve if an attribute value definition is not specified by a consuming application.
Done! You have now configured your templates with assigned attributes. You can now assign these templates to entities and pull in values for the attributes.