ON THIS PAGE:
Overview
In the Explorer module, workspaces are the only object that can be secured at the object level. An individual workspace is an object of the Workspaces resource in the Explorer module.
Securing workspaces relies on default object security, which provides the Everyone role with implicit view privileges for all objects in the system. When securing a workspace, you will need to remove the View privilege from the resource, as well as default object privileges for other roles.
When applying object-level privileges, it is important to remember the cascading nature of privileges applied at the resource-level. If a role has explicit View privileges (or higher) on the Workspaces resource, all users with that role can view all workspaces.
If you intend on changing security for workspaces, avoid explicitly setting privileges on the Workspaces resource in Server Management.
Changing object-level security for individual workspaces is done directly within Explorer workspaces, and requires Explorer administrator privileges.
What the Privileges Mean
Each resource may have different privileges. This is a list of the privileges for each resource, and what they mean.
Additionally, Explorer Admin privileges grants the user privileges to:
- Set per-workspace privileges.
- Create workspaces.
Styles
Privileges on styles apply to both styles and style constants.
| Privilege | What it means |
| Edit | Create and modify styles and style constants. |
| Delete | Delete styles and style constants. |
Workspaces
Privileges on a workspace apply to the workspace, and displays in the workspace i.e. the pages and trends belonging to the workspace.
| Privilege | What it means |
| View | See the workspace and its displays. |
| Edit |
|
| Delete | Delete the workspace and all of its contents. |
Tutorial 1. Changing Workspace Privileges
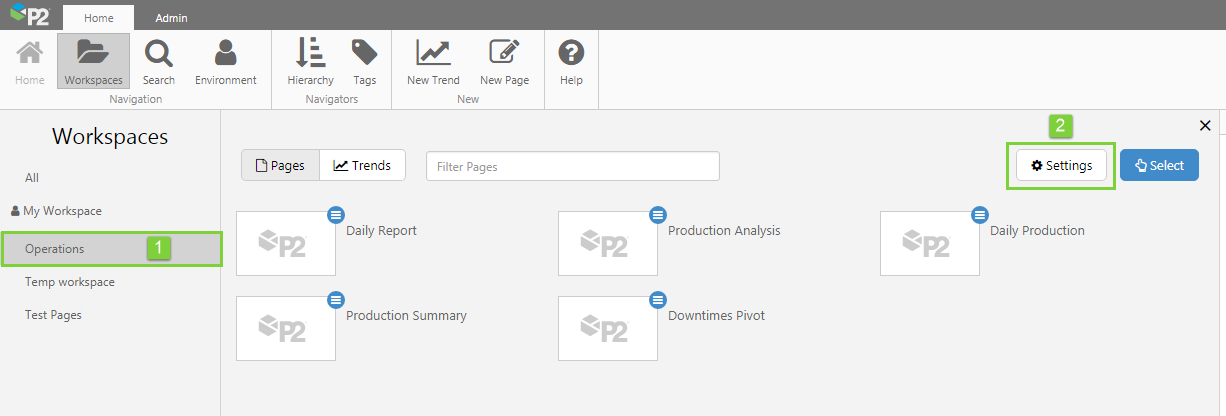
1. In P2 Explorer, open the workspace you want to lock down.
2. Click the ![]() Settings button.
Settings button.
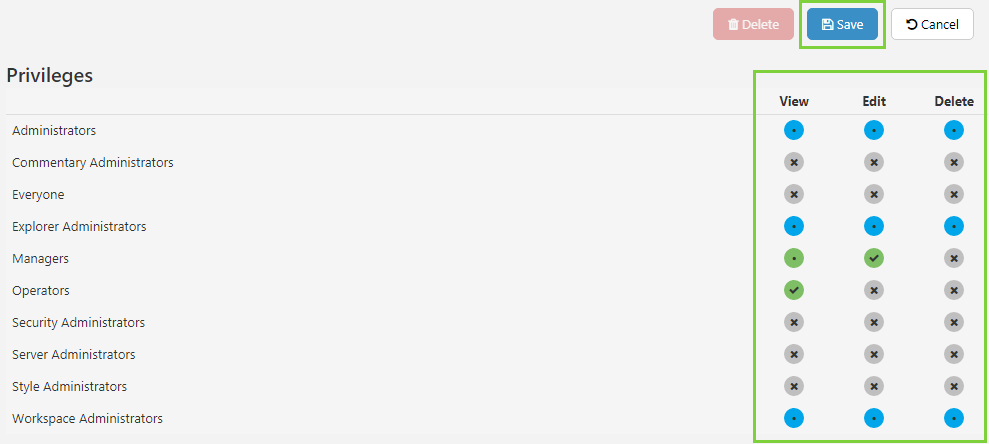
For each role, click the relevant privileges you want to assign.
What the Colours Mean
The privileges matrix is colour-coded to indicate the cascading nature of privileges. The colours are:
![]() Grey: Privilege not granted
Grey: Privilege not granted
![]() Green tick: Privilege is explicitly granted, associated privileges will also be automatically granted.
Green tick: Privilege is explicitly granted, associated privileges will also be automatically granted.
![]() Green dot: Privilege is granted because a higher level privilege has been granted on the object.
Green dot: Privilege is granted because a higher level privilege has been granted on the object.
![]() Blue: Privilege is granted because it is inherited by a resource privilege.
Blue: Privilege is granted because it is inherited by a resource privilege.
When you have finished, click Save.
Tutorial 2. Locking Down a Workspace
In this example, we show you how to lock down a workspace. We will use the Operations workspace as an example.
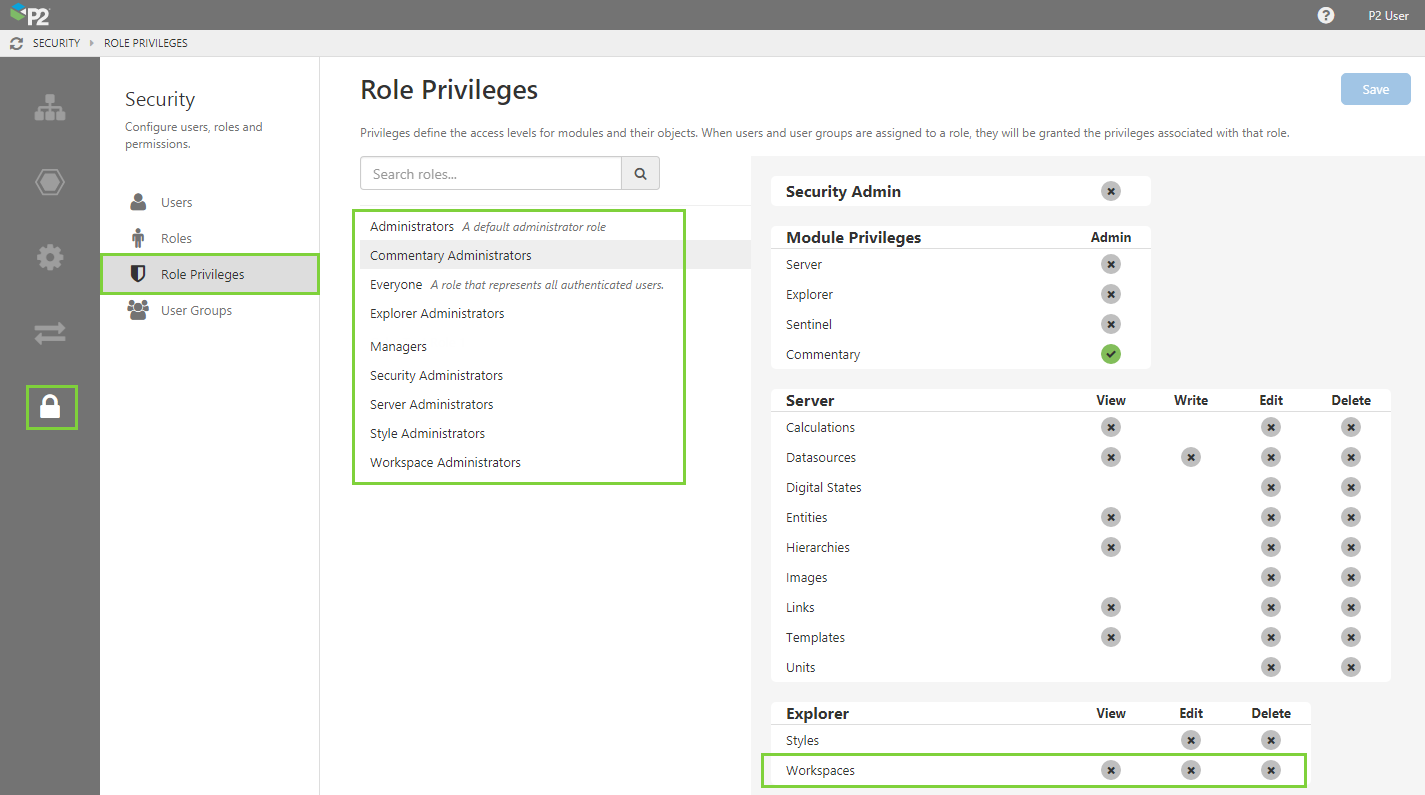
Step 1. Server Management Role Privileges
The first step is to make sure that no roles have resource-level privileges for workspaces.
The exception is the administrator role for the module which owns the object you are locking down. In this case, you might allow Administrators and Explorer Administrators resource-level privileges, but no other role.
You will need to go through each and every role, one by one, and make sure that all privileges for workspaces are off. It may be easier to first check the workspace to see which roles are affected.
Step 2. Object Privileges
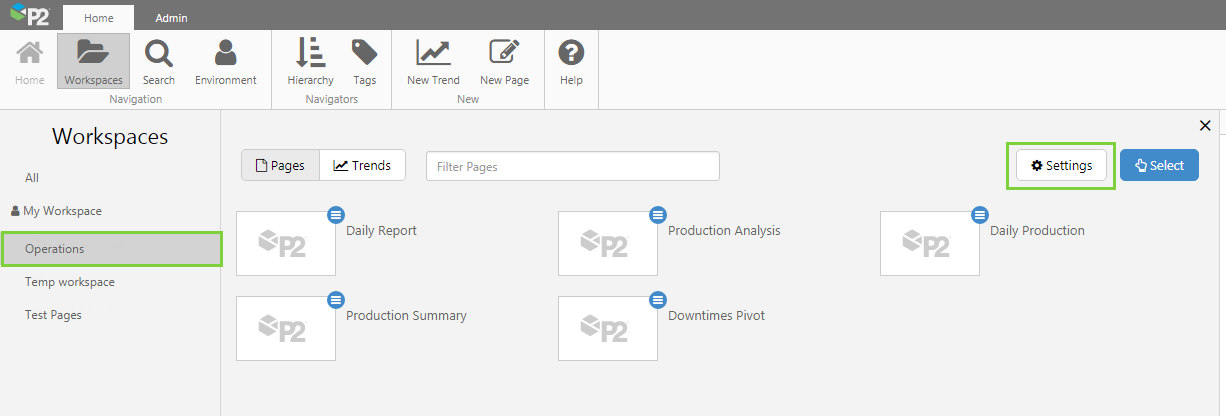
Next, open the module in which the object is located. In the case of workspaces, these are located in Explorer. However other objects, such as datasources, are located in other modules and the privileges can be found alongside the configuration options (for the datasources example, these are in Server Management > Configuration > Datasources).
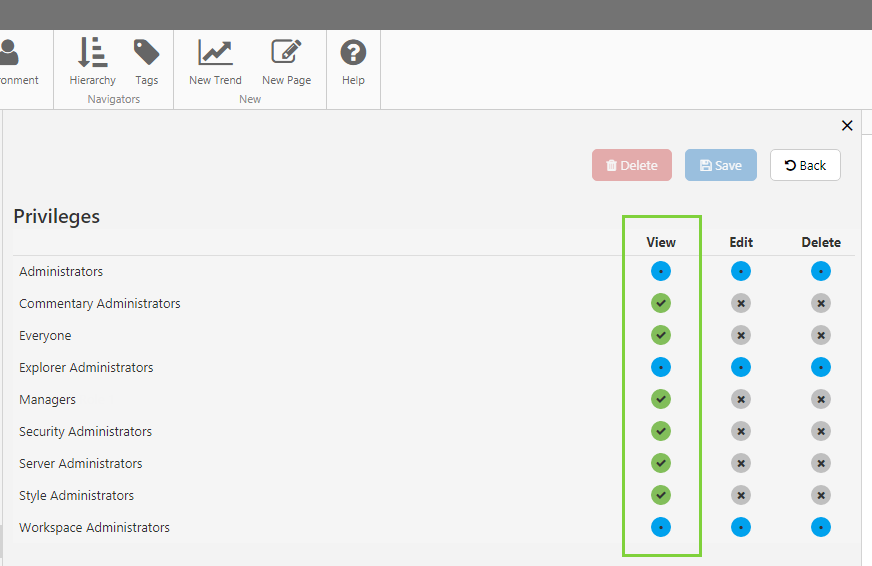
Open the workspace you want to lock down, and click the ![]() Settings button.
Settings button.
Take note of the View privileges, and especially the blue ones. These are the roles that have the privilege applied at the resource level. If you do not want any of these roles to see this workspace, go back into Role Privileges and remove it from the role (see Step 1 above).
Next, you will notice that the remaining roles all have explicit (green) view privileges for the workspace. This is because of default security, whereby all users have view access to all objects. We can override this default security here.
For each role, except the Managers role, go through and untick the green View privilege. The only role want to be able to view this workspace is the Managers role, so that will remain green.
Then, click Save.
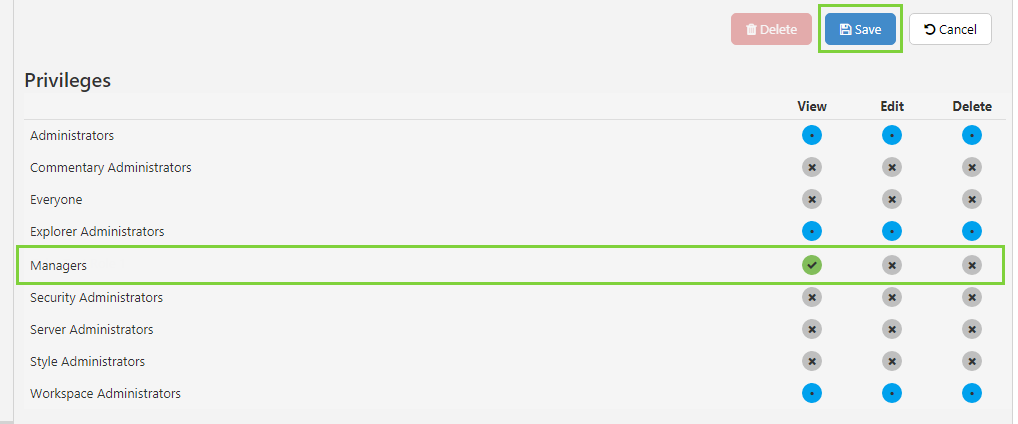
You have now locked down the Operations workspace so that only Managers and some administrators are able to view it.