Overview
Server Management provides functionality for connecting to data, and then defining that data, as well as modelling data relationships, for use in other applications such as IFS OI Explorer. This article provides an overview of IFS OI Server Management, and describes how to navigate it.
Server's parts work together. To find out how to navigate to a part/component, click on the appropriate link in the table below.
| Component | About | Navigation | |
|
Hierarchies
|
Hierarchies are used to logically define parent-child relationships between entities, such that they model real-world data. For example, a corporate hierarchy could be modelled as its organisational levels and sub-levels (corporation, business units, regions, areas, wells). | Hierarchies in Server | |
|
and Entities in a Hierarchy |
Entities are added to a hierarchy in various parent-child relationships. | Entities in a Hierarchy | |
|
Entities
|
Entities take on the data structure of their current primary template, and are used for modelling data in a hierarchy. | Entity Navigation | |
|
and Attribute Values |
Attributes (and their attribute values) are assigned to an entity based on its current primary template. When you edit an entity, you need to specify where the Attribute Values get their data from. | Attribute Values for an Entity | |
|
Configuration
|
All the components required for configuring connections to datasources, as well as for configuring the elements of data modelling, are found under this menu. | Configuration Navigation | |
| Datasources: These define the connections to various datasources, such as historians and relational databases. | Navigate Datasources | ||
| and Tags: A tag is an item of time-series data that is retrieved from a data historian, using a Tag datasource. | Navigate Tags | ||
| and Datasets: Relational datasources contain a collection of datasets, which are SQL queries (with optional parameters), written using specialised Server syntax. | Navigate Datasets | ||
| Calculations: Calculations in IFS OI Server allow users to combine existing data and derive new tags that aid in analysing existing data. | Navigate Calculations | ||
| Attribute Groups: These are used for organising attributes into smaller, more manageable lists. | Navigate Attribute Groups | ||
| Template Groups: These are used for organising templates into smaller, more manageable lists. | Navigate Template Groups | ||
| Templates: A template is a collection of attributes that is used for modelling entities. The template can also contain links and an icon, that are adopted by the entity. The Template Group and icon, as well as the name and description of the template and its attributes, further define the purpose of the template. | Navigate Templates | ||
| and Attributes A name, description and data type. This can be grouped under an attribute group. | Navigate Attributes | ||
| and Attribute Values A name and description. Each attribute gets a default attribute value. | Navigate Attribute Values | ||
| Link Groups: Links are grouped into Link Groups. | Navigate Link Groups | ||
| Links: A link represents a reference to a page, trend or fixed URI that is assigned to a template in order to model related information for entities that use this as their current primary template. | Navigate Links | ||
| Digital State Sets: Digital state sets are used to map numbers and names for digital states which are usually returned by tags or calculations. Digital state sets can either be imported from datasources during tag discovery or they can be defined manually. | Navigate Digital State Sets | ||
| Units: You can associate a unit to a tag (to define the unit of values fetched from a historian). | Navigate Units | ||
| Images: Use images in Templates so that they appear alongside entities in a hierarchy. | Navigate Images | ||
|
Import/Export
|
You can import or export data to/from the IFS OI Server database using an Excel® spreadsheet | Navigate Import/Export |
Logging In/Out
To launch IFS OI Server Management and log in:
- Open a new window in Microsoft® Internet Explorer or Google® Chrome.
- In the address bar, type the URL supplied by your System Administrator. For example, https://servername/P2.server.managment/
Note: A link to IFS OI Server is usually available via your corporate intranet.
You will usually be logged in automatically. If automatic login fails, or if you have logged out, the P2 Security login screen appears.
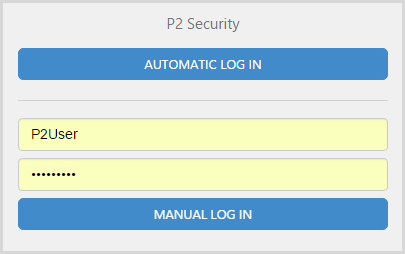
If you are logged in to a corporate network, you will usually be able to log in by clicking "Automatic Log In".
If you do not want to use your current network login:
- In the Username box, type your user name. If you are using a network user name, you may need to also specify your domain name. E.g. DOMAIN\user.name
- In the Password box, type your password.
- Click Manual Log In.
IFS OI Server Management opens, on the Hierarchies page.
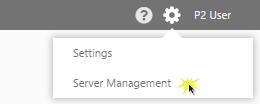
- Click the Configuration
 icon on the toolbar.
 - Click Server Management in the menu.
The IFS OI Explorer Toolbar
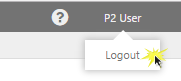
To Log Out
- Click your User Name on the toolbar.
- Click Logout in the menu.
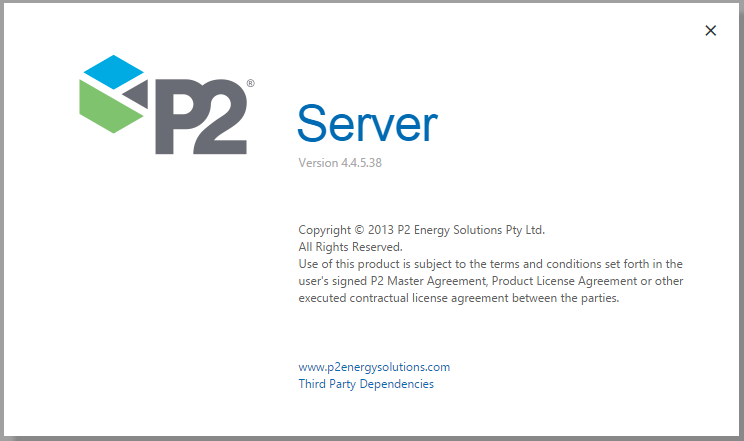
About Box
The About box displays version and copyright information for IFS OI Server.
Click the P2 Logo on the toolbar to open the About box.
![]()
Server's navigation follows a pattern. Here are some guidelines:
Filtered Searches
Many of the pages have a search box that can be used for filtering a list.
To use the search box:
Type one or more letters in the search box. The list is filtered as you type.

Note: For versions earlier than 4.4.6, press Enter or click the Search button after typing into the search box.
Searching with Wildcard Filtering
Note: Wildcard filtering is available for versions 4.5.4 and later.
All Search functions now have Wildcard filtering capabilities for tags and entities, allowing you to search for patterns, as an alternative to the regular simple text match available since earlier versions.
Using Asterisks
Use an asterisk (*) at the beginning, middle and/or end of the search text, to search for patterns that contain one or more alpha-numeric values.
Search results match the search term for all text before or after the asterisks. Any number of alpha-numerical characters can replace the asterisks in the search term. For example, the search term ‘*900’ will return search results ending in ‘900’ (such as 12350900, ‘ABC900’, ‘989hhh900’, etc.), while the search term ‘*.pump*rate’ returns results that contain alpha-numeric values before and after ‘.pump’, and end with ‘rate’ (such as ‘Abes.PumpFlowRate’, ‘Alligator.PumpFlowRate’, etc.).
Using Question Marks
Use one or more question mark characters (?), to limit replacement text to one alpha-numeric character per question mark symbol.
Examples Using One or Both Symbols
You can also use a combination of asterisks and question marks, as shown in the table below.
| Search String | Valid Search Results |
| RT??MN | RTABMN RTW1MN RT12MN |
| *99?2?4 | Hello991234 ABCDEFG99H2I4 A99Z2S4 |
| Pump*8? | Pump000981 PumpXYZ12383 Pump8888880 |
Breadcrumb Navigation
The breadcrumb is useful for navigating back through pages, for example when you are going through a list of attributes for an entity.
Most of the sections below explain the relevant breadcrumb navigation.
Menu Levels
Sometimes fairly significant components are a level or two away from the main menu items, because of the logic and structure of Server. For example, Tags are found within the Datasource pages of Tag datasources. The navigational table (see above) is there to help you get familiar with the location of these components.
FAQ
Below are the answers to some of the navigational questions around IFS OI Server.
How do I search for a tag?
Tags can be found under Tag datasources. Navigate to the tag's datasource, then search for the tag by name, or using wildcard symbols.
How do I search for an entity?
All of Server's entities can be searched for by name, or using wildcard symbols, in the Entities page.
How do I search for an entity in a hierarchy?
To search for an entity within a particular hierarchy, you need to open that hierarchy and then search for the entity within the hierarchy.
How do I assign a tag to an entity's attribute value?
Locate the entity, then edit the attribute value, assign the tag type and tag name to the attribute value. (Read more: Navigate to an Attribute Value, Configuring Attribute Values).
Where do I find an attribute's definition?
Attributes belong to Templates. Navigate to the template, then search for the attribute.
Can I update an entity in a hierarchy?
You can navigate to an entity's details or overview, from the Entity Details panel, in the Hierarchy Editor.
Hierarchies
Hierarchies are used to logically define parent-child relationships between entities, such that they model real-world data. For example, a corporate hierarchy could be modelled as its organisational levels and sub-levels (corporation, business units, regions, areas, wells).
Points to note, regarding entities in hierarchies:
- An entity does not have to be on any particular level in the hierarchy.
- An entity can belong to more than one hierarchy.
- An entity can belong to a single hierarchy more than once, provided it does not appear twice in a single parent-child line.
A hierarchy has two parts: Details (captured, edited and viewed on the Hierarchy Details page) and Structure (captured, edited and viewed on the Hierarchy Editor page).
Click the Hierarchy ![]() icon in IFS OI Server Management to view the list of hierarchies.
icon in IFS OI Server Management to view the list of hierarchies.
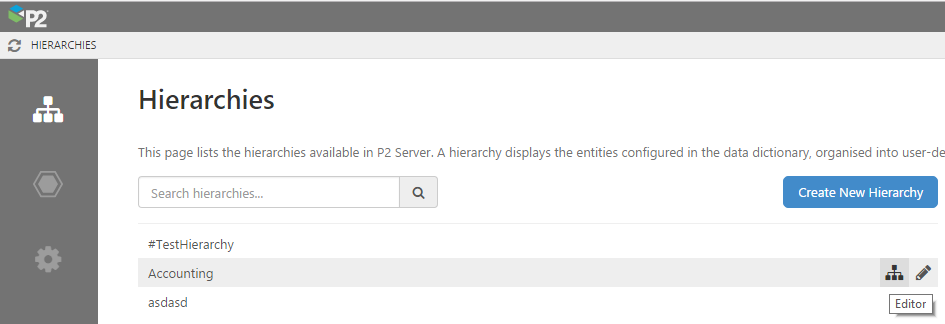
Searching for a Hierarchy
Search for a hierarchy by scrolling down the list of hierarchies, or filter by typing part of the hierarchy name in the Search hierarchies search box.
Adding a Hierarchy
- Click Create New Hierarchy. This opens the Hierarchy Details page for the new hierarchy.
- Capture and save the hierarchy details.
- Click the hierarchy name on the breadcrumb, to navigate to the hierarchy's editor: Hierarchy Editor.
- Capture and save the hierarchy's structure.
Editing a Hierarchy from the Hierarchy List
- To edit a hierarchy's details (Name, Description, Ordinal), hover over the hierarchy name and click the hierarchy details
 button.
 - To edit a hierarchy's structure (Entities, and their parent-child relationships), hover over a hierarchy name and click the hierarchy editor
 button, or click on the hierarchy name in the list, or click the hierarchy name in the breadcrumb.
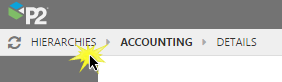
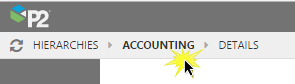
Navigation from Hierarchy Details/Editor
Click HIERARCHIES on the breadcrumb, to return to the list of hierarchies, or click the hierarchy name in the breadcrumb to open the Hierarchy Editor.
 |
 |
 |
| Navigate to Hierarchy List, from the Hierarchy Details | Navigate to Hierarchy List, from the Hierarchy Editor | Navigate to Hierarchy Editor, from the Hierarchy Details |
Entities in a Hierarchy
To view or edit entities in a hierarchy, navigate to the Hierarchy Editor.
The Hierarchy Editor page has a hierarchy list on the left [1]; if a hierarchy structure already exists, this is displayed on the centre of the page [2]. There is a search box on the right [3], for searching entities in the hierarchy.
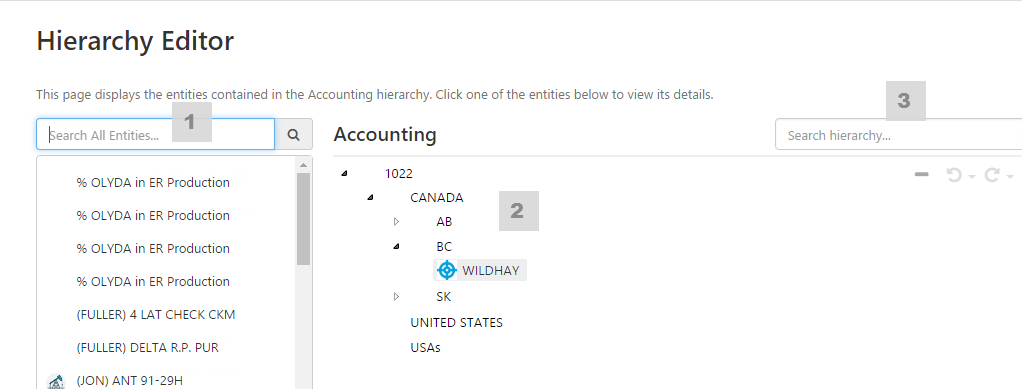
Searching for an Entity to add to the Hierarchy
Search for any entity in Server, by scrolling down the list of entities (on left of page), or filter by typing part of the entity name, or using wildcard symbols, in the Search All Entities search box.
Searching for an Entity in the Hierarchy
There are two ways to search for an entity in the hierarchy:
- Click through the hierarchy nodes, to see what entities are used within the structure
- or
- Type part of the entity name, or use wildcard symbols, in the Search hierarchy search box, then click an entity from the drop-down list of results. This opens the hierarchy path to the selected node (entity).
Note: When you click on an entity in the hierarchy, the Entity Details are displayed in a panel on the far right of the page. You can navigate to the Entity Details page or the Overview page by clicking the Edit or Overview button.
Entities
Entities take on the data structure of their current primary template, and are used for modelling data in a hierarchy.
An entity has three parts: Details (captured, edited and viewed on the Details page), Overview (captured, edited and viewed on the Overview page) and Assigned Templates (captured, edited and viewed on the Assigned Templates page).
Click the Entities ![]() icon in IFS OI Server Management.
icon in IFS OI Server Management.

Searching for an Entity
Search for an entity by scrolling down the list, or filter by typing part of the entity name in the Search entities search box, or using wildcard symbols.
Adding an Entity
- Click Create New Entity. This opens the Details page for the new entity.
- Capture and save the entity details.
Editing an Entity from the Entity List
To edit details, assign templates, and assign attribute values you need to navigate to the different pages for a specific entity.
Hover over an entity in the entity list, then click on one of the buttons:
- Click the Overview
 button to open the Overview page.
 - Click the Assign Templates
 button to open the Assigned Templates page.
 - Click the Edit Details button to open the Details page.
Navigation from Entity Pages
When an entity has details, the entity menu items are enabled and available from any of the Entity pages (Overview, Details, Assigned Templates).
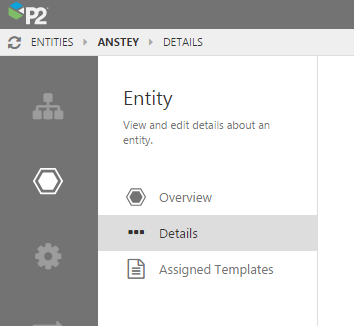
- Click Overview
 to open the entity's Overview page.
 - Click Details
 to open the entity's Details page.
 - Click Assigned Templates
 to open the entity's Assigned Templates page.
Navigation from the Breadcrumb
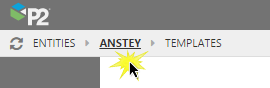
Click ENTITIES on the breadcrumb, to return to the list of entities, or click the entity name on the breadcrumb to open the entity's Overview page.
 |
 |
| Navigate to the Entity List, from any of the entity pages | Navigate to Overview page from any of the entity pages |
Navigation from the Overview Page
You can navigate to an entity's Details page or Assigned Templates page, from the entity's Overview page, by clicking the Edit button alongside the Details section, or the Edit button alongside the Active Primary Template section.
Attribute Values
Attributes (and their attribute values) are assigned to an entity based on its current primary template. When you edit an entity, you need to specify where the Attribute Values get their data from (for example, from a Tag).
Attribute Value Navigation
- Click the Entities
 icon in IFS OI Server Management.
 - Hover over an entity in the search list, and click the Overview button to open the Overview page.
This is what the breadcrumb looks like.
 |
| The Overview page of the Archer entity |
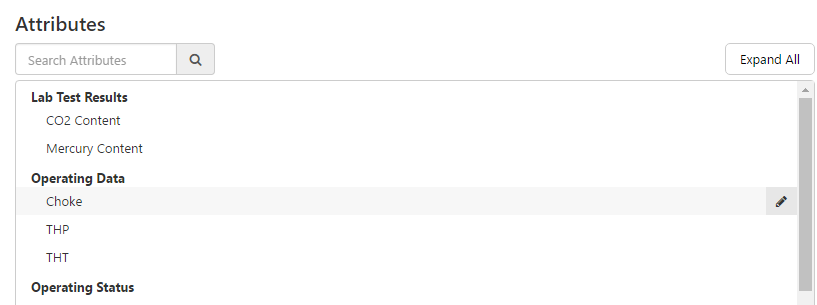
The Attributes section is at the bottom of the entity's Overview page.
Searching for an Attribute
Search for an attribute by scrolling down the list, or filter by typing part of the attribute name in the Search Attributes search box.
Note: Attributes are grouped and alphabetically ordered within their Attribute Groups, which are also ordered alphabetically.
Editing an Attribute Value
To view, edit, add or delete attribute values, hover over an attribute in the attribute list, then click the ![]() button to open the Attribute Values page for that attribute.
button to open the Attribute Values page for that attribute.
This is what the breadcrumb looks like, for the Attribute Values page.
 |
| The Attributes Value page of the Choke attribute for the Archer entity |
- Any existing Attribute Values are listed on a timeline at the top of the page. The timeline matches the current primary template's time range.
- Individual Attribute Values are listed below the timeline, in alphabtical order. Each can have one or more values assigned, as long as there is no time overlap. This is where you add, edit or delete attribute values. An attribute value can be a Tag or a literal value.
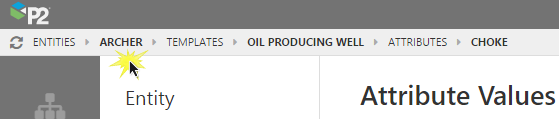
- The attribute name is displayed on the breadcrumb.
Breadcrumb Navigation
To view the attributes list: Click the entity name in the breadcrumb to open the entity's Overview page. This way you can go methodically through the list of attributes and their associated attribute values.
| Clicking here .. | ..takes you here |
 |
 |
| Navigate to Overview page from the Attribute Values page of any of the entity's attributes |
Click the primary template name on the breadcrumb to open the entity's Assigned Templates page (clicking ATTRIBUTES or TEMPLATES in the breadcrumb will also open this page).
| Clicking here .. | .. takes you here |
 |
 |
| Navigate to Assigned Templates page from the Attribute Values page of any of the entity's attributes |
Configuration
All the components required for configuring connections to datasources, as well as the configuring the elements of data modelling, are found under this menu.
Click the Configuration ![]() icon in IFS OI Server Management to open the configuration menu panel.
icon in IFS OI Server Management to open the configuration menu panel.
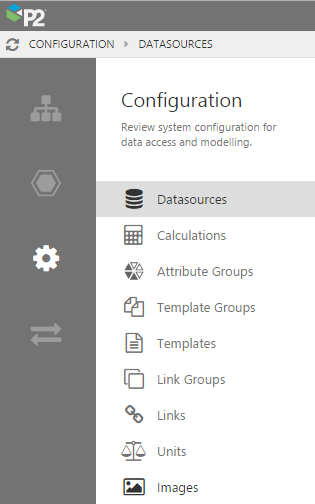
Datasources
This is where you define the connections to various datasources, such as historians and relational databases.
Datasource Navigation
Click Datasources ![]() in the Configuration menu panel in IFS OI Server Management.
in the Configuration menu panel in IFS OI Server Management.

Searching for a Datasource
Search for a datasource by scrolling down the list, or filter by typing part of the datasource name in the Search datasources search box.
Adding a Datasource
- Click Create New Datasource. This opens the Datasource page for the new datasource.
- Capture and save the datasource details.
Editing or Deleting a Datasource from the Datasource List
Hover over the datasource name and click the Edit ![]() button.
button.
- Edit and click Save
- or click Delete to delete
Navigation from Datasource Editor
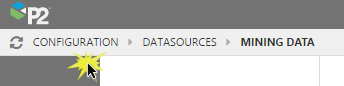
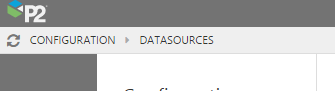
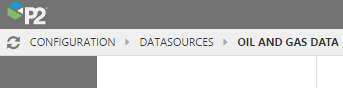
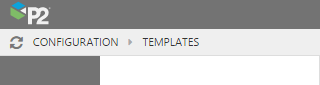
Click DATASOURCES on the breadcrumb, to return to the list of datasources, or click CONFIGURATION to return to the Configuration menu (this opens the Datasource pages again, as it is the first item on the Configuration menu).
Or click another item on the Configuration menu.
 |
 |
| Navigate to the list of datasources | Navigate to the configuration page |
Tags
Tags can be found on the Datasource page, for a Tag datasource (datasources with a Data Type of Tag).
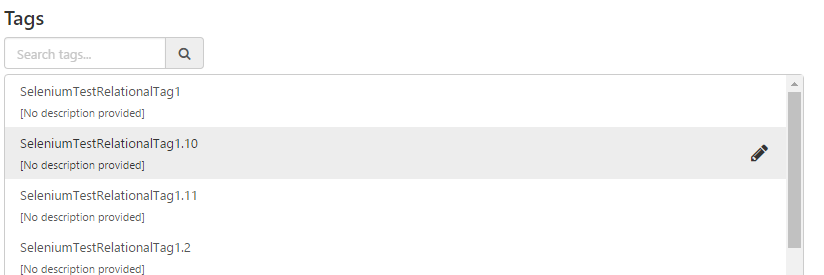
Searching for Tags.
- Open the page for a Tag datasource.
- In the Tags section, scroll down the tags list, or type part of the tag name, or using wildcard symbols, in the Search tags search box.
Editing or Deleting a Tag from a Tag Datasource
Hover over the tag name in the tags list and click the edit ![]() button.
button.
The tag page opens.
- Edit and click Save
- or click Delete to delete
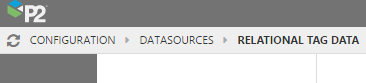
Tag Breadcrumb Navigation
Use the breadcrumb to navigate back to the datasource (to add, edit or view more of the tags), or navigate to all datasources.
| Clicking here .. | ..takes you here |
 |
 |
| Navigate back to the datasource, for the list of tags | |
 |
 |
| Navigate to all datasources |
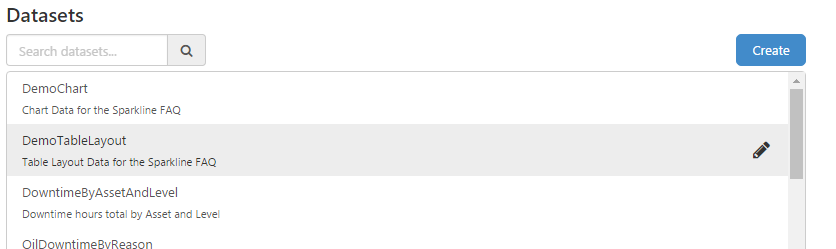
Datasets
Datasets can be found on the Datasource page, for a Dataset datasource (datasources with a Data Type of Dataset).
Searching for Datasets.
- Open the page for a Dataset datasource.
- In the Datasets section, scroll down the dataset list, or type part of the dataset name in the Search datasets search box.
Adding a Dataset to a Dataset Datasource
- Click Create. This opens the Dataset page for the new dataset.
- Capture and save the dataset.
Editing or Deleting a Dataset from a Dataset Datasource
Hover over the dataset name in the dataset list and click the edit ![]() button.
button.
The dataset page opens.
- Edit and click Save
- or click Delete to delete
Dataset Breadcrumb Navigation
Use the breadcrumb to navigate back to the datasource (to add, edit or view more of the datasets), or navigate to all datasources.
| Clicking here .. | ..takes you here |
 |
 |
| Navigate back to the datasource, for the list of datasets | |
 |
 |
| Navigate to to all datasources |
Calculations
Calculations in IFS OI Server allow users to combine existing data and derive new tags that aid in analysing existing data.
Calculation Navigation
Click Calculations ![]() in the Configuration menu panel in IFS OI Server Management.
in the Configuration menu panel in IFS OI Server Management.

Searching for a Calculation
Search for a calculation by scrolling down the list, or filter by typing part of the calculation name in the Search calculations search box.
Adding a Calculation
- Click Create New Calculation. This opens the Calculation page for the new calculation.
- Capture and save the calculation.
Editing or Deleting a Calculation from the Calculation List
Hover over the calculation name and click the edit ![]() button.
button.
- Edit and click Save
- or click Delete to delete
Navigation from Calculation Editor
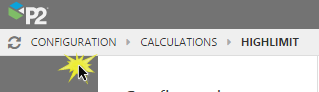
Click CALCULATIONS on the breadcrumb, to return to the list of calculations, or click CONFIGURATION to return to the Configuration menu.
Or click another item on the Configuration menu.
 |
 |
| Navigate to the list of calculations | Navigate to the configuration page |
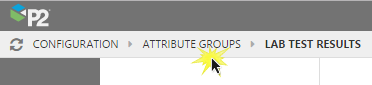
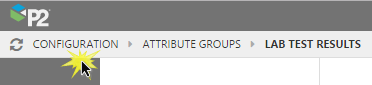
Attribute Groups
Attribute Groups are used for organising attributes into smaller, more manageable lists.
Attribute Group Navigation
Click Attribute Groups ![]() in the Configuration menu panel in IFS OI Server Management.
in the Configuration menu panel in IFS OI Server Management.

Searching for an Attribute Group
Search for an attribute group by scrolling down the list, or filter by typing part of the attribute group name in the Search attribute groups search box.
Adding an Attribute Group
- Click Create New Attribute Group. This opens the Attribute Group page for the new attribute group.
- Capture and save the attribute group details.
Editing or Deleting an Attribute Group from the Attribute Group List
Hover over the attribute group name and click the edit ![]() button.
button.
- Edit and click Save
- or click Delete to delete
Navigation from the Attribute Group Editor
Click ATTRIBUTE GROUPS on the breadcrumb, to return to the list of datasources, or click CONFIGURATION to return to the Configuration menu.
Or click another item on the Configuration menu.
 |
 |
| Navigate to the list of attribute groups | Navigate to the configuration page |
Template Groups
These are used for organising templates into smaller, more manageable lists.
Template Group Navigation
Click Template Groups ![]() in the Configuration menu panel in IFS OI Server Management.
in the Configuration menu panel in IFS OI Server Management.

Searching for a Template Groups
Search for a datasource by scrolling down the list, or filter by typing part of the template group name in the Search template groups search box.
Adding a Template Group
- Click Create New Template Group. This opens the Template Group page for the new template group.
- Capture and save the template group details.
Editing or Deleting a Template Group from the Template Group List
Hover over the template group name and click the edit ![]() button.
button.
- Edit and click Save
- or click Delete to delete
Navigation from Template Group Editor
Click TEMPLATE GROUPS on the breadcrumb, to return to the list of template groups, or click CONFIGURATION to return to the Configuration menu.
Or click another item on the Configuration menu.
 |
 |
| Navigate to the list of template groups | Navigate to the configuration page |
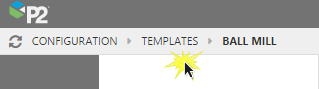
Templates
A template is a collection of attributes that is used for modelling entities. The template can also contain links and an icon, that are adopted by the entity. The Template Group and icon, as well as the name and description of the template and its attributes, further define the purpose of the template.
Template Navigation
Click Templates ![]() in the Configuration menu panel in IFS OI Server Management.
in the Configuration menu panel in IFS OI Server Management.

Searching for a Templates
Search for a datasource by scrolling down the list, or filter by typing part of the template name in the Search templates search box.
Adding a Template
- Click Create New Template. This opens the Template page for the new datasource.
- Capture and save the template details.
Editing or Deleting a Template from the Template List
Hover over the datasource name and click the datasource edit ![]() button.
button.
- Edit and click Save
- or click Delete to delete
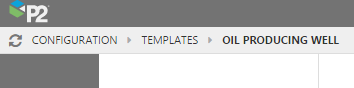
Navigation from Template Editor
Click TEMPLATES on the breadcrumb, to return to the list of templates, or click CONFIGURATION to return to the Configuration menu.
Or click another item on the Configuration menu.
 |
 |
| Navigate to the list of templates | Navigate to the configuration page |
Attributes
An attribute has a name, description and data type, and can be be grouped under an attribute group. Attributes are defined as part of a template definition.
Attribute are found on the Template page, for a particular template.
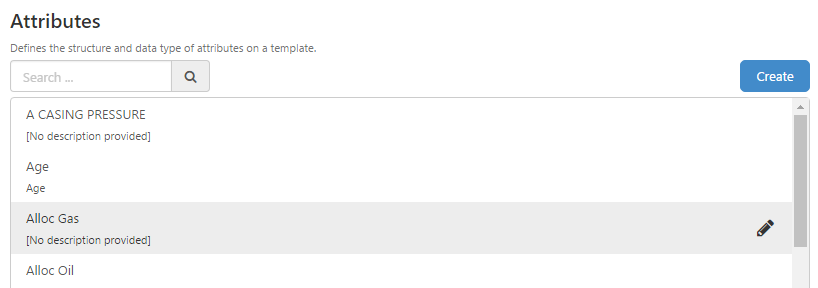
Searching for Attributes.
- Open the page for a template.
- In the Attributes section, scroll down the attribute list, or type part of the attribute name in the Search box.
Editing or Deleting an Attribute from a Template
Hover over the attribute name in the attribute list and click the edit ![]() button.
button.
The Attribute page opens.
- Edit and click Save
- or click Delete to delete
Attribute Breadcrumb Navigation
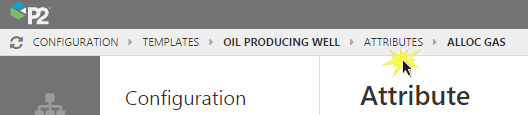
Use the breadcrumb to navigate back to the template (to add, edit or view more of the attributes), or navigate to all templates.
| Clicking here .. | ..takes you here |
 |
 |
| Navigate back to the template, for the list of attributes | |
 |
 |
| Navigate to all templates |
Attribute Values
An attribute value has a name and description. There is one default attribute value per attribute.
Attribute values are found on the Attribute page, for a particular attribute.
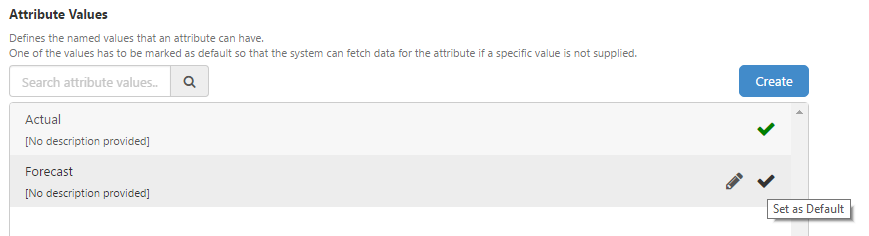
Searching for Attributes Values.
- Open the page for an attribute.
- In the Attribute Values section, scroll down the attribute value list, or type part of the attribute value name in the Search attribute values box.
Editing or Deleting an Attribute Value from an Attribute
Hover over the attribute value name in the attribute list and click the Edit ![]() button.
button.
The Attribute Value page opens.
- Edit and click Save
- or click Delete to delete
Assigning an Attribute Value as the default for the Attribute
Hover over the attribute value name in the attribute list and click the Default ![]() button.
button.
Attribute Value Breadcrumb Navigation
Use the breadcrumb to navigate back to the attribute (to add, edit or view more of the attribute values), or navigate to all attributes for a template.
| Clicking here .. | ..takes you here |
 |
 |
| Navigate back to the attribute, for the list of attribute values | |
 |
 |
| Navigate back to the template, for the list of attributes |
Link Groups
Link groups are used for organising links into smaller, more manageable lists.
Link Group Navigation
Click Link Groups ![]() in the Configuration menu panel in IFS OI Server Management.
in the Configuration menu panel in IFS OI Server Management.

Searching for a Link Group
Search for a link group by scrolling down the list, or filter by typing part of the link group name in the Search link groups search box.
Adding a Link Group
- Click Create New Link Group. This opens the Link Group page for the new link group.
- Capture and save the link group details.
Editing or Deleting a Link Group from the Link Group List
Hover over the datasource name and click the datasource edit ![]() button.
button.
- Edit and click Save
- or click Delete to delete
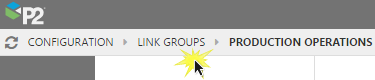
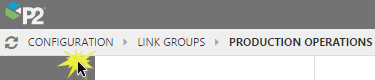
Navigation from Link Group Editor
Click LINK GROUP on the breadcrumb, to return to the list of datasources, or click CONFIGURATION to return to the Configuration menu.
Or click another item on the Configuration menu.
 |
 |
| Navigate to the list of link groups | Navigate to the configuration page |
Links
A link represents a reference to a page, trend or fixed URI that is assigned to a template in order to model related information for entities that use this as their current primary template.
Link Navigation
Click Links ![]() in the Configuration menu panel in IFS OI Server Management.
in the Configuration menu panel in IFS OI Server Management.

Searching for a Link
Search for a link by scrolling down the list, or filter by typing part of the link name in the Search links search box.
Adding a Link
- Click Create New Link. This opens the Link page for the new link.
- Capture and save the link details.
Editing or Deleting a Link from the Links List
Hover over the link name and click the edit ![]() button.
button.
- Edit and click Save
- or click Delete to delete
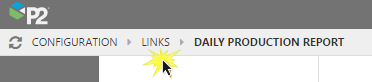
Navigation from Link Editor
Click LINKS on the breadcrumb, to return to the list of datasources, or click CONFIGURATION to return to the Configuration menu.
Or click another item on the Configuration menu.
 |
 |
| Navigate to the list of links | Navigate to the configuration page |
Digital State Sets
Digital state sets are used to map numbers and names for digital states which are usually returned by tags or calculations. Digital state sets can either be imported from datasources during tag discovery or they can be defined manually.
Digital State Sets Navigation
Click Digital State Sets ![]() in the Configuration menu panel in IFS OI Server Management.
in the Configuration menu panel in IFS OI Server Management.
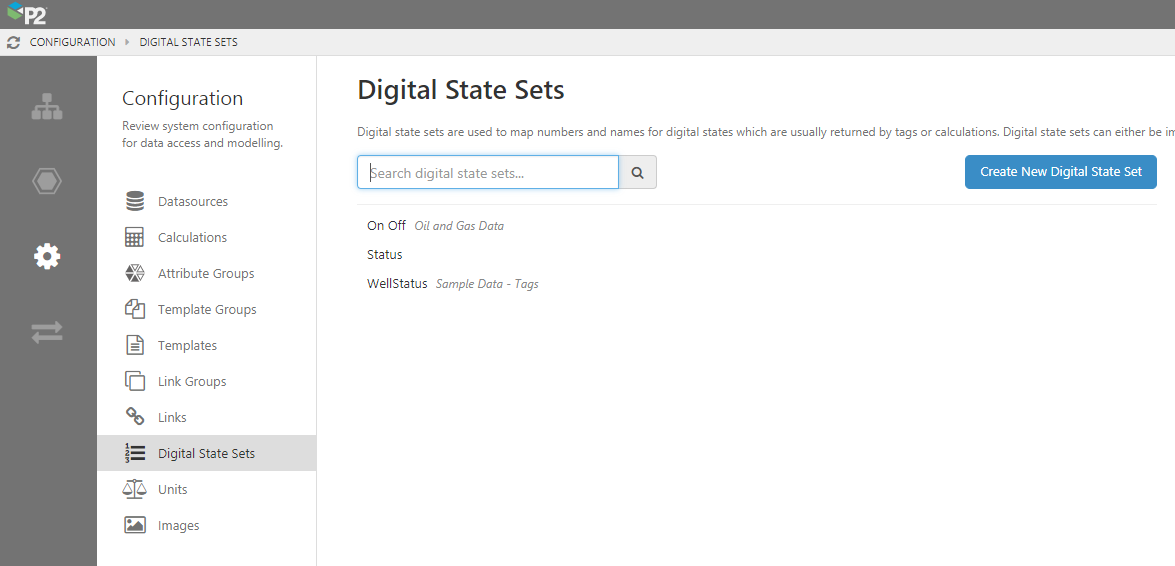
Searching for a Digital State Set
Search for a digital state set by scrolling down the list, or filter by typing part of the digitial state set name in the Search digital state sets search box.
Adding a Digital State Set
- Click Create New Digital State Set. This opens the Digital State Set page for the new digital state set.
- Capture and save the digital state set.
Editing or Deleting a Digital State Set from the Digital State Set List
Hover over the digital state set name and click the edit ![]() button.
button.
- Edit and click Save
- or click Delete to delete
Navigation from the Digital State Set Editor
Click DIGITAL STATE SETS on the breadcrumb, to return to the list of digital state set, or click CONFIGURATION to return to the Configuration menu.
Or click another item on the Configuration menu.
 |
 |
| Navigate to the list of digital state sets | Navigate to the configuration page |
Units
You can associate a unit to a tag (to define the unit of values fetched from a historian).
Unit Navigation
Click Units ![]() in the Configuration menu panel in IFS OI Server Management.
in the Configuration menu panel in IFS OI Server Management.
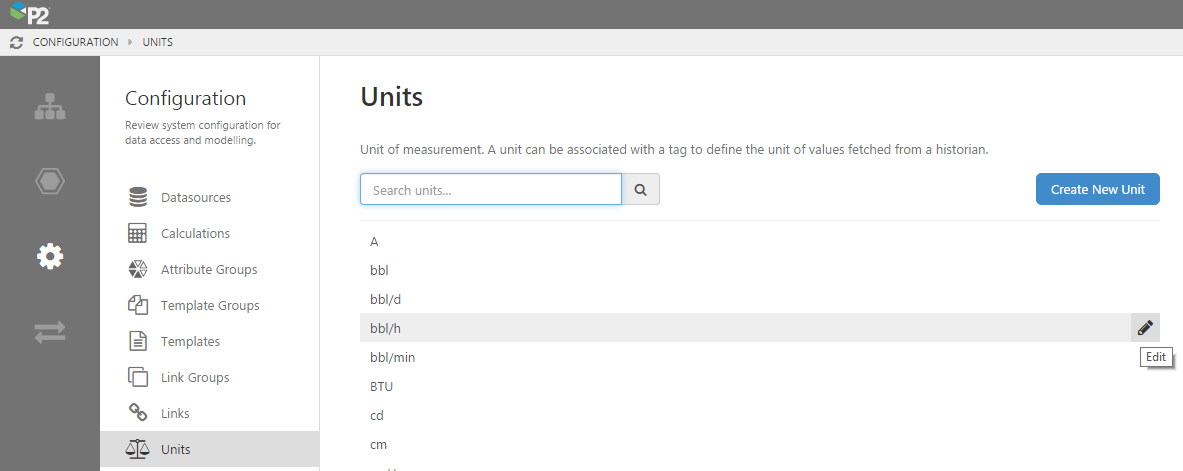
Searching for a Units
Search for a unit by scrolling down the list, or filter by typing part of the unit name in the Search units search box.
Adding a Unit
- Click Create New Unit. This opens the Unit page for the new unit.
- Capture and save the unit details.
Editing or Deleting a Unit from the Units List
Hover over the datasource name and click the datasource edit ![]() button.
button.
- Edit and click Save
- or click Delete to delete
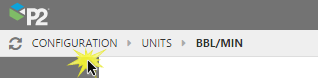
Navigation from Unit Editor
Click UNITS on the breadcrumb, to return to the list of units, or click CONFIGURATION to return to the Configuration menu.
Or click another item on the Configuration menu.
 |
 |
| Navigate to the list of units | Navigate to the configuration page |
Images
Use images in Templates so that they appear alongside entities in a hierarchy.
Image Navigation
Click Images ![]() in the Configuration menu panel in IFS OI Server Management.
in the Configuration menu panel in IFS OI Server Management.
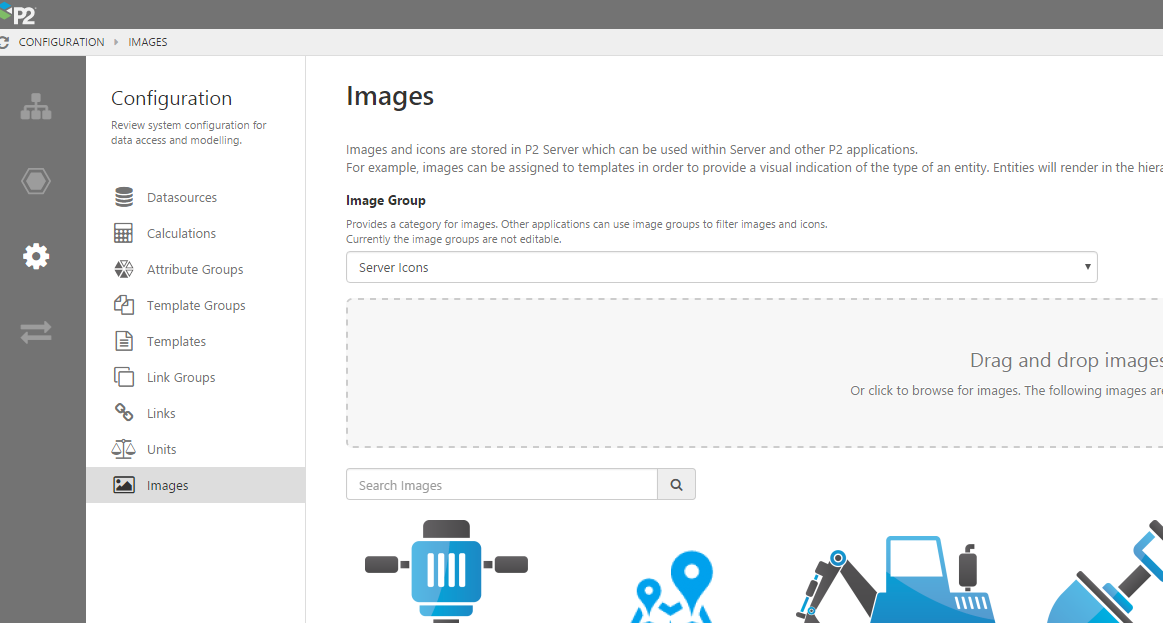
Searching for an Image
- Select a filter from the Image Group drop-down list.
- Search for a image by scrolling down the list, or filter by typing part of the image name in the Search Images search box.
Adding an Image
- Drag and drop an image, or click to browse for images, in the Image drop section.
- Capture and save the datasource details.
Editing, Updating or Deleting an Image from Image list
Locate the image.
- Type a new name or description in the Name or Description edit box, below the image
- or hover over the image and click the Update image icon to update the image
- or hover over the image and click the Delete to delete
Navigation from Images page
Click CONFIGURATION to return to the Configuration menu.
Or click another item on the Configuration menu.
 |
| Navigate to the configuration page |
Import/Export
You can import or export data to/from the IFS OI Server database using an Excel® spreadsheet.
Click Import/Export ![]() icon in IFS OI Server Management to open the Import&Export menu panel.
icon in IFS OI Server Management to open the Import&Export menu panel.
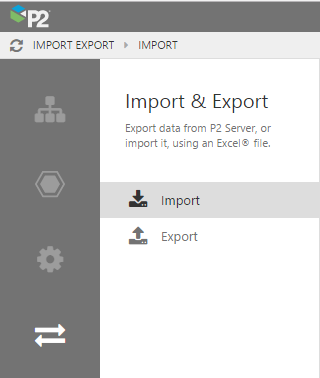
Import
Click Import ![]() in the Import & Export menu panel in IFS OI Server Management.
in the Import & Export menu panel in IFS OI Server Management.
Export
Click Export ![]() in the Import & Export menu panel in IFS OI Server Management.
in the Import & Export menu panel in IFS OI Server Management.
Navigation from Export page
Click Import Export to return to the Import page.
Or click another item on the Configuration menu.
 |
| Navigate to the import page |