A person can only access P2 Explorer if they are added as a user of the system. As a user, they will automatically be granted read permission for all of P2 Explorer, unless an object has been explicitly secured.
In order to be able to add users, a user must be a Security administrator. There are two ways to add a new user:
- Active Directory: The AD Sync tool will automatically add all users in Active Directory that are configured to have access to P2 Explorer. For instructions on running the AD Sync tool, refer to the P2 Explorer Installation Guide.
- Manual User: You can manually add a user who can access P2 Explorer, using either their domain credentials or a username and password.
Once you have added a user, they are automatically added to the Everyone role. In addition, assign the user to other roles if they require further privileges. The user will inherit all the privileges associated with the roles they are assigned to.
Manually Adding a New User
To add a new user:
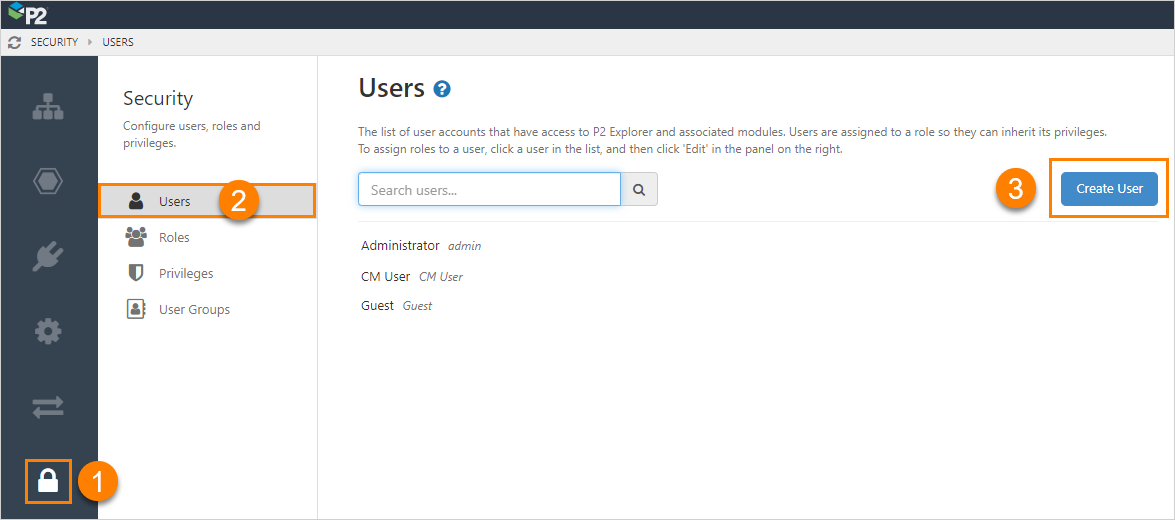
1. Open P2 Server Management, and click the Security ![]() icon.
icon.
2. Click Users ![]() .
.
3. On the Users page, click Create User.
4. On the User page, fill in the details:
- Username: The username must not contain reserved characters or words.
- Display name: The name you want displayed in the application header and selection lists.
- Login Method: Choose "Windows" if you want the user to use their Windows domain credentials (managed in Active Directory), or choose "Forms" if you want the user to log in with their user name and a password.
- Password: This only applies to the Forms login method, as Windows users will use the password managed in Active Directory. There is no restriction on a password, however you should adhere to your corporate policy.
- PIN: The PIN is between 4 and 10 numerical characters long and is used to authenticate workbook changes. See Setting a PIN.
- Email: Fill in the email field to receive email notifications from the Rules Engine.
- Deactivated: Selecting this check box will prevent the user from being able to log in. You may wish to do this if you want to create a user account, but do not want them to access the system until a later date. You will need to come back in and clear this check box when you want them to have access.
- Time Zone: The user Time Zone can be set in the User profile configuration, or by the user clicking on the time zone next to the username in Explorer.
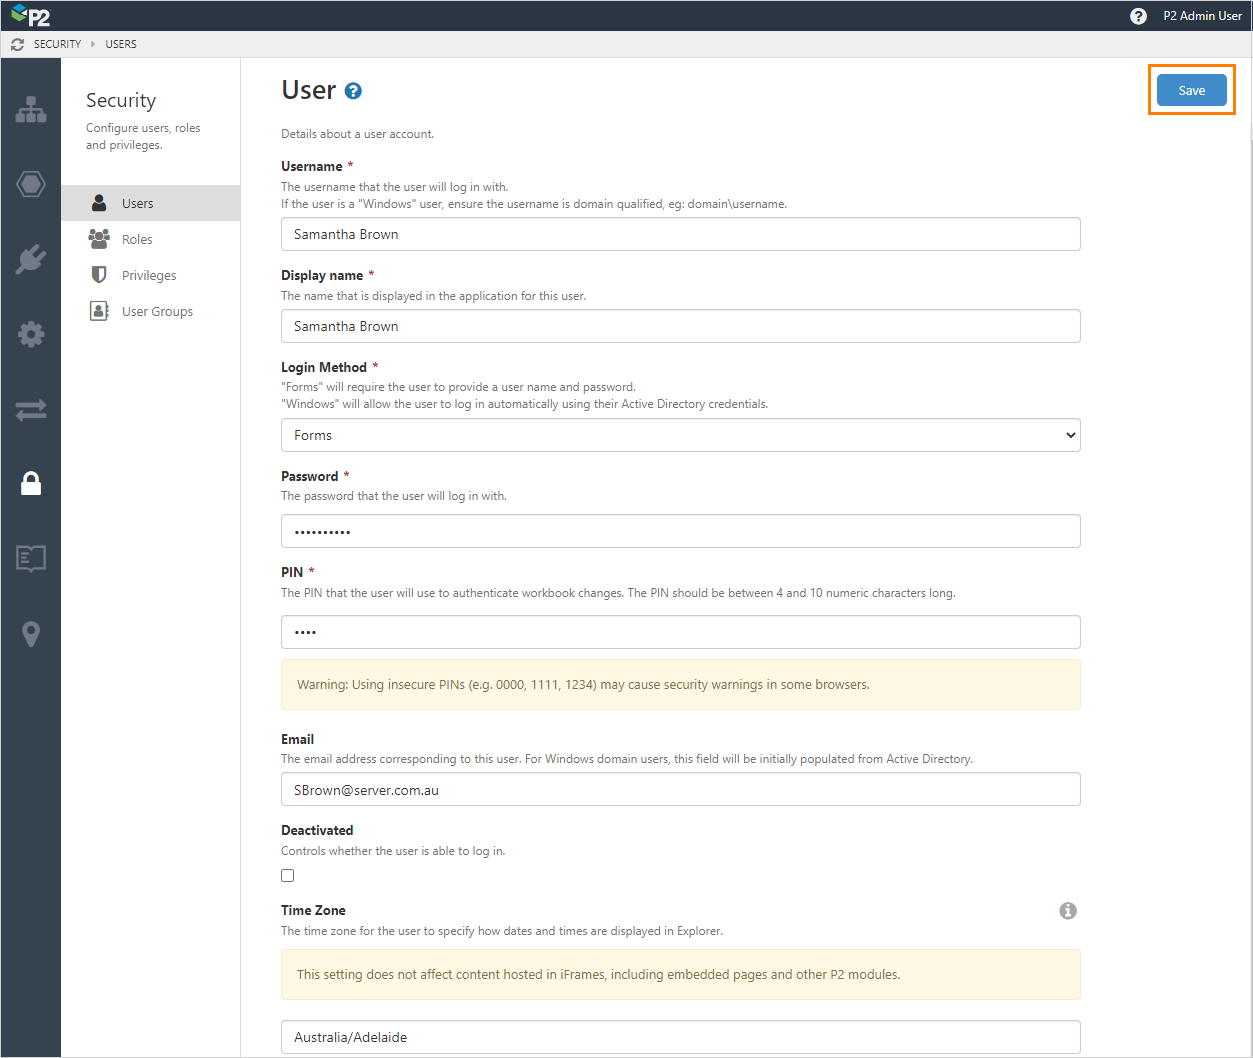
5. When you have finished, click the Save button in the top right corner.
The new user is added to the system, and you can now assign the user to a role.
Setting a PIN
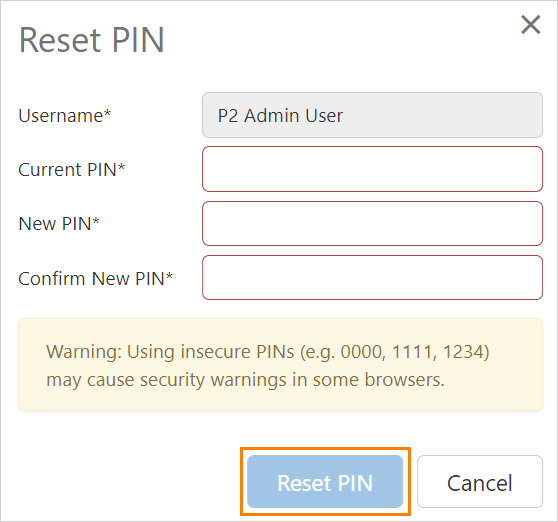
Your PIN can be set or reset by clicking on your username in the top right corner of the P2 Explorer header and selecting Reset PIN.

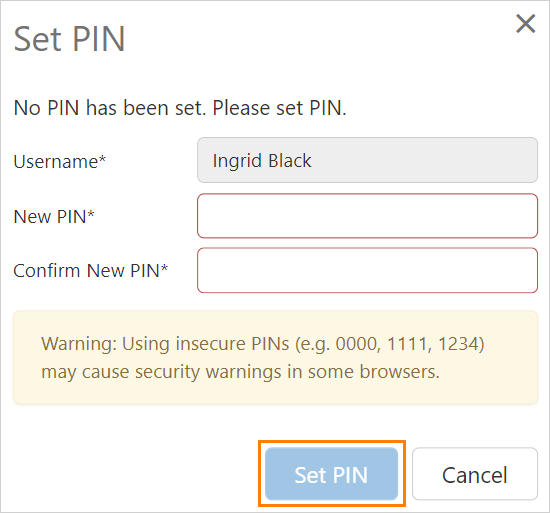
If no PIN has been set, enter a value of between 4 and 10 numeric characters twice, and select Set PIN.
To reset your PIN, first enter your Current PIN, then enter your new PIN twice and select Reset PIN.
The PIN is encrypted and stored in the P2 Explorer database.
Release History
- Add A New User (this release, 4.9.6):
- Email addresses added to User profiles