ON THIS PAGE:
In Field Operator you'll find easy to use action buttons across the application.
The buttons in the Navigation Ribbon and Toolbar give you access to key functionality. They, and other functions and buttons are described on this page.
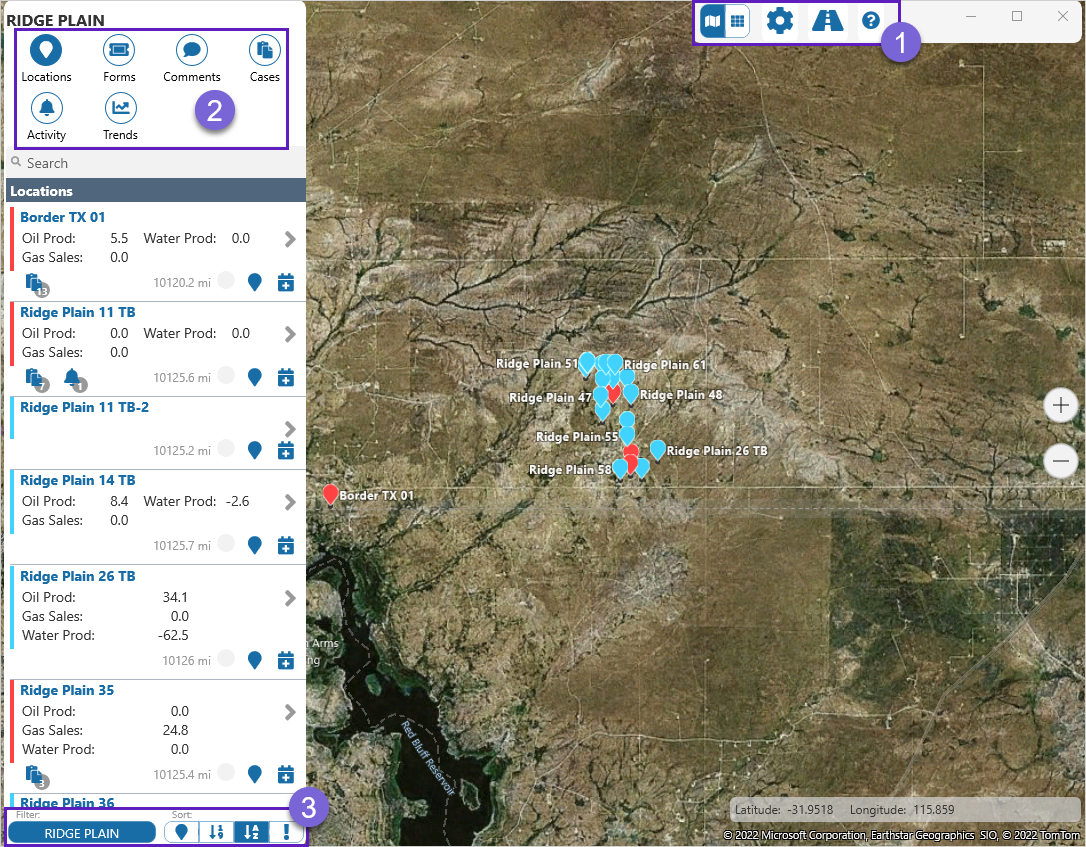
| 1. Toolbar | 2. Navigation Ribbon | 3. Route Selection |
The Navigation Ribbon is the main way to access many of the Field Operator options. The ribbon is found at the top left side of each screen, except when the tools on the Toolbar are active.
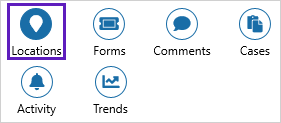
The highlighted icon on the ribbon in the images below, changes between the different views to reflect the page status.
Map shows Locations summaries.
Grid Summary shows Daily Production for locations.

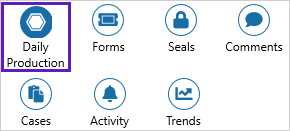
Location Detail view shows Daily Production for entities.
Active ribbon selections are shown by a white icon on a solid blue circle.
| Location | Select the location button to display location summary information. | |
| Forms |
The forms button lists the field data capture forms that are available for each location on the selected route. In Map view, the most recent day's forms are listed in the information panel. In Grid Summary view, the list of all forms are displayed by location, with the option to look at all forms for the selected route by today, yesterday, or the last 14 days. In Location Detail view, forms for each individual entity are displayed when the entity is selected. |
|
|
|
Comments |
Select the comments button to see all the comments on the selected route. Click on the comment to add, edit, or reply, to the comment. In Map view, the most recent day's comments are listed in the information panel. In Grid Summary view, the list of all comments are displayed by location, with the option to look at all comments for the selected route by today, yesterday, or the last 14 days. In Location Detail view, comments for each individual entity are displayed when the entity is selected. The Comments |
| Cases |
In Map view, select Cases to the see the list of cases for the day for the planned route. Click on an individual case to view the case in detail, and to update it, in the location summary box. In Grid Summary view, first select cases and then filter the case list by selecting:
In Location Detail view, select an entity to see its associated cases. The Cases The Cases option is only available to Route Surveillance users. |
|
| Activity |
Select to see all items directly relating to the logged in user. The Activity option is only available to Route Surveillance users. |
|
| Trends |
Select to see all trends on your route in one place; opens in the Location Summary box. The Trends option is only available to Route Surveillance users. |
|
| Seals |
Select Seals from the Location Detail view. |
|
| Entities | Select the Location Detail view to access Entity data capture forms. |
Toolbar
The Toolbar is found at the top right side of each screen.
![]()
| View Mode | Click on View Mode to toggle between Map view and Grid Summary view. | |
| Settings |
Click to access:
|
|
| Journey Planner | Opens the Journey Planner which is used to plan today's route. | |
| Help | Click to access the online Help and About information. |
Settings
| Server Connection |
Open the server connection screen to:
Contact your company's Field Operator administrator for assistance. |
|
| Preferences |
Open the Set Preferences dialog box to select:
|
|
| Route Sequence |
Open the Route Sequence screen to sort:
|
|
| Sync Status |
Open the Sync Status dialog box to:
|
Preferences
The Set Preferences dialog box enables you to choose a range of default settings.
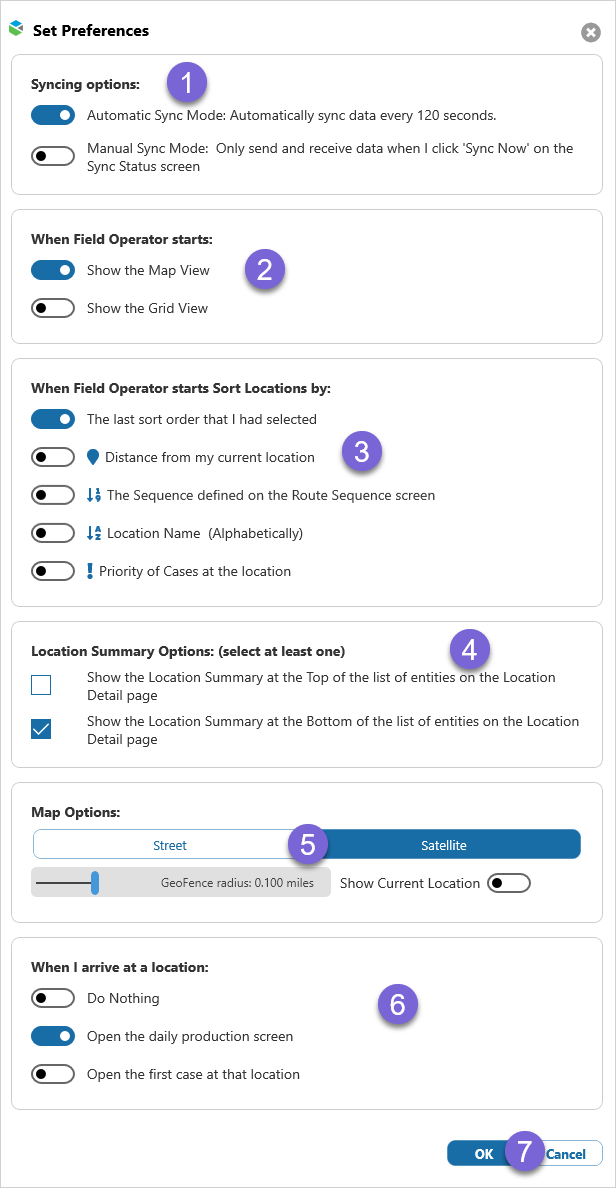
| 1. | Syncing Options |
Select to automatically, or manually sync data. Options are:
|
| 2. | Start View |
Select which view you see when you open the app. Options are:
|
| 3. | Location Sort |
Select which method the locations are sorted by when you open the app. Options are:
|
| 4. | Location Summary |
The Location Summary can be displayed at the top, bottom, or top and bottom of Location Detail. Select:
|
| 5. | Map Options |
Set Map options by:
Your current location, or what your location is set at, is marked on the map with the Your Location |
| 6. | Location Options |
Select which screen opens when you arrive at a location. Options are:
|
|
Note: For this feature to work, your device must allow apps to access the device’s location. |
||
| 7. | Actions |
Select:
|
Sync Status
What you see on the Sync Status screen depends on whether you have automatic, or manual sync turned on.
Automatic Sync Mode:
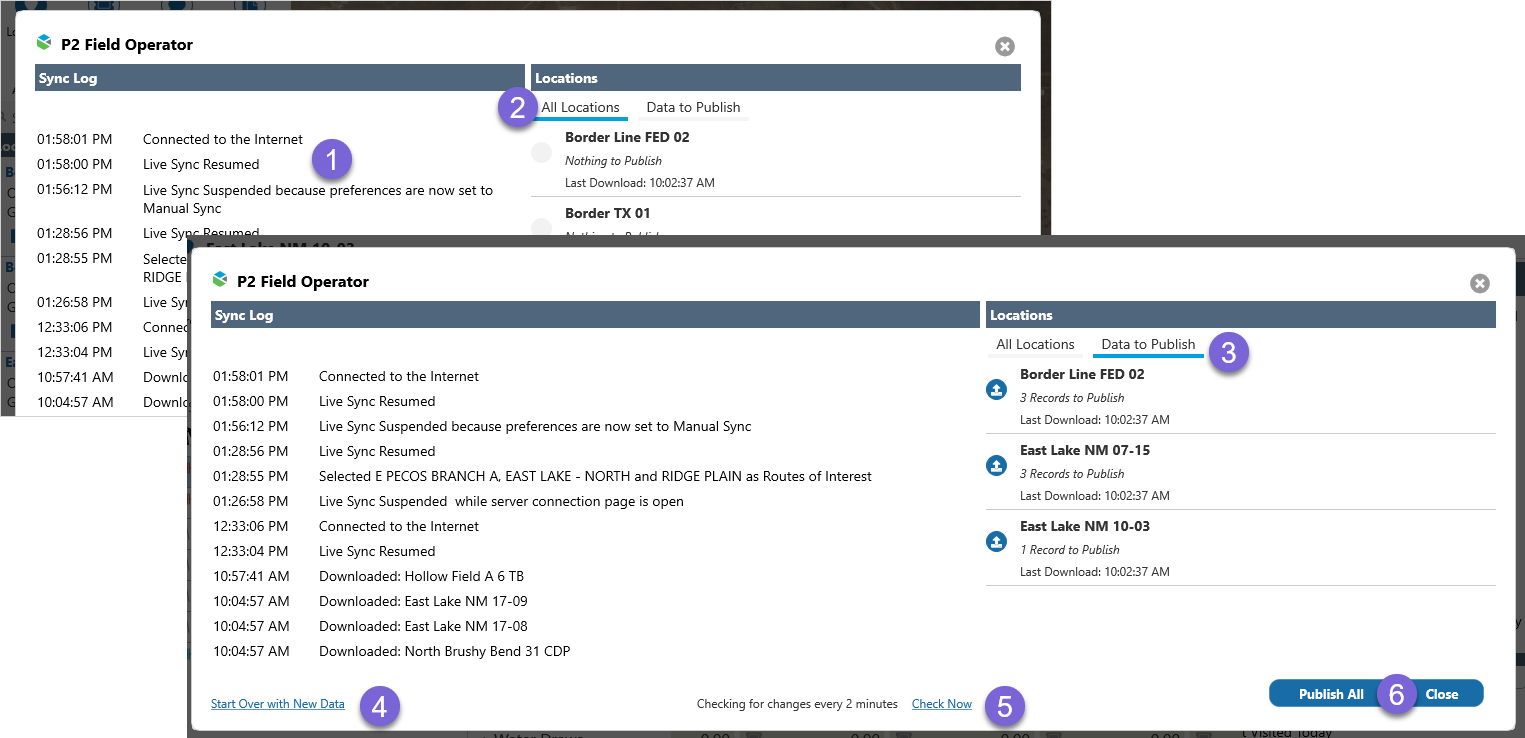
| 1. | Sync Log | The Sync Log shows the interaction between your device and the server. |
| 2. | All Locations | A list of all locations on the currently uploaded routes. |
| 3. | Data to Publish | Locations where data has been entered but not published. |
| 4. | Start Over | Click Start Over with New Data to discard all unpublished data. |
| 5. | Check Now | Click Check Now to check the server for changes now. |
| 6. | Action |
Select:
|
Manual Sync Mode:
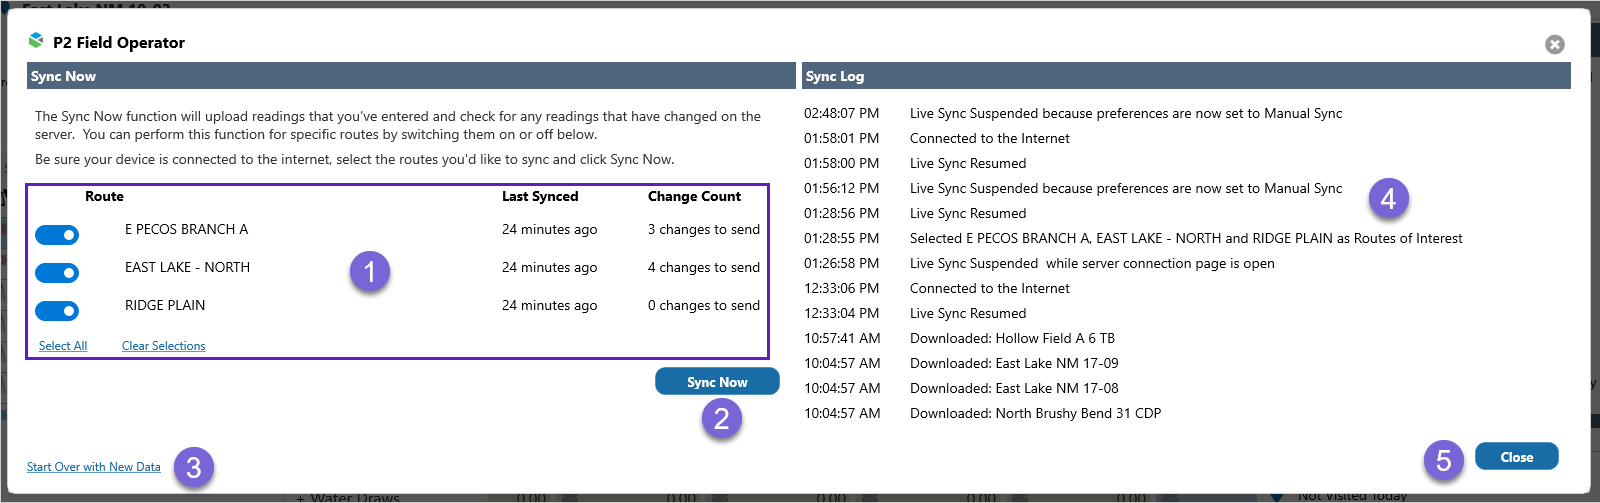
| 1. | Sync Route |
Sync information for currently uploaded routes:
|
| 2. | Sync Now | Click Sync Now to upload readings and check the server for updates. |
| 3. | Start Over | Click Start Over with New Data to discard all unpublished data. |
| 4. | Sync Log | The Sync Log shows the interaction between your device and the server. |
| 5. | Close | Close the Sync Status screen. |
Help
| Help | Click on the Help button to open the online help pages. | |
| About | Click on the About button to find the Field Operator version number, send diagnostic data to IFS OI or delete all data. |
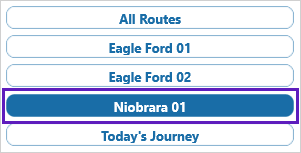
Route Selection
Route selection is found in the bottom left of the Map and Grid Summary.
It is comprised of the Filter and Sort functions, which enable you to select and organize saved routes.
![]()
In the Filter field, choose from the available preloaded routes, or select Today's Journey.
The locations (1) on the route (2) are displayed in the information panel.
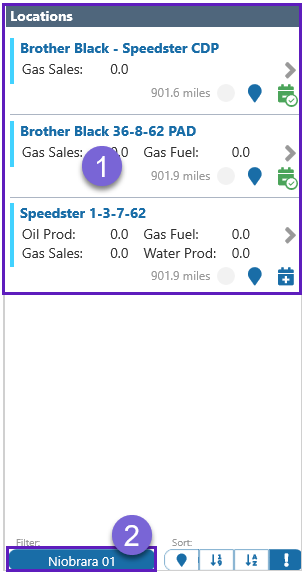
Choose from the Sort options, to change the order of the locations in the selected route.
| Location | Locations sorted by distance from your location, or where your location has been set as. | |
| Number | Sorted into the order set by users in Route Sequence. | |
|
|
Alphabetical | Location names are sorted alphabetically. |
| Importance | Locations are sorted firstly by priority, and then alphabetically. |
Other Buttons
Publish, visit, and plan status icons, are found throughout Field Operator.
| 1. | Publish |
The Publish icons indicate the current synced, or published state of the data. Records marked Sync Pending will be automatically uploaded to the server when the device has an internet connection. The current Publish status is indicated by:
|
||||||||||||||
| 2. | Visit | Click on the Location icon to mark the location as:
|
||||||||||||||
| 3. | Planner | Click on the Calendar icon to add, or remove the location from Today's Journey.
|
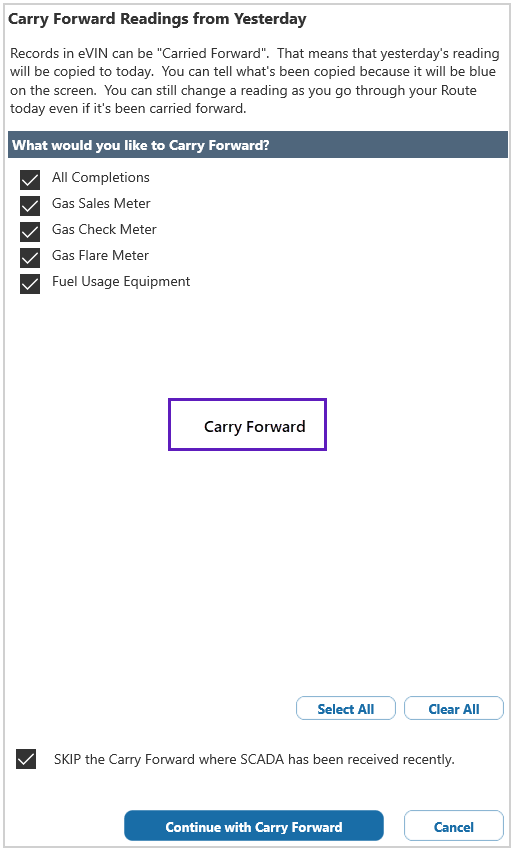
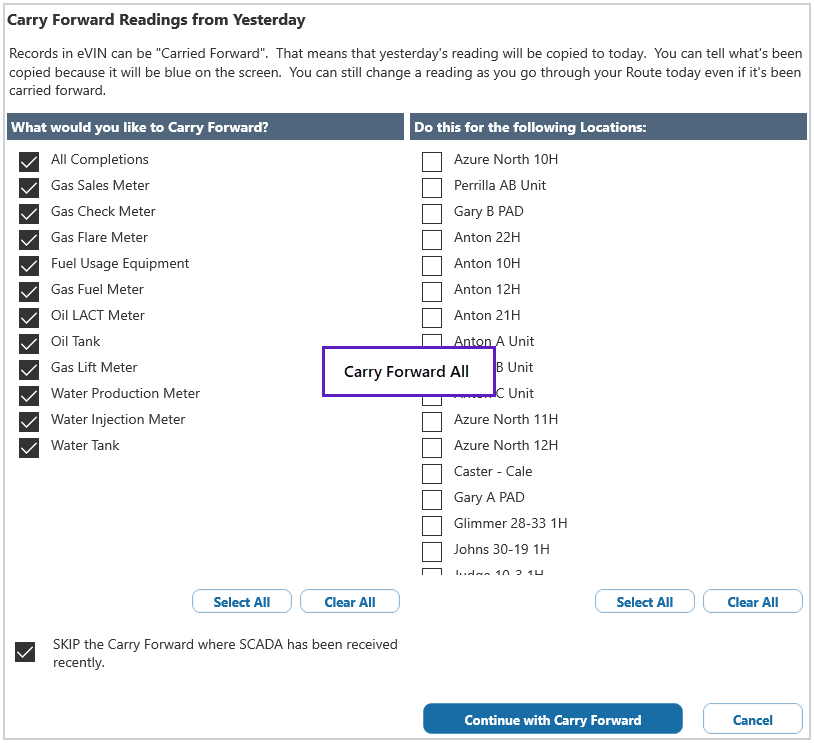
Carry Forward
The Carry Forward function allows you to copy yesterday's readings forward to today. Carried forward fields are marked in blue, and all fields are editable.
The Carry Forward, and Carry Forward All buttons are found in Location Detail, and Grid Summary respectively.
The Carry Forward dialog box.
The Carry Forward All dialog box.
Release History
- Ribbons, Toolbars, and Other Buttons (this release 4.7)
- Name change - Tasks to Cases